
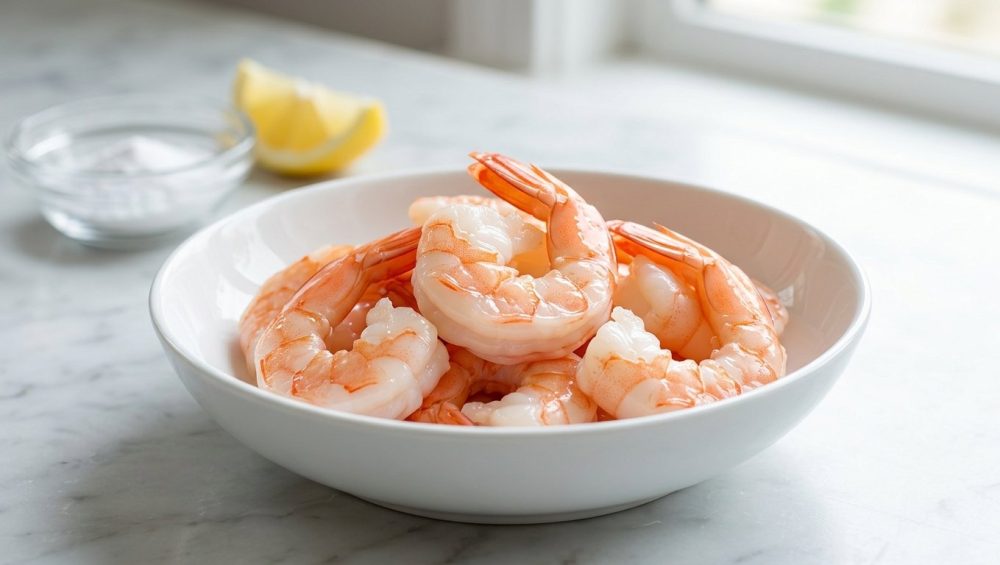
Listen, we need to have a serious, brutally honest conversation about the shrimp you have been serving to your family, your dinner guests, and yourself. You know exactly what I am talking about. You come home after a relentlessly long workday, exhausted and starving. You decide to whip up a “quick” seafood dinner because, hey, shrimp cooks in three minutes, right? It is supposed to be the ultimate fast food for the busy professional. But then you blink, or you turn your back for five seconds to yell at your dog for eating a shoe, and suddenly your beautiful, expensive crustaceans have curled up into tight, impenetrable little tires.
You bite into one, and it literally squeaks against your teeth. Congratulations, you have just cooked a batch of pencil erasers.
If this sounds familiar, take a deep breath. You are not alone. In fact, Americans consume nearly six pounds of shrimp per person annually, making it the undisputed king of the seafood counter and accounting for a massive 38% of all annual seafood consumption in the United States. We eat more shrimp than salmon and tuna combined. And yet, despite our national obsession with these little decapods, the average home cook completely ruins them on a weekly basis.
But I am here to tell you that you do not need a culinary degree to fix this. You do not need expensive commercial equipment, and you certainly do not need to resign yourself to a lifetime of chewy, sad seafood. If you want to master simple weeknight dinners, you just need to understand a tiny bit of food science. Today, we are going to break down the absolute magic of “velveting” your shrimp with a simple baking soda soak. It takes exactly fifteen minutes, costs about two cents, and will fundamentally transform your cooking forever.
The Crime Scene: Why Your Shrimp Currently Tastes Like a Tire
Before we can fix the problem, we need to understand the crime you are committing in your skillet. To do that, we have to look at the basic anatomy of a shrimp.
Shrimp are essentially tiny, delicate bundles of water and protein. Unlike a tough cut of beef that needs hours of low-and-slow braising to break down connective tissue, shrimp have very little connective tissue. Their protein structure is incredibly fragile. When raw, these protein strands are relaxed and loosely tangled, allowing plenty of moisture to sit comfortably between them.
However, the second these proteins are exposed to heat, they begin to denature and coagulate. They unfold and then aggressively link together, shrinking and squeezing out the water that was trapped inside. According to culinary science, shrimp proteins actually begin to cook and set at a mere 120°F. By the time the shrimp turns that signature opaque pink color—which happens around 140°F—it is already fully cooked.
Here is the harsh reality: by the time your shrimp looks done to your untrained eye, it is likely already overcooked by a full twenty degrees. When shrimp overcooks, the proteins bond so tightly that they wring out all their internal moisture like a wet sponge being twisted by a bodybuilder. The result is a dry, chalky interior and a rubbery exterior that curves into a tight “O” shape. (Pro tip: Perfectly cooked shrimp form a gentle “C” shape. If it forms an “O,” it is overcooked. Remember: “C” stands for Cooked, “O” stands for Overcooked).
The Sassy Sous-Chef’s Secret Weapon: The “Velveting” Miracle
If you have ever eaten at a high-quality Chinese restaurant, you have probably marveled at the texture of their stir-fried meats and seafood. The chicken is impossibly silky, the beef is tender enough to cut with a spoon, and the shrimp is plump, juicy, and has a distinct, lobster-like “snap” when you bite into it.
You might have assumed they were buying some elite, ultra-expensive grade of seafood that you simply cannot find at your local supermarket. Let me stop you right there. They are buying the exact same frozen shrimp you are. The difference is a traditional Chinese cooking technique called “velveting.”
Traditional velveting involves marinating the protein in a mixture of egg whites, cornstarch, rice wine, and sometimes a touch of oil, before briefly blanching it in hot oil or water. It creates a protective barrier around the meat that prevents it from seizing up in a screaming hot wok. But let’s be real—on a busy Tuesday night, you do not have the time, the patience, or the energy to deal with egg whites and deep-frying just to get dinner on the table. We need a shortcut. We need maximum results with minimum effort.
Enter the magic of baking soda.
By utilizing sodium bicarbonate (baking soda) alongside a healthy dose of kosher salt, we can achieve that exact same plump, snappy, velveted texture in just fifteen minutes, right in your refrigerator, with zero messy egg whites required.
The Hard Science: How Baking Soda Changes Everything
I promised you no pretentious chef-speak, but we do need to put on our lab coats for just a second so you understand why this works. I firmly believe that once you understand the “why” behind a technique, you will eliminate kitchen chaos and start cooking with actual confidence.
Baking soda is an alkaline compound. When you toss your raw shrimp in a tiny amount of baking soda, you are actively raising the surface pH of the meat, moving it from its natural neutral-to-slightly-acidic state into a basic (alkaline) state.
Why do we care about the pH of our seafood? Because an alkaline environment fundamentally alters how protein molecules behave when they get hot. The higher pH increases the negative electrical charge on the protein filaments. Because like charges repel each other, the protein strands are literally forced to push away from one another. When you drop that alkaline-treated shrimp into a hot pan, the proteins cannot bond tightly together. They remain relaxed and separated, meaning they cannot squeeze out their internal moisture. The shrimp stays incredibly plump, ridiculously juicy, and develops a snappy, firm texture that mimics expensive lobster tail.
But wait, there is more. The alkaline environment created by the baking soda also acts as a hyper-accelerator for the Maillard reaction. The Maillard reaction is the complex chemical process responsible for the gorgeous, savory brown crust on seared meats. Because shrimp cooks so incredibly fast, it is notoriously difficult to get a good brown sear on it before the inside turns to rubber. By raising the pH, the baking soda allows that beautiful browning to happen in a fraction of the time. You get a restaurant-quality crust on the outside while the inside remains perfectly tender.
And we cannot forget about the salt. While the baking soda is working its pH magic, the kosher salt is acting as a rapid dry brine. The salt dissolves the muscle proteins (specifically myosin) near the surface, turning them into a gel that actively holds onto water. Furthermore, the salt penetrates deep into the flesh, seasoning the shrimp all the way through to the center.
This combination of baking soda and salt is a scientifically proven one-two punch that makes it virtually impossible to overcook your shrimp. Food science authorities like Cook’s Illustrated and Serious Eats have extensively tested and verified this exact method, proving that a quick alkaline brine is the ultimate safeguard against rubbery seafood.
The Perfect 15-Minute Soak: A Foolproof Step-by-Step Guide
Alright, enough theory. Let’s get our hands dirty. Here is the exact, foolproof process for treating your shrimp. Do not skip any of these steps, or you will end up with a disaster on your hands.
Step 1: The Thaw and the Prep
First of all, buy frozen shrimp. Unless you live on a fishing boat in the Gulf of Mexico, the “fresh” shrimp sitting on ice at your grocery store is just frozen shrimp that the fishmonger thawed out yesterday. Buy it frozen (IQF – Individually Quick Frozen) so you can control the thawing process.
To thaw them safely and quickly, place the frozen shrimp in a colander and run them under cold tap water for about ten minutes. Never use warm or hot water, unless your goal is to pre-cook the exterior and breed bacteria. Once thawed, peel and devein them if they aren’t already.
Step 2: The Magic Ratio
Place your thawed, raw shrimp into a mixing bowl. For every one pound of shrimp, add exactly 1/4 teaspoon of baking soda and 1/2 to 1 teaspoon of kosher salt.
Listen to me very carefully: do not eyeball the baking soda. Measure it. If you use too much, your shrimp will undergo saponification, which is a fancy scientific way of saying they will literally taste like a bar of soap. 1/4 teaspoon per pound is the absolute sweet spot. Toss the shrimp vigorously until they are evenly coated in the salt and baking soda mixture.
Step 3: The 15-Minute Waiting Game
Place the bowl of treated shrimp in the refrigerator and let it sit for at least 15 minutes, but no longer than 45 minutes. This is the perfect window of time to prep your side dishes. Mince your shallots, chop your parsley, boil your pasta water, or just pour yourself a well-deserved glass of Pinot Grigio.
Step 4: The Crucial Rinse and Dry
Once the time is up, you must rinse the shrimp. Dump them back into your colander and rinse them thoroughly under cold water. If you skip this step, you risk a lingering metallic tang from the baking soda.
After rinsing, you need to dry them aggressively. Lay out a double layer of paper towels, spread the shrimp out, and pat them completely dry. Moisture is the mortal enemy of the Maillard reaction. If your shrimp go into the pan wet, they will steam instead of sear, completely defeating the purpose of everything we just did. Get them bone dry.
The “No-Go” Rule: Ditching Toxic Gear for Searing
Now that we have perfectly treated, chemically optimized shrimp, we need to talk about the vessel you are going to cook them in.
I am going to be blunt because I care about you: throw away your cheap, scratched, peeling non-stick pans. I absolutely despise them. Not only are they an environmental nightmare, but when those mystery-metal pans get scratched, they start leaching toxic forever-chemicals into your food. Furthermore, cheap non-stick pans simply cannot hold the high thermal mass required to put a proper sear on a piece of protein. The second you drop cold shrimp into a thin aluminum non-stick pan, the temperature plummets, and your shrimp end up boiling in their own juices.
If you are serious about banishing toxic kitchen gear from your life, you need to invest in a heavy-bottomed, multi-clad stainless steel skillet or a thick carbon steel pan. These materials are practically indestructible, entirely non-toxic, and hold heat like a champion.
“But Sassy Sous-Chef,” you whine, “everything sticks to my stainless steel pan!”
No, it doesn’t. You just don’t know how to preheat it properly. To make a stainless steel pan completely non-stick, you must preheat it dry over medium heat for about three minutes. Then, perform the water drop test. Flick a few drops of water into the pan. If they sizzle and evaporate instantly, the pan is too cold. If they shatter into a million tiny droplets, it is too hot. But if the water forms a perfect, cohesive bead that glides around the pan like a mercury marble, your pan has reached the Leidenfrost effect. It is now perfectly non-stick. Wipe the water out, add your high-smoke-point oil, and get ready to sear.
Cooking Methods: How to Treat Your Plumped-Up Shrimp
Your shrimp are velveted. Your pan is hot. Let’s talk about execution. Because we have altered the pH and protected the proteins, you have a much wider margin for error, but you still need to respect the ingredient.
The Blistering Stovetop Sear
For a flawless pan-sear, drop your dry, velveted shrimp into your preheated stainless or carbon steel pan in a single, uncrowded layer. Do not touch them. Let them sear undisturbed for about 60 to 90 seconds until a gorgeous golden-brown crust forms. Flip them once, cook for another 30 to 60 seconds until they just turn opaque, and immediately pull them off the heat.
If you want a truly perfectly seared fish or shrimp crust, try tossing your dry shrimp in a microscopic coating of mayonnaise before they hit the pan. Yes, mayonnaise. It is simply an emulsion of oil and egg yolks. The egg proteins promote incredible browning, and the emulsion prevents sticking better than plain oil ever could. The magic of a little mayo on the exterior of seafood before searing is an industry secret that will blow your mind.
The Low and Slow Poach (For Shrimp Cocktail)
If you are making a classic shrimp cocktail, you want the gentlest cooking method possible. The experts at Serious Eats recommend a brilliant technique for poached shrimp: start them in cold liquid.
Place your baking-soda-treated shrimp into a pot of cold water (or better yet, a flavorful court bouillon made of wine, lemon, peppercorns, and herbs). Turn the heat to medium and slowly bring the liquid up to about 170°F—which is well below a boiling point. The gentle, gradual increase in temperature cooks the shrimp evenly from edge to center without shocking the proteins. As soon as they hit 170°F and turn pink, pull them out and plunge them into an ice bath to immediately halt the cooking process. You will end up with the most tender, bouncy shrimp cocktail of your life.
The Backyard Grill
Grilling shrimp can be a nightmare because the intense, dry heat of the grates can turn them into jerky in seconds. After your 15-minute baking soda soak, thread your shrimp onto metal skewers. The trick here is to pack them tightly together, alternating head-to-tail, so they are practically spooning each other. By nesting them snugly, you reduce the surface area exposed to the direct flames, allowing the exterior to char beautifully while the interior stays protected and juicy.
Flavor Pairings and Pan Sauces
One of the greatest benefits of searing shrimp in a proper stainless steel pan is the creation of “fond”—those deeply flavorful, caramelized brown bits stuck to the bottom of the skillet. Once you remove your perfectly cooked shrimp from the pan, do not dare wash it. You are going to build a pan sauce.
Lower the heat and add a knob of butter. Now, this is crucial: stop adding garlic first. Minced garlic burns in about thirty seconds, turning acrid and bitter. Instead, add minced shallots first, letting them soften for a minute or two. Then add your minced garlic and red pepper flakes, cooking just until fragrant (about 30 seconds).
Next, deglaze the pan with a splash of dry white wine or chicken broth, scraping up all that beautiful fond with a wooden spoon. Let the liquid reduce by half, squeeze in the juice of half a lemon, and swirl in one more tablespoon of cold butter to emulsify the sauce into a glossy masterpiece. Toss your shrimp back in for exactly ten seconds to coat them in the sauce, and serve immediately over pasta or crusty bread.
By the way, if you find yourself weeping uncontrollably while mincing those shallots for your scampi sauce, a dull knife is to blame, not your sensitive eyes. A dull blade crushes the cell walls of the alliums, releasing a massive cloud of the volatile sulfur compounds that cause tears. Keep your knives sharp, people.
Troubleshooting: Where Rookie Cooks Go Wrong
Even with a foolproof scientific method, I know some of you are going to find a way to mess this up. Let’s proactively troubleshoot the most common mistakes so you don’t have to order an emergency pizza.
“My shrimp tastes like a battery!”
You committed one of two cardinal sins. Either you eyeballed the baking soda and used way too much, or you completely skipped the rinsing step. The ratio is 1/4 teaspoon per pound of shrimp, and you must rinse them under cold water after the 15-minute soak. Baking soda is powerful; treat it with respect.
“My shrimp didn’t brown, they just boiled in the pan!”
You didn’t dry them. I cannot stress this enough. When you rinse the shrimp, they become waterlogged on the surface. If you throw wet food into hot oil, the water instantly turns to steam. Steam sits at 212°F, which is nowhere near hot enough to trigger the Maillard browning reaction (which requires temperatures north of 285°F). You effectively steamed your shrimp. Next time, use more paper towels and pat them bone dry.
“My non-stick pan is ruined!”
I warned you. When you try to get a screaming hot sear on a cheap Teflon pan, the synthetic coating degrades. Furthermore, using aerosol cooking sprays (which contain soy lecithin propellants) will bake onto the surface and destroy the non-stick properties permanently. If you are serious about your kitchen game, ruining your nonstick pans is a rite of passage that should push you to finally buy stainless steel.
“My shrimp are still rubbery!”
Baking soda is a scientific safety net, not a magical forcefield. It raises the pH and gives you a wider margin for error, but if you leave the shrimp in a hot pan for ten minutes while you scroll through social media, they are going to turn into rubber. Shrimp cook in minutes. Pay attention to the pan.
The Sassy Sous-Chef’s Final Verdict
Cooking restaurant-quality seafood at home does not require expensive gadgets, a culinary degree, or hours of prep work. It simply requires a basic understanding of how ingredients react to heat and a willingness to use smart, science-backed shortcuts.
By taking 15 minutes to velvet your shrimp with a little baking soda and kosher salt, you are actively manipulating the pH levels to protect the delicate proteins from seizing. You are guaranteeing a plump, juicy, snappy bite every single time, completely eliminating the stress of weeknight seafood cooking.
So the next time you find yourself staring down a bag of frozen shrimp on a Tuesday night, do not panic. Thaw them properly, measure out your 1/4 teaspoon of baking soda, and let chemistry do the heavy lifting. Your dinner guests will think you spent hours slaving over a hot stove, and you can just smile, nod, and pour yourself another glass of wine. You’ve got this. Now get into the kitchen and start cooking.






