
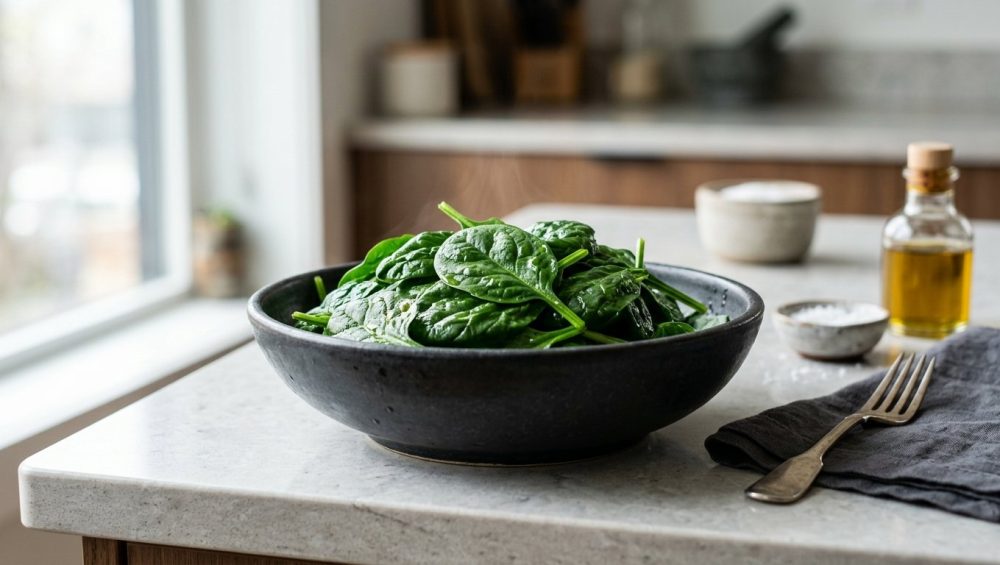
You’ve been there. You’ve spent your hard-earned money on a gorgeous, thick-cut ribeye steak, you’ve nailed the edge-to-edge medium-rare sear, and you’ve whipped up a batch of velvety, butter-laden mashed potatoes. To balance out the unapologetic decadence of the plate, you decide to throw together a quick side of sautéed spinach. You take a bite of the vibrant greens, expecting a tender, garlicky finish, and suddenly, it feels like your teeth are wearing tiny, fuzzy wool sweaters. Your entire mouth is coated in a chalky, astringent film that makes you want to scrub your tongue with a wire dish brush.
Welcome to the universally despised phenomenon known as “spinach tooth.”
If you’ve been suffering through this metallic, gritty sensation for years because you thought it was simply the mandatory toll you had to pay for eating your dark leafy greens, I am here to tell you to stop settling for mediocre food. You do not need a culinary degree from a pretentious French institute to fix this. You don’t need a private chef, and you certainly don’t need to banish spinach from your kitchen. You just need a rudimentary understanding of plant chemistry and a large pot of aggressively boiling water.
Today, we are going to master the quick blanch. This is the fundamental, non-negotiable technique that separates the clueless kitchen rookies from the seasoned, confident home cooks. Grab your apron, pour yourself a glass of wine, and let’s dive into the science of why your spinach tastes like a chalkboard—and exactly how we are going to fix it.
The Science of the Shag Carpet Mouth: What is “Spinach Tooth”?
Before we start boiling water, we need to talk about what is actually happening inside your mouth when you chew on poorly prepared spinach. Despite what the wellness influencers tell you, plants do not actually want to be eaten. They cannot run away from predators, so they have evolved complex chemical defense mechanisms to deter herbivores from turning them into an afternoon snack. Spinach is a botanical powerhouse when it comes to chemical warfare.
The primary culprit behind your fuzzy teeth is an organic compound called oxalic acid (also known as oxalate). Spinach happens to contain exceptionally high concentrations of this naturally occurring dicarboxylic acid, often boasting upwards of 750 milligrams per 100-gram serving. In its natural state, this acid is safely compartmentalized within the microscopic vacuoles of the plant’s cellular structure.
However, the moment you begin to chew the spinach, you mechanically rupture those cell walls, releasing a flood of highly reactive oxalic acid directly into your oral cavity. Now, here is where the chemistry experiment takes place. Your saliva is a complex biological fluid that serves as a reservoir for various minerals, most notably calcium, which your body uses to constantly remineralize your dental enamel.
When the oxalic acid from the spinach collides with the free-floating calcium in your saliva, an immediate chemical precipitation occurs. The two compounds bond together to form calcium oxalate crystals. These microscopic crystals are completely insoluble in water. Because they cannot dissolve, they physically precipitate out of the solution and latch onto the acquired pellicle layer of your teeth.
That gritty, chalky, astringent sensation you are feeling? You are literally feeling thousands of microscopic, insoluble crystalline structures coating your teeth. While it is completely harmless and is not actually eroding your dental enamel, it is an incredibly unpleasant tactile experience that ruins the enjoyment of a good meal. Furthermore, if you have ever noticed that your pan sauce tastes metallic after wilting raw greens directly into the skillet, this intense concentration of oxalic acid is the primary offender.
Why Direct Sautéing is Sabotaging Your Greens
I get it. It is a Tuesday night, you are exhausted from back-to-back meetings, and you are desperately trying to get dinner on the table before 8:00 PM. The temptation to just rip open a plastic bag of pre-washed baby spinach and dump it directly into a hot frying pan is overwhelming. But this seemingly innocent weekday shortcut is exactly why your side dishes taste like a compromise.
When you throw raw spinach directly into a hot skillet, you are not actually sautéing it; you are violently steaming it in its own cellular liquid. Spinach is composed of over 90% water. As the heat hits the leaves, the cell walls collapse, dumping all of that internal water—along with the massive payload of oxalic acid—straight into your pan.
Because the acid has nowhere to go, it merely concentrates in the cooking liquid at the bottom of the skillet. You are essentially creating a hot, bitter, oxalate-rich tea, and then forcing the leaves to braise in it. Just like how overcrowding a sheet pan is the main reason your roasted veggies turn mushy, throwing a mountain of wet, raw spinach into a confined skillet is a guaranteed recipe for a culinary disaster.
Home cooks often try to mask this resulting bitterness by aggressively overcompensating with heavy cream, fistfuls of parmesan cheese, or half a stick of butter. But no amount of dairy can dissolve calcium oxalate crystals. You will still end up with a chalky mouthfeel, just with a higher calorie count. If we want to eliminate the astringency entirely, we have to physically remove the acid from the equation before the spinach ever touches a sauté pan.
The Magic of the Quick Blanch: A Culinary Chemistry Hack
This brings us to the hero of our story: the quick blanch. Blanching is a foundational culinary technique that involves briefly plunging vegetables into a large pot of rolling, salted boiling water, followed immediately by a rapid cooling process. While it sounds like an extra, annoying step designed to create more dirty dishes, it is actually a brilliant application of food science that completely transforms the chemical makeup of your greens.
Because oxalic acid is highly water-soluble, boiling water acts as the ultimate extraction solvent. When you submerge the spinach into the boiling water, the extreme heat rapidly degrades the plant’s cell walls. As the cells break down, the water-soluble oxalates leach out of the spinach leaves and dissolve harmlessly into the surrounding cooking water.
The scientific data backing this up is staggering. Studies have shown that boiling or blanching spinach can reduce its total soluble oxalate content by anywhere from 40% to over 50%, depending on the exact duration and temperature. In a matter of seconds, you are effectively washing away the compounds responsible for the bitter taste and the chalky teeth.
But the magic of the blanch doesn’t stop at acid reduction. It also acts as a profound textural reset. By wilting the spinach in a massive volume of water rather than a shallow pan, the greens cook evenly and instantly, resulting in a silken, tender texture that melts in the mouth. It is the ultimate kitchen hack: a 60-second investment of your time that elevates a cheap bag of grocery store greens into a restaurant-quality side dish.
The Ice Bath Shock: Locking in the Chlorophyll
If the boiling water is the first half of the blanching equation, the ice bath is the equally critical second half. If you want to stop eating mushy veggies that look like they were dredged out of a swamp, you have to arrest the cooking process immediately.
When you look at a raw spinach leaf, you are seeing chlorophyll, the green pigment responsible for photosynthesis. Chlorophyll is a highly sensitive molecule; at its center sits a delicate magnesium ion. When vegetables are exposed to prolonged heat, the plant cells collapse and release their own internal organic acids. These natural acids lower the pH of the environment, and the resulting hydrogen ions physically displace the magnesium ion at the center of the chlorophyll molecule.
When that magnesium is lost, the chlorophyll chemically transforms into a compound called pheophytin, which possesses a drab, unappetizing, olive-gray color. This is why overcooked green beans and boiled-to-death broccoli look so depressing.
However, during a rapid blanch, something beautiful happens. The sudden blast of heat expands and expels the microscopic pockets of gas trapped between the plant cells. Normally, these tiny air bubbles diffuse light, making the raw leaf look slightly opaque or frosted. When the air is violently expelled by the boiling water, the surface of the leaf becomes highly reflective, revealing the true, hyper-vibrant, emerald green of the chlorophyll.
But this vibrant green state is fleeting. If you leave the spinach in the hot water for even a minute too long, or if you pull it out and let it sit steaming on the counter, the thermal degradation will catch up, the magnesium will be displaced, and the pheophytin will take over.
This is why we shock the greens. By immediately plunging the boiling-hot spinach into a bowl of ice water, you drop the temperature of the plant tissue to near-freezing in seconds. This instantly halts the enzymatic breakdown and prevents the thermal degradation of the chlorophyll, permanently locking in that stunning, jewel-toned green color.
The Anti-Toxic Kitchen: Gear You Actually Need for This
Before we get to the step-by-step instructions, we need to have a very serious conversation about the equipment you are using. I am completely uncompromising when it comes to banishing toxic kitchen gear from my house, and you should be too.
Do not even think about boiling water in a cheap, lightweight, scratched non-stick pot. The chemical coatings on bargain-bin non-stick cookware degrade under high heat, flaking off into your food and leaching mystery compounds into your water supply. Throw those peeling toxic hazards directly into the sun.
To execute a proper blanch, you need thermal mass. You need a heavy-bottomed, tri-ply stainless steel stockpot or a large enameled cast-iron Dutch oven. The reason for this is thermodynamics. When you drop a pound of room-temperature spinach into a pot of water, the temperature of that water is going to plummet. If you are using a flimsy, thin-gauge aluminum pot, the water will stop boiling entirely and will take five minutes to recover. During those five minutes, your spinach isn’t blanching; it is steeping, turning into a soggy, gray mess. A heavy pot holds onto heat, ensuring the water returns to a rolling boil almost instantly.
Furthermore, you are going to need a wide stainless steel spider skimmer to swiftly rescue the greens from the boiling water. Trying to fish out wilted spinach with a tiny slotted spoon or a pair of clumsy silicone tongs is an exercise in utter futility. You need a tool that can scoop up massive amounts of greens in a single motion while allowing the boiling water to drain away instantly.
Finally, you need a proper mixing bowl for your ice bath and a heavy-duty colander. Just as you finally figured out why your wooden cutting board keeps cracking (stop putting it in the dishwasher, for the love of all things holy), you need to learn how to invest in and care for heirloom-quality cookware that will last you a lifetime.
The Step-by-Step Masterclass: Blanching Spinach Like a Pro
Alright, class is in session. Here is the foolproof, step-by-step method for perfectly blanched spinach that will never leave a chalky film on your teeth.
Step 1: The Prep and the Wash
Do not skip washing your greens. Spinach grows in sandy, gritty soil, and there is nothing worse than biting into a beautifully cooked meal and crunching down on a mouthful of dirt. If you leave them sitting in a plastic bag for a week, your fresh herbs get slimy and your spinach turns into a literal biohazard.
Fill a large basin or a clean sink with cold water. Submerge the spinach leaves and agitate them gently with your hands. Let them sit for a few minutes so the heavy sand and grit can sink to the bottom. Carefully lift the floating spinach out of the water with your hands. Do not pour the basin of water through a colander, or you will just be pouring the dirty, sandy water right back over the clean leaves.
Step 2: The Rolling Boil
Fill your heavy stockpot with at least four quarts of water. Bring it to a violent, rolling boil. Once it is boiling—and not a second before—season the water aggressively with kosher salt. It should taste like the ocean. Salting the water not only seasons the interior of the plant tissue via osmosis, but it also helps to preserve the integrity of the cell walls during the cooking process.
Step 3: The Ice Bath Logistics
Before the spinach ever touches the hot water, your ice bath must be ready. Fill a large mixing bowl halfway with cold water and dump in two trays of ice cubes. Place it right next to your stove. Blanching is a fast-paced operation; you do not have time to be frantically cracking ice trays while your spinach turns to mush on the burner.
Step 4: The Plunge
Working in manageable batches if necessary, drop the washed spinach into the boiling water. Use your spider skimmer to immediately push the leaves under the surface.
Now, watch closely. This will only take 30 to 60 seconds. You are looking for a visual cue: the moment the leaves collapse, wilt, and turn that hyper-vibrant, glowing emerald green, they are done. Do not walk away to check your phone. Do not start chopping an onion. Stand there and watch the pot.
Step 5: The Shock
The second the spinach hits that vibrant green stage, use your spider skimmer to rapidly scoop all the leaves out of the boiling water. Transfer them directly into the waiting ice bath. Submerge them completely. Let them sit in the ice water for at least two minutes until they are completely cold to the touch. This halts the cooking process entirely.
Step 6: The Squeeze (The Most Important Step)
Once the spinach is cold, lift it out of the ice bath and place it into your colander. Now comes the critical part: you must extract the water. Spinach acts like a biological sponge, and if you do not remove the excess moisture, your final dish will be a watery, diluted mess.
Grab a handful of the cold spinach and squeeze it between your hands as hard as you can. You want to wring it out until it forms a tight, dense, dry puck of greens. Repeat this until all the spinach has been squeezed. You will be shocked at how a massive mountain of raw spinach reduces down to three or four modest green pucks.
Weekday Efficiency vs. Weekend Perfection: How to Use Your Blanched Spinach
Congratulations, you have successfully neutralized the oxalic acid, locked in the chlorophyll, and prepped your greens like a professional chef. Because you have removed the excess water, these blanched spinach pucks will stay fresh in an airtight container in the fridge for up to four days. This is the ultimate meal-prep hack. Here is how you deploy them, depending on how much time you have.
The Weekday Hustle: Quick Garlic Sauté
When you are rushing to get dinner on the table on a Wednesday, you now have a massive head start. Take a puck of blanched spinach from the fridge and roughly chop it on your cutting board.
Place a skillet over medium heat. Add a generous glug of high-quality extra virgin olive oil and a pinch of red pepper flakes. If you are still trying to figure out why your garlic always burns, remember to add it to the pan only during the last thirty seconds of sautéing, keeping the heat moderate.
Once the oil is fragrant, toss in the chopped, blanched spinach. Because the spinach is already fully cooked and the bitter acid has been washed down the drain, your only goal here is to warm the greens through and coat them in the flavored oil. Toss it in the pan for 60 seconds, hit it with a squeeze of fresh lemon juice for brightness, and serve. Because you aren’t scorching raw wet leaves to the bottom of the skillet, you won’t spend your evening scrubbing stainless steel pans until your arms ache.
Alternatively, if you are making an Asian-inspired dish, you can toss the squeezed pucks of greens directly into a ripping hot carbon steel wok for a blisteringly fast stir-fry with soy sauce and sesame oil.
The Weekend Showstopper: Steakhouse Creamed Spinach
When the weekend rolls around and you have the time to be an absolute perfectionist, your blanched spinach is the perfect canvas for a luxurious steakhouse-style creamed spinach.
Because you have already leached out the oxalic acid, the spinach will not react poorly with the dairy, meaning your cream sauce will stay silky smooth instead of breaking or turning grainy. In a saucepan, melt butter and sweat some finely minced shallots until translucent. Whisk in a little flour to create a blonde roux, then slowly stream in heavy cream, whisking constantly until it thickens. Season heavily with freshly grated nutmeg, black pepper, and a pinch of cayenne.
Fold your chopped, blanched spinach into the rich cream sauce, top it with a handful of grated Gruyère or Parmigiano-Reggiano, and bake it in a hot oven until the top is bubbling and golden brown. It is rich, it is decadent, and most importantly, it will not leave a single trace of chalk on your teeth.
Troubleshooting the Blanch: Where Rookies Go Wrong
Even with a foolproof method, things can occasionally go sideways if you lose focus. If your spinach didn’t turn out perfectly, you likely committed one of these three cardinal sins.
Mistake 1: The Crowded Pot
If you try to stuff two pounds of spinach into a tiny two-quart saucepan, you are going to fail. The massive influx of cold, wet leaves will instantly kill the boil. Instead of a rapid 30-second blanch, the spinach will sit in tepid water for minutes, slowly turning gray and mushy as the enzymes have a field day breaking down the cellular structure. Always use a pot that feels slightly too big for the job, and if necessary, blanch in batches.
Mistake 2: Skipping the Ice Bath
I have seen home cooks pull the spinach out of the boiling water and just leave it sitting in a colander in the sink to cool down. This is a tragedy. The residual heat trapped in that dense pile of greens will cause them to continue cooking for another ten minutes. By the time they reach room temperature, the vibrant green chlorophyll will have degraded into olive-brown pheophytin, and the texture will resemble baby food. The ice bath is not optional; it is a thermodynamic necessity.
Mistake 3: The Half-Hearted Squeeze
If your final sautéed spinach dish ends up sitting in a watery, diluted puddle on your dinner plate, it is because you were too gentle during the squeezing phase. Do not be afraid to manhandle the blanched greens. You have to use serious grip strength to wring out that internal moisture. If you have weak wrists, wrap the cooled spinach in a clean, lint-free kitchen towel and twist the ends of the towel in opposite directions to wring the water out mechanically.
Conclusion
Cooking at home should never feel like a compromise, and you should never have to tolerate side dishes that leave your mouth feeling like the inside of a dusty vacuum cleaner. By understanding the underlying chemistry of oxalic acid and respecting the thermal dynamics of chlorophyll, you can completely eliminate the dreaded “spinach tooth.”
The quick blanch is more than just a recipe step; it is a foundational technique that empowers you to take control of your ingredients. It requires no specialized culinary training, just a bit of patience, a proper pot of boiling water, and a willingness to execute the details correctly. So, the next time you bring home a beautiful bunch of fresh greens, skip the lazy weekday skillet steam. Give them the rapid boil and the ice-cold shock they deserve. Your palate, your dinner guests, and your teeth will thank you. Now get out of here and go cook something amazing.






