
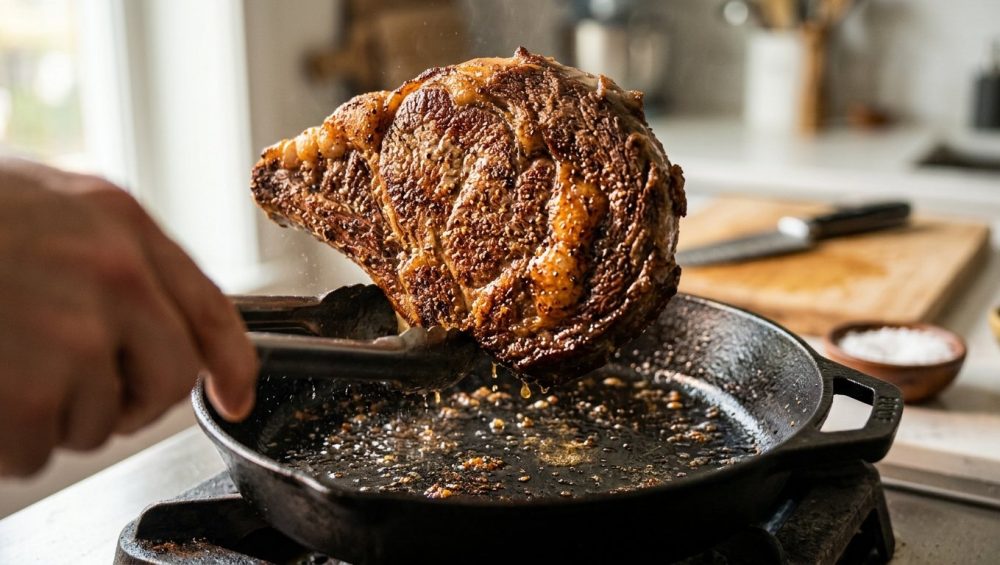
Picture this. It is Friday night. You have just survived a grueling, soul-crushing work week. To reward yourself, you stopped by the local butcher and dropped an embarrassing amount of your hard-earned cash on a pair of gorgeous, thick-cut, beautifully marbled ribeye steaks. You have lit some candles, poured a glass of robust Cabernet, and you are ready to treat yourself to a restaurant-quality meal without the pretentious, wallet-gouging restaurant markup. You heat up your favorite skillet, you drop the meat in, and you wait for that glorious, aggressive, ear-shattering sizzle.
But instead of a sizzle, you hear a sad, wet sputter.
Ten minutes later, you are staring down at a pair of gray, rubbery, boiled-looking meat-pucks. The interior is somehow simultaneously overcooked and tough, while the exterior looks like it just survived a lukewarm sponge bath. You chew through your expensive disappointment and wonder what kind of dark culinary magic professional chefs possess that you lack.
Listen up, buttercup. The culprit isn’t your lack of a culinary degree. It is not your stove, and it is certainly not a lack of talent. The reason your dinner looks like a sad, steamed tragedy boils down to a fundamental misunderstanding of physics, chemistry, and thermodynamics.
You do not need a Michelin star to cook the perfect steak. You do not need to spend thousands on commercial kitchen equipment. All you need is a basic understanding of food science and a roll of paper towels. Today, we are going to dive exhaustively deep into the mechanics of browning, the physics of water, and the zero-cost kitchen secrets that will permanently elevate your weekend cooking projects.
The Science of the Sear: Meet the Maillard Reaction
To understand why steaks turn out gray, we first need to understand what browning actually is. When you bite into a perfectly seared steak, you are not just tasting “cooked meat.” You are tasting a highly complex, cascading chemical reaction that fundamentally alters the molecular structure of your food.
This is known as the Maillard reaction. Named after the French chemist Louis-Camille Maillard, who first described the phenomenon in 1912 while attempting to reproduce biological protein synthesis, this reaction is the undisputed holy grail of savory cooking. It is the exact same non-enzymatic browning process that gives us the golden crust on a loaf of sourdough bread, the rich complexity of roasted coffee beans, the dark maltiness of a stout beer, and the irresistible aroma of toasted marshmallows.
Here is how it works: When exposed to high heat, the reactive carbonyl group of reducing sugars in the meat collides with the nucleophilic amino group of the amino acids (the building blocks of proteins). This collision forms a complex, volatile mixture of poorly characterized molecules known as melanoidins, which are responsible for the deep mahogany color and the hundreds of complex flavor and aroma compounds that make seared meat taste so incredibly good.
But here is the catch—and it is a massive one. The Maillard reaction is exceptionally picky about its working conditions. It does not just happen because the meat is getting warm. For this beautiful cascade of flavor to occur rapidly and noticeably, the surface of the meat must reach a temperature threshold of approximately 280°F to 330°F (140°C to 165°C).
If the surface of your steak does not hit that critical temperature zone, the Maillard reaction stalls. You get no browning, no crust, and no complex flavor development. You just get hot, gray protein.
So, if your stove is cranked to high, and your pan is smoking hot, why is the surface of your meat failing to reach 280°F?
Because you have inadvertently erected an invisible, impenetrable thermal force field between the heat of the pan and the surface of your meat. That force field is water.
The Enemy of the Crust: Surface Moisture and the Steam Barrier
Let’s take a quick trip back to high school physics. Water, under normal atmospheric pressure, boils at exactly 212°F (100°C). It physically cannot get any hotter than that in a standard frying pan. Once water reaches 212°F, any additional thermal energy pumped into it does not raise its temperature; instead, that energy is spent forcing the liquid water to change phases into a gas (steam).
This brings us to a concept known as the “latent heat of vaporization.” I need you to pay close attention here, because this is the single most important scientific principle you will ever learn for stovetop cooking.
It takes a relatively small amount of energy to heat water from freezing to boiling. Specifically, it takes 1 calorie of energy to raise 1 gram of water by 1 degree Celsius. But once that water hits 100°C, the rules change drastically. To turn that 1 gram of boiling water into 1 gram of steam, it requires a staggering 540 calories (approximately 2,260 joules) of energy.
Let me translate that from science-speak into chef-speak: It takes over five times more energy to boil away a single drop of surface water than it does to heat that water all the way from ice-cold to boiling hot.
When you pull a steak out of its vacuum-sealed plastic packaging, it is absolutely swimming in a mixture of water and myoglobin (the red protein that gives meat its color). If you take that wet, dripping steak and toss it directly into a hot skillet, you are committing a culinary crime.
The moment that wet meat hits the hot metal, the pan’s thermal energy is instantly hijacked. Instead of transferring that intense heat into the amino acids and sugars to trigger the Maillard reaction, the pan is forced to spend all of its energy desperately trying to boil off the surface moisture.
Because water acts as a thermal shield, the temperature at the exact interface between the meat and the pan becomes artificially capped at 212°F (100°C). Remember our golden rule? The Maillard reaction requires at least 280°F (140°C). While your pan is fighting a losing battle against the latent heat of vaporization, the internal temperature of your steak is steadily rising. By the time the pan finally manages to evaporate all the surface water and the temperature can finally climb high enough to begin browning, the inside of your steak is already hopelessly overcooked, gray, and tough.
You didn’t sear your steak. You boiled it in its own juices. One of the most tragic beginner cooking mistakes I see weekend hobbyists make is completely ignoring the physics of moisture.
The Paper Towel Technique: Your Zero-Cost Kitchen Hack
The solution to this heartbreaking problem costs exactly zero dollars and takes roughly ten seconds. It is the humblest, most effective kitchen hack in existence: the paper towel.
If you want a steakhouse-quality crust, you must aggressively remove surface moisture before the meat ever touches the heat. Here is the exact, foolproof protocol:
- Unpack and Drain: Remove your protein from its packaging and let any excess liquid drain away into the sink.
- The First Pass: Take two sheets of heavy-duty, highly absorbent paper towel (do not use the cheap, flimsy stuff that disintegrates into paper lint). Wrap the steak completely and press down firmly. Do not just dab it daintily; press the paper towel into the meat as if you are trying to give it CPR.
- The Edges and Fat Cap: Do not forget the sides! The fat cap on a New York Strip or the curved edges of a Filet Mignon contain moisture too. Roll the steak on its sides and dry the edges.
- The Final Pass: Discard the soaked paper towels and grab a fresh sheet. Give the steak one final, aggressive pat down. When you pull the paper towel away, it should feel almost completely dry.
The surface of your meat should now feel tacky and matte, not slick and glossy. By manually removing the water, you have just saved your skillet from having to expend thousands of joules of energy on evaporation. Now, when that bone-dry steak hits the hot oil, the surface temperature will immediately skyrocket past the 212°F boiling point and rocket straight into the 300°F+ Maillard zone. You will get an instantaneous, aggressive sear, a gorgeous mahogany crust, and you will achieve it so quickly that the delicate interior of the meat remains a perfect, juicy medium-rare.
And please, this rule does not just apply to beef. If you are cooking skin-on chicken thighs, pat the skin bone-dry to achieve shatteringly crisp results. If you are searing scallops, pat them dry so they don’t steam into rubbery erasers. If you are pan-frying tofu, press it and dry it. Moisture is the universal enemy of the crust.
Dry Brining: The Advanced (But Lazy) Upgrade
If you are just throwing together a quick Tuesday night dinner, the paper towel method is your absolute best friend. Time is money during the week, and a quick pat-down gets the job done. But if it is the weekend, and you have the time to be an absolute perfectionist, you need to graduate to the next level of moisture control: dry brining.
Dry brining is the culinary secret weapon of high-end steakhouses, and it relies on the beautiful biological principles of osmosis and diffusion.
To dry brine, you simply pat your steak dry with a paper towel, season it generously on all sides with coarse Kosher salt, and place it on a wire cooling rack set over a baking sheet. Then, you put it in the refrigerator—completely uncovered—for anywhere from 12 to 24 hours.
Here is the microscopic ballet happening while you sleep. Initially, the high concentration of salt on the exterior of the meat draws liquid out from the muscle fibers via osmosis. If you look at a steak ten minutes after salting it, you will see water beading up on the surface. Most amateur cooks panic at this stage, assuming the salt is “drying out” their expensive meat. Keep calm and let science work.
Over the next hour, that extracted water dissolves the salt, creating a highly concentrated liquid brine on the surface of the meat. Then, through the magic of diffusion, the meat reabsorbs that salty liquid deep into its muscle fibers.
This does two incredible things. First, it seasons the meat all the way through, rather than just leaving a salty coating on the outside. Second, the salt actually denatures (unwinds) the tightly coiled protein strands in the meat—specifically myosin—causing them to loosen and swell. This structural change prevents the muscle fibers from squeezing together too tightly during cooking, meaning the steak will retain significantly more of its natural juices. This is the magic of dry brining at work.
But what does this have to do with getting a good sear? Everything.
While the salt is working its magic on the interior, the cold, continuously circulating air of your refrigerator is acting as a gentle dehydrator for the exterior. Over 24 hours, the fridge air evaporates all the surface moisture. When you finally pull that steak out to cook it, the surface will be a deep, dark red, and it will feel dry, stiff, and slightly tacky—almost like a drum skin.
You have created the ultimate, mathematically perfect canvas for the Maillard reaction. Because the surface is entirely devoid of liquid water, the meat will sear incredibly fast, developing a crust so thick and flavorful it will bring tears to your eyes.
Debunking the “Room Temperature” Myth
While we are dismantling kitchen falsehoods, it is time to aggressively murder one of the most pervasive, stubbornly persistent myths in the culinary world: the idea that you must let your steak sit on the counter for an hour to come to “room temperature” before cooking.
You have heard this from your grandfather, you have read it in old-school cookbooks, and you have probably seen pretentious TV chefs preach it. The theory claims that a cold steak will drop the temperature of your pan too much, resulting in an uneven cook.
It is complete and utter nonsense.
Food scientists, including J. Kenji López-Alt of Serious Eats and meat experts like Dave Yasuda, have exhaustively debunked this myth. Let’s look at the actual math. Your refrigerator sits at roughly 39°F (4°C). If you take a thick, one-pound ribeye out of the fridge and leave it on your kitchen counter for 20 to 30 minutes, the internal temperature of that meat will rise by less than one single degree Fahrenheit.
Even if you leave that steak sitting out for two full hours—which is a fantastic way to invite bacterial pathogens to a pool party on your dinner—the center of the steak will only rise to about 49°F (9.7°C). Congratulations, your steak is now slightly colder than the tap water in your sink.
When you are dropping a piece of meat into a skillet that is radiating 500°F of thermal fury, a 10-degree difference in the meat’s starting temperature is statistically meaningless. The searing process has virtually nothing to do with the starting internal temperature; it is entirely dependent on water evaporation and the Maillard reaction.
Stop wasting your time. Stop risking foodborne illness. Take your dry-brined steak straight out of the fridge, give it one last pat with a paper towel just to be safe, and put it directly into the hot pan.
Choosing the Right Pan: Banishing the Toxic Teflon
You can perfectly dry your steak, you can dry-brine it for a week, but if you drop it into the wrong pan, you are still going to fail. I am fiercely dedicated to banishing toxic kitchen gear from your home, and that starts with throwing your cheap, scratched, peeling non-stick pans directly into the garbage where they belong.
Standard non-stick pans are coated in Polytetrafluoroethylene (PTFE), commonly known as Teflon. These pans are fantastic for cooking delicate scrambled eggs on low heat. They are a catastrophic hazard for searing steaks.
To get a proper Maillard crust, you need screaming high heat. When Teflon is heated past 500°F (260°C)—a temperature easily reached when preheating a pan for a steak—the chemical coating begins to break down and degrade, releasing toxic, invisible fumes that can cause polymer fume fever (the “Teflon flu”) in humans, and are famously lethal to pet birds. Furthermore, aluminum non-stick pans are generally thin and lack thermal mass. The moment a cold, heavy steak hits thin aluminum, the pan’s temperature plummets, killing the sear.
For high-heat searing, you need heavy, durable metals that boast massive thermal retention. You have three elite options:
1. Cast Iron: The undisputed heavyweight champion of the home kitchen. Cast iron takes a long time to heat up, but once it gets hot, it stays aggressively hot. It acts like a thermal battery, storing heat so efficiently that dropping a massive steak into it barely causes a temperature drop. Properly seasoning cast iron pans will give you a naturally non-stick surface that lasts generations. And please, stop treating it like fragile glass. Wash it, dry it, and for the love of all things holy, maintain it by using a chainmail scrubber to knock off the burnt bits without stripping the seasoning.
2. Carbon Steel: This is the workhorse of the professional restaurant industry. It is an alloy of iron and carbon, making it lighter and more maneuverable than cast iron, but with the exact same incredible heat retention and searing power. It also requires seasoning and builds a slick, black patina over time.
3. Multi-Clad Stainless Steel: If you love making pan sauces, stainless steel is your best friend. It does not have a dark seasoning layer, which means the browned, caramelized bits of meat proteins (the fond) stick to the bottom of the pan. You can deglaze this fond with wine or broth to make mind-blowing sauces. If you’re terrified of food sticking to stainless steel, you just need to learn temperature control. By utilizing the Leidenfrost effect—preheating the pan until water droplets bead up and dance like mercury before adding oil—your stainless pan becomes remarkably stick-resistant.
Temperature Control and Oils: Fueling the Fire
Now that you have the right pan and a bone-dry steak, you need the right conductive medium. You cannot just slap dry meat against dry metal; there are microscopic air gaps between the uneven surface of the meat and the flat surface of the pan. Air is a terrible conductor of heat. Oil bridges those gaps, maximizing thermal transfer.
But not all fats are created equal. Remember, we are cooking at temperatures north of 400°F. If you drop a pat of butter into a 450°F cast-iron skillet, the milk solids in the butter will instantly burn, turning black and imparting an acrid, bitter, ashy flavor to your beautiful steak.
You must use a fat with a high smoke point. Avocado oil, refined grapeseed oil, clarified butter (ghee), or beef tallow are your best options. Beef tallow, in particular, is a cheat code for flavor, actively contributing to the savory crust rather than just acting as a neutral lubricant.
Ditch the aerosol cooking sprays that gunk up the edges of your pans with impossible-to-remove soy lecithin residues. Pour a tablespoon of your chosen high-heat fat into the preheated pan. You want just enough to coat the bottom in a thin, shimmering layer. Wait until the oil is practically smoking—shimmering and rippling with heat—before laying the steak down. Always lay the steak down away from you, so if any hot oil splatters, it hits the backsplash, not your forearms.
The Flipping Debate: Stop Fiddling, or Flip Constantly?
There is another myth floating around the culinary ether: “Never flip your steak more than once.” The traditional advice dictates that you should leave the meat completely untouched for four minutes, flip it once, and leave it alone again.
If you are an absolute beginner, this is actually decent advice. Why? Because it prevents you from anxiously prodding, poking, and prematurely tearing the meat off the pan before the crust has had time to form and naturally release from the metal.
However, if you want to get highly technical, food science proves that flipping your steak frequently (every 30 to 60 seconds) actually produces a superior result. By constantly flipping the meat, you are mimicking the mechanics of a rotisserie. Neither side has time to cool down completely, but neither side is exposed to the blistering heat of the pan long enough to burn.
This rapid-flip method cooks the interior of the steak much more evenly, significantly reducing that dreaded “gray band” of overcooked meat just beneath the crust. Furthermore, because you are constantly exposing the surface to the air, moisture evaporates faster, often resulting in an even crispier, more developed Maillard crust.
Whether you flip once or flip twenty times, the absolute most critical tool you can own to ensure your steak is perfectly medium-rare is a fast-reading, accurate digital meat thermometer. Stop trying to guess doneness by poking the meat and comparing it to the squishiness of your palm. You are not a line cook who has cooked 10,000 steaks this year. Use a thermometer. Pull the steak off the heat when the center hits 125°F to 130°F for a perfect medium-rare, keeping in mind that carryover cooking will cause the internal temperature to rise another 5 degrees while it rests.
And please, focus on keeping your kitchen knives sharp so you don’t butcher and tear the beautiful crust you just worked so hard to build when it finally comes time to slice.
Troubleshooting: Why Your Steak is Still Gray
If you have followed all these steps and your steak is still coming out looking like a boiled shoe, let’s run through a quick diagnostic checklist.
1. You Crowded the Pan
This is the silent killer of the Maillard reaction. If you try to cram three massive ribeyes into a single 10-inch skillet, you are setting yourself up for failure. Meat is 75% water. As the meat cooks, it releases moisture into the pan. If the pan is crowded, there is no empty surface area for that moisture to quickly evaporate. Instead, the water gets trapped between the steaks, creating a massive steam pocket. Furthermore, adding that much cold mass to the pan at once causes the temperature of the metal to plummet far below the 280°F Maillard threshold. Cook in batches, or use two separate pans.
2. Your Pan Wasn’t Hot Enough
Patience is a virtue. If you pour oil into a cold cast-iron skillet, drop the steak in, and turn the burner on, you are going to slowly render and boil the meat. You must preheat your heavy pans for at least 5 to 10 minutes on medium-high heat before the meat ever touches them. The pan needs to be fully saturated with thermal energy, ready to transfer it instantly to the protein.
3. You Used the Wrong Cut of Meat
You cannot sear a paper-thin, quarter-inch steak without turning the inside to leather. Thin cuts cook through to the center in a matter of seconds. By the time the outside has evaporated its moisture and started to brown, the inside is well-done. For a proper sear with a medium-rare center, you need a steak that is at least 1.25 to 1.5 inches thick.
The Sassy Sous-Chef’s Final Verdict
Cooking a mind-blowing, restaurant-tier steak at home does not require expensive gadgets, secret chef handshakes, or a culinary degree. It requires a fundamental respect for the laws of thermodynamics.
Water is the enemy of heat. Moisture is the assassin of the crust. The Maillard reaction is a diva that demands a hot, bone-dry stage to perform on.
By simply taking ten seconds to thoroughly pat your proteins dry with a paper towel, you eliminate the steam barrier. You stop forcing your expensive cookware to act as a water boiler, and you allow the intense heat to do exactly what it was meant to do: transform basic amino acids and sugars into a symphony of savory, roasted, caramelized perfection.
So this weekend, when you bring home that beautiful cut of beef, do yourself a favor. Ignore the old wives’ tales about leaving it on the counter. Throw out the toxic non-stick pan. Grab your heavy cast iron, get it ripping hot, and for the love of all things delicious, dry your meat.
You can absolutely do this. Now go forth, conquer your kitchen, and sear like you mean it.






