
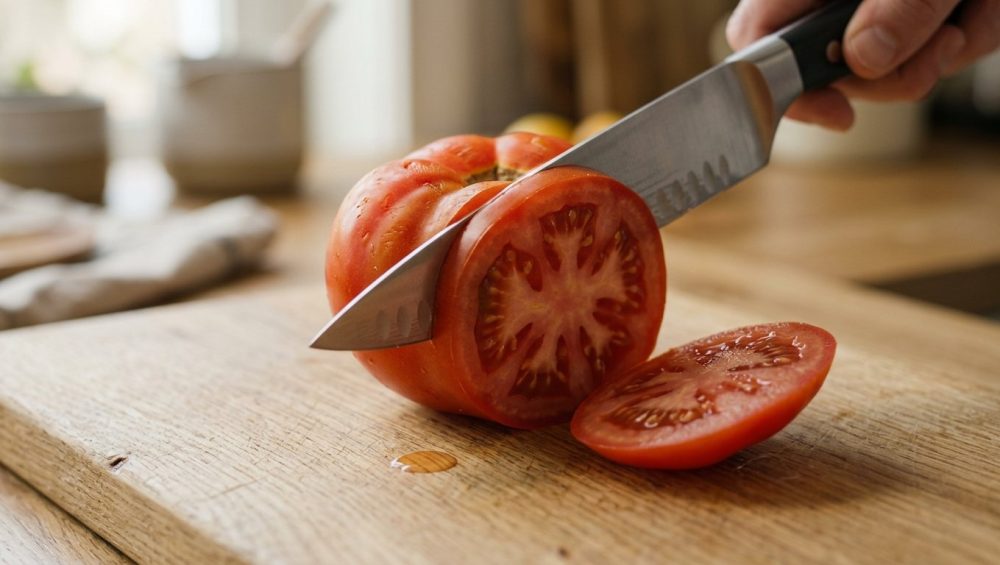
Picture this: It is a beautiful Saturday afternoon. You have just returned from the local farmers market with a stunning, ruby-red heirloom tomato. It is perfectly ripe, heavy for its size, and smells like an actual garden, not the inside of a commercial refrigerator. You place it on your cutting board, envisioning a flawless Caprese salad. You reach for your trusty, heavy-duty chef’s knife. You line up your cut, press down, and—squelch.
Instead of a clean, translucent slice of culinary perfection, you have just created a localized massacre of seeds, juice, and mangled flesh. The skin tore, the inside collapsed, and half the flavor is now dripping off the edge of your counter onto the floor.
Listen, weekend culinary warriors, we have all been there. Squishing a beautiful piece of produce is one of those disastrous beginner cooking mistakes that can instantly ruin your mood and your meal. But before you blame your own technique or assume you need a pretentious culinary degree to slice a vegetable, let me stop you. It is not your fault. It is a matter of physics, biology, and using the wrong tool for the job.
You do not need to be a Michelin-starred chef to prep food beautifully in a standard home kitchen. What you do need is to understand the mechanics of what you are cutting and the geometry of the blade you are using. Today, we are going completely scorched-earth on the science of slicing soft-skinned produce. We are going to explore exactly why your standard straight-edge knife is failing you, and why the serrated utility knife—often affectionately dubbed the “tomato knife”—is the undisputed, magical hero of your prep station.
The Anatomy of a Tomato (And Why It Hates You)
To understand why tomatoes turn into a watery pile of mush the second a dull blade touches them, we have to look at their biological construction. A tomato is not just a red orb; it is a highly complex, pressurized botanical structure. Botanically speaking, a tomato is a berry, and it develops from the fertilized ovary of the plant. It is composed of roughly 95 percent water, which is held together by a highly fragile network of cellular walls.
When you look at a tomato, you are dealing with three distinct anatomical layers that actively fight against your knife.
The Taut Exocarp (The Skin)
The outermost layer of the tomato is the exocarp, commonly referred to as the skin or peel. This layer is incredibly thin, yet it is deceptively tough, smooth, and glossy. The skin’s primary biological job is to act as a protective barrier for the delicate tissues underneath, keeping insects out and moisture in. Because it is stretched tightly over the watery interior, the exocarp is under constant outward pressure. It is essentially a biological water balloon. To breach it cleanly, you need a tool that can pierce a high-tension surface without applying blunt downward force.
The Delicate Pericarp (The Flesh)
Directly beneath the skin lies the mesocarp and endocarp, which together make up the fleshy pericarp of the tomato. This is the juicy, edible meat of the fruit, composed mostly of parenchyma cells filled with water, sugars, and acids. While the skin is tough and taut, the pericarp is incredibly soft and structurally fragile. It relies on a delicate pectin network to hold its shape. If you apply too much compressive force to the tomato, these parenchyma cells rupture, instantly turning the firm flesh into a mealy, watery paste.
The Gelatinous Locules (The Seed Cavities)
Finally, at the center of the tomato, you have the seed locules. Depending on the variety, a tomato can have anywhere from two to five or more of these radial chambers. The locules house the seeds, which are suspended in a highly fragile, gelatinous placental tissue. This gel is the most delicate part of the entire fruit. When a tomato is crushed rather than sliced, the locular cavities burst prematurely, ejecting the seeds and the flavorful gel all over your cutting board.
When you attempt to cut a tomato, you are asking a piece of metal to simultaneously breach a tough, slippery, high-tension barrier (the skin) while completely preserving the microscopic, water-filled cellular structure directly beneath it (the flesh and locules). It is an absolute structural nightmare.
The Chef’s Knife Illusion: Why Bigger Isn’t Always Better
So, why does your massive, expensive, straight-edge chef’s knife fail so spectacularly at this task? It all comes down to the physics of edge geometry and the inevitable reality of kitchen maintenance.
The Physics of Pressure
Let’s talk about basic physics. Pressure is defined as force divided by area. When you want to cut through a tough material like tomato skin, you need to generate high pressure. You can achieve this in one of two ways: either you apply a massive amount of downward force, or you decrease the surface area of the blade making contact with the skin.
A brand-new, razor-sharp chef’s knife has a microscopic edge, meaning its surface area is incredibly small. When it touches the tomato, it generates enough pressure to cleanly sever the exocarp without needing much downward force. However, we all know how fast standard kitchen knives get dull when used daily.
Microscopically, the edge of a straight blade rolls over, chips, and flattens out with every trip to the cutting board. Once that edge loses its absolute razor sharpness, its surface area increases. When the surface area increases, the pressure drops. To compensate for this drop in pressure, your brain subconsciously tells your hand to push down harder on the knife.
The Wedge Effect and Compressive Force
This is where the tragedy occurs. A slightly dull chef’s knife no longer acts as a precision cutting instrument; it acts as a wedge. As you push down, the blade fails to immediately pierce the tough, slippery exocarp. Instead, the skin stretches, transferring all of that heavy, downward compressive force directly into the fragile pericarp and locules below.
Before the skin ever breaks, the internal pressure of the tomato skyrockets. The parenchyma cells in the flesh rupture. The locular gel bursts out of its chambers. By the time the blade finally snaps through the skin, the interior of the tomato has already been pulverized. You haven’t sliced the tomato; you have bludgeoned it to death. Stop trying to brute-force your produce. You are making a sandwich, not chopping firewood.
Enter the Microserration: The Physics of the Saw
If blunt downward force is the enemy of the tomato, how do we breach the skin without pushing down? The answer lies in the brilliant, highly engineered geometry of the serrated utility knife.
Unlike a straight edge, a serrated blade features a series of peaks (the teeth) and valleys (the scallops or gullets) along the cutting edge. This design completely changes the physics of how the blade interacts with food.
Stress Concentrators and the “Bite”
The magic of a serrated knife lies in its teeth. Because the points of the serrations are incredibly sharp and narrow, they have a microscopic surface area. When you place a serrated blade against a tomato, only the very tips of the teeth make contact with the skin.
Going back to our physics equation (Pressure = Force / Area), this tiny surface area means that an immense amount of pressure is concentrated at those specific contact points. These teeth act as stress concentrators. They instantly “bite” into the slippery, tough exocarp, anchoring the blade into the skin without requiring you to apply any downward compressive force at all.
The Scalloped Valleys and Friction Reduction
Once the teeth have pierced the skin, the valleys between the teeth take over. As you draw the knife backward or forward, the scallops glide cleanly through the soft, watery flesh of the pericarp. Because the valleys are recessed, there is less metal making constant contact with the delicate interior of the fruit. Less surface area means less friction, which prevents the blade from dragging, tearing, or bruising the cellular walls.
Horizontal Force vs. Vertical Force
The most crucial mechanical difference is the direction of the force. A straight-edge chef’s knife relies heavily on vertical, downward force (push-cutting or chopping). A serrated knife relies almost entirely on horizontal force (sawing). By moving the blade back and forth, the teeth act like a microscopic saw, cleanly severing the skin and flesh while leaving the structural integrity of the locules completely undisturbed. The result? A perfectly intact, restaurant-quality slice that retains all of its juices.
The Serrated Utility Knife Masterclass: What It Is and What It Isn’t
Now that we understand the science, we need to talk about the tool itself. Not all serrated knives are created equal, and grabbing the wrong one will just create a different kind of mess. Because of its incredible versatility, it is undoubtedly one of the most essential kitchen tools for beginners and seasoned home cooks alike.
But what exactly is a serrated utility knife?
It Is Not a Bread Knife
A standard bread knife is a massive, unwieldy beast, usually measuring between 8 and 10 inches long. The serrations on a bread knife are macro-serrations—large, wide, and aggressive, designed to rip through thick, crusty artisan sourdoughs without crushing the crumb. If you take a massive bread knife to a delicate cherry tomato, the wide teeth will catch the skin and violently tear the flesh apart. It is simply too big and too aggressive for delicate prep work.
It Is Not a Steak Knife
On the other end of the spectrum, a steak knife is too small, typically maxing out at 4 inches. Furthermore, steak knives often have a curved blade profile and handle ergonomics designed for sitting at a dining table and cutting against a ceramic plate, not for standing at a prep station and executing rapid, precise slices on a cutting board.
The Sweet Spot: The 4.5 to 6-Inch Blade
The true serrated utility knife (or tomato knife) lives in the Goldilocks zone. It typically features a blade length between 4.5 and 6 inches. This length gives you enough runway to utilize a smooth, continuous sawing motion on medium-sized produce without feeling clumsy or oversized.
The blade profile is usually quite narrow and straight, allowing for nimble maneuverability. The serrations themselves are micro-serrations—fine, closely spaced teeth that provide a gentle but incredibly effective bite.
Many traditional “tomato knives” also feature a distinct, two-pronged forked tip at the end of the blade. This is not just a quirky design choice; it is a highly functional feature. Once you have sliced your delicate tomato, you can use the forked tip to gently spear and lift the slices off the cutting board and place them onto your sandwich or platter without having to pinch and potentially crush them with your fingers.
Beyond the Tomato: The Unsung Hero of the Prep Station
I am a firm believer that time is money in the kitchen. When you want to master simple weeknight dinners, efficiency is everything. You do not have time to switch between five different knives for one recipe. While it is famous for conquering the tomato, the serrated utility knife is actually one of the most versatile, hard-working multi-taskers in your entire kitchen arsenal.
Conquering Citrus
Lemons, limes, and oranges present a similar structural problem to tomatoes. They feature a tough, leathery, slippery outer rind hiding a soft, incredibly juicy interior. A dull chef’s knife will slip right off a lemon rind, which is a fantastic way to end up in the emergency room with a sliced finger. The micro-serrations of the utility knife bite instantly into the citrus peel, allowing you to cut perfectly thin, even wheels for garnishes or cocktails without squeezing all the juice onto your cutting board.
Saving Stone Fruit
Peaches, plums, and nectarines are notoriously difficult to prep when they are perfectly ripe. Their skins are smooth and resistant, while their flesh bruises if you so much as look at it too hard. A serrated utility knife glides through stone fruit effortlessly, allowing you to portion them beautifully for tarts or salads. If you have slightly overripe produce, a clean cut is the only way to salvage it so you can stop throwing away sad veggies and fruits that just need a gentle touch.
The Ultimate Sandwich and Sausage Slicer
Have you ever built a towering, beautiful sandwich, only to crush the bread and squeeze the mayonnaise and deli meat out the sides when you try to cut it in half? A serrated utility knife acts as a mini bread knife, sawing cleanly through the crust of a baguette or a soft brioche bun without compressing the layers inside.
It is also the absolute best tool for slicing cured meats, salamis, and sausages. Sausage casings are notoriously tough and rubbery, and a straight blade will often just roll the sausage around the board. The serrated teeth grip the casing immediately, giving you flawless, uniform coins of chorizo or pepperoni. You don’t want a meal where your roasted veggies turn out soggy because you aggressively hacked your sausage and vegetables into uneven, jagged chunks that cook inconsistently. Precision matters.
The “No-Go” Rule: Banishing Cheap, Toxic Blades from Your Kitchen
If you have read any of my previous masterclasses, you know I have a strict, absolute zero-tolerance policy for cheap, toxic, gimmicky kitchenware. The market is absolutely flooded with terrible, brightly colored, plastic-handled serrated knives sold in bins at the grocery store. Do not buy them.
The Danger of Stamped Mystery Metals
Cheap serrated knives are often stamped out of massive sheets of low-grade, mystery-alloy steel. These blades are incredibly thin and flimsy. When a blade bends and flexes while you are trying to cut, you lose all control of the geometry, leading to uneven slices and a high risk of the blade slipping and cutting your hand. You want a knife made from high-carbon stainless steel (such as X50CrMoV15 from Germany or VG-MAX from Japan). These steels offer the perfect balance of rigidity, rust resistance, and edge retention.
Say No to Peeling Coatings
Avoid any knife that features a painted-on, brightly colored “non-stick” coating. These coatings are cheap gimmicks designed to hide poor steel quality. Over time, as the knife faces the friction of daily use, that synthetic coating is going to scratch, flake, and peel directly into your food. Just like you avoid habits ruining your nonstick pans, you should actively avoid coated blades that degrade and leach chemicals into your meals. A high-quality, polished steel blade naturally releases food; it doesn’t need a toxic paint job.
Handle Ergonomics and Hygiene
Finally, pay attention to the handle. Cheap, soft rubber or hollow plastic handles are a hygienic nightmare. They crack, melt in the dishwasher, and create microscopic crevices where bacteria thrive. Look for a knife with a full tang (where the steel of the blade extends all the way through the handle). The handle scales should be made from highly durable, water-resistant materials like POM (Polyoxymethylene), Pakkawood, or Fibrox. These materials are nearly indestructible, perfectly balanced, and completely sanitary.
Knife Skills 101: Wielding the Serrated Utility Blade
Owning the right tool is only half the battle; using it correctly is where the real kitchen magic happens. Wielding a serrated utility knife requires a slightly different physical approach than using a standard chef’s knife.
The Grip
First, maintain a proper pinch grip. Grip the handle with your bottom three fingers, and pinch the base of the blade (the bolster) between your thumb and the side of your index finger. This gives you total control over the blade’s trajectory and prevents the knife from wobbling laterally.
The Motion: Saw, Don’t Chop
Remember the physics we discussed earlier. Serrations require horizontal movement to work. If you place a serrated knife on a tomato and push straight down, you will just mangle the fruit and likely ruin the teeth of your knife.
Place the tip (or the heel) of the blade against the skin of the tomato. Apply virtually zero downward pressure. Instead, gently pull the knife backward toward your body, allowing the teeth to bite into the skin. Once the skin is pierced, use long, smooth, even strokes back and forth. Let the geometry of the blade do the work. The weight of the knife itself is usually all the downward force you need.
The Setup
Always use a high-quality cutting board. End-grain wood or high-density plastic/rubber are ideal. Never, ever use glass, marble, or bamboo cutting boards. These materials are brutally hard and will instantly roll the microscopic teeth of your serrated blade. If you are wondering why your wooden cutting board keeps cracking, it is likely because you are exposing it to too much moisture or using a cheap, overly dense bamboo board that lacks the natural self-healing fibers of proper hardwoods. Treat your tools with respect.
Maintenance and Care: You Can’t Hone a Saw
One of the greatest advantages of a high-quality serrated utility knife is its edge retention. Because only the extreme tips of the teeth make contact with the cutting board, the recessed scallops remain razor-sharp for years. However, this unique geometry also means that maintenance requires a specific approach.
Cleaning: Hand Wash Only
I do not care what the packaging says; no quality knife is truly dishwasher safe. The extreme heat, the violent water jets, and the highly abrasive, caustic detergents in a dishwasher will destroy the edge of your knife and degrade the handle material.
Wash your serrated utility knife by hand immediately after use, using warm water and mild dish soap. Tomatoes and citrus fruits are highly acidic. If you leave acidic juice sitting on the blade, it can cause pitting and corrosion in the steel. Dry the blade completely with a towel before storing it. If you leave your knife wet in the sink, you are asking for rust. It is the exact same kind of culinary neglect that happens when you let moisture build up in your crisper drawer, ensuring your fresh herbs get slimy and rot before you can use them.
Proper Storage
Never throw a serrated knife loose into a utensil drawer. The teeth will bang against spatulas, whisks, and other knives, causing them to chip and dull prematurely. Store your knife safely in a wooden knife block, on a wall-mounted magnetic strip, or in a dedicated plastic blade guard.
The Sharpening Dilemma
You cannot use a standard steel honing rod on a serrated knife. A flat rod will simply grind down the teeth and completely ruin the blade profile.
When your serrated knife eventually does begin to dull (which, for a quality blade, should take years of heavy use), you have two options. You can purchase a specialized, tapered ceramic sharpening rod. This tool is designed to fit individually into each scalloped valley, allowing you to manually sharpen each serration one by one. It is a tedious, time-consuming process, but it works. Alternatively, you can send the knife out to a professional sharpening service that utilizes specialized grinding wheels designed for serrated profiles.
The Final Slice
Cooking should never be a source of stress, and prepping fresh ingredients should be a joy, not a battle against your own produce. You do not need to settle for bruised, weeping tomatoes or mangled citrus wheels. By simply understanding the biological structure of your food and applying the correct mechanical physics to the problem, you can achieve flawless, professional-level results in your own kitchen.
The serrated utility knife is not a uni-tasking gimmick; it is a meticulously engineered solution to one of the most common prep frustrations. It bridges the gap between power and precision, allowing you to breeze through your prep work so you can actually enjoy the process of cooking.
So, ditch the dull chef’s knife when it comes to soft-skinned produce. Invest in a high-quality, 5-inch serrated utility blade. Slice your heirloom tomatoes with the respect they deserve, plate them up beautifully, and serve them before your salad dressing separates. You are the master of your kitchen—now you finally have the right tool to prove it. Happy slicing, and as always, keep cooking with confidence.






