
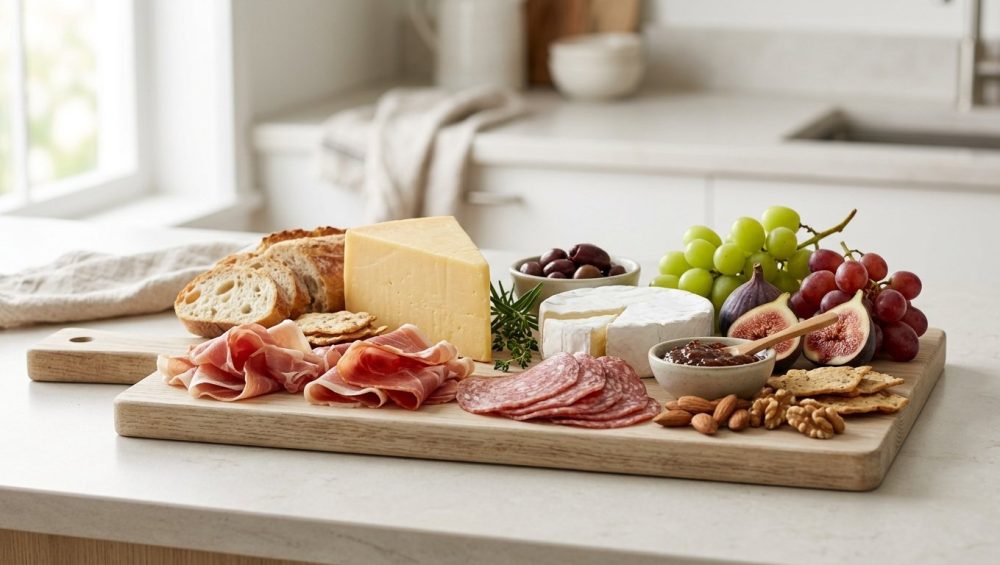
Listen, we’ve all been there. You invite your friends over for a relaxed weekend gathering, you drop an embarrassing amount of your hard-earned cash at the local artisanal cheese shop, and you spend forty-five minutes meticulously arranging prosciutto into delicate little meat roses. You set your masterpiece on the coffee table, feeling like an absolute culinary deity. But an hour later? Your prized triple-cream Brie looks like it just ran a marathon in a sauna, your aged Cheddar is weeping oily tears, and your delicate crackers have turned into a soggy, depressing mush.
Nobody wants to eat room-temperature dairy that looks like it’s actively sweating. It is unappetizing, it ruins the texture, and frankly, it is an insult to the cheese.
As a home cook who has survived my fair share of disastrous dinner parties, I am here to tell you that you do not need a culinary degree to build a mind-blowing, professional-level charcuterie board. What you do need is a basic understanding of thermodynamics, lipid separation, and a ruthless commitment to time management. When it comes to fixing rookie kitchen mistakes, learning how to properly control the temperature of your ingredients is more than half the battle. We are going to banish the sweaty cheese for good. Welcome to the definitive masterclass on building a mindful, scientifically sound, and utterly flawless grazing board.
The Anatomy of a Cheese Sweat (And Why It’s Ruining Your Vibe)
The Science of Milk Fat Emulsions
To stop the sweat, you have to understand the sweat. Cheese is not just a solid block of yellow joy; it is a highly complex colloidal matrix. It is composed of fat globules, protein micelles (specifically casein), water, salt, and various microbial metabolites that give it its distinct flavor.
When cheese is sitting comfortably in your refrigerator (which should be hovering right around 34°F to 38°F), the milk fat within that matrix remains crystalline, rigid, and tightly bound. In this chilled state, the aromatic esters and lactones—the compounds responsible for all those incredible nutty, earthy, and buttery flavors—are completely trapped inside the hardened fat. This is why eating cheese straight out of the fridge is a massive waste of money; your palate physically cannot detect the muted flavors because the fat hasn’t melted enough to coat your tongue and release the volatile aromas.
However, as the cheese warms up, it undergoes a fat phase transition. Depending on the specific fatty acid composition of the cheese, melting begins at different temperature thresholds. Soft cheeses, which are high in palmitic and oleic acids, begin their melting phase at much lower temperatures. Hard, aged cheeses, which contain higher levels of stearic acid, require more ambient heat to achieve that perfect “creamy crumble” texture.
Lipid Separation: When Good Fats Go Bad
Here is where things go horribly wrong. There is a massive difference between “bringing cheese to room temperature” and “abandoning cheese on a 75°F countertop for three hours.” As the temperature of the cheese rises past its optimal threshold, the casein protein network relaxes too much. It loses its structural integrity.
When this happens, the trapped moisture and the now-liquefied lipids (fats) physically migrate to the surface of the cheese. This is lipid separation. It creates that greasy, shiny, unappetizing sheen that we affectionately call “cheese sweat.” Not only does this ruin the visual appeal of your board, but it completely destroys the mouthfeel, turning a supple, velvety paste into a rubbery, oily mess.
Furthermore, serving cheese outside of its optimal temperature range suppresses its volatile organic compound (VOC) emissions by up to 73%. You are literally evaporating the flavor away into the room instead of keeping it in the food. And let’s not forget the bacterial risk: excessive surface condensation on warm cheese creates a highly favorable environment for unwanted microbial growth. This is exactly why buying pre-shredded cheese is a culinary sin—it is heavily coated in anti-caking cellulose to artificially manage this exact moisture migration, which permanently ruins its ability to melt smoothly. We respect our ingredients in this house, which means we manage their moisture naturally.
The Thermodynamic Battleground: Temperature Control for Grazing Boards
The Danger Zone vs. The Goldilocks Zone
There is no single “best” temperature for all cheese. You are dealing with a diverse ecosystem of dairy, and they all have different thermal breaking points. If you want to stop serving sweaty cheese, you must memorize the Goldilocks zones for your ingredients:
- Fresh Cheeses (Ricotta, Mozzarella di Bufala, fresh Goat Cheese): 50°F to 55°F. These have high moisture contents and will weep immediately if they get too warm.
- Semi-Soft & Semi-Hard Cheeses (Gouda, Havarti, young Cheddar): 60°F to 65°F.
- Hard & Aged Cheeses (Parmigiano-Reggiano, aged Gouda, Comté): 65°F to 70°F. These need the most warmth to relax their rigid structures.
- Blue Cheeses (Roquefort, Stilton, Gorgonzola): 55°F to 60°F.
Now, I know what you are thinking: How on earth am I supposed to maintain four different micro-climates on a single piece of wood in the middle of my living room? You can’t. But by employing scientific food staging techniques, you can manipulate the environment and the serving ware to keep everything in its respective sweet spot for the duration of your party.
Why Your Serving Board Material Matters (Ditch the Cheap Plastic)
The foundation of a mindful charcuterie board is the board itself. We need to talk about thermal mass and specific heat capacity. The material you choose to plate your food on directly dictates how fast that food will succumb to the ambient temperature of your dining room.
Marble and slate are the undisputed champions of thermal mass. They are incredibly dense materials that absorb and retain cold temperatures far better than wood or plastic. According to material science evaluations, a standard 1.5-inch thick marble slab can cool from an ambient 72°F down to 58°F within just 8 minutes when properly chilled at 34°F for two hours. If you place your delicate, temperature-sensitive soft cheeses on a chilled marble board, the stone acts as a thermal sink, slowly absorbing the ambient heat of the room and keeping the cheese perfectly nestled in that 50°F to 60°F Goldilocks zone for hours. No weeping, no sweating, no lipid separation.
If you are using wood, stick to high-quality, dense hardwoods like hard maple, acacia, cherry, or olive wood. Hardwoods are naturally less porous than softwoods, meaning they won’t absorb the funky odors of pungent blue cheeses, and they actively resist microbial growth up to three times better than synthetic plastic cutting boards. It all comes down to optimizing thermal mass to keep your ingredients stable while maintaining a sanitary serving surface.
The Anti-Sweat Charcuterie Arsenal: What to Buy and What to Burn
High-Thermal-Mass Serving Ware
If you are going to invest in a beautiful marble or natural slate board, you must maintain it correctly. These are porous natural stones. If you do not seal them, a raw marble board can absorb liquid olive oil in as little as 12 seconds, creating deep, lipid-rich microscopic niches that become a breeding ground for bacteria like Pseudomonas fluorescens.
You must seal your stone boards every four to six weeks using a penetrating, food-safe silane-based sealer. Do not use topical acrylic sealers, which will inevitably flake off into your expensive prosciutto. For your hardwood boards, a monthly generous rubdown with food-grade mineral oil and beeswax will keep the wood hydrated, preventing it from cracking and creating a naturally hydrophobic barrier against cheese oils and berry juices.
The Truth About Toxic Resin and Cheap Coatings
This brings me to my absolute strictest rule in the kitchen: zero tolerance for toxic, cheap garbage. I am looking directly at those trendy, mass-produced epoxy resin “river” boards you buy at discount home goods stores.
I am a huge advocate for banishing toxic kitchen gear from your home, and that firmly includes serving platters made of mystery synthetic chemicals. When you drag a sharp cheese knife across a cheap epoxy resin board, you are creating micro-scratches. Those scratches flake off microscopic shards of plastic and uncured resin directly into your food. You are quite literally feeding your guests microplastics. Stick to natural, inert materials: solid hardwood, natural stone, or unglazed high-fired ceramic.
And while we are on the subject of terrible serving ware: absolutely no glass cutting boards. Ever. The screeching sound alone is enough to ruin a party, but more importantly, glass is harder than the steel of your knives. If you’ve ever wondered why knives get dull fast, look no further than that decorative glass cutting board you refuse to throw away. It will roll the edge of your expensive cutlery in a single slice.
Strategic Staging: A Stress-Free Timeline for Flawless Presentation
A mindful charcuterie board is built on a precise timeline. You cannot assemble the entire thing three hours early and leave it on the counter, nor can you frantically throw it together while your guests are taking off their coats. You need a staging protocol.
T-Minus 24 Hours: The Prep Phase
The day before your gathering is all about prep. Wash your produce. Grapes, berries, and cherry tomatoes need to be cleaned, but moisture is the absolute enemy of a grazing board. Wet fruit will bleed onto your cheeses and turn your artisanal crackers into a soggy paste.
Nobody wants to see their expensive berries get moldy fast, so wash them in a solution of one part white vinegar to three parts cold water. This destroys mold spores. Rinse them thoroughly, and then dry them obsessively. Use a salad spinner lined with paper towels to extract every last drop of water. Store them in a paper-towel-lined container in the fridge overnight.
This is also the time to pre-cut your hard cheeses. Hard cheeses (like aged Cheddar or Manchego) won’t dry out quickly if stored properly, so cut them into their serving shapes, place them in airtight glass containers, and put them back in the fridge.
T-Minus 2 Hours: The Strategic Chill
Two hours before your guests arrive, clear a shelf in your refrigerator and put your marble or slate serving board directly inside. You want that thermal mass to get as cold as possible.
Simultaneously, take your hard and semi-hard cheeses out of the fridge. Leave them in their wrappers or containers on the kitchen counter. They need this two-hour head start to slowly rise to that 65°F to 70°F Goldilocks zone.
T-Minus 30 Minutes: The Plating Protocol
Thirty minutes before the doorbell rings, pull your chilled stone board out of the fridge. Now, take your soft cheeses (the Brie, the Camembert, the fresh goat cheese) straight out of the fridge, unwrap them, and place them onto the ice-cold board.
Because the board is acting as a thermal sink, those highly volatile soft cheeses will be protected from the ambient room temperature. They will slowly, gently rise to their ideal 55°F serving temperature over the next hour, completely bypassing the lipid separation phase. No sweat, no weeping.
Now, arrange your room-temperature hard cheeses, fold your cured meats, and place your dry accoutrements. To truly master the art of effortless hosting, you must have all the messy prep done beforehand so you can simply place, garnish, and pour yourself a glass of wine before anyone arrives.
Slicing Mechanics: Preserving Integrity and Preventing Degradation
The Geometry of Cheese Slicing
How you cut the cheese matters just as much as how you temp it. Cheese is a living, breathing thing, and its flavor profile changes dramatically from the center paste to the outer rind. If you just hack off the tip of a wedge of Brie, you are stealing the ripest, most flavorful part for yourself and leaving your guests with nothing but the rind.
- Wedges (Brie, Camembert, Roquefort): Cut these into long, thin radial triangles, starting from the point and cutting straight back to the rind. This ensures every single slice contains a fair ratio of center paste to outer rind.
- Logs (Goat Cheese): Cut these into uniform circular coin slices.
- Wheels (Small artisan wheels): Cut these exactly like you would cut a cake, into even triangular wedges.
- Hard Blocks (Cheddar, Monterey Jack): Cut these into uniform rectangular slices or rustic, bite-sized cubes.
Tool Selection: Why Dull Knives Destroy Delicate Cheeses
If you take a thick, dull chef’s knife and try to slice through a room-temperature triple-cream Brie, you are going to obliterate it. The wide surface area of a standard knife blade creates a vacuum effect against the sticky paste of the cheese, crushing the delicate cellular structure, smearing the fat, and completely ruining the texture.
You must use the right tools. It’s all about unlocking kitchen creativity without losing your mind over mangled dairy. For soft cheeses, you absolutely need a skeleton knife—a specialized cheese knife with large holes cut out of the blade. These holes eliminate the surface area, breaking the vacuum seal and allowing the knife to glide through the sticky paste without dragging or smearing. Alternatively, a wire cheese slicer works wonders for a perfectly clean cut.
For hard, aged cheeses like Parmigiano-Reggiano, do not try to slice them thinly. They are crystalline and crumbly by nature. Use a spade knife or a sharp, stubby parmesan knife to stab into the cheese and twist, cleaving the block along its natural fault lines into beautiful, rustic nuggets.
Elevating the Grazing Experience: Flavor Pacing and Maturation
Preventing Enzymatic Browning in Accoutrements
A mindful charcuterie board requires fresh fruit to cut through the heavy, rich fats of the meat and dairy. Crisp apples and juicy pears are classic pairings, but they present a massive aesthetic problem: enzymatic browning. When you slice an apple, you expose the enzyme polyphenol oxidase to oxygen, which rapidly turns the pristine white flesh into a sad, rusty brown.
We need to talk about preventing enzymatic browning on your fruit slices, and no, we are not going to use lemon juice. Squeezing raw lemon juice over your apples stops the browning, but it also makes everything taste like overpowering citrus, completely throwing off the delicate flavor pairings of your board.
Instead, use a honey-water soak. Whisk one tablespoon of honey into one cup of room-temperature water. Soak your apple and pear slices in this solution for exactly five minutes, then drain and pat them dry. Honey contains a specific peptide compound that naturally deactivates the polyphenol oxidase enzyme. Your fruit will stay beautifully crisp and white for hours, with only the faintest, complementary hint of natural sweetness.
Pairing for Maximum Impact Without the Mess
Building a board is an exercise in structural engineering and flavor chemistry. You must balance fat, acid, salt, and texture.
Rich, buttery cheeses (like a double-cream Brie or a fatty liver pâté) coat the palate in a heavy layer of lipids. You must provide acidic accoutrements to cut through that fat and cleanse the palate. This is why tart cornichons, pickled red onions, whole-grain mustard, and sour cherry preserves are non-negotiable.
You also need textural contrast. Pair a smooth, velvety goat cheese with crunchy, oil-roasted Marcona almonds. Pair a sharp, crystalline aged Gouda with a soft, chewy dried fig.
But most importantly, you must practice strict moisture management. Do not let wet ingredients touch dry ingredients. Build physical “dams” out of neutral, dry items (like a row of almonds, dried apricots, or folded salami rivers) to separate the wet items (like olives, pickles, or fresh fruit) from your delicate crackers and crostini. A soggy cracker is a tragedy that can easily be avoided with a little bit of architectural foresight. Use small, unglazed ceramic ramekins to corral particularly juicy items like marinated olives or liquid honey.
The Final Word on Mindful Entertaining
Building a spectacular charcuterie board does not require a Michelin star. It requires intentionality. It requires respecting the thermal limits of your ingredients, investing in a proper, high-thermal-mass serving board, and taking the time to stage your prep so you aren’t sweating alongside your Cheddar.
When you understand the science of milk fat emulsions, you stop treating cheese like an indestructible block of plastic and start treating it like the delicate, crafted food it is. You control the temperature, you control the moisture, and you control the pacing.
So ditch the toxic resin boards, throw away the pre-shredded cheese, and put that marble slab in the fridge where it belongs. You are entirely capable of hosting a flawless, stress-free gathering that looks—and tastes—like it was catered by a professional. Now go pour yourself a glass of wine, slice up some Comté, and enjoy your weekend. You’ve earned it.






