
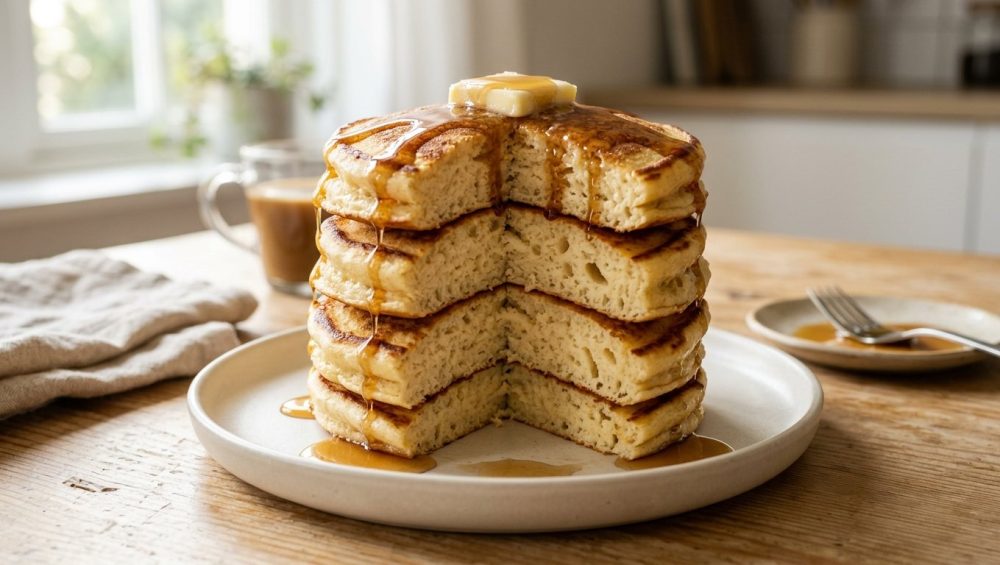
Picture this: It is Sunday morning. You are in your favorite sweatpants, nursing a hot cup of coffee, and you have graciously decided to treat your family—or just yourself, no judgment here—to a towering stack of homemade pancakes. You pull out the mixing bowls, whisk the ingredients together until the batter is as smooth as a silk bedsheet, and pour it onto a hot skillet. You flip them, plate them, and take that highly anticipated first bite.
And then, tragedy strikes. Instead of biting into a cloud of tender, melt-in-your-mouth perfection, you find yourself chewing on a dense, rubbery disc that has more in common with a yoga mat than a diner-style flapjack.
Look, I get it. As a home cook, you have been conditioned to believe that lumps are the enemy of good food. You see a lump in your batter, and your Type-A perfectionism kicks in. Your first instinct is to grab a balloon whisk and beat that batter into submission like it owes you money. But here is the brutally honest truth from your favorite snarky sous-chef: your overachieving nature is exactly what is ruining your weekend brunch. When it comes to quick batters, trying to achieve a perfectly smooth consistency is a culinary death sentence.
If you want restaurant-quality, incredibly light, sky-high flapjacks, you need to understand the scientific reason why your batter needs to rest before it hits the griddle. You need to embrace the ugly, lumpy chaos of barely-mixed ingredients. Today, we are going to completely deconstruct the biochemistry of breakfast. We are going to look at the exact molecular mechanics of starch hydration, protein networks, and chemical leavening. By the end of this masterclass, you will know exactly how to achieve pancake perfection by simply doing a whole lot less work.
The Anatomy of a Pancake: It’s Not Just Breakfast, It’s Chemistry
Before we can fix your terrible pancakes, we need to understand what a pancake actually is. A pancake is not just a random amalgamation of flour, milk, and eggs. It is a highly volatile, time-sensitive chemical matrix. Every single ingredient plays a highly specific structural role, and the way you handle them dictates whether you end up with a fluffy cloud or a hockey puck.
The Flour Matrix: Gliadin and Glutenin
Let us start with the backbone of your batter: wheat flour. Flour is essentially a powder ground from the endosperm of wheat berries. It is composed primarily of starches, but it also contains about 10% to 12% protein (if you are using standard all-purpose flour). The two most important proteins in this powder are called gliadin and glutenin.
When these proteins are sitting dry in your bag of flour, they are completely inert. They do absolutely nothing. However, the moment you introduce them to a liquid—like milk, buttermilk, or water—they wake up. They begin to bond with one another, linking together to form a complex, elastic, web-like network known as gluten.
Gluten is a miracle of food science. It is what gives a crusty sourdough boule its chewy texture, and it is what allows a New York bagel to have that satisfying, jaw-testing pull. Gliadin provides the dough with extensibility (the ability to stretch), while glutenin provides elasticity (the ability to snap back into place). In bread baking, we actively want to develop a massive, strong gluten network. But in a delicate quick bread like a pancake? A strong gluten network is your absolute worst nightmare.
The Role of Hydration: Wet Meets Dry
The second a wet ingredient hits a dry ingredient, a ticking clock begins. The liquid acts as a catalyst, initiating the hydration process. But it is not just the proteins that are drinking up that moisture; the starch molecules are also hard at work.
Wheat flour is packed with microscopic starch granules (composed of amylose and amylopectin). When exposed to liquid, these granules act like tiny sponges, absorbing the moisture and swelling up. This process is known as starch hydration, and it is what gives a batter its viscosity and structure without relying on tough gluten bonds. The goal of a perfect pancake batter is to maximize starch hydration while minimizing gluten development. Unfortunately, most home cooks do the exact opposite.
The Chemical Leavening Engine
While the flour is building the structure, your leavening agents are responsible for the lift. American-style pancakes rely on a chemical leavening system—usually baking powder, baking soda, or a combination of both.
Baking soda (sodium bicarbonate) is a highly alkaline base. When it comes into contact with an acidic ingredient like buttermilk (which has a pH of around 4.5), an immediate acid-base neutralization reaction occurs. This reaction rapidly produces thousands of microscopic carbon dioxide (CO2) gas bubbles throughout the batter. These tiny bubbles form the internal scaffolding of your pancake. When the batter hits a hot pan, the heat causes the trapped gases to expand rapidly, pushing the starches and proteins upward before the heat sets the structure into place.
The Cardinal Sin of Brunch: Why Overmixing Ruins Everything
Now that we understand the delicate biochemical balance sitting in your mixing bowl, let us talk about how you are actively destroying it.
The Gluten Trap: How Stirring Creates Rubber
Gluten development is not just triggered by moisture; it is exponentially accelerated by mechanical shear force. Every single time you drag a whisk through your batter, you are physically aligning the gliadin and glutenin proteins, encouraging them to form tighter, stronger, and more complex bonds.
When you aggressively whisk your pancake batter in a misguided attempt to eliminate every last lump, you are essentially kneading it. You are applying the exact same mechanical energy that a baker uses to knead pizza dough. Because pancake batter has a very high hydration ratio (often around 180% to 220% liquid to flour by weight), the proteins are highly mobile, meaning gluten forms incredibly fast if agitated.
The result? The batter becomes highly elastic. When you pour it onto the griddle, those tight, rubber-band-like gluten strands refuse to let the expanding gas bubbles lift the batter. Instead of rising into a fluffy, tender cake, the structure seizes up, resulting in a flat, dense, chewy disc that requires a steak knife to cut through. This is the primary reason why your flapjacks taste like despair, which is exactly why resting your batter is the ultimate cheat code for bypassing this culinary disaster.
Deflating the Magic: Popping Your Own Bubbles
If developing a tough gluten network wasn’t bad enough, overmixing also sabotages your leavening agents. Remember those beautiful, microscopic carbon dioxide bubbles being generated by the chemical reaction between your baking soda and your buttermilk?
When you vigorously beat the batter, you are physically popping those bubbles and driving the precious gas right out of the bowl. You are actively deflating the batter before it even has a chance to see the stove. By the time you finally pour the perfectly smooth batter onto the pan, the chemical leavening engine has completely stalled out. There is no gas left to provide lift, leaving you with a sad, lifeless crepe instead of a towering pancake.
The Lumpy Batter Manifesto: Why Ugly Equals Delicious
Here is my professional mandate to you: embrace the lumps. A proper pancake batter should look terrifyingly unfinished. It should look like cottage cheese. It should look like you gave up halfway through the recipe.
Those lumps are not your enemy. A lump in pancake batter is simply a tiny pocket of dry flour encapsulated by a hydrated, sticky outer shell of starch and protein. If you leave them alone, the liquid in the batter will naturally permeate that shell over time, hydrating the dry flour inside without any mechanical agitation required. By refusing to stir out the lumps, you are protecting the carbon dioxide bubbles and preventing the gluten from organizing into a tough network. Ugly batter equals beautiful pancakes.
The Science of the Rest: Why Ten Minutes Changes Everything
So, you have gently folded your wet and dry ingredients together, leaving a shaggy, lumpy mess in your bowl. Now comes the hardest part for any impatient, hungry home cook: you must walk away.
Allowing your batter to rest undisturbed on the counter for 10 to 15 minutes is the single most transformative technique in pancake science. It requires zero extra effort, zero extra money, and zero culinary skill, yet it fundamentally alters the molecular structure of the batter. Here is exactly what is happening while you wait.
Starch Gelatinization and Passive Hydration
During the rest period, the magic of passive hydration takes over. The water molecules slowly penetrate the dry pockets of flour (the lumps) that you intentionally left behind. The starch granules absorb the liquid and swell, a process known as partial starch gelatinization.
As the starches swell, the batter naturally thickens and becomes more viscous. This increased viscosity is crucial. A thicker batter holds its shape better on the griddle, preventing it from spreading out into a thin, sad puddle. Because this thickening happens passively through absorption rather than actively through stirring, you get all the structural benefits of a thick batter with absolutely none of the tough gluten development.
Relaxing the Gluten Strands
Let us be realistic: even with the gentlest folding technique, you are going to develop a tiny bit of gluten. It is unavoidable. However, gluten is an elastic network, and like a stretched rubber band, it will eventually relax if you stop pulling on it.
Resting the batter gives those newly formed gluten strands time to unwind and relax. The protein network softens, ensuring that when the heat of the pan triggers the leavening agents to expand, the batter is pliable and tender enough to rise beautifully without resistance.
The Double-Acting Leavening Miracle
Most modern baking powders are “double-acting,” meaning they contain two different types of acidic salts. The first acid (usually monocalcium phosphate) reacts immediately at room temperature the second it touches liquid, creating that initial burst of CO2 in the mixing bowl.
The second acid (such as sodium aluminum sulfate or sodium acid pyrophosphate) is heat-activated. It does absolutely nothing until the batter hits a temperature of around 140°F (60°C) on the griddle.
Resting the batter allows the first, room-temperature reaction to fully process and evenly distribute its gas bubbles throughout the hydrating starch matrix. The viscous, resting batter traps these bubbles securely. Then, when the batter hits the hot pan, the heat-activated acid kicks in, causing those pre-existing bubbles to rapidly expand, resulting in a dramatic, fluffy “oven spring” effect right on your stovetop.
Building the Perfect Batter: A Step-by-Step Masterclass
Now that you understand the incredibly complex chemistry happening inside your mixing bowl, let us walk through the actual, physical process of building the ultimate pancake batter.
The Dry Ingredients: Setting the Stage
The foundation of your pancake is the dry mix. You will need all-purpose flour, sugar, salt, baking powder, and baking soda. But how you measure these ingredients dictates your success before you even crack an egg.
Stop measuring your flour by volume. Depending on how densely the flour is packed into the bag, and how humid your kitchen is, a standard measuring cup can hold anywhere from 120 grams to 160 grams of flour. That is a massive margin of error that will completely ruin the delicate hydration ratio of your batter. Long before you start wildly scooping your flour with a measuring cup, do yourself a favor and get a digital kitchen scale for consistent results. Weighing your ingredients ensures that your chemical ratios are flawless every single time.
Once weighed, thoroughly whisk your dry ingredients together in a large bowl. This is the only time you are allowed to whisk aggressively. You want the leavening agents, salt, and sugar perfectly and uniformly distributed throughout the flour so that you do not end up with isolated pockets of bitter baking soda in the final product.
The Wet Ingredients: Fat, Acid, and Moisture
In a separate bowl, you need to combine your wet ingredients. For the absolute best flavor and texture, buttermilk is non-negotiable. As we discussed, the lactic acid in buttermilk is required to activate the baking soda for that crucial first leavening reaction. Furthermore, the acid actually helps to chemically tenderize the gluten strands, acting as an insurance policy against toughness.
You will also need melted fat—usually butter. Fat is a tenderizer. When mixed into the batter, the lipids coat the flour proteins, creating a physical barrier that actively prevents water from reaching the gliadin and glutenin. This literally “shortens” the gluten strands (which is why baking fats are often called “shortening”), guaranteeing a tender, melt-in-your-mouth crumb.
Whisk your buttermilk, eggs, melted butter, and a splash of vanilla extract together until completely homogenous.
The “Dump and Fold” Technique
This is the moment of truth. Pour the wet ingredients directly into the center of the dry ingredients.
Do not use a balloon whisk for this step. A balloon whisk is designed to incorporate air and aggressively break up clumps—the exact two things we are trying to avoid. Instead, ditch the balloon whisk and use a Danish dough whisk to gently fold the wet ingredients into the dry. If you do not have one, a flexible silicone spatula works beautifully.
Use a gentle, sweeping figure-eight motion. Scrape the bottom of the bowl, lift the batter, and fold it over itself. Count your folds. You should not be mixing this batter more than 10 to 12 times. The moment you no longer see massive streaks of dry, unhydrated flour powder, stop. Walk away. Leave the lumps. Let the batter rest for 10 to 15 minutes, and do not touch it again until it is time to cook.
The Heat, The Pan, and The Flip: Cooking Mechanics
You have successfully engineered the perfect, biochemically optimized resting batter. Now, you have to cook it without ruining it.
Choosing the Right Skillet (And Banishing the Junk)
I have a very strict rule in my kitchen, and I expect you to follow it: life is entirely too short to cook on cheap, toxic, peeling non-stick cookware. Throw away that toxic kitchen gear with the peeling coating right now. Not only is it a health hazard, but cheap, thin aluminum pans possess terrible thermal mass.
When you drop cold pancake batter onto a thin, cheap skillet, the temperature of the metal instantly plummets. The pan cannot hold enough heat energy to recover quickly, meaning your pancake ends up steaming in its own moisture rather than frying to a crisp, golden brown.
Instead, use a heavy-gauge carbon steel griddle or a well-seasoned cast-iron skillet. These materials have incredible thermal mass. They take longer to heat up, but once they are hot, they stay hot, delivering a relentless, even sear to the exterior of your pancake. Furthermore, stop ruining your nonstick pans with aerosol sprays that leave a sticky residue; use real butter or clarified ghee for cooking.
To ensure your pan is at the precise optimal temperature (around 350°F to 375°F), use the water drop test to see if your stainless steel skillet is ready. Flick a tiny drop of water onto the surface; if it immediately sizzles and evaporates, the pan is too cold. If it shatters into a dozen tiny beads, it is too hot. If it forms a single, cohesive bead of water that dances and glides across the surface like a hovercraft (thanks to the Leidenfrost effect), your pan is perfectly preheated.
The Maillard Reaction: Achieving the Golden Brown
Cooking a pancake is not just about solidifying the batter; it is about flavor development. When the proteins and reducing sugars in the batter are exposed to high heat, they undergo a complex cascade of chemical changes known as the Maillard reaction.
This reaction is responsible for transforming the pale, bland batter into a deeply savory, golden-brown, aromatic masterpiece. For the Maillard reaction to occur efficiently, the surface temperature of the pancake needs to rapidly exceed 285°F (140°C). This is why preheating your heavy skillet is so critical. If the pan is too cold, the batter will absorb the cooking fat and turn blonde and greasy. If the pan is too hot, the sugars will burn and carbonize before the interior structure has time to set.
The Bubble Test: When to Actually Flip
The most common mistake home cooks make at the stove is flipping the pancake prematurely. You pour the batter, you stare at it, you see three bubbles form on the surface, and you immediately jam a spatula underneath it.
Stop rushing. Remember, nobody wants a pancake that is burnt outside and raw in the middle when you cut into it. You must wait for the visual cues that indicate the internal structure has set.
Watch the bubbles. Initially, bubbles will rise to the surface and sit there. Do not flip yet. Wait until those bubbles actively pop and leave open, porous craters on the surface of the batter that do not immediately fill back in with wet liquid. Simultaneously, inspect the edges of the pancake. The perimeter should lose its wet, glossy sheen and take on a dull, matte, slightly dry appearance.
When the edges are dry and the popped bubbles hold their shape, slide a wide, flexible spatula underneath and flip it confidently in one swift motion. Do not press down on the pancake after you flip it! Pressing down forcefully expels the trapped steam and physically crushes the delicate crumb structure you just spent 20 minutes scientifically engineering.
Troubleshooting Your Flapjacks: The Sassy Q&A
Even with a masterclass under your belt, things can occasionally go sideways in the kitchen. Let us troubleshoot some common beginner woes.
“Why do my pancakes taste like a mouthful of loose change?”
You used too much baking soda, or you did not use enough acid (like buttermilk) to neutralize it. Unreacted sodium bicarbonate leaves a highly unpleasant, metallic, soapy taste in your mouth. Always measure your leavening agents with precision.
“My pancakes are completely flat, even though I rested the batter. What gives?”
Your baking powder is dead. Chemical leaveners degrade over time, especially if exposed to humidity. Test your baking powder by dropping a spoonful into hot water; if it doesn’t immediately and violently fizz, throw it in the trash and buy a fresh container.
“Why does my food taste weirdly like my dishwasher?”
If you ever wonder why your silicone spatulas taste soapy when you flip a delicate pastry, it is because cheap silicone absorbs the essential oils from harsh dishwasher detergents. Hand wash your high-quality silicone gear, or bake them in a 250°F oven for 20 minutes to burn off the absorbed odors.
“Why is the first pancake always a disaster?”
The “first pancake rule” is a universal truth of thermodynamics. Even with proper preheating, the surface temperature of a skillet is rarely perfectly uniform when you start. The first pancake acts as a thermal stabilizer, absorbing excess heat hotspots and conditioning the cooking fat. Consider it a chef’s tax, eat it standing over the sink, and proceed with the rest of the batch.
The Final Verdict on Fluffiness
Cooking does not have to be a stressful, chaotic chore, and you certainly do not need a degree from Le Cordon Bleu to make a breakfast that will blow your family’s minds. The secret to kitchen mastery is often just understanding the underlying science of your ingredients and having the confidence to get out of your own way.
By actively choosing to do less work—by putting down the whisk, embracing the ugly lumps, and giving your batter the time it needs to hydrate and relax—you are allowing food chemistry to do the heavy lifting for you. So this weekend, throw out your boxed mixes. Weigh your flour. Leave the batter lumpy. Give it ten minutes of peace. Your reward will be a towering stack of the lightest, fluffiest, most structurally perfect pancakes you have ever tasted. Now go preheat your skillet, and for the love of all things culinary, stop pressing down on them with your spatula.






