
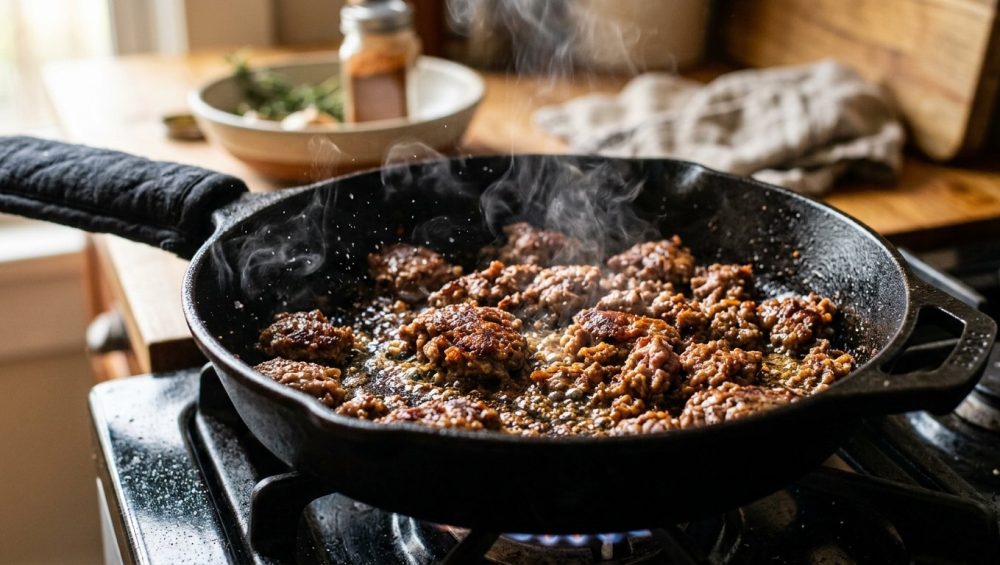
Listen up, folks. I know exactly how your Tuesday evening goes. You get home from work, you are completely exhausted, and you just want to get some tacos or a quick meat sauce on the table before you completely lose the will to stand upright. You grab a pound of ground beef from the fridge, toss it into a cold pan, turn the stove to medium, and grab your spatula. And then, because you are stressed, rushing, and feel an overwhelming psychological need to actively do something while standing at the stove, you start stirring. And stirring. And stirring.
You hack at that block of meat like it owes you money. Within three minutes, your kitchen does not smell like a high-end steakhouse; it smells like a wet dog. The pan fills with a murky, grayish liquid. The meat turns into sad, rubbery little pebbles boiling in their own juices. Congratulations, you are no longer cooking dinner—you are conducting a depressing science experiment in liquid evaporation.
I have ruined enough dinners in my early days so you do not have to, and I am here to tell you that it is time for an intervention. You can easily stop making those rookie kitchen mistakes that turn an easy weeknight meal into a flavorless chore. The secret to restaurant-quality, deeply caramelized, mind-blowingly flavorful ground beef requires absolutely zero culinary school training. It requires zero expensive, hard-to-find ingredients. It simply requires you to put the spatula down, understand the basic physics of your cookware, and step away from the stove.
The Gray Meat Epidemic: Why Your Ground Beef Looks Sad
We need to address the elephant in the kitchen: most home cooks are serving gray meat. It is a tragedy of epic proportions, mostly because it is entirely preventable. When you look at a beautifully seared restaurant burger or a rich, dark Bolognese sauce, you are looking at the results of patience and heat management. When you look at the pale, crumbly mess sitting in your taco shells, you are looking at the result of anxiety and over-agitation.
The Anatomy of a Weeknight Tragedy
Let us break down the exact sequence of events that leads to ruined ground beef. When you drop a brick of cold meat into a pan and immediately start breaking it apart, you are exponentially increasing the surface area of that meat. Every single tiny crumble you create is suddenly exposed to the heat, and as those muscle fibers contract, they violently squeeze out their internal moisture.
Because you have broken the meat into hundreds of tiny pieces, all of that moisture floods the pan simultaneously. Suddenly, the sizzling sound stops. It is replaced by a depressing, low bubbling sound. Your meat is no longer frying in its own rendered fat; it is submerged in a pool of water. It is steaming. It is boiling. And boiling meat is the fastest way to guarantee a chewy, bouncy, flavorless dinner.
The Culprit: Your Spatula and Your Impatience
The urge to stir is deeply ingrained in the amateur cook’s psyche. We are falsely conditioned to believe that if we are not constantly moving food around a pan, it will instantly burn to a crisp. But your spatula is actually a weapon of mass flavor destruction when used at the wrong time. By constantly moving the meat, you never allow any single surface to remain in contact with the hot metal long enough to actually sear. You are continuously cooling the pan down by moving cold, wet meat over the hot spots. If you want to cook like a pro, you have to learn the hardest culinary skill of all: the art of doing absolutely nothing.
The Science of Searing: Meet the Maillard Reaction
I promised no pretentious chef-speak, but we do need to talk about the actual chemistry of what makes food taste good. You do not need a Ph.D. to understand this, but knowing the “why” will fundamentally change how you approach every meal you cook from this day forward.
What the Heck is Maillard Anyway?
The Maillard reaction is a complex chemical reaction between amino acids (the building blocks of proteins) and reducing sugars that gives browned food its distinctive, savory flavor. Named after the French chemist Louis-Camille Maillard, who first described the phenomenon in 1912, this reaction is the holy grail of the culinary arts.
It is the exact reason a seared ribeye tastes infinitely better than a boiled piece of shoe leather. It is the reason toast tastes complex and nutty compared to a raw slice of bread. When meat undergoes the Maillard reaction, it creates hundreds of brand new, highly complex flavor compounds that simply do not exist in raw or boiled meat. When you aggressively stir your ground beef and let it boil in its own juices, you are actively preventing this magical reaction from ever taking place.
Temperature Thresholds: The Boiling Point vs. The Searing Point
Here is where the strict physics of your kitchen come into play. The Maillard reaction does not happen at just any temperature. It typically requires a surface temperature of at least 280°F to 330°F (140°C to 165°C) to proceed rapidly and create that deep mahogany crust.
Do you know what temperature water boils at? 212°F (100°C).
If you have ever wondered why your ground beef steams instead of getting that gorgeous, crispy edge, it all comes down to moisture management. As long as there is liquid water pooling in your pan, the temperature of that water—and the meat sitting in it—cannot mathematically exceed 212°F. All the thermal energy pumping out of your stove is entirely wasted on evaporating the water rather than browning the meat. You are stuck in a thermal bottleneck. Until every last drop of that water evaporates, the Maillard reaction is completely stalled.
The Water Content Problem: You Bought Meat, You Got Moisture
Let us talk about what you are actually buying at the supermarket. You might think you are buying a solid block of protein and fat, but according to the USDA, raw 85% lean ground beef is approximately 64% water by weight. Even a richer 80/20 blend is packed with massive amounts of moisture.
When you throw cold meat into a pan, the muscle fibers violently contract as they heat up, wringing out that water like a wet sponge. If you are constantly stirring the meat, you are encouraging all that water to flood the pan at once. Steaming is the absolute enemy of flavor development because it traps the temperature in the danger zone of blandness.
The Pan Problem: Crowding, Heat Retention, and Toxic Gear
You cannot build a house with a plastic hammer, and you cannot get a perfect sear on your ground beef using garbage cookware. The vessel you choose to cook in dictates the thermal dynamics of your meal.
Stop Using Peeling Non-Stick Pans (Seriously, Throw Them Out)
I am going to get on my soapbox here because this is a non-negotiable rule in my kitchen. You need to stop cooking your meat in cheap, flimsy, scratched-up non-stick pans. I absolutely despise toxic kitchenware. If your pan has a mystery chemical coating that is flaking off into your food, throw it in the trash right now. Not only are you serving your family a side of forever chemicals, but you are also actively sabotaging your food’s potential.
Thin non-stick aluminum pans have terrible heat retention. The moment you drop a pound of cold, wet beef into a paper-thin skillet, the temperature of the pan plummets. It does not matter if your burner is cranked to high; the pan simply does not have the thermal mass to bounce back quickly. Furthermore, you should never heat non-stick pans to the screaming-hot temperatures required for a proper sear, as the coatings degrade and release toxic fumes. And please, for the love of everything holy, stop ruining your nonstick pans with cheap aerosol sprays that build up a sticky, polymerized residue that ruins whatever is left of the coating.
The Right Tools for the Job: Cast Iron and Stainless Steel
If you want to cook like an expert, you need gear that works with you, not against you. You want a pan with high thermal capacity (often referred to as thermal mass). Cast iron is the undisputed king of the sear. While aluminum actually has a higher thermal conductivity (meaning it heats up fast), cast iron has massive density and heat capacity. This means that once a heavy cast iron skillet gets hot, it holds onto that thermal energy with a vengeance. When you drop cold meat into it, the temperature does not instantly drop to a pathetic simmer. The pan fights back, maintaining the high heat necessary to evaporate surface moisture instantly and kickstart the Maillard reaction.
Alternatively, a heavy-bottomed, multi-clad stainless steel skillet is phenomenal. If your meat sticks to stainless steel, it usually means your pan was not properly preheated before you added the oil, or you impatiently tried to move the meat before it naturally released its crust. Do yourself a favor and invest in a few high-quality beginner kitchen tools that will last a lifetime and will not flake toxic chemicals into your weeknight dinners.
Pan Size Matters: The Mathematics of Surface Area
Another massive mistake home cooks make is overcrowding the pan. If you try to cook two pounds of ground beef in a tiny 8-inch skillet, you are doomed from the start. The meat is piled on top of itself, trapping steam underneath the top layers. You need a 10-inch or, ideally, a 12-inch skillet for a single pound of meat. The wide surface area gives the moisture room to evaporate quickly into the air rather than pooling at the bottom and boiling your dinner.
The Secret Weapon: The Baking Soda Hack
Okay, I promised you time-saving weeknight hacks, and this is the absolute holy grail. If you are dealing with standard supermarket ground beef, it is going to release water no matter what you do. But culinary science has provided us with a brilliant workaround. By altering the pH of the meat before cooking, you can fundamentally change how the proteins behave under heat.
Alkalinity and Protein Bonds
According to extensive testing by culinary scientists, mixing your raw ground beef with a tiny amount of baking soda works absolute miracles for moisture retention. Baking soda (sodium bicarbonate) is highly alkaline. When you mix it into the raw meat, it raises the overall pH level of the beef.
Why does this matter? Meat proteins naturally want to tightly bond and coagulate when they are exposed to high heat. As they squeeze together, they wring out their internal liquid. However, the alkaline environment created by the baking soda makes it much harder for those protein strands to tightly bond. Because the proteins do not squeeze together as aggressively, they hold onto their internal moisture. Much like how baking soda transforms your stir-fries by tenderizing otherwise tough cuts of flank steak, it works absolute magic on ground meat.
How It Locks in Moisture and Accelerates Browning
The formula is incredibly simple and takes thirty seconds. Dissolve 1/4 to 1/2 teaspoon of baking soda in about a tablespoon of water, and gently mix it into one pound of raw ground beef. Let it sit on the counter for 15 minutes while you chop your onions, grate your cheese, or prep your taco toppings.
When you finally cook the meat, you will notice an immediate, shocking difference. The meat will release a fraction of the liquid it normally does. Because the pan remains dry instead of turning into a soup, the temperature stays high, and the Maillard reaction kicks in almost instantly. You get deeply browned, ultra-tender beef in half the time. It is one of those foolproof cooking secrets that requires absolutely zero extra effort but completely changes the game.
Step-by-Step Masterclass: How to Brown Ground Beef Like a Pro
We have covered the science, the metallurgy, and the chemistry. Now it is time to put it all together into a flawless, repeatable technique that you can execute even on your most exhausted weeknights.
Step 1: Prep the Meat (And Lose the Fridge Chill)
Take your meat out of the fridge about 15 to 20 minutes before you plan to cook it. Throwing ice-cold meat into a hot pan is a recipe for a thermal crash. This resting period is the perfect time to apply the baking soda hack.
However, do not salt the meat yet. Salt draws out moisture through osmosis. Adding it too early will just give you a wetter pan. In fact, another weeknight tragedy happens when you start salting ground beef too early, turning your meat into a cured, bouncy, sausage-like texture rather than a tender, rich crumble. Save the salt for later.
Step 2: Preheat Your Pan (Patience is a Virtue)
Place your heavy cast iron or multi-clad stainless steel skillet on the stove over medium-high heat. Let it get hot. Not “warm,” not “I think I feel some heat radiating,” but genuinely hot. Add a small drizzle of high-smoke-point oil, like avocado oil or a touch of beef tallow. You want the oil to shimmer and glide across the pan like water on glass. If it starts smoking wildly, turn the heat down a notch; you want a sear, not a grease fire.
Step 3: The Smash and Spread Technique
Here is where we diverge from everything you have ever been taught. Do not dump the beef into the pan and immediately start chopping it up with your spatula. Instead, place the entire block of meat into the center of the hot pan. Using a stiff spatula (preferably a heavy-duty stainless steel one, not a flimsy silicone scraper), smash the beef down into a single, large, flat patty that covers the entire bottom of the skillet.
You are treating the ground beef exactly like a giant smash burger. You want maximum surface area making direct, uninterrupted contact with the hot metal.
Step 4: Step Away from the Stove (The “Do Nothing” Phase)
This is the hardest step for the anxious home cook. Once you have smashed the meat into a giant patty… do nothing. Walk away. Go pour yourself a glass of wine. Go yell at your kids to set the table. Do whatever you have to do to physically restrain yourself from touching that spatula.
Leave the meat completely undisturbed for a full 4 to 5 minutes. As it sits there, the bottom layer is undergoing the glorious Maillard reaction. It is developing a dark, crusty, deeply savory mahogany exterior. If you were to stir it, you would interrupt this process and drop the temperature. Let the heat do the heavy lifting. You will hear the sound change from a wet sputter to a sharp, aggressive sizzle. That is the sound of flavor being built.
Step 5: The Flip and Break
After about 5 minutes, peak under the edge of the meat patty. If you see a gorgeous, dark brown crust, it is time to flip. Slide your metal spatula under the giant patty and flip it over in large sections. It does not matter if it breaks into a few pieces; the goal is just to get the raw side down against the metal.
Now, let the other side sear undisturbed for another 2 to 3 minutes. Only after both sides have developed a fantastic crust should you finally use your spatula to chop the meat into smaller crumbles. At this point, the meat is mostly cooked through, the moisture has successfully evaporated, and the delicious crust is locked in.
Advanced Troubleshooting and Weekday Hacks
Even with the perfect technique, weeknight cooking can throw you curveballs. Let us troubleshoot the final stages of your meal prep so you can cross the finish line like a champion.
Dealing with Excess Fat (To Drain or Not to Drain?)
If you are using an 80/20 blend (which you absolutely should be, because fat carries flavor), you will inevitably have some rendered fat in the pan once the meat is cooked. If it looks excessive and your meat is swimming in an oil slick, you can carefully tilt the pan and spoon some out.
But please, I am begging you, do not dump your ground beef into a colander and rinse it under the sink. I have seen people do this, and it makes my culinary soul leave my body. You are literally washing away the flavor compounds you just spent ten minutes building. Leave a couple of tablespoons of fat in the pan; you need it to carry the fat-soluble flavor compounds of your spices and aromatics.
Flavor Layering: When to Add Spices and Aromatics
Now that your beef is beautifully browned and crumbled, it is time to build the flavor profile. Turn the heat down to medium-low. Push the beef to the outer edges of the pan, creating a clear space in the center. Drop your diced onions and minced garlic directly into that pool of hot, rendered beef fat.
Let the aromatics sauté in the beef fat until they are softened and fragrant, then stir them into the meat. Now is the time to add your salt, black pepper, cumin, smoked paprika, chili powder, or whatever spices your recipe calls for. By adding the spices now, you allow them to “bloom” in the hot fat, waking up their essential oils and amplifying their potency without burning them into bitter ash.
The Ripple Effect: How Proper Browning Elevates Your Entire Menu
You might be thinking, “It is just ground beef, who cares?” But mastering this single, simple technique creates a massive ripple effect across your entire cooking repertoire. Ground beef is the foundational building block for dozens of beloved weeknight meals.
Next-Level Tacos and Chili
When you use this smash-and-sear technique, your Tuesday night tacos will instantly taste like they came from a high-end, authentic taqueria. The meat will have an incredible textural contrast—crispy, caramelized, deeply savory edges giving way to tender, juicy centers.
When you fold this properly browned meat into a chili, those crusty bits act as flavor bombs. They infuse the entire pot with a rich, roasted depth that you simply cannot achieve with gray, steamed meat. Your chili will taste like it simmered over a campfire for two days, even if it only sat on your stove for thirty minutes.
Ragu and Meat Sauces That Taste Like They Simmered All Day
For Italian meat sauces, the Maillard reaction is your absolute secret shortcut to building complex, restaurant-quality flavors fast. When you properly brown the beef without stirring it, it leaves behind a sticky, dark brown residue on the bottom of your stainless steel or enameled cast iron pan. In the culinary world, this concentrated layer of flavor is called the fond.
When you pour in your dry red wine, crushed tomatoes, or beef broth, you will scrape up that fond with a flat wooden spoon. You will deglaze the pan, turning burnt bits into sauce that tastes impossibly rich. This is the exact foundation of a spectacular Bolognese. In fact, because if your homemade soups taste flat, a deeply browned meat base is exactly what is missing to provide that robust umami backbone. The fond is free flavor; do not leave it stuck to the pan.
The Final Verdict: Patience Pays Off
Cooking is not about frantically moving things around in a pan until they reach a safe internal temperature. It is about understanding the basic physics of heat, the chemistry of moisture, and letting the ingredients do what they naturally want to do.
You do not need a culinary degree to make mind-blowing food in your own kitchen. You do not need a pantry full of expensive white truffles or imported finishing salts. You just need a good, heavy, non-toxic pan, a little bit of baking soda, and the sheer willpower to stop poking at your food while it cooks.
The next time you make ground beef, put the spatula down and embrace the beautiful art of doing nothing. Let the heat work its magic. Your palate—and your highly impressed dinner guests—will thank you.






