
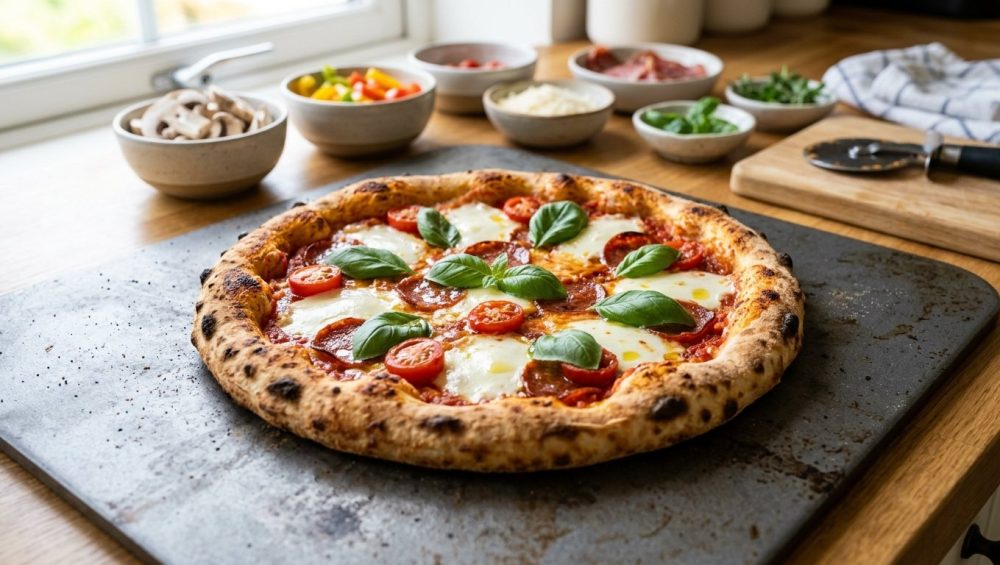
Picture this: you’ve invited your favorite people over for a DIY pizza party. You’ve curated a stunning playlist, poured a fantastic bottle of Sangiovese, and set up a beautiful toppings bar. You stretch the dough, load it up with artisanal ingredients, and slide it into the oven. But when you pull it out and slice into it, disaster strikes. The center is a pale, soggy swamp. The crust flops over like a sad, wet noodle, and all those expensive toppings slide right off onto your lap.
If this sounds familiar, take a deep breath. You are not a bad cook; you are simply a victim of bad culinary physics. Hosting a relaxed pizza night shouldn’t require a commercial wood-fired oven or a culinary degree. As a home cook, you absolutely have the power to create mind-blowing, pizzeria-quality pies in your standard residential kitchen. You just need to understand the science of dough hydration, moisture management, and heat transfer.
We are going to completely deconstruct the mechanics of a perfect pizza. No pretentious chef-speak, no useless gadgets, and absolutely no fluff. Just the brutal, honest truth about why your pizza crust gets soggy and exactly how to fix it so you can host the ultimate interactive dinner party without losing your mind.
The Anatomy of a Soggy Pizza (And Why It’s Your Fault)
Before we can fix the problem, we have to understand the crime scene. A soggy pizza is not just a matter of undercooking; it is a fundamental failure of moisture evaporation and thermal dynamics.
The Physics of the “Gum Line”
When you bite into a slice of homemade pizza and find a dense, gummy, raw-tasting layer between the crispy bottom crust and the tomato sauce, you have encountered the dreaded “gum line.” This is the sworn enemy of the home pizza maker. The gum line is not actually raw dough. It is a layer of flour and water that has gelatinized under the heat of the oven but failed to fully evaporate its moisture.
When wet dough meets wet sauce, the surface temperature of the dough struggles to rise above the boiling point of water (212°F or 100°C) until that excess moisture turns into steam and escapes. If your oven environment doesn’t provide enough sheer thermal force to flash-evaporate that water, the starches in the flour swell and turn into a paste. You might also be wondering why your pizza dough shrinks in the oven; this is often tied to underdeveloped gluten structures fighting against this very same thermal shock. To eliminate the gum line, we have to attack the problem from two sides: reducing the moisture on top of the dough, and increasing the heat delivered to the bottom of the dough.
Why Standard Home Ovens Betray Us
Let’s get one thing straight: your home oven is lying to you. When the dial says 500°F, the ambient air inside might briefly hit that temperature, but the moment you open the door to load your pizza, that heat escapes into your kitchen.
Commercial Neapolitan pizza ovens operate at blistering temperatures of 900°F to 1000°F. In that extreme environment, a pizza cooks in 90 seconds. The intense ambient heat blasts the top of the pie, perfectly melting the cheese and blistering the crust, while the super-heated stone floor instantly vaporizes the moisture at the bottom of the dough, creating a rigid, charred foundation.
Your residential oven, maxing out at 500°F or 550°F, simply cannot replicate this 90-second flash-bake. At 500°F, a pizza takes anywhere from 5 to 8 minutes to bake. This extended bake time completely changes the rules of engagement. If you try to use a traditional restaurant recipe in a home oven, you are setting yourself up for a soggy, frustrating failure. We have to adapt our dough and our tools to conquer the 500°F environment.
Dough Hydration: The Foundation of Crispiness
The secret to a crispy, airy crust that can support a payload of toppings starts long before you turn on the oven. It begins with your dough formulation, specifically your hydration level.
The Hydration Sweet Spot for Home Ovens
In baking, we use “baker’s percentages” to measure ingredients relative to the weight of the flour. If a recipe calls for 1,000 grams of flour and 600 grams of water, that is a 60% hydration dough.
Traditional Neapolitan pizza dough, designed for those 900°F wood-fired ovens, typically sits at a relatively stiff 60% to 65% hydration. Because the pizza is only in the oven for 90 seconds, it doesn’t have time to dry out. But if you put a 60% hydration dough into a 500°F home oven for 8 minutes, the prolonged exposure to dry heat will turn your crust into a dense, moisture-starved cracker.
To achieve a crust that is crispy on the outside but incredibly light, airy, and soft on the inside, home cooks need to push their hydration higher—typically between 65% and 72%. The extra water in the dough serves two purposes. First, it creates more steam inside the dough as it bakes, which forces the crust to puff up dramatically (a phenomenon known as “oven spring”). Second, it acts as an insurance policy against the long 8-minute bake time, ensuring the crumb stays tender rather than turning into a crouton.
Flour Power: Protein Content Matters
Not all white powders are created equal. If you have been buying imported Italian “00” (doppio zero) flour because a fancy food blog told you it was authentic, you are likely shooting yourself in the foot.
Type 00 flour is milled incredibly fine and is specifically engineered to withstand the 900°F temperatures of a commercial wood-fired oven without instantly burning. It lacks the malted barley flour (sugar) that American flours contain. If you bake 00 flour in a 500°F home oven, it will not brown properly. You will end up with a pale, anemic, blonde crust that lacks flavor and structural integrity.
For the home kitchen, you want a high-quality Bread Flour. Bread flour has a higher protein content (usually around 12% to 14%), which creates a stronger gluten network. This strong network is exactly what you need to trap the steam created by your high-hydration dough, resulting in those beautiful, massive air bubbles in the crust. Furthermore, if your dough keeps shrinking back like a rubber band when you try to stretch it, bread flour combined with a proper resting period will give you the extensibility you need for a stress-free stretch.
The Cold Fermentation Cheat Code
If you are mixing your dough at 3:00 PM for a 6:00 PM dinner party, you are doing it wrong. Time is the greatest ingredient in pizza making, and it requires zero active effort.
Once you mix your high-hydration bread flour dough, you need to let it undergo a “cold fermentation.” This means putting the tightly covered dough into the refrigerator for 48 to 72 hours. During this long, slow, chilly rest, the yeast works at a glacial pace, producing complex organic acids and alcohols that give the crust an incredible, nuanced, sourdough-like flavor.
More importantly for our anti-soggy crusade, cold fermentation allows the flour enzymes to fully break down starches into simple sugars. These sugars caramelize rapidly in the oven, giving you a deeply browned, gorgeous crust even at 500°F. The long rest also relaxes the gluten entirely, meaning the dough will stretch over your knuckles like silk without tearing.
Moisture Management: Stop Drowning Your Pizza
You can have the most scientifically perfect dough in the world, but if you treat it like a soup bowl, you will still end up with a soggy disaster. Managing the moisture of your toppings is the most critical intervention for a home cook.
The Fresh Mozzarella Trap
We all love the romantic idea of tearing pillowy balls of fresh mozzarella over our homemade pies. But fresh mozzarella is a watery sabotage grenade. Fresh mozzarella, especially the kind sold suspended in tubs of water or brine, has a staggering moisture content of 60% to 62%. When that cheese hits the heat of your oven, it rapidly releases all that trapped water directly into your dough, creating a milky puddle that guarantees a severe gum line.
I am begging you to stop using fresh mozzarella on your standard home bakes unless you are willing to thoroughly drain it, slice it, and press it between paper towels for at least an hour before baking.
Instead, you need to embrace Low-Moisture Whole Milk Mozzarella. This is the firm block cheese you find in the dairy aisle, boasting a much safer moisture content of 45% to 52%. It melts beautifully, stretches like a dream, and most importantly, it does not weep water into your crust. Just do yourself a massive favor and grate it yourself from a block. Please stop buying pre-shredded cheese in bags; it is coated in cellulose (wood pulp) and potato starch to prevent clumping, which completely ruins its ability to melt into a cohesive, creamy layer.
Sauce Viscosity: Less is More
Your pizza sauce should not have the consistency of a bloody mary. Many beginners open a can of crushed tomatoes, spoon it directly onto the dough, and wonder why the crust turns to mush. Canned tomatoes are predominantly water.
You have two choices for proper moisture management. First, you can gently simmer your crushed tomatoes in a saucepan for 20 minutes to evaporate 30% of the water, creating a rich, thick, concentrated sauce. Alternatively, if you prefer the bright, acidic punch of a raw sauce, you must strain your canned tomatoes through a fine-mesh sieve to remove the excess watery serum before pureeing the remaining pulp.
And when it comes time to sauce the dough, exercise extreme restraint. A standard 12-inch pizza needs no more than 3 to 4 tablespoons of sauce. You should be able to see the dough peeking through the sauce. If you can’t see the dough, you have built a swimming pool, not a pizza.
Vegetable Transpiration (Why Mushrooms Ruin Everything)
Vegetables are essentially delicious water balloons. Mushrooms, bell peppers, onions, and zucchini are packed with cellular water. When you place them raw onto a pizza and blast them with 500°F heat, their cell walls rupture, and they dump all of their internal moisture straight down into your cheese and dough.
If you want vegetables on your pizza, you must cook the water out of them before they ever touch the dough. Sauté your mushrooms in a dry skillet until they release their liquid and brown. Roast your peppers and onions to concentrate their sugars and eliminate their excess hydration. And please, stop using a cold pan when pre-cooking these veggies; get the skillet screaming hot so the moisture evaporates instantly rather than boiling the vegetables in their own juices.
Heat Transfer: The Unsung Hero of a Crispy Bottom
We have optimized the dough. We have eliminated the surface puddles. Now, we must deliver a massive, violent shock of heat to the bottom of the pizza to instantly set the crust and banish the gum line forever.
Why Your Baking Sheet is a Saboteur
If you are currently baking your pizzas on a thin aluminum baking sheet or a flimsy perforated pizza pan, we need to have an intervention. Aluminum baking sheets are fantastic for roasting broccoli, but they are woefully inadequate for pizza. They lack the necessary thermal mass—the ability to absorb, store, and rapidly release heat. When you place a room-temperature piece of dough onto a hot, thin baking sheet, the dough instantly sucks all the heat out of the metal. The pan cools down, and your pizza slowly bakes rather than rapidly searing, resulting in a tough, blonde, soggy bottom.
The Baking Steel vs. Pizza Stone Showdown
For decades, the culinary world told home cooks to buy ceramic or cordierite pizza stones. They were an improvement over baking sheets, but they are fundamentally flawed. Ceramic is an insulator, not a conductor.
Enter the greatest invention in modern home pizza making: the Baking Steel. A baking steel is a heavy, solid slab of highly conductive carbon steel. To understand why it reigns supreme, we have to look at the physics of thermal conductivity (measured in Watts per meter-Kelvin, or W/m·K).
A standard cordierite pizza stone has a thermal conductivity of roughly 17 W/m·K, while cheaper ceramic stones hover around 6.5 W/m·K. A carbon steel baking plate, however, boasts a massive thermal conductivity of roughly 52 W/m·K. This means that the magic of a baking steel allows it to transfer heat into your pizza dough up to 18 times faster than a traditional ceramic stone.
When your dough hits a 500°F baking steel, the sheer speed of the heat transfer mimics the environment of a 900°F commercial brick oven. The bottom of the crust sears instantly, locking in the structure, vaporizing the surface moisture, and creating a rigid, deeply charred foundation that will never sag under the weight of your toppings. Furthermore, steels will never shatter from thermal shock like ceramic stones inevitably do.
Preheating: The Golden Rule of Thermal Mass
Owning a baking steel is only half the battle; you have to know how to charge it. You cannot turn your oven on, wait for the little preheat beep, and immediately launch your pizza. That beep only means the air in the oven has reached 500°F. Your heavy slab of steel is still lukewarm.
You must place your baking steel on the top-middle rack of your oven and preheat it at your oven’s absolute maximum temperature for a minimum of 60 minutes before baking. This gives the steel the time it needs to absorb and store a massive battery of thermal energy. When you finally slide the pizza onto the steel, it will have the stored power to rapidly dump that heat into the dough without dropping in temperature.
The “No-Go” Gear: Toxic Pans and Useless Gadgets to Toss
As someone who spends their life in the kitchen, I am utterly ruthless about the equipment I allow into my workspace. I am militant about banishing toxic kitchen gear from your cabinets, and the pizza-making industry is full of cheap, dangerous garbage marketed to unsuspecting hobbyists.
Ditching the Peeling Non-Stick Pizza Trays
Walk into any big-box store, and you will see stacks of flimsy, dark-grey pizza pans coated in non-stick Teflon, often riddled with holes that claim to “crisp the crust.” Do not buy these. Throw them in the recycling bin if you already own one.
Traditional PTFE non-stick coatings begin to break down and release toxic fumes at temperatures above 500°F. Since making great pizza requires pushing your oven to its absolute limits (often 550°F), using a non-stick pan is a chemical hazard. Over time, the extreme heat will cause the coating to blister, peel, and flake off directly into your food. You do not want to be eating mystery polymer crisps with your pepperoni.
Furthermore, you should never grease your high-heat pizza surfaces. If you are trying to use a cast iron pan or a steel, remember that aerosol cooking spray is the enemy. The propellants and soy lecithin in aerosol sprays will polymerize and burn into a sticky, impossible-to-remove resin at 500°F. Stick to a high-quality carbon steel slab, and use a dusting of semolina flour for a perfectly natural, non-toxic release agent.
Execution: Hosting a Mindful Pizza Party Without Losing Your Mind
The global pizza market is exploding, with industry reports projecting growth from $155 billion in 2024 to over $226 billion by 2033. A massive driver of this growth is the rising trend of the DIY at-home pizza party. People are craving interactive, hands-on culinary experiences with their friends. But hosting a pizza night can easily devolve into a chaotic, flour-covered nightmare if you don’t stage your workflow like a professional.
The Assembly Line Strategy
The secret to a stress-free dinner party is aggressive mise en place. Before your first guest arrives, every single topping should be prepped, cooked, sliced, and placed in individual bowls. Your sauce should be reduced and cooled. Your low-moisture mozzarella should be grated.
Your dough, having finished its 72-hour cold ferment, should be pulled from the fridge two hours before baking so it can come to room temperature. Cold dough will snap back and refuse to stretch. You need a bench scraper to easily divide the dough into perfectly portioned 250-gram dough balls without tearing the delicate gluten strands. Shape them into tight, smooth orbs, cover them with a damp towel, and let them rest on the counter. When it’s time to eat, the assembly should take less than two minutes per pie.
The “Less is More” Topping Intervention
When you give guests free rein over a toppings bar, their first instinct is to build a leaning tower of ingredients. They will pile on sausage, pepperoni, olives, peppers, onions, and three handfuls of cheese.
You must act as the culinary bouncer at your own party. Enforce the “Rule of Three.” A pizza should have no more than three toppings, plus sauce and a moderate dusting of cheese. If a pizza is overloaded with a pound of heavy, wet ingredients, it doesn’t matter how hot your baking steel is—the dough will never cook through, and you will be back in soggy gum-line territory. Encourage your guests to make multiple, lightly-topped pizzas to share, rather than one massive garbage-disposal pie.
The Peel Slide: Overcoming the Fear of the Launch
The final hurdle that terrifies home cooks is transferring the raw, topped pizza from the counter into the oven. To do this gracefully, you need a wooden pizza peel.
Dust your wooden peel lightly with semolina flour (not regular flour, which absorbs water and turns to glue). Semolina acts like thousands of tiny ball bearings. Build your pizza directly on the peel, and work quickly. If the raw dough sits on the peel for more than three minutes, the moisture will seep into the wood, and the pizza will stick.
Before you walk to the oven, give the peel a gentle shimmy. The pizza should slide freely back and forth. If it’s stuck, gently lift the sticky edge and toss a pinch more semolina underneath. Open the oven, place the tip of the peel at the back of the screaming-hot baking steel, and pull the peel back toward you in one confident, fluid motion. Do not hesitate. Hesitation is how calzones are accidentally born.
Bake for 5 to 7 minutes, keeping a close eye on the crust. If the bottom is getting too dark but the top cheese isn’t blistered, switch your oven from “Bake” to “Broil” for the final 60 seconds to blast the top with direct infrared heat.
When you pull that pizza out, it will be a masterpiece. The crust will be rigid enough to hold straight out, the interior crumb will be wildly airy and aromatic, and the toppings will be perfectly caramelized. You’ll slice through it, hear that aggressive, satisfying crunch, and realize that you just out-cooked your favorite local delivery joint.
Pizza is a science, but it is a highly accessible one. Ditch the toxic gear, upgrade to a baking steel, respect the hydration math, and stop drowning your dough in wet cheese. Your weekend gatherings are about to become legendary. Now pour yourself another glass of wine, preheat that oven, and go make some magic.






