
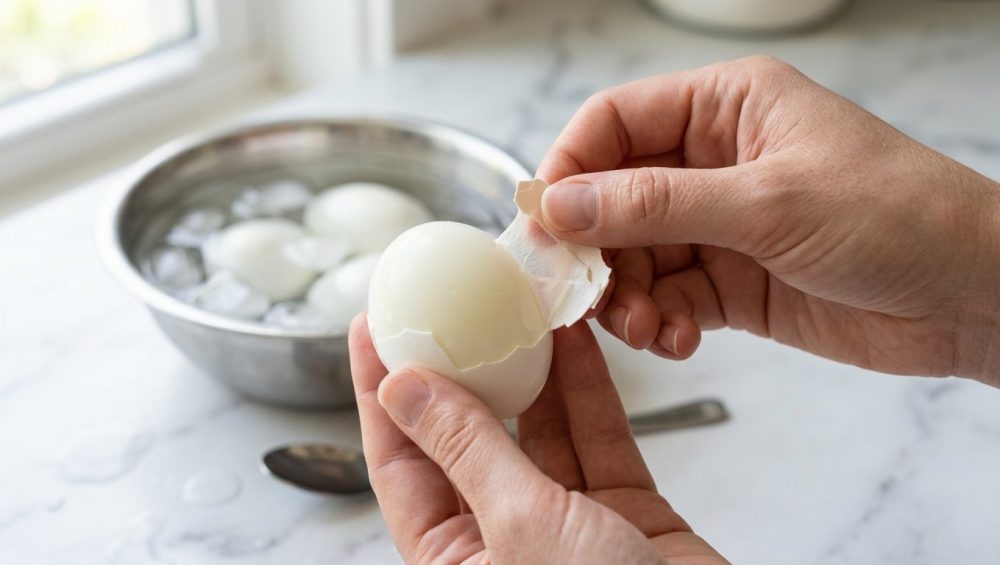
You wanted a beautiful, protein-packed snack to get you through your Tuesday afternoon slump. Instead, you are standing over your kitchen sink, aggressively picking microscopic shards of shell off a mangled, pockmarked orb that looks like it just survived a meteor shower. The whites are torn, half the egg is stuck to the shell, the yolk has a terrifying green ring around it, and your patience is entirely gone.
Listen, I love you, but we have all been there. Destroying a batch of boiled eggs is one of those maddening rookie kitchen mistakes that makes you want to throw your spatula across the room and order takeout. But as your resident snarky sous-chef, I am here to tell you that you are overcomplicating this. You do not need a culinary degree to boil an egg, nor do you need to rely on old wives’ tales that defy the laws of physics.
What you actually need is a basic understanding of protein science and thermodynamics. I have zero patience for pretentious chef-speak, so we are going to break this down into actual, usable science. I am going to teach you exactly why your egg whites stubbornly glue themselves to the shell membrane, and I will give you the definitive, science-backed technique to guarantee a flawless peel every single time. And because I am a fierce advocate for banishing toxic kitchen gear from your life, we are going to do it using safe, high-quality tools that actually belong in a modern home kitchen. Pour yourself a glass of wine, grab a notepad, and let’s fix your meal prep forever.
The Science of the Stubborn Shell: What’s Actually Happening?
If you want to defeat your enemy, you must first understand your enemy. The reason your eggs are impossible to peel has nothing to do with bad luck and everything to do with the chemical makeup of the egg itself.
The Anatomy of an Egg
To understand why peeling fails, we need to look at the architecture of the egg. On the outside, you have the shell, which is made almost entirely of calcium carbonate. It feels solid, but it is actually highly porous, containing thousands of microscopic holes that allow air and moisture to pass through.
Just inside the shell are two incredibly strong, keratin-like protective layers called the outer and inner membranes. Their biological job is to protect the developing yolk from bacterial invaders. Beneath these membranes sits the albumen (the egg white), which is composed primarily of water and complex proteins. Finally, nestled in the center, you have the fat-rich yolk.
When you peel an egg, your goal is to separate the shell and the outer membrane from the inner membrane and the albumen. When things go wrong, it is because the albumen proteins have chemically fused to the inner membrane.
The Great Protein Bond
When an egg is raw, the proteins in the egg white are tightly folded into little microscopic bundles. When you introduce heat, these protein bundles begin to vibrate violently, unfold (a process called denaturation), and look for new partners to bond with.
If these unfolding proteins are heated too slowly, they have ample time to reach out and form incredibly strong chemical bonds with the keratin proteins in the inner shell membrane. Once this bond is formed, it is essentially permanent. You cannot undo it. When you try to pull the shell away, the membrane takes chunks of the cooked egg white with it, leaving you with a disastrous, cratered mess. If you have ever wondered why your scrambled eggs leak water on the plate, it is because of these exact same proteins tightening up too much when cooked incorrectly. Protein management is everything.
The pH Factor (Fresh vs. Old Eggs)
Here is where the chemistry gets really fascinating. The strength of that nasty protein-to-membrane bond is heavily dictated by the pH level of the egg white.
When a chicken lays an egg, the fresh albumen is saturated with carbon dioxide, making it slightly acidic with a pH of around 7.6. In this acidic environment, the egg white proteins are highly reactive and will fiercely bind to the inner shell membrane when heated. This is why farm-fresh eggs are an absolute nightmare to peel.
However, as an egg sits in your refrigerator over the course of a week or two, it slowly loses that carbon dioxide through the microscopic pores in the shell. As the CO2 escapes, the pH of the egg white rises, becoming more alkaline (typically reaching a pH of 8.7 to 9.2). In this alkaline environment, the proteins in the white are significantly less likely to bond with the membrane.
Simultaneously, the egg loses a tiny bit of moisture through evaporation, which causes the internal contents to shrink slightly, expanding the air cell at the wide base of the egg. This larger air cell provides a crucial starting point for the peeling process. Therefore, the older the egg, the easier it is to peel. Save your expensive, farm-fresh eggs for frying and poaching, and use your week-old grocery store eggs for boiling.
The Hall of Fame of Useless Kitchen Myths
Home cooks love a good wives’ tale, but I operate on facts. The internet is littered with viral “hacks” for peeling eggs that completely ignore basic chemistry. Let’s debunk the nonsense so you can stop wasting your time.
Myth 1: Baking Soda
Somewhere along the line, someone realized that alkaline eggs peel easier, so they deduced that adding baking soda (an alkaline substance) to the boiling water would magically raise the pH of the egg and solve the problem.
This is entirely false. The eggshell is a solid barrier of calcium carbonate. Adding a teaspoon of baking soda to your boiling water does absolutely nothing to the internal pH of the egg white because the baking soda cannot penetrate the shell. All you are doing is making your kitchen smell weird and wasting pantry staples.
Myth 2: Vinegar
The opposite myth claims that adding vinegar to the water will dissolve the shell and make peeling effortless. Yes, vinegar is an acid, and if you leave a raw egg submerged in a jar of pure vinegar for three days, the calcium carbonate shell will eventually dissolve.
However, adding a splash of vinegar to a pot of boiling water for ten minutes does practically nothing. It lowers the pH of the water slightly, but it does not penetrate the shell to alter the membrane interface. Furthermore, boiling highly acidic liquids in cheap, reactive cookware can leach metallic flavors into your food. If you are going to experiment with acids in the kitchen, at least use a high-quality stainless steel pan that won’t degrade and poison your family. But for boiling eggs? Skip the vinegar.
Myth 3: The “Blow the Egg Out of the Shell” Trick
We have all seen the viral videos of a smug influencer cracking the top and bottom of an egg and blowing into it as hard as they can until the egg shoots out the other side. Please do not do this. First of all, it rarely works unless the egg was already perfectly cooked and chilled using the methods I am about to teach you. Second, blowing your lung air and saliva all over food you are about to serve to your family or guests is disgusting. We are civilized weekend culinary hobbyists, not frat boys doing parlor tricks.
The Ultimate Fix: The Temperature Shock Method
If baking soda and vinegar are useless, what actually works? The answer lies in temperature manipulation. The definitive authority on this is culinary scientist J. Kenji López-Alt, who conducted a massive, double-blind experiment testing thousands of eggs with dozens of volunteers to find the absolute truth. The results were undeniable: the temperature at which you start cooking the egg is the single most important factor in whether or not it will peel cleanly.
Why the Hot Start is Non-Negotiable
I see this mistake constantly: people placing their cold eggs in a pot of cold tap water, putting it on the stove, and slowly bringing it to a simmer. starting them in cold water is the absolute worst thing you can do for peelability.
When you start with cold water, the egg proteins heat up very gradually. This slow rise in temperature gives the proteins in the egg white ample time to unfold, reach out, and form concrete-like bonds with the inner shell membrane before they fully set.
To prevent this, you must subject the egg to severe thermal shock. You need to drop cold eggs directly into a blazing hot environment (either boiling water or hot steam). The sudden, violent blast of heat instantly denatures the outermost layer of the egg white. It essentially sears the exterior of the albumen into a solid, firm barrier before the proteins even have a chance to think about fusing with the membrane. A hot start guarantees that the white sets independently of the shell.
The Ice Bath: Stopping the Cook and Shrinking the White
The thermal shock method has two parts. The hot start is only half the battle; the cold finish is just as critical.
The moment your eggs have reached your desired level of doneness, they must be immediately removed from the heat and plunged into an aggressive ice water bath. I do not mean cool tap water; I mean a bowl filled with actual ice cubes and water.
This serves two vital purposes. First, it instantly halts the cooking process. If you leave eggs to cool on the counter, carryover cooking will ruin the yolk. Have you ever bitten into a hard-boiled egg and seen a chalky, grayish-green ring around the yolk? That is ferrous sulfide, a harmless but visually unappealing compound created when the sulfur in the egg white reacts with the iron in the yolk due to excessive heat. The ice bath prevents this reaction, ensuring your yolks remain beautifully vibrant.
Second, the rapid cooling causes the egg white to physically contract. As the hot egg hits the freezing water, the proteins shrink slightly, pulling away from the shell and creating a microscopic gap. This rapid cooling is the same reason we use precise temperature control to prevent stringy poached eggs—it stops the protein strands from behaving badly. Leave the eggs in the ice bath for at least 12 to 15 minutes. Rushing this step will result in failure.
The Step-by-Step Masterclass to Flawless Peeling
Now that you understand the protein science, the pH balance, and the thermodynamics of thermal shock, it is time to execute. This is my foolproof, no-nonsense method for perfect eggs. Time is money, so we are going to do this efficiently.
Equipment Check
Before we begin, let’s talk about your gear. I have a strict rule in my kitchen: no cheap, toxic garbage. Do not boil eggs in a flimsy aluminum pot you bought at a gas station, and absolutely do not use a scratched non-stick pan that is flaking mystery chemicals into your boiling water.
You need a high-quality, heavy-bottomed stainless steel saucepan or pot. You will also need a stainless steel steamer basket insert. To safely handle the eggs, use a stainless steel spider skimmer or a pair of high-quality kitchen tongs. Finally, prepare a large glass or metal mixing bowl for your ice bath.
Boiling vs. Steaming (The Steam Advantage)
While dropping eggs into a pot of rapidly boiling water works perfectly well, steaming them is actually scientifically superior.
First, steam is an incredibly efficient conductor of heat. Because of the latent heat of vaporization, steam transfers energy to the eggshell much faster and more intensely than boiling water does, ensuring that instantaneous protein coagulation we want.
Second, steaming is gentler on the eggs. When you boil eggs, the violent bubbling water knocks them against each other and against the bottom of the pot, often causing the shells to crack and leak white wisps into the water. In a steamer basket, the eggs sit peacefully above the fray.
Third, and most importantly for the busy home cook: steaming is vastly faster. Bringing a giant pot of water to a rolling boil takes ten to fifteen minutes. Bringing one inch of water to a boil to create steam takes two minutes.
The Setup:
- Place your steamer basket in your stainless steel pot.
- Add about one inch of water to the pot (it should sit just below the bottom of the steamer basket).
- Cover the pot with a tight-fitting lid and bring the water to a rapid boil over high heat.
- Once steam is billowing out, remove the lid, and carefully lower your cold eggs straight from the fridge into the basket in a single layer. Do not stack them into a mountain, or they will cook unevenly.
- Replace the lid immediately and set your timer.
The Exact Timings for Your Perfect Yolk
Because steam temperature is incredibly consistent, you can dial in your yolk texture with absolute precision. Assuming you are using large, refrigerator-cold eggs, here are the exact timings you need:
- 6 Minutes: The ultimate soft-boiled egg. The white is just barely set, and the yolk is entirely liquid and warm. Perfect for slicing in half and serving over a bowl of hot ramen.
- 7 to 8 Minutes: The jammy, fudgy egg. The white is firm, and the yolk is thick, sticky, and custardy. Ideal for toast or salads.
- 9 to 10 Minutes: The medium-hard egg. The yolk is mostly set but still retains a dark orange, creamy center.
- 11 to 12 Minutes: The classic hard-boiled egg. The yolk is entirely firm, pale yellow, and dry enough to mash. This is the exact timing you want for deviled eggs or classic egg salad.
Once your timer goes off, immediately transfer the eggs into your prepared ice water bath and leave them there for a minimum of 12 minutes.
The Peeling Technique (Crack and Submerge)
You have executed the science perfectly; do not ruin it at the finish line by hacking at the shell with your fingernails. You do not need any weird, single-use gadgets or odor-free silicone peeling mats to get the shell off. You just need water and finesse.
Take a chilled egg and gently tap the wide end against your countertop. The wide end houses the air cell, which provides a natural hollow space to break the shell without piercing the egg white. Once the wide end is cracked, gently roll the egg along the counter under the palm of your hand, applying just enough pressure to shatter the shell into a mosaic of tiny cracks all the way around.
Now, here is the final secret: peel the egg underwater. You can either do this submerged in your bowl of ice water, or hold the egg under a gentle stream of cold water from your faucet. As you peel, the water will seep through the cracks you created, utilizing capillary action to slip between the inner membrane and the egg white. The water acts as a lubricant, hydraulically separating the shell from the protein. If you followed the hot-start method, the shell will practically fall off in two or three large, satisfying sheets.
Troubleshooting and Advanced Egg-cellence
Even with the perfect technique, the kitchen is a dynamic environment. Here are a few advanced tips to ensure you never face a mangled egg again.
High Altitude Adjustments
If you live in Denver or anywhere significantly above sea level, you know that the laws of boiling water change. At high altitudes, atmospheric pressure is lower, meaning water boils at a lower temperature (below 212°F / 100°C). Because your steam is cooler, your eggs will cook slower. Just like figuring out why your garlic always burns when you add it to the pan too early, adjusting your egg boiling routine for high altitude requires a little bit of scientific troubleshooting. As a general rule, add one to two extra minutes to your steaming time to achieve the same yolk textures listed above.
Storing Peeled vs. Unpeeled Eggs
If you are meal prepping, you have a choice to make regarding storage. Hard-boiled eggs left in their unpeeled shells will easily last for a week in the refrigerator. The shell acts as nature’s perfect Tupperware.
If you choose to peel them in advance for convenience, they will only last about two to three days before the texture begins to degrade. Furthermore, peeled eggs are highly susceptible to absorbing odors from your fridge. Never store peeled eggs in cheap plastic tubs, unless you enjoy googling why your plastic containers stain orange and smell like a sulfur pit. Always store peeled eggs in an airtight glass container with a tight-fitting silicone lid.
Batch Prepping for the Week
As a busy professional who relies on efficiency to survive the week, I highly recommend batch-steaming your eggs on Sunday afternoon. You can easily steam a dozen eggs at once (just make sure you use a wide enough steamer basket so they remain in a single layer).
When you are rushing out the door on a Tuesday morning, having perfectly cooked, easily peelable eggs ready to go is an absolute lifesaver. It is one of those simple, foundational cooking habits that prevents weekday chaos and keeps you away from the drive-thru.
The Bottom Line
You do not need to be a Michelin-starred chef to master the basics of the kitchen. You just need to ignore the viral internet fluff, respect the science of your ingredients, and use the right techniques.
Stop using fresh eggs for boiling, throw away the baking soda, banish the cold-water start from your routine, and embrace the power of the steam-and-shock method. Once you experience the sheer joy of a shell slipping off an egg in one effortless piece, you will never look back. Now go forth, steam your eggs with confidence, and enjoy the perfect weekend meal prep. You’ve got this.






