
Let’s get one thing straight right out of the gate: weekend cooking is an entirely different beast than your Tuesday night survival routine. On a Tuesday, time is money, and I am the first person to champion a thirty-minute, one-pan miracle that gets you fed and on the couch before eight o’clock. But when the weekend rolls around, the rules change. We have the luxury of time, the patience for precision, and the desire to create something genuinely spectacular. You don’t need a culinary degree to make mind-blowing food, but you do need to understand the basic rules of kitchen chemistry.
Today, we are tackling a weekend project that strikes fear into the hearts of otherwise confident home cooks: from-scratch hot fudge. We’ve all been there. You’re melting premium chocolate, feeling like a domestic deity, and suddenly, in the blink of an eye, your glossy pool of chocolate turns into a dull, gritty, oily paste. It’s frustrating, it’s expensive, and it’s entirely preventable.
The global ice cream market is experiencing an absolute boom, projected to reach a staggering USD 125.8 billion in 2026, with 62% of consumers choosing to enjoy their frozen treats at home rather than at commercial parlors. We are officially in the era of the premium home dessert experience. Consumers are demanding multi-sensory textural contrasts—creamy, crunchy, and chewy all in a single bite. This makes the build-your-own sundae bar the ultimate modern entertaining format. It is interactive, it is nostalgic, and when executed properly, it is entirely stress-free. But the cornerstone of this entire operation is a flawless, velvety hot fudge.
If you want to host a gathering without last-minute panic, you need to understand exactly why chocolate behaves the way it does. We are going to dive deep into the everyday science of emulsions, debunk some toxic cookware myths, and construct a foolproof strategy for the ultimate weekend dessert. Grab a glass of wine, preheat your ambition, and let’s get to work.
The Chemistry of Chocolate: Why Your Hot Fudge Seizes
To master hot fudge, you have to stop treating chocolate like a simple solid that magically turns into a liquid when heated. Chocolate is actually a highly complex, finely milled suspension. It consists of dry, microscopic particles—specifically cocoa powder solids and granulated sugar—suspended in a continuous fat phase made of cocoa butter. Because it is a suspension of dry ingredients in fat, chocolate contains virtually zero water. This fundamental lack of moisture is the key to understanding its temperamental behavior on the stove.
The Moisture Trap: Water is the Enemy of Melted Chocolate
The most common reason your beautiful, expensive chocolate turns into a bowl of chocolate-flavored gravel is accidental moisture. Sugar is highly hydrophilic, meaning it absolutely loves water. Cocoa butter, being a fat, intensely repels water.
When you introduce even a microscopic droplet of water into melted chocolate, the sugar particles immediately snatch up that moisture. Because there isn’t enough water to fully dissolve the sugar, the sugar particles become sticky and start clumping together, dragging the cocoa solids with them. In seconds, the continuous fat phase is broken, and the dry particles form massive, gritty aggregates. This chemical reaction is known as seizing.
This is why experienced pastry chefs are incredibly paranoid about steam. If you are melting chocolate over a bain-marie (a hot water bath), and the water is boiling so vigorously that steam billows up and condenses on the inside of your bowl, your chocolate is doomed. The hidden danger of a wet bowl cannot be overstated; even a bowl that was hastily towel-dried and still harbors a single drop of tap water will ruin your entire batch.
The Heat Trap: Scorching Your Way to a Grainy Mess
If moisture is the first enemy of chocolate, excessive heat is the second. Chocolate is incredibly sensitive to temperature fluctuations. Milk and white chocolates should never exceed 115°F (46°C), while dark chocolate can withstand a slightly higher threshold of 120°F (49°C).
When you blast chocolate with direct, aggressive heat, two disastrous things happen. First, the delicate milk proteins (if you are using milk or white chocolate) coagulate and burn. Second, the cocoa solids scorch, separating from the cocoa butter. The fat will pool on the surface as a slick, yellow oil, while the solids turn into a hard, burnt mass at the bottom of the pot. If you have ever wondered exactly melted chocolate turns clumpy when microwaved for too long, it is because you have fundamentally degraded the protein and solid structures through thermal shock.
The Emulsion Breakdown: When Fat and Liquid Divorce
Hot fudge is not just melted chocolate; it is a stable emulsion of chocolate, added dairy (water and milk fat), and sugars. Creating an emulsion means forcing two natural enemies—fat and water—to coexist in harmony.
When you add a large amount of liquid (like heavy cream) to melted chocolate, you bypass the seizing stage. Seizing only happens when a tiny amount of water is introduced. When you add a substantial volume of liquid, there is enough water to completely dissolve the sugar and suspend the cocoa solids, creating a fluid ganache. However, this emulsion is fragile. If the ratio of fat to liquid is off, or if the mixture is boiled aggressively, the emulsion will break. The fat will separate from the water phase, leaving you with a greasy, split sauce that looks deeply unappetizing poured over vanilla bean ice cream. Commercial sauces often rely on lecithin, a natural emulsifier, to keep the fat and water tightly bound, ensuring a smooth, shelf-stable texture. As home cooks, we rely on proper technique, precise temperature control, and vigorous mechanical agitation (whisking) to maintain our emulsion.
The Sassy Sous-Chef’s Foolproof Hot Fudge Masterclass
Now that we understand the chemical booby traps waiting for us, it is time to talk about execution. Making hot fudge is entirely achievable in a standard home kitchen, provided you respect the ingredients and, more importantly, use the right gear. I have zero patience for pretentious chef-speak, but I have even less patience for science denial and toxic kitchen equipment.
Ditch the Toxic Cookware: Choosing the Right Double Boiler
We need to have a serious conversation about your pans. If you are trying to melt chocolate or build a delicate fudge sauce in a cheap, scratched-up non-stick pot you bought a decade ago, you are setting yourself up for failure and potential health risks.
Many traditional non-stick coatings are made from polytetrafluoroethylene (PTFE), which belongs to a broader class of per- and polyfluoroalkyl substances (PFAS), widely known as “forever chemicals”. When these pans are heated, especially if they are thin and prone to hot spots, the coating can degrade. At temperatures above 500°F (260°C)—which a thin pan can reach surprisingly fast on a gas burner—PTFE begins to break down and release toxic fumes.
The cookware industry has tried to rebrand, loudly claiming their pans are “PFOA-free.” But recent investigations by environmental health organizations like the Ecology Center and Breast Cancer Prevention Partners have revealed that many manufacturers simply substituted PFOA with other, equally dubious PFAS chemicals. I am a firm believer in banishing toxic kitchen gear from your life. You do not want forever chemicals leaching into your pristine weekend desserts. Furthermore, if you are the type of cook who relies on aerosol sprays, you should know that the propellants in ruins nonstick pans by leaving a sticky, polymerized residue that is impossible to clean.
For melting chocolate and building emulsions, you need a proper double boiler (bain-marie) made of safe, non-reactive materials. A heat-safe borosilicate glass bowl set over a high-quality, multi-clad stainless steel saucepan is the gold standard. Stainless steel provides excellent, even heat distribution, and glass allows you to monitor the chocolate without any fear of chemical off-gassing.
The Low and Slow Method: Temperature Control for Home Cooks
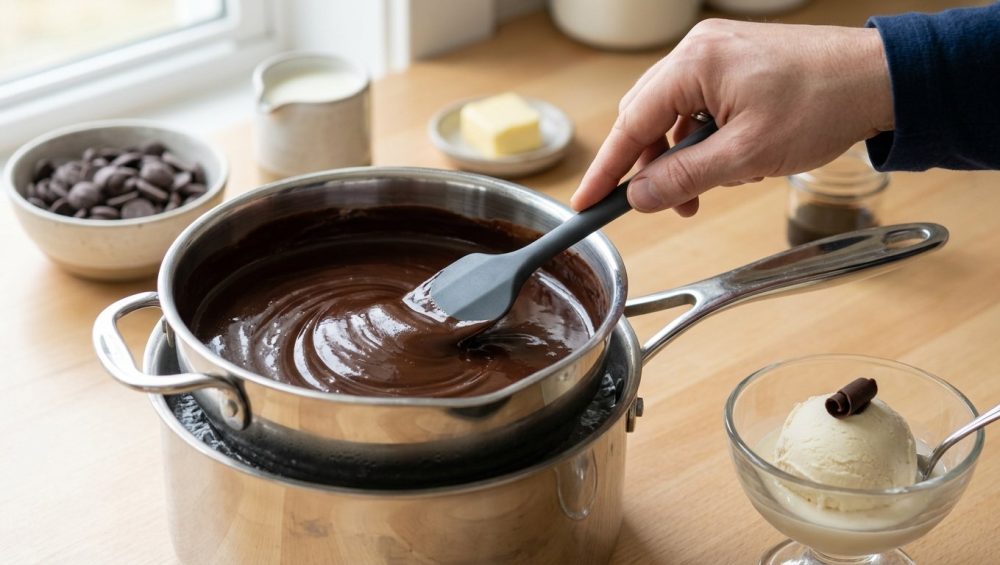
The secret to a flawless melt is indirect, gentle heat. Fill your stainless steel saucepan with barely an inch of water. The water should be at a gentle, lazy simmer—not a rolling boil. Place your glass bowl over the pot, ensuring the bottom of the bowl does not physically touch the water. You are melting the chocolate with the residual ambient steam, not direct boiling water.
Chop your chocolate evenly. Do not throw massive, uneven chunks into the bowl, as the smaller pieces will scorch before the larger pieces even begin to soften. Stir continuously with a flexible silicone spatula (ensure it is 100% pure silicone, not a cheap plastic blend that will melt). The moment the chocolate is 90% melted, pull the bowl off the pot. The residual heat of the bowl will melt the remaining 10%, ensuring you never cross that dangerous 115°F temperature threshold.
The Rescue Mission: Can You Save Seized Chocolate?
Let’s say the worst happens. A rogue droplet of condensation falls from the lid into your bowl, and your chocolate seizes into a stiff, ugly paste. Is it destined for the trash?
If you were planning to temper this chocolate for dipping strawberries or making truffles, yes, it’s ruined. You cannot re-temper seized chocolate. However, because we are making hot fudge—which requires the addition of liquid anyway—you can absolutely execute a rescue mission.
To fix seized chocolate intended for a sauce, you must aggressively add more liquid to dissolve the clumped sugar. Add a tablespoon of boiling water or hot heavy cream, and whisk vigorously. At first, it will look worse, like a greasy, separated mess. Keep whisking and adding hot liquid one tablespoon at a time. Eventually, the water volume will become high enough to dissolve the sugar crystals, and the mixture will smooth out into a fluid emulsion. It’s a stressful detour, but it works.
Formulating the Ultimate Hot Fudge Sauce
A true hot fudge is not just chocolate syrup. Chocolate syrup is thin, watery, and designed to dissolve easily into cold milk. Hot fudge is thick, rich, chewy, and designed to drape luxuriously over a scoop of frozen vanilla bean, stiffening slightly as it hits the cold ice cream. Achieving this specific texture requires a precise formulation of sugars, dairy, and fats.
The Role of Corn Syrup and Invert Sugars
If you look at the back of a high-quality commercial hot fudge jar, you will almost always see corn syrup or invert sugar listed. Before you panic and assume all corn syrup is evil, let’s talk food science. We are not talking about high-fructose corn syrup; we are talking about standard, pure glucose syrup.
Sucrose (table sugar) molecules love to stack together and form crystals. If you make a fudge sauce using only table sugar, as it cools in the fridge, those sucrose molecules will find each other, link up, and form a grainy, crystalline texture. Glucose molecules, however, are shaped differently. When you introduce corn syrup into your hot fudge, the glucose physically gets in the way of the sucrose molecules, preventing them from stacking. This is known as interfering. A touch of corn syrup guarantees your hot fudge will remain incredibly smooth, glossy, and scoopable even after two weeks in the refrigerator. Measuring this sticky ingredient can be a nightmare, which is why utilizing the plunger measuring cup is the smartest shortcut a home cook can take. You push the syrup out perfectly, leaving zero waste behind.
Dairy Ratios: Heavy Cream vs. Evaporated Milk
The dairy you choose dictates the entire personality of your hot fudge. If you use heavy whipping cream, you will create a sauce that leans heavily toward a classic French ganache. It will be exceptionally rich, velvety, and smooth, but it won’t have that nostalgic “chew.”
If you want to replicate the iconic, slightly sticky, chewy hot fudge of a classic American diner, you need evaporated milk. Evaporated milk has had 60% of its water content removed, leaving behind a high concentration of milk proteins and lactose. When these concentrated proteins are cooked down with sugar and cocoa powder, they undergo a mild Maillard reaction, developing deep, complex caramel notes and a distinctly fudgy, chewy texture that heavy cream simply cannot replicate.
The Butter Finish: Achieving that Glossy Sheen
The final step in any masterful hot fudge formulation is mounting it with butter. Once your emulsion of chocolate, cocoa powder, sugar, and dairy is fully integrated and thickened, you remove it from the heat. Never boil your sauce after this point.
While the sauce is hot but off the heat, whisk in several tablespoons of cold, unsalted butter. The cold butter slowly melts into the sauce, emulsifying the milk fat into the mixture. This technique, borrowed from classical French sauce-making (monter au beurre), gives the hot fudge an incredible, mirror-like glossy sheen and a luxurious mouthfeel. It is the defining difference between a good homemade sauce and a professional-grade topping.
Crafting a Stress-Free, Mindful Sundae Bar
You have conquered the chemistry. You have a pot of flawless, glossy hot fudge. Now, it is time to deploy it. Entertaining on the weekend should be a joyful, mindful experience, not a frantic, sweaty marathon where you are trapped in the kitchen while your guests have all the fun. The beauty of a sundae bar is that it shifts the assembly work to the guests, allowing you to relax. But a successful, relaxed DIY sundae bar requires strategic staging and flow control.
Thermal Mass and Ice Cream: Keeping the Cold Things Cold
The biggest logistical hurdle of an ice cream party is the melting factor. If you pull three cartons of ice cream out of the freezer and leave them on the counter, you have approximately twelve minutes before they turn into soup.
To combat this, you must utilize the concept of thermal mass. Hours before your guests arrive, place your serving bowls in the freezer. Heavy ceramic or thick glass bowls possess excellent thermal mass; they will absorb and hold the freezing temperatures.
Furthermore, do not let your guests scoop their own ice cream from the cartons. It creates a massive bottleneck as people struggle to chisel through rock-hard ice cream. Instead, pre-scoop your ice cream. Two hours before the party, line a metal 9×13 baking sheet with parchment paper. Scoop perfect spheres of ice cream onto the sheet, and place the entire tray back into the deep freeze. When it is time for dessert, simply pull out the tray of pre-portioned, rock-solid scoops. Guests can grab a scoop with a pair of tongs in two seconds flat. It is visually stunning, highly efficient, and completely eliminates the scooping bottleneck.
The Toppings Matrix: Textural Contrast Without the Chaos
A great sundae is an exercise in textural engineering. According to 2024 and 2025 consumer data, the most sought-after dessert experiences combine creamy, crunchy, and chewy elements. You do not need twenty different toppings; you need a curated matrix that covers all the bases without overwhelming the palate.
- The Base: Your pre-scooped, high-quality vanilla bean or dark chocolate ice cream.
- The Sauce: Your chemically perfect, warm, chewy hot fudge (and perhaps a salted caramel for variety).
- The Crunch: Toasted Marcona almonds, crushed waffle cones, or toasted coconut flakes. (Always toast your nuts—raw nuts in a sundae are a culinary tragedy).
- The Chew: Cubes of dense fudge brownie, chewy mochi bites, or mini marshmallows. If you want to lean into a relaxed s’mores night vibe, lightly torch the marshmallows right before serving.
- The Fresh: Macerated strawberries or fresh raspberries to provide a necessary hit of acid to cut through the intense fat and sugar.
Flow Control: Avoiding the Kitchen Bottleneck
Set up your sundae bar strategically to promote a natural flow of traffic. Start with the chilled bowls and the pre-scooped ice cream tray at the beginning of the line. Next, place the warm sauces. Follow this with the dry toppings (crunch and chew), and finish the line with the fresh fruit and whipped cream. Place the spoons and napkins at the very end. If you put the spoons at the beginning, guests will awkwardly juggle them while trying to pump hot fudge. Think like a professional caterer: linear progression is the key to a stress-free gathering.
The Equipment Upgrade: Banish the Mystery Metals
We have already discussed the dangers of toxic non-stick cookware, but executing a flawless sundae bar requires a few more equipment audits. If you want to cook like an expert, you have to stop buying disposable, low-quality tools that actively sabotage your efforts. I am a fierce advocate for the home cook, which means I will absolutely call you out if you are using gear that makes your life harder.
Safe Holding Vessels for Hot Fudge
Once your hot fudge is made, you need to keep it warm for the duration of the party. Do not leave it in a thin aluminum pot, as the residual heat from the burner will scorch the bottom layer.
Instead, transfer your fudge to a high-quality enameled cast iron cocotte or a multi-clad stainless steel curved saucier pan. A saucier has rounded bottom edges, meaning there are no sharp 90-degree corners for the fudge to get stuck in and burn. The thick, heavy bottom of a multi-clad stainless pan will retain gentle, even heat for a long time. If you want to test the quality of your stainless steel, preheat it and perform the water drop test; if a drop of water beads up and dances like mercury, your pan is properly heated and ready to provide a naturally stick-resistant surface. For holding fudge, simply keep the heavy pan on a wooden trivet; the thermal mass of the metal will keep the sauce perfectly pourable for at least forty-five minutes.
Scoops That Don’t Degrade
If you choose not to pre-scoop your ice cream, or if you are serving a secondary dessert, you need a proper ice cream scoop. Have you ever pulled an aluminum scoop out of the dishwasher and noticed it was covered in a chalky, dark gray residue that rubs off on your hands?
That is oxidation. Many cheap ice cream scoops are made of uncoated aluminum and filled with a chemical antifreeze liquid designed to transfer the heat from your hand to the bowl of the scoop. When these aluminum scoops are exposed to the harsh, highly alkaline detergents and high heat of a modern dishwasher, the aluminum oxidizes and corrodes. That is exactly why your ice cream scoop turned gray, and yes, that metallic residue is transferring directly into your food.
Throw it away. Invest in a solid, single-piece, heavy-duty stainless steel spade or scoop. It contains no toxic antifreeze, it will never oxidize in the dishwasher, and it relies on pure mechanical leverage rather than cheap chemical tricks to carve through frozen dairy.
Final Thoughts on Mastering the Art of the Sundae
Cooking at home, even when tackling seemingly intimidating projects like homemade emulsions and sugar work, should never be a source of anxiety. The kitchen is not a place for blind guessing; it is a place where fundamental science meets creativity. When you understand that chocolate seizes because of moisture, that emulsions break because of excessive heat, and that cheap cookware is actively working against you, you strip away the mystery. You are left with pure, actionable technique.
You don’t need a culinary degree to make the best hot fudge of your life. You just need a safe, heavy-bottomed stainless steel pan, a reliable thermometer, and the patience to melt your ingredients low and slow. By prepping your ice cream in advance, curating a thoughtful matrix of textural toppings, and utilizing the thermal mass of your serving ware, you elevate a simple dessert into a memorable, interactive event.
So this weekend, skip the plastic squeeze bottle of high-fructose corn syrup. Banish the peeling Teflon pan to the recycling bin. Embrace the chemistry, trust the process, and host a sundae bar that proves, once and for all, that the absolute best dessert in town comes out of your own kitchen. You’ve got this. Now go melt some chocolate.






