Let’s get one thing straight right out of the gate: you do not need a fancy culinary degree, a starched white chef’s coat, or a kitchen that looks like a sterile operating room to make mind-blowing, restaurant-quality food. You just need a healthy dose of common sense, a willingness to understand the basic science of what is happening in your skillet, and the ability to stop making the exact same rookie mistakes over and over again. I firmly believe that anyone can learn the art of the kitchen with a little patience and a lot of trial and error. I should know. I learned to cook by setting off my apartment’s smoke detector so many times that my neighbors started greeting me in the hallway with a fire extinguisher.
Today, we are pouring a glass of wine, rolling up our sleeves, and tackling one of the most notoriously frustrating, misunderstood, and poorly executed ingredients in the modern home kitchen: the eggplant.
If you have ever tried to pan-fry an eggplant on a busy weeknight, you already know the tragedy I am about to describe. You cube up your beautiful, glossy purple vegetable. You heat up a couple of tablespoons of expensive extra-virgin olive oil in your skillet. You toss the eggplant in, fully expecting it to sizzle and brown into tender, caramelized perfection. Instead, within three seconds flat, the eggplant drinks every single drop of oil in the pan. The pan is bone dry. Panic sets in. You pour in another glug of oil. The eggplant drinks that, too. You repeat this desperate cycle until you have emptied half a bottle of olive oil, and what are you left with? A soggy, unappetizing, heavy, oil-logged disaster that oozes grease down your chin with every bite. It is heavy, it is gross, and it is a complete waste of your precious time and expensive ingredients.
I survive my busy weekdays by relying on clever, scientifically sound cooking hacks because, frankly, time is money. I buy myself the time to be an absolute perfectionist with my elaborate weekend baking projects by ruthlessly streamlining my Monday-through-Friday dinners. If you want to master simple weeknight dinners, you cannot afford to be a slave to prep methods that take an hour. You need a foolproof, rapid-fire technique that completely alters the physical structure of the eggplant before it ever touches your pan.
The secret? Your microwave.
Yes, that neglected box sitting on your counter that you only use to reheat yesterday’s coffee and melt butter. We are going to use microwave radiation to fundamentally change the cellular architecture of the eggplant. By the time we are done, you will have a tender, perfectly browned vegetable with a fraction of the fat. Let’s dive into the fascinating, slightly nerdy, and incredibly practical science of why microwaving your eggplant changes absolutely everything.
The Biological Trap: Why Eggplant Behaves Like a Kitchen Sponge
To understand how to fix the problem, we have to strip away the pretentious chef-speak and look at the actual botany of what we are dealing with. The eggplant (Solanum melongena) is technically a berry, belonging to the nightshade family. While it looks dense and heavy when you pick it up in the produce aisle, its internal structure is actually a biological trap waiting to ruin your dinner.
According to botanical science, a raw eggplant is composed of approximately 92% water. The remaining solid mass is primarily made up of a network of spongy parenchyma cells. These cells are loosely packed together, creating a vast, intricate matrix of microscopic air pockets.
Think of a standard yellow kitchen sponge. It is full of holes, which allows it to hold a massive volume of liquid relative to its weight. The flesh of an eggplant is structurally identical to that sponge. When you drop raw, untreated eggplant into a hot, oiled skillet, a disastrous chain reaction occurs. The heat of the pan immediately causes the microscopic air pockets inside the eggplant to expand. As the air expands and escapes, it creates a literal vacuum effect within the cellular matrix. Capillary action takes over, and the eggplant rapidly sucks the hot cooking oil deep into its core to fill the empty void left by the escaping air.
Because lipids (fats) do not evaporate like water, that oil is now permanently trapped inside the flesh. This is exactly why your pan-fried eggplant is always greasy if you skip the necessary prep work. The vegetable is simply doing what its biological structure dictates: acting as an ultra-absorbent sponge.
The Traditional Workarounds (And Why They Ruin Your Tuesday Night)
Professional chefs and Italian grandmothers have known about the eggplant’s sponge-like tendencies for centuries. They developed several traditional methods to combat the issue, and while these methods absolutely work from a culinary standpoint, they are completely impractical for a busy home cook trying to get dinner on the table by 7:00 PM.
The Salting and Weeping Method
The most classic technique is purging, also known as salting or weeping. You slice the eggplant, arrange it on a wire rack, generously coat it in kosher salt, and let it sit. Through the magic of osmosis, the salt draws the water out of the cells. As the water exits, the cellular structure shrinks and the air pockets collapse. After 45 to 60 minutes, you rinse the slices, pat them obsessively dry with paper towels, and then fry them.
Does it work? Yes. It effectively collapses the sponge. But who on earth has an extra hour to wait around for a vegetable to cry on a Tuesday night? Not me.
The Brining Method
Another old-school trick is submerging the eggplant cubes in a bowl of heavily salted water for 30 minutes. The idea is that the flesh absorbs the water, filling up the air pockets so that there is physically no room left for the oil to enter. Again, this works, but it requires you to thoroughly squeeze and drain the eggplant afterward, which turns the flesh to mush, and it still eats up half an hour of your life.
The Roasting Method
Some recipes tell you to bypass the skillet entirely and roast the eggplant in a hot oven. While this uses less oil, baking often dries the eggplant out, leaving you with leathery, shriveled skins and a lackluster texture. Plus, preheating an oven and waiting 40 minutes for the vegetables to roast defeats the purpose of a quick stove-top meal.
If you want to know why your vegetable dishes absorb so much oil, it is because you are skipping the structural breakdown phase. But since we refuse to waste an hour salting and waiting, we need a faster way to achieve the exact same cellular collapse.
The Microwave Hack: Dielectric Heating to the Rescue
Enter the microwave. I know, I know. A lot of home cooks turn their noses up at the microwave, viewing it as a tool meant only for heating up frozen burritos and popping popcorn. But if you want to stop eating mushy veggies, you have to rethink how you utilize this appliance. The microwave is actually a highly sophisticated piece of scientific equipment that excels at one specific task: dielectric heating.
Unlike a traditional oven or a skillet, which heats food from the outside in via conduction or convection, a microwave emits electromagnetic waves. These waves penetrate the food and specifically target polar molecules—most notably, water. The microwave radiation causes the water molecules inside the food to rapidly vibrate and generate intense friction. This friction creates heat instantaneously throughout the entire mass of the food.
Remember how we established that an eggplant is 92% water?
When you place cubed or sliced eggplant into the microwave, the electromagnetic waves immediately excite the massive amount of water trapped inside the parenchyma cells. Within minutes, that internal water reaches the boiling point and converts into steam.
As the steam expands, it violently ruptures the delicate cell walls from the inside out. The steam then vents out of the vegetable, taking a significant portion of the eggplant’s moisture with it. Without the structural integrity of the water-filled cells, the entire spongy matrix collapses in on itself. The microscopic air pockets are completely obliterated.
What you are left with is a denser, shrunken, slightly translucent piece of eggplant. Because the air pockets no longer exist, the vacuum effect is gone. The sponge has been destroyed. When you transfer this pre-treated, structurally collapsed eggplant to a hot skillet, it is physically impossible for it to absorb excess oil. Instead, it will sit beautifully on the surface of the fat, allowing the exterior to sear, brown, and caramelize in a matter of minutes. This brilliant, time-saving technique is actively championed by culinary heavyweights like America’s Test Kitchen, and it is the ultimate game-changer for weeknight cooking.
The Foolproof Blueprint: How to Microwave Eggplant Before Frying
Knowing the science is only half the battle; executing it properly is where the magic happens. The first step to conquering weeknight cooking anxiety is having a reliable, repeatable prep routine. Here is your definitive, step-by-step masterclass on how to properly microwave your eggplant to guarantee a flawless, grease-free pan-fry every single time.
Step 1: The Cut and Prep
Start with a firm, glossy eggplant. The skin should be tight and unblemished. Wash it, dry it, and trim off the top calyx. Depending on the dish you are making, you will want to cut the eggplant into either 1-inch cubes (perfect for stir-fries, curries, and pasta sauces) or 1/2-inch thick slices (ideal for eggplant parmesan or layering).
Consistency is key here. Make sure your pieces are relatively uniform in size so that they process at the same rate. If you have massive chunks mixed with tiny slivers, the small pieces will turn to absolute mush before the large pieces have properly collapsed.
Step 2: The Setup
You have two options for the microwave setup, depending on the volume of eggplant you are processing.
The Plate Method (For Slices): Line a large, microwave-safe plate with a double layer of heavy-duty paper towels. Arrange the eggplant slices in a single, even layer on top of the paper towels. The paper towels are crucial here—they will absorb the massive amount of moisture that the eggplant is going to expel as it steams.
The Bowl Method (For Cubes): If you are working with a mountain of cubed eggplant, place the cubes into a large, microwave-safe glass or ceramic bowl. You do not need to add any water to the bowl; the eggplant has more than enough internal moisture to steam itself. Cover the bowl loosely with a microwave-safe lid or a vented piece of plastic wrap, leaving a small gap for the steam to escape.
Step 3: The Thermal Processing
Place your plate or bowl into the microwave. Run the microwave on high power. The exact timing will depend heavily on the wattage of your microwave and the total volume of the vegetable, but a standard rule of thumb is 3 to 5 minutes.
If you are using the bowl method, stop the microwave halfway through the cooking time, carefully remove the lid (watch out for the hot steam!), and give the cubes a good toss to ensure even processing.
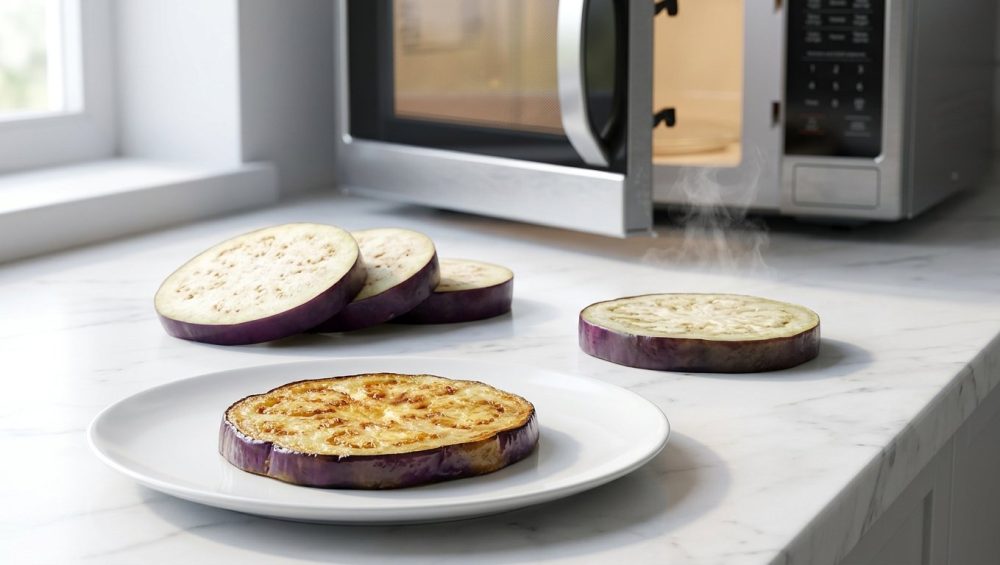
Step 4: Visual and Tactile Cues
How do you know when the eggplant is ready? You are looking for a very specific transformation. The pieces should look visibly shriveled and reduced in size. The stark white flesh should take on a slightly translucent, grayish hue. Most importantly, when you press on a piece, it should feel soft, pliable, and relatively dry to the touch. It should no longer feel like a stiff, airy sponge.
Step 5: The Crucial Rest
Carefully remove the eggplant from the microwave. If you used the bowl method, immediately dump the cubes into a colander or a mesh strainer to drain away the pool of murky, bitter liquid that has accumulated at the bottom of the bowl. Let the eggplant rest for about 2 to 3 minutes. This allows the residual surface moisture to flash off and evaporate. A dry exterior is absolutely essential for achieving a good sear in the pan.
The “No-Go” Rule: Stop Cooking on Toxic Chemical Slicks
Alright, we have successfully hacked the biology of the eggplant. Now it is time to move to the stovetop. But before we drop a single cube of food into a pan, we need to have a brutally honest conversation about your cookware.
As a culinary blogger and an advocate for the home cook, I have a very strict, non-negotiable philosophy: I am incredibly passionate about banishing toxic kitchen gear from your home. I have absolutely zero patience for cheap, peeling, chemically coated non-stick pans.
If you are still cooking your dinners on a $15 aluminum skillet coated in mystery black Teflon that is scratched, flaking, and peeling into your food, you need to throw it in the trash immediately. Traditional non-stick coatings are formulated using synthetic fluoropolymers, historically relying on per- and polyfluoroalkyl substances (PFAS) and perfluorooctanoic acid (PFOA). These are notoriously dubbed “forever chemicals” because they do not easily break down in the environment or in the human body.
While manufacturers claim that modern non-stick pans are “PFOA-free,” many still rely on polytetrafluoroethylene (PTFE) to achieve that slick surface. The danger with PTFE is that it is highly unstable at high temperatures. When you heat a cheap non-stick pan past 500°F (which happens incredibly fast if the pan is preheating empty on a gas burner), the chemical coating literally begins to break down and degrade. As it degrades, it releases toxic, invisible, and odorless fumes into your kitchen.
Furthermore, you might actively be ruining your nonstick pans by exposing them to aerosol cooking sprays. The emulsifiers in commercial cooking sprays bond permanently to the chemical non-stick coating when heated, creating a sticky, polymerized layer of invisible gunk. This is the exact reason your cheap non-stick pans keep losing their slick coating after just a few months of use. They are inherently disposable, environmentally disastrous, and offer terrible thermal mass for searing vegetables.
The Safe, High-Quality Alternatives
If you want to cook like a pro, you need to use the tools the pros use. For searing vegetables like our pre-treated eggplant, you should be using one of three materials:
- Carbon Steel: This is the undisputed king of the professional sauté station. Carbon steel is relatively lightweight, heats up incredibly fast, and when properly seasoned, develops a naturally non-stick patina of polymerized fat. You must understand the thermodynamics of carbon steel to get a perfect sear, but once you do, it will outlive you.
- Cast Iron: The rugged, heavy-duty workhorse. Cast iron takes a while to preheat, but once it gets hot, it stays hot. It provides the intense, sustained thermal mass required to aggressively sear the exterior of your vegetables before the interior turns to mush.
- Multi-Clad Stainless Steel: A high-quality, fully clad stainless steel skillet offers brilliant heat distribution and zero chemical coatings. It requires proper heat control to prevent sticking, but it allows for the development of a beautiful fond (the caramelized brown bits stuck to the bottom of the pan), which is the foundation of any great pan sauce.
Do not fall for the “greenwashed” ceramic pans that promise the world but lose their non-stick properties after three months of heavy use. Invest in raw, honest, durable metals.
The Final Sear: Achieving the Perfect Maillard Reaction
Now that you have a safe, high-quality skillet on the stove, it is time to bring this dish home. Our goal here is to achieve the Maillard reaction—the complex chemical reaction between amino acids and reducing sugars that occurs under high heat, resulting in that deeply savory, browned, caramelized crust that makes food taste irresistible.
Because we took the time to microwave the eggplant, the cellular sponge is collapsed, and the surface moisture has evaporated. The eggplant is primed and ready to sear.
Step 1: Preheat the Pan
Place your carbon steel or cast-iron skillet over medium-high heat. Let the dry pan preheat for a solid 2 to 3 minutes. You want the metal to be radiating heat.
Step 2: Add the Fat
Once the pan is hot, add 1 to 2 tablespoons of a high-smoke-point cooking fat. Do not use extra-virgin olive oil for this initial sear; its smoke point is too low, and it will burn and turn bitter before the eggplant has a chance to brown. Instead, opt for avocado oil, ghee, or refined peanut oil. Swirl the oil to coat the bottom of the pan. It should shimmer and glide across the metal like water.
Step 3: The Sear
Carefully add your microwaved eggplant to the hot pan. Spread the pieces out into a single, even layer. If you overcrowd the pan, the temperature of the metal will plummet, and the eggplant will steam instead of searing. If necessary, work in batches.
Now, step back and do absolutely nothing. Do not poke, prod, stir, or aggressively shake the pan. Let the eggplant sit in direct contact with the hot metal for 2 to 3 minutes. As you watch, you will notice something miraculous: the oil remains in the pan. The eggplant is not soaking it up. It is sizzling happily in a shallow pool of fat, frying exactly the way a potato or a piece of chicken would.
Step 4: Toss and Caramelize
Once the underside has developed a deep, golden-brown crust, use a thin metal spatula to flip the pieces over. Cook for another 2 minutes until the other side is equally browned and the interior is meltingly creamy and tender.
Elevating the Dish: Flavor Profiles and Pairings
You have just created the perfect textural foundation: an eggplant that is crisp and caramelized on the outside, rich and custardy on the inside, and completely free of the heavy, greasy mouthfeel that usually plagues this vegetable. Now, it is time to build flavor.
Because eggplant has a naturally mild, slightly earthy flavor profile, it is the ultimate blank canvas for aggressive, punchy seasonings.
The Weeknight Garlic-Soy Glaze:
In the last 60 seconds of cooking, push the seared eggplant to one side of the pan. Add a tiny splash of oil to the empty side and toss in a tablespoon of minced garlic and a teaspoon of grated fresh ginger. Let them sizzle for 15 seconds until fragrant. Pour in a mixture of 2 tablespoons of soy sauce, 1 tablespoon of rice vinegar, a splash of sesame oil, and a pinch of sugar. Toss everything together. The sauce will rapidly reduce and glaze the eggplant in a sticky, savory, umami-bomb coating. Serve over steamed rice with sliced scallions.
The Quick Mediterranean Toss:
Once the eggplant is seared, turn off the heat. Toss the hot eggplant with a generous handful of halved cherry tomatoes, a splash of high-quality, peppery extra-virgin olive oil (now is the time to use the good stuff, off the heat), a splash of red wine vinegar, and a handful of torn fresh basil or mint. Crumble some salty feta cheese over the top. The residual heat will slightly soften the tomatoes and awaken the essential oils in the herbs.
The Perfect Pasta Addition:
Fold your perfectly seared eggplant cubes directly into a bubbling pot of marinara sauce just before serving. Because the eggplant has already been cooked and its cells collapsed, it will hold its shape beautifully in the sauce rather than disintegrating into a watery, stringy mess.
The Bottom Line
Cooking does not have to be an intimidating, chaotic chore. You do not need to accept soggy, greasy vegetables as an unavoidable fact of life. By taking three minutes to understand the basic cellular structure of the ingredients you are working with, you can completely change the trajectory of your dinner.
Microwaving your eggplant before pan-frying is not a cheat code; it is a smart, scientifically validated application of thermodynamics. It is the exact kind of practical, no-nonsense kitchen hack that separates the stressed-out amateur from the confident, resourceful home cook.
So, the next time you are staring down a beautiful purple eggplant on a busy Tuesday night, don’t panic. Ditch the hour-long salting routine, ignore the pretentious recipes that demand a gallon of olive oil, and put your microwave to work. Your palate, your schedule, and your sanity will thank you. Now pour yourself another glass of wine, plate up that perfectly caramelized, grease-free masterpiece, and enjoy your dinner. You earned it.


