The Morning Tragedy: Why We Are Still Ruining Our Toast
We need to talk about the absolute tragedy that occurs in millions of kitchens every single morning. You wake up, you brew a beautiful, aromatic cup of coffee, and you toast a perfect, artisanal slice of sourdough bread. You open the refrigerator, pull out a solid, freezing-cold brick of butter, and attempt to spread it. What happens next is nothing short of a culinary crime. You end up violently tearing your delicate toast to shreds, leaving behind a mangled, crumbly mess with a massive, un-melted chunk of dairy sitting mockingly in the center. I have zero patience for this daily frustration, and neither should you.
As a home cook who spends her weekends obsessing over multi-day fermentation projects, I refuse to let my weekday mornings be derailed by rock-hard butter. If you are looking for simple secrets for kitchen artistry, mastering ingredient temperature control is unequivocally step one. You cannot achieve professional-level results—or even just a decent breakfast—if you are constantly fighting your ingredients.
For decades, we have been conditioned by modern appliance marketing to shove absolutely everything we buy into the refrigerator. We treat our fridge like a magical preservation vault, blindly tossing in tomatoes, bread, and butter without understanding the chemical and biological consequences. The result? Mealy tomatoes, stale bread, and butter that requires a chisel to portion. It is time to break this cycle. The solution to your morning woes is not microwaving your butter into a sad, greasy puddle. The solution is a brilliant, centuries-old piece of French kitchen engineering known as the butter bell. But before we get to the hardware, we need to strip away the myths and look at the hard science of dairy preservation.
The Great Butter Storage Debate: Fridge vs. Counter
Whenever I tell people that I leave my butter out on the kitchen counter 24/7, I am inevitably met with gasps of horror. People look at me as if I have just confessed to serving raw chicken at a dinner party. The fear of leaving dairy out at room temperature is deeply ingrained in our modern psyche. However, one of the most common beginner cooking mistakes is treating a block of pure fat the same way you treat a carton of raw milk.
Let’s look at the actual composition of butter. By law in the United States, commercial butter must be at least 80% butterfat. The remaining 20% is composed of roughly 16% to 17.5% water, and a small percentage of milk solids, proteins, and salt. This unique ratio is exactly why butter behaves so differently from fluid milk or heavy cream.
In the world of food safety, dairy products are generally classified as Time/Temperature Control for Safety (TCS) foods. This means that if they sit in the temperature danger zone (above 41°F) for more than four hours, they become a breeding ground for dangerous pathogenic bacteria and must be thrown out. However, pasteurized butter is frequently granted an exception to this rule. Why? Because the pasteurization process destroys the initial harmful bacteria in the cream, and the subsequent churning process creates a physical structure that makes it incredibly difficult for new bacteria to thrive. Bacteria require a substantial amount of available moisture to multiply. In butter, the water is tightly bound within an emulsion of fat, making it largely inaccessible to microbial invaders.
Furthermore, if you are using salted butter, you have an extra layer of chemical protection. Salt is one of humanity’s oldest preservatives, acting as a powerful antimicrobial agent that inhibits bacterial growth. The United States Department of Agriculture (USDA) explicitly states that it is safe to leave butter at room temperature. However, they do note that if left out unprotected for several days, it can begin to turn rancid. This brings us to the crux of the issue: the real enemy of room-temperature butter is not necessarily bacterial spoilage, but rather chemical degradation.
The Chemistry of Spoilage: Oxidation and Rancidity
If you have ever bitten into a piece of toast and immediately recoiled at a harsh, metallic, or sour flavor, you have experienced the unpleasant reality of rancid butter. Just like you should stop eating mushy veggies because of poor cooking methods, you should stop eating metallic-tasting butter because of poor storage. To prevent this, we have to put on our lab coats for a moment and understand exactly how butter fails.
Unlike a piece of raw meat that rots due to bacterial colonies, butter primarily “goes bad” through a chemical process known as rancidity. There are two main types of rancidity that attack your butter: hydrolytic rancidity and oxidative rancidity.
Hydrolytic rancidity occurs when water reacts with the triglycerides (the fat molecules) in the presence of enzymes called lipases, breaking the fat down into free fatty acids. This specific reaction is infamous for producing a smell that food scientists delicately describe as “baby vomit”. Fortunately, pasteurization destroys most lipases, making this less common in commercial butter.
The much more common villain in your kitchen is oxidative rancidity. This occurs when the unsaturated fatty acids in the butter are exposed directly to oxygen in the air. When oxygen molecules interact with the fat, they trigger a chain reaction of oxidation, producing secondary oxidation products like aldehydes and ketones. These chemical compounds are entirely responsible for the harsh, paint-like, cardboard-esque, and sour odors that ruin your breakfast. This oxidative breakdown is heavily accelerated by light and heat.
This is exactly why the traditional American butter dish—a flat plate with a loose-fitting lid—is a fundamentally flawed design. Even with the lid on, the butter is sitting in a pool of trapped, oxygen-rich air. Every time you lift the lid, you introduce a fresh supply of oxygen to accelerate the degradation of the fat. If you want to keep butter soft and safe on the counter for weeks rather than days, you have to completely eliminate oxygen from the equation.
Enter the Beurrier: A Masterpiece of 19th-Century Engineering
Long before the invention of the electric refrigerator, the dairy farmers and home cooks of Europe faced the exact same problem. They needed a way to preserve their freshly churned butter without it turning into a rancid, unpalatable mess. The brilliant solution emerged in France during the late 19th century.
The invention is widely credited to the pottery-rich regions of France, specifically Vallauris, a town famous for its ceramics, as well as the dairy-heavy regions of Brittany and Normandy. Originally known as a beurrier à eau (water butter dish), a beurrier Breton, or a beurrier Normand, this ingenious two-piece ceramic crock revolutionized food storage.
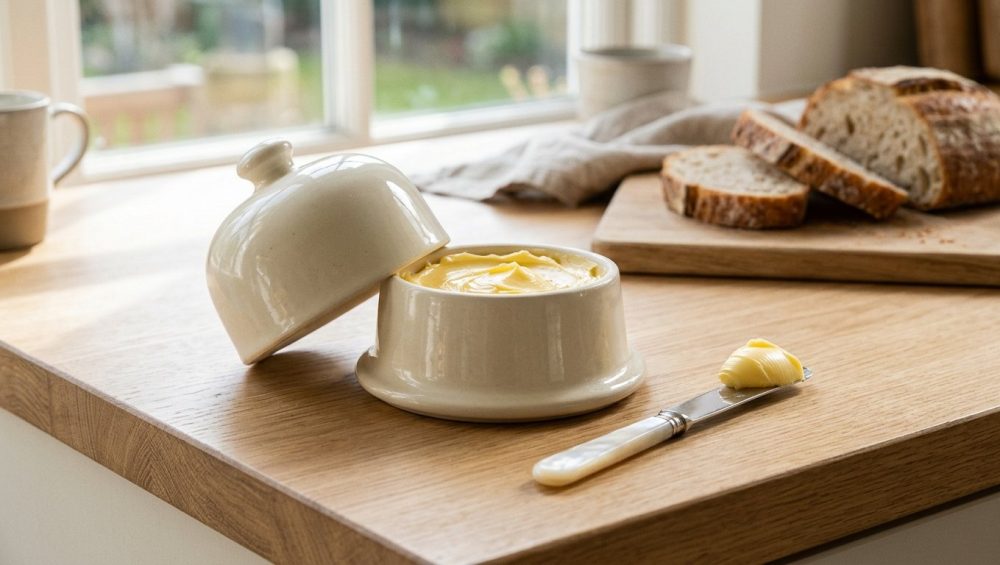
The design is deceptively simple but functionally profound. It consists of a wide base that holds a small amount of water, and an inverted, bell-shaped lid (the cup) where the butter is packed. When the lid is placed into the base, the water creates a perfect, impenetrable seal around the butter.
For decades, the beurrier was a staple in rural French kitchens. However, as electric refrigerators became common household appliances in the mid-20th century, the butter bell fell out of fashion. It wasn’t until the 1970s and 1980s that American and Canadian craft potters rediscovered this historic design, bringing it back to life at local craft fairs and boutique art shops. Today, it is a heritage piece that every beginner needs on their countertop, not just for its rustic aesthetic, but for its flawless application of physics.
The Thermodynamic and Biological Mechanics of the Water Seal
To truly appreciate the genius of the French butter bell, we have to look at the specific mechanics of the water seal. How does submerging dairy in water actually protect it? It all comes down to creating an anaerobic environment and leveraging thermal mass.
When you invert the butter-filled bell into the water-filled base, the water rises up around the edges of the butter, completely cutting off its exposure to the ambient air. This creates a strictly anaerobic (oxygen-free) environment. Because oxidative rancidity requires a constant supply of oxygen to break down the triglycerides, the water seal effectively halts the chemical degradation of the fat in its tracks. Without oxygen, the butter cannot oxidize. It will not develop that cardboard, paint-like smell, and it will not turn dark yellow or translucent at the edges.
But what about the water itself? Doesn’t water make the butter soggy? This is where basic chemistry saves the day. Because butter is an emulsion of roughly 80% fat, it is highly hydrophobic. Oil and water do not mix. The water rests gently against the exposed surface of the butter without penetrating it, diluting it, or making it soggy.
Furthermore, the water serves a secondary, highly crucial purpose: thermal regulation. The water inside the ceramic base undergoes a very slow process of evaporation. As the water evaporates, it pulls heat away from the ceramic, creating a subtle, natural cooling effect. This micro-climate keeps the butter sitting just slightly below the ambient room temperature. It remains perfectly soft and spreadable, but the evaporative cooling prevents it from crossing the threshold into a melted, greasy liquid. Having ingredients prepped and ready to go at the exact right texture is a guaranteed way to cure cooking anxiety before your morning coffee even finishes brewing.
How to Properly Pack and Maintain a French Butter Bell
While the butter bell is a phenomenal tool, it does require a specific technique to use correctly. You cannot simply drop a cold stick of butter into the bell and hope for the best. Proper preparation is mandatory.
Step 1: Soften the Butter
Before you can pack your butter bell, you must allow your butter to soften at room temperature until it yields easily to a knife. Do not microwave it. If you melt the butter, you will break the delicate fat-water emulsion, separating the milk solids from the butterfat. Once butter is melted, it will never regain its proper structural integrity, and it will slide right out of the bell.
Step 2: Pack it Tightly
Take a spoon or a butter knife and firmly press the softened butter into the dry, clean bell. You must pack it with intention. The goal is to completely eliminate any internal air pockets. If you leave air pockets trapped inside the butter, you are trapping oxygen, which defeats the entire purpose of the crock. Furthermore, air pockets compromise the structural grip the butter has on the ceramic walls. If you don’t pack it tightly, you’ll have to fish a wet lump of dairy out of the water to fix your food.
Step 3: Add the Cold Water
Pour cold tap water into the base of the crock. You do not need to fill it to the brim. Depending on the size of your specific butter bell, you generally only need about 1/4 inch to 1/2 inch of water. You only need enough water to rise up and touch the rim of the inverted bell, creating the airtight seal.
Step 4: Routine Maintenance
This is the single most important rule of owning a butter bell: you must change the water every two to three days. If you leave stagnant water sitting on your counter for a week, it will eventually become a breeding ground for yeast, mold, and ambient kitchen bacteria. Simply dump the old water, rinse the base, and refill it with fresh, cold water. This takes approximately five seconds and ensures your butter remains pristine for up to a month.
Troubleshooting the Dreaded “Drop”
If you spend enough time reading reviews of butter bells online, you will inevitably find angry comments from people complaining that their butter fell out of the bell and splashed into the water below. When this happens, it is almost never a flaw with the crock itself; it is a user error. Let’s troubleshoot the most common reasons for the dreaded drop.
The Temperature Threshold
Butter melts at around 90°F to 95°F, but it begins to lose its structural integrity long before that. The universally accepted maximum temperature for a butter bell is 80°F (27°C). If you live in a hot climate without air conditioning, or if you place your butter bell directly next to a roaring stovetop or in a window with direct, blinding sunlight, the ambient heat will soften the butter too much. It will lose its grip on the ceramic walls and slide into the water. If your kitchen routinely creeps above 80°F in the peak of summer, you will unfortunately need to move your butter to the refrigerator until the weather cools down. These are simple kitchen fixes that require nothing more than a basic understanding of ambient room temperature.
The Margarine Mistake
Listen to me closely: a butter bell is designed exclusively for real, high-fat butter. You cannot use margarine, vegan butter substitutes, or commercially “whipped” butter in a butter bell. Margarine and tub-spreads contain a significantly higher percentage of water and added vegetable oils. They lack the dense, structural butterfat required to cling to the inverted bell. If you pack margarine into a beurrier, it will instantly turn into a sloppy, separated mess and fall into the water. Whipped butter is equally disastrous, as it has been artificially pumped full of air to make it lighter. That incorporated air destroys the density needed to stay packed inside the bell.
Material Matters: The “No-Go” Rule on Toxic Kitchenware
As a home cook, I am notoriously strict about banishing toxic kitchen gear from my house, and storage containers are no exception. When you are shopping for a butter bell, the material it is constructed from is non-negotiable.
You must purchase a butter bell made from authentic, high-fired ceramic, stoneware, or porcelain. Do not, under any circumstances, buy a cheap plastic or melamine butter bell.
First and foremost, cheap plastics can leach endocrine-disrupting chemicals into your high-fat foods. Fat is an incredible solvent, and it will readily absorb chemical odors and compounds from low-quality plastic containers. Secondly, plastic completely lacks the necessary thermal mass required to make the butter bell function properly.
Thermal mass is a material’s ability to absorb, store, and slowly release heat energy. High-density stoneware and ceramic have excellent thermal mass. When you fill a ceramic base with cold water, the heavy walls of the crock absorb that cold temperature and hold onto it, insulating the butter from sudden spikes in your kitchen’s ambient heat. Plastic is a terrible insulator. Just like cheap baking sheets keep warping under heat, cheap plastic butter bells fail to regulate temperature, meaning your butter will experience wild temperature fluctuations and inevitably fall into the water. Invest in a heavy, high-quality ceramic piece. It will last you a lifetime, and it won’t poison your breakfast.
The Butter Dish vs. The Butter Bell: A Final Verdict
If you are still on the fence about ditching your standard flat butter dish, let’s do a quick comparative recap.
The standard butter dish is essentially a plate with a hat. It does absolutely nothing to protect your butter from oxygen. Every hour your butter sits in a standard dish, oxidative rancidity is slowly turning those beautiful, creamy triglycerides into harsh, bitter aldehydes. Furthermore, a standard dish offers zero thermal regulation. If your kitchen gets warm, the butter on a flat dish will melt into a translucent, separated puddle of milk solids and liquid fat.
The French butter bell, on the other hand, is an active preservation system. By utilizing an airtight water seal, it completely halts oxidation. By utilizing the thermal mass of ceramic and the physics of evaporative cooling, it actively regulates the temperature of the butter, keeping it in a state of perfect, spreadable suspension. It is the difference between leaving your food out to die, and actively preserving it through applied science.
Elevate Your Morning Routine
Cooking should not be a stressful chore, and making a simple piece of toast should not require you to battle a frozen block of dairy. By understanding the science of fat oxidation and the biological mechanics of bacterial growth, you empower yourself to make smarter, safer choices in your kitchen.
Consider this your essential kitchen survival guide for navigating the treacherous waters of breakfast preparation. You do not need a culinary degree to cook like a professional; you just need the right tools and a refusal to settle for mediocre results.
Throw away the cheap plastic tubs. Stop ripping your beautiful sourdough bread to shreds. Invest in a high-quality, ceramic French butter bell. Buy a block of premium, high-butterfat European salted butter, pack it tightly into the bell, and experience the absolute joy of flawless, room-temperature butter that glides onto your toast like silk. Your mornings will never be the same.