We’ve all been there. You’ve spent the better part of your Sunday babysitting a gorgeous, expensive cut of meat. The house smells like a rustic French bistro, your side dishes are perfectly timed, and you are feeling like an absolute culinary genius. You pull the roast from the oven, and sitting at the bottom of the roasting pan is a pool of liquid gold—the drippings. These drippings contain the concentrated, caramelized essence of the meat, infused with roasted garlic, herbs, shallots, and wine. It is the absolute foundation of a mind-blowing pan sauce. But there’s a massive, slippery problem standing between you and culinary perfection: a half-inch oil slick of rendered animal fat floating right on top.
If you don’t remove that fat, your gravy is going to taste like a greasy frying pan. If you try to remove it with a spoon, you are going to lose your mind, waste your time, and probably end up serving a broken, oily mess anyway. I have received countless frantic messages from weekend cooks trying to rescue a ruined dinner just because they botched the pan sauce at the very last second. Listen to me: making restaurant-quality sauces at home does not require a culinary degree. It requires understanding basic physics and owning exactly one inexpensive, highly functional tool.
If you want to stop serving mediocre, heavy meals and start cooking like someone who actually respects their ingredients, it is time to talk about the bottom-release fat separator.
The Great Gravy Tragedy: Why Your Pan Sauces Taste Like a Frying Pan
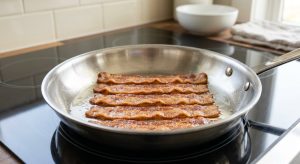
Let’s get one thing straight: fat is flavor, but free-floating grease is a culinary disaster. When you roast a chicken, braise short ribs, or cook a massive holiday turkey, the heat of the oven slowly renders the intramuscular fat and subcutaneous lipid layers of the animal. This fat drips down into the pan, mixing with the water-soluble juices, the wine you used to deglaze, and the moisture released by your mirepoix (that’s fancy chef-speak for your chopped onions, carrots, and celery).
The Anatomy of Pan Drippings
What you are left with in the bottom of that roasting pan is a chaotic mixture of incredible flavor compounds and pure, unadulterated grease. The flavorful part—the aqueous liquid—contains dissolved gelatin from the bones, umami-rich amino acids, and volatile aromatics. The greasy part is just liquid lipid. If you’ve ever wondered why your pan sauces are watery underneath but coated in a heavy, mouth-coating oil slick on top, it is because you have failed to properly separate the lipids from the aqueous cooking liquid before attempting to thicken it.
The Palate-Coating Nightmare of Unrendered Fat
When you try to make a gravy or a pan sauce without removing the bulk of this fat, several terrible things happen. First, the sauce will constantly try to “break” or separate, leaving gross little oil puddles on your guests’ plates. Second, the sheer volume of fat coats the tongue, literally creating a physical barrier over your tastebuds that mutes the complex flavors of the herbs and wine you worked so hard to develop. Finally, it makes the meal unnecessarily heavy. Skimming the fat doesn’t just improve the mouthfeel; it reduces the caloric load of your gravy by roughly 85 to 92 calories per single cup. You want your sauces to be rich and velvety, not slick and heavy.
The Brutal Science of Liquid Density (And Why Your Spoon is Useless)
Let’s get nerdy for a second, because I absolutely despise cooking advice that doesn’t explain why something works. Fat removal isn’t just about “sucking out grease”—it is about exploiting the scientific principles of immiscibility, density differentials, and laminar flow.
Understanding Specific Gravity in the Kitchen
Animal fats—like beef tallow, chicken schmaltz, or pork lard—are complex triglyceride mixtures. Because they are hydrophobic (water-fearing), they refuse to mix permanently with the water-based juices in your pan. When heated together and allowed to rest, thermodynamic equilibrium drives phase separation. Fat rises to the top because its specific gravity is consistently 8 to 12 percent lower than the broth. To put actual numbers on it, the fat layer has a density of roughly 0.91 g/mL, while the aqueous sauce sits below it at a denser 1.02 to 1.05 g/mL.
The Emulsion Trap: Why Ladling Destroys Your Sauce
So, if the fat naturally floats to the top, why can’t you just scoop it off with a spoon or a ladle? Because ladling creates mechanical shear force. When you dip a spoon into hot liquid, you create turbulence. At high temperatures, fat exists as tiny dispersed droplets. Dragging a spoon through this delicate stratification creates a shear force that fragments these droplets further, actively mixing the fat back into the broth and ruining the separation. This microscopic fragmentation is exactly why your chicken soup is cloudy instead of beautifully clear and translucent. You are literally whisking the grease into the water every time you clumsily dig your spoon into the pot.
The Failed “Hacks” You Need to Stop Believing
Because manual skimming is such a nightmare, the internet is full of ridiculous, viral “kitchen hacks” meant to save you time. As your resident sassy sous-chef, it is my duty to tell you that most of these are garbage.
The Ice Cube Illusion
You’ve probably seen the trick where someone drops a handful of ice cubes into hot broth, claiming the fat will magically congeal to the ice so you can pluck it out. Here is the reality: dropping freezing ice into a perfectly reduced, hot pan sauce immediately waters down your concentrated flavors. It also rapidly drops the temperature of the liquid. Remember that optimal fat separation happens in a specific thermal window between 62°C and 78°C. By shocking the liquid with ice, you increase the viscosity sharply, trapping fat droplets inside the sauce before they have a chance to rise to the surface.
The Paper Towel Disaster
Another popular hack involves dragging a piece of paper towel across the surface of the hot liquid to “blot” the grease. Not only is this incredibly dangerous (you are putting your fingers millimeters away from boiling hot fat), but paper towels are highly absorbent to all liquids. You end up soaking up just as much of your precious, flavorful stock as you do the fat. Plus, cheap paper towels will disintegrate into your gravy, leaving you with a sauce that tastes like wet cardboard.
The Refrigerator Waiting Game
The only scientifically flawless manual method for removing fat is chilling the broth in the refrigerator until the fat solidifies into a hard, white puck that you can lift off. This works perfectly for weekend meal prep or making stock. But on a Tuesday night? Or on Thanksgiving Day when the turkey is resting and you have exactly 15 minutes to get the gravy on the table? You do not have four hours to wait for thermodynamics to do its job in the fridge. Time is money, and we need efficiency.
Enter the Bottom-Release Fat Separator: The Ultimate Kitchen Cheat Code
If you want to eliminate the grease instantly without watering down your sauce or waiting for it to chill, you need a bottom-release fat separator. Just like you need a potato ricer for fluffy mash, you need this tool for flawless pan sauces. It is arguably one of the most brilliant, low-tech gadgets ever invented for the home kitchen.
The Mechanics of Gravity-Fed Separation
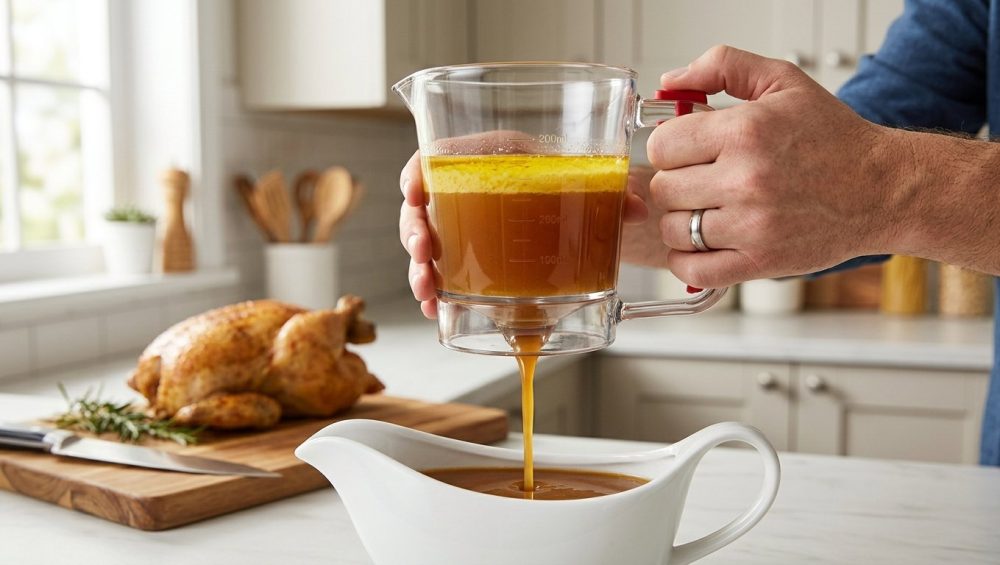
A bottom-release fat separator looks like a large measuring pitcher with a built-in strainer on top and a trigger handle. You pour your messy, chunky pan drippings directly through the top strainer. The strainer catches the burnt bits of garlic, the rosemary stems, and the weird coagulated proteins, letting only the liquid fall into the pitcher. Because the pitcher is deep, the liquid density differential takes over immediately. The fat rushes to the top, and the rich, dark broth settles at the bottom.
Here is the genius part: instead of pouring the liquid out of the top, you squeeze a trigger on the handle. This trigger lifts a silicone stopper at the very bottom of the pitcher, allowing the heavy, flavorful broth to drop straight down into your saucepan. The fat, which is floating safely at the top, stays in the pitcher. You release the trigger the second the fat layer reaches the bottom hole. It is flawless, gravity-fed precision.
Spout Pitchers vs. Bottom-Release Mechanisms
You may have seen older styles of fat separators that look like watering cans, with a long spout originating from the bottom of the pitcher. Throw them away. While the physics are similar, spout pitchers are notoriously flawed. When you pour the hot liquid into a spout pitcher, a small amount of fat inevitably gets pushed into the spout before the separation occurs. When you go to pour your “clean” broth, the first thing that hits your saucepan is a giant glug of the exact fat you were trying to avoid. The bottom-release mechanism with a silicone stopper completely eliminates this design flaw.
The Toxic Trap: Why Cheap Plastic Separators Are Ruining Your Food
We need to have a very serious conversation about the materials lurking in your kitchen. I have zero patience for toxic, cheap gear. I’ve told you before why cooking spray is the enemy when it comes to preserving the lifespan of your skillets, but cheap plastic kitchenware is an actual enemy to your health.
The Hidden Dangers of BPA and BPS Leaching
Many discount fat separators are made from cheap polycarbonate plastics. Bisphenol A (BPA) is an industrial chemical that has been used to harden these plastics since the 1950s. It is a known endocrine disruptor that can throw off your body’s natural hormone balance by either blocking or mimicking hormones like estrogen.
Here is the most critical part: the degree to which these toxic chemicals leach into your food depends heavily on the temperature of the liquid. Heat drastically increases the amount of BPA and microplastics that transfer from the container into your meal. When you take 212°F boiling turkey drippings and pour them directly into a $5 plastic jug from a discount bin, you are creating a toxic chemical soup. Even if a cheap plastic is labeled “BPA-Free,” manufacturers often replace it with BPS (Bisphenol S), which exhibits the exact same endocrine-disrupting behaviors.
Material Matters: What You Should Actually Buy
Do not compromise on the material of a tool designed to hold boiling fat. You have three acceptable options for a fat separator:
- Tritan Plastic: Tritan is a high-grade, rigorously tested co-polyester that is completely free of BPA, BPS, and all other bisphenols. It is shatterproof and holds up to boiling temperatures without degrading or leaching.
- Borosilicate Glass: This is the same thermal-shock-resistant glass used in laboratory beakers. It is completely non-toxic, won’t absorb odors, and can handle extreme temperature shifts without shattering.
- High-Grade Stainless Steel: Indestructible, plastic-free, and infinitely durable. The only downside is that you cannot visually see the fat line as easily as you can with clear materials, making the release slightly trickier to time.
How to Actually Use a Bottom-Release Fat Separator Like a Pro
Owning the tool is only half the battle; using it correctly requires a tiny bit of patience. Just as your cheap meat thermometer is lying to you about the internal temperature of your steak if you don’t use it properly, your eyes will lie to you if you don’t let the liquid rest long enough to separate.
Step 1: The Initial Strain
Place your separator on a flat, heat-proof surface. Carefully pour all the liquid from your roasting pan or stockpot through the top strainer. Do not press down on the solids trapped in the strainer with a spoon; you will just push cloudy, bitter sediment into your clean broth. Discard the solids.
Step 2: The Thermodynamic Rest Phase
This is the step everyone rushes. You must let the pitcher sit completely undisturbed for at least 45 to 60 seconds. Do not tap it. Do not swirl it. Let thermodynamics do the heavy lifting. You will literally watch the liquid stratify into two distinct layers: a dark, opaque bottom layer (the good stuff) and a translucent, yellowish top layer (the fat).
Step 3: The Precision Release
Hold the separator directly over your saucepan or skillet. Gently squeeze the trigger handle to lift the bottom stopper. The dark, defatted broth will flow cleanly out of the bottom. Keep your eyes locked on the line where the broth meets the fat.
Step 4: The Strategic Cut-Off
As the liquid level drops, the fat layer will approach the bottom hole. Release the trigger just before the fat hits the opening. It is always better to sacrifice a tiny tablespoon of good broth than to accidentally let a tablespoon of grease slip into your pan. You are now left with pure, concentrated, defatted culinary gold.
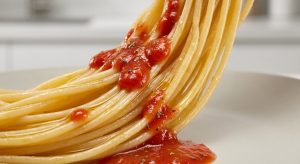
Building the Perfect Pan Sauce (Now That the Fat is Gone)
Now that you have isolated the pure drippings, you are ready to build a sauce that will make people weep. This is exactly how you turn those burnt bits into sauce without serving your guests a cup of liquid grease.
The Art of Deglazing
While your fat separator is doing its 60-second rest, place your empty roasting pan or skillet on the stove over medium-high heat. Pour in a splash of dry white wine, vermouth, or even a little apple cider vinegar. As the liquid bubbles, use a wooden spoon to scrape up the fond—the dark, sticky, caramelized proteins stuck to the bottom of the pan. Let the alcohol cook off for about two minutes.
Thickening Agents: Roux vs. Slurry
Release your clean, defatted broth from the separator directly into the deglazed pan. Bring it to a gentle simmer. If you want a thick, traditional Thanksgiving-style gravy, you need a thickener. Since we removed all the fat, we can’t make a traditional roux in the pan. Instead, whisk a tablespoon of cornstarch or arrowroot powder into a splash of cold water to create a slurry, then slowly whisk it into the simmering broth until it reaches your desired consistency.
Monter au Beurre: The Final Polish
Turn off the heat. To give your sauce that glossy, professional, restaurant-quality finish, we are going to perform a technique the French call monter au beurre. Take one tablespoon of ice-cold, unsalted butter and aggressively whisk it into the hot sauce. Because the butter is cold, it emulsifies into the liquid rather than melting into a greasy puddle, giving the sauce a velvety texture and a brilliant shine.
Beyond Gravy: The Hidden Versatility of Your New Favorite Tool
If you think this gadget is just going to sit in the back of your cabinet waiting for Thanksgiving to roll around, you are vastly underestimating its utility. A bottom-release fat separator is a weekday workhorse.
Liquid Gold: Effortless Clarified Butter
Clarified butter (or ghee) is incredible for high-heat searing because the milk solids—which burn at high temperatures—have been removed. Making it manually involves tedious skimming. Instead, melt a pound of butter in a saucepan, pour it into your fat separator, and let it rest. The water and white milk solids will sink to the bottom, while the pure, clear butterfat rises to the top. Just release the bottom waste layer into the trash, and keep the pure butterfat!
Crystal Clear Bone Broths and Consommés
If you love making homemade chicken stock or beef bone broth, this tool is mandatory. If you stop adding garlic first and instead focus on building a clean, defatted broth base, your soups will rival any high-end bistro. You can pour massive batches of hot stock through the separator to instantly remove the heavy layer of schmaltz or tallow before storing the broth in your fridge.
Rescuing Heavy Braising Liquids
When you braise short ribs, pork shoulder, or lamb shanks, the meat releases a staggering amount of fat into the braising liquid. Before you serve the dish, pour the braising liquid through the separator. You can instantly extract the heavy grease and pour the intensely flavored, reduced wine sauce right back over the meat.
Frequently Asked Questions About Fat Separators (Because I Know You’re Wondering)
What Size Separator Do I Actually Need?
Do not buy a tiny 2-cup separator. It sounds cute, but it is entirely useless when you are dealing with a 15-pound turkey or a massive Dutch oven full of braised short ribs. Always buy a 4-cup (1-liter) capacity separator. It gives the liquid plenty of vertical room to stratify properly, and it prevents you from having to work in annoying, messy batches.
Are They Really Dishwasher Safe?
If you buy a high-quality Tritan or borosilicate glass separator, yes, they are top-rack dishwasher safe. However, I highly recommend hand-washing the silicone stopper mechanism with hot, soapy water to ensure no residual grease gets trapped in the spring or the seal. Much like the reason your tomato sauce tastes metallic when cooked in reactive aluminum, your hot stock will taste like a chemical factory if you allow rancid fat to build up in the mechanical parts of your plastic gear.
What Do I Do With the Leftover Fat?
Do not pour it down your kitchen sink unless you enjoy paying exorbitant emergency plumbing bills. Rendered animal fat solidifies at room temperature and will violently clog your pipes. Either pour the fat into a disposable container and throw it in the trash, or—if it is high-quality bacon grease, duck fat, or chicken schmaltz—store it in a glass jar in the fridge to use for roasting potatoes later in the week.
The Final Verdict: Stop Working So Hard for Mediocre Results
Cooking should be an enjoyable, creative process, not a stressful battle against a puddle of grease. You do not have to settle for heavy, oily gravies, and you certainly do not have to spend twenty minutes hunched over a hot stove with a spoon, meticulously trying to skim microscopic fat droplets out of your dinner.
By understanding the basic science of liquid density and utilizing a tool designed to exploit it, you can elevate your home cooking instantly. Consider this bottom-release fat separator a mandatory chapter in your kitchen survival guide. It is inexpensive, incredibly satisfying to use, and it guarantees that all the time, money, and effort you put into your weekend roasts will actually shine through in the final sauce. Now stop reading, go get your gear sorted out, and start making pan sauces that actually taste as good as they look.