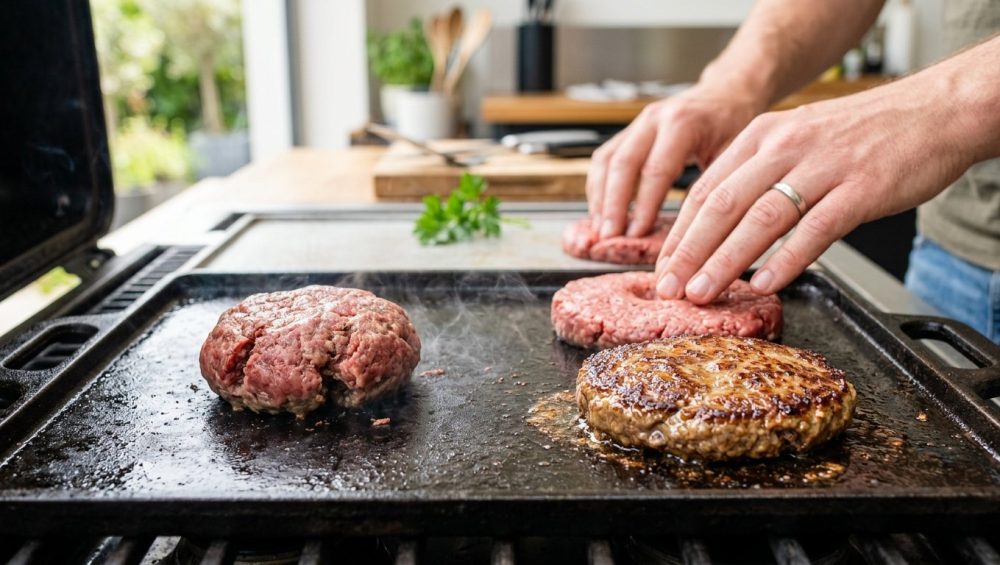
Picture this: It is a gorgeous Saturday afternoon. You have invited a few friends over, you went out of your way to buy the good ground beef from the local butcher, and you spent twenty minutes meticulously shaping wide, perfectly flat, restaurant-style patties. You gently lay them onto the hot grill or cast-iron pan, anticipating that glorious, mouth-watering sizzle. But within three minutes, tragedy strikes. You watch in absolute horror as your beautiful, wide patties violently contract, puffing up in the center until they resemble oversized, graying golf balls.
You are left with a thick, tough, dry meatball that stubbornly refuses to cover even half of the hamburger bun. It is the ultimate home-cooking humiliation. You take a bite, and it is 80% dry bread and 20% dense, chewy beef.
I see this happen all the time, and frankly, it breaks my heart (and my patience). As a home cook who has ruined more dinners than I care to admit before finally figuring out the science of the kitchen, I am here to tell you: this is not a personal failure. You do not lack some mystical culinary gene, and you certainly do not need a culinary degree to fix this. You are simply losing a battle against basic physics and biology.
Today, we are putting an end to the meatball burger. We are going to completely deconstruct the science of why meat shrinks, break down the cardinal sins you are committing during prep, and arm you with the foolproof, no-nonsense techniques to guarantee flat, juicy, edge-to-edge patties every single time. Grab a beverage, take a deep breath, and let’s get to work.
The Anatomy of a Burger Disaster: Why Your Patties Turn Into Meatballs
The Science of Protein Contraction (Myosin and Actin)
To understand how to stop a burger from shrinking into a puck, you first have to understand what ground beef actually is. Ground meat isn’t just a homogenous paste; it is a complex, chaotic matrix of chopped-up muscle fibers, fat, and connective tissue.
The primary structural components of these muscle fibers are two proteins called myosin and actin. In their raw, cold state, these proteins are relaxed and elongated. However, when you introduce them to heat—specifically when the internal temperature of the meat crosses the threshold of 130°F to 150°F—a drastic chemical change occurs. The heat causes the proteins to denature. They unfold and then aggressively bond together, contracting and shortening in length.
Imagine a loose, woven net. Now imagine grabbing all four corners of that net and yanking them tight. That is exactly what is happening on a microscopic level inside your burger. Because the outside edges of your patty are exposed to the highest heat first, the perimeter of the burger cooks and contracts before the center does. This creates a tightening, constricting ring around the still-raw middle of the patty. With nowhere else to go, the raw meat in the center is forced upward, creating that dreaded domed, puffy shape.
The Role of Fat and Moisture Loss
Protein contraction doesn’t just change the shape of the meat; it changes the volume. Raw ground beef is composed of roughly 60% to 70% water, depending on the grind and the cut. As the myosin and actin proteins contract and tighten like a microscopic corset, they violently squeeze the muscle fibers, wringing them out like a wet sponge.
This mechanical squeezing forces water and melting fat to escape from the patty. If your pan isn’t hot enough to immediately evaporate that escaping moisture, you end up steaming your ground beef in a sad, gray puddle of its own juices. This loss of mass is mathematically unavoidable. A standard patty will lose about 20% to 25% of its overall size during the cooking process. The goal isn’t to magically stop the meat from losing moisture—the goal is to control how that shrinkage affects the final geometry of the burger.
Connective Tissue and Collagen Shrinkage
If you are someone who insists on cooking your burgers well-done (a tragedy I will begrudgingly tolerate for the sake of food safety education, but will silently judge you for), you are triggering a second wave of shrinkage. Around 160°F, the connective tissue in the beef—primarily collagen—begins to shrink rapidly. This secondary contraction compounds the puck effect, turning an already domed burger into a dense, unyielding hockey puck. Understanding these temperature thresholds is the first step in outsmarting your food.
The Cardinal Sins of Burger Prep (What You’re Doing Wrong)
Overworking the Meat (The Meatloaf Effect)
Let’s get one thing straight: ground beef is not bread dough, and it is not modeling clay. One of the most common and devastating mistakes home cooks make is aggressively kneading, mixing, and tightly packing their burger meat.
When you overwork ground beef, you are physically forcing the myosin proteins to cross-link with one another before the meat even hits the pan. This is the exact technique used to make sausage and meatloaf, where a bouncy, tightly bound, sliceable texture is the goal. For a burger, that texture is an absolute nightmare. A perfect burger should have a loose, tender structure that yields effortlessly to the bite.
The more you handle the meat, the denser it becomes, and the more violently it will contract and dome when heated. You should handle the ground beef as if it were a fragile explosive. Gently coax it into a shape with light, airy pressure. Do not compress it into a diamond.
Salting Too Early (Curing vs. Seasoning)
Salt is a magical ingredient, but it is also a powerful chemical solvent. When salt comes into contact with raw meat, it immediately begins to dissolve the muscle proteins, drawing out moisture through osmosis and creating a sticky, tacky surface.
If you mix salt directly into your ground beef mixture before forming the patties, you are essentially curing the meat from the inside out. Just as salting greens too early will completely destroy the crisp, refreshing texture of a salad, salting ground beef prematurely will chemically alter the protein structure, resulting in a rubbery, sausage-like puck.
The golden rule of burger seasoning is simple: keep the salt away from the meat until the very last second. Form your naked, unseasoned patties. Only apply a generous shower of kosher salt to the exterior surface of the meat immediately before it hits the hot pan or grill.
The Room Temperature Myth
You have probably read pretentious culinary advice telling you to let all your meat rest at room temperature for an hour before cooking to “take the chill off.” While that advice is highly debatable even for thick steaks, applying it to ground beef is a catastrophic error.
The fat in your ground beef needs to remain cold and solid until the exact moment it hits the searing heat of your pan. If you let the meat sit on the counter, the ambient heat of your kitchen and the warmth of your hands while shaping will cause the fat to soften and smear. Smeared fat melts and renders out of the patty far too quickly during cooking, leaving you with a dry, crumbly burger that shrinks excessively. Keep your ground beef in the refrigerator until the very second you are ready to form the patties, and put the formed patties back in the fridge if your pan isn’t hot yet.
The Foolproof Fixes: How to Keep Your Burgers Flat and Juicy
The Legendary “Dimple Trick”
If you take absolutely nothing else away from this masterclass, remember this single, life-saving technique. The “dimple trick” is the ultimate, scientifically backed defense against the meatball effect.
After you have gently formed your patty, take your thumb or the back of a spoon and press a shallow indentation directly into the center of the meat. The dimple should be about the diameter of a golf ball and roughly a quarter-inch to a half-inch deep.
Why does this work? It’s pure structural engineering. As we discussed earlier, the edges of the burger cook and contract first, forcing the raw center to push upward. By creating a depression in the center of the raw patty, you are providing negative space. When the edges shrink and the center bulges, it simply pushes up into the empty space of the dimple, leveling out perfectly. By the time the burger is fully cooked, the dimple will have vanished, leaving you with a flawlessly flat, edge-to-edge patty that sits beautifully on the bun.
The Smash Burger Method
If you want to completely bypass the anxiety of shrinking, doming patties, you need to embrace the smash burger. This technique doesn’t just minimize shrinkage; it actively uses mechanical force to overpower the biology of protein contraction.
Instead of forming a flat patty, you gently roll your cold ground beef into a loose, airy meatball (about 2.5 to 3 ounces). You place this cold ball of meat onto a ripping hot, ungreased cast iron or carbon steel surface. Immediately, you place a piece of parchment paper over the meat and use a heavy, rigid spatula (or a dedicated burger press) to smash the meat violently flat against the metal.
Because you are flattening the meat before the internal proteins have a chance to heat up and contract, you force the beef into a wide, thin shape. Within seconds, the intense heat triggers the Maillard reaction, cementing the meat to the pan and locking in that flat structure. The proteins literally cannot contract into a puck because they are anchored to the cooking surface by a crispy, caramelized crust. It is the ultimate anti-shrinkage hack.
Optimal Patty Sizing and Shaping Techniques
Let’s talk about geometry. Meat shrinks when cooked. This is an unavoidable fact of thermodynamics. If you form a raw patty that is exactly the same diameter as your hamburger bun, you are guaranteeing a final product that is far too small.
To achieve that highly coveted, restaurant-style aesthetic where the meat reaches the very edges of the bun (or even overhangs slightly), you must overcompensate during the shaping phase. Always form your raw patties to be roughly 20% to 25% wider than the bun you intend to serve them on. If your bun is four inches wide, your raw patty needs to be at least five inches wide. Combine this oversized shaping with the dimple trick, and you will achieve perfect bun-to-meat harmony every single time.
The Meat Matters: Choosing the Right Grind and Fat Ratio
The Golden Ratio: 80/20 Chuck
You cannot build a structurally sound, juicy burger out of the wrong raw materials. The lean-to-fat ratio of your ground beef is arguably the most critical variable in the entire process. Fat provides flavor, moisture, and vital heat insulation that protects the muscle fibers from drying out.
Do not buy 90/10 or 93/7 ground beef for burgers. That ultra-lean meat is fine for a Tuesday night meat sauce, but in a burger, it is a dry, crumbly disaster waiting to happen. Without sufficient fat, the proteins contract violently, squeezing out what little moisture exists, leaving you with a dusty, choking hazard of a patty.
Conversely, a 70/30 blend is incredibly flavorful but highly volatile. That much fat will render out rapidly in the pan, causing massive shrinkage and leaving your burger swimming in a pool of grease.
The undisputed, scientifically proven sweet spot is 80% lean to 20% fat. An 80/20 blend of ground chuck provides the perfect equilibrium. It has enough fat to continuously baste the meat from the inside out as it cooks, ensuring a juicy bite, but enough lean muscle to maintain structural integrity and minimize aggressive shrinkage.
Why Pre-Formed Supermarket Patties Are a Scam
I will say this clearly: stop buying those pre-formed, shrink-wrapped stacks of burger patties from the supermarket meat case. They are a trap designed for lazy cooks, and they are inherently flawed.
These commercial patties are extruded and stamped out by heavy industrial machinery. They are massively over-compressed, forcing the proteins into a dense, tightly bound matrix before you even open the package. Because they are so densely packed, they are virtually guaranteed to shrink, dome, and toughen the moment they hit the heat. Take the extra sixty seconds to buy loose ground beef and shape it yourself.
Grinding Your Own (For the Weekend Overachievers)
If you want to ascend to absolute burger nirvana and you have some extra time on a Sunday afternoon, you need to start grinding your own meat. Pre-ground supermarket beef is a mystery bag; you rarely know exactly what cuts went into the grinder, and the meat has been oxidizing in a plastic tube for days.
By buying whole cuts of beef and grinding them yourself (either with a dedicated meat grinder attachment or by pulsing the meat carefully in a food processor), you control the texture, the fat ratio, and the flavor profile. The holy grail of custom burger blends is a mix of equal parts Chuck (for classic beefy flavor and fat), Brisket (for deep, rich, almost sweet notes), and Short Rib (for unmatched marbling and tenderness). Grinding your own meat allows you to keep the grind coarse and loose, which drastically reduces protein contraction and results in a patty that practically melts in your mouth.
Temperature Control and Cooking Techniques
The Searing Process and the Maillard Reaction
A burger without a dark, crispy, deeply caramelized crust is just a sad, boiled meat sandwich. To achieve that crust, you need intense, unrelenting heat to trigger the Maillard reaction—a complex chemical process where amino acids and reducing sugars react under high temperatures to create hundreds of new flavor compounds.
This reaction does not occur in a lukewarm pan. While the cold pan searing technique is a brilliant, gentle method for rendering the fat cap on a delicate piece of fish, a burger demands thermal violence. Your cooking surface needs to be ripping hot—ideally around 400°F to 450°F—before the meat ever touches it. If the pan isn’t hot enough, the meat will slowly release its juices, boiling the patty instead of searing it, resulting in a gray, rubbery puck.
Flip Once or Flip Often? The Great Debate Settled
For decades, backyard grill masters have peddled the arrogant myth that a burger should only ever be flipped exactly once. They claim that flipping it multiple times “ruins the crust” or “dries out the meat.” Science has thoroughly debunked this nonsense.
Flipping your burger frequently—every 30 to 45 seconds—is actually the superior cooking method. When you flip frequently, you are creating a simulated rotisserie effect. Instead of blasting one side of the patty with intense heat while the top side cools down, you are driving heat gently and evenly into the center of the meat from both directions. This frequent flipping cooks the burger up to 30% faster, reduces the harsh temperature gradient that causes severe protein curling, and still develops a magnificent crust. Just make sure you are using a proper spatula so you don’t tear the meat.
Resting the Meat (Yes, Burgers Need It Too)
We all know that a thick ribeye needs to rest before slicing, but home cooks rarely apply this logic to burgers. This is a mistake.
Unlike a delicate baking project where letting the mixture rest is required before cooking, burger meat should be cooked immediately after shaping. However, after the burger comes off the heat, it desperately needs a timeout. During cooking, the intense heat forces the moisture to the center of the patty. If you bite into the burger the second it comes off the grill, all those pressurized juices will immediately spill out onto your plate (and down your forearms), leaving the actual meat dry.
Let the cooked patties rest on a wire rack or a warm cutting board for just three to five minutes. This brief pause allows the muscle fibers to relax slightly and the internal temperature to equalize, which thickens the juices and allows them to redistribute evenly throughout the meat.
A Brutally Honest Word on Kitchen Gear (Ditch the Toxic Pans)
The Danger of Cheap Non-Stick for High-Heat Searing
I have absolutely zero patience for cheap, disposable, toxic kitchenware. If you are attempting to sear a burger in a flimsy, lightweight non-stick skillet, you need to stop immediately.
Traditional non-stick coatings (PTFE/Teflon) are designed for gently scrambling eggs or flipping pancakes on medium-low heat. They are fundamentally incapable of handling the 400°F+ temperatures required to properly sear beef. When you heat a cheap non-stick pan to searing temperatures, the chemical coating begins to break down, degrading the surface and releasing toxic, invisible fumes into your kitchen.
If you are still cooking your family’s dinners in heavily scratched, peeling non-stick pans, you are not only guaranteeing a terrible, crustless burger, you are actively exposing your food to mystery chemicals. Throw them in the trash where they belong.
Why Cast Iron and Carbon Steel Are Your Best Friends
To conquer the burger, you need a cooking surface with massive thermal mass—a material that can absorb a tremendous amount of heat and hold onto it stubbornly when cold meat is introduced.
A thick, well-seasoned cast iron skillet is the undisputed king of the indoor burger. When you drop a half-pound of 38°F ground beef into a cast iron pan, the temperature of the metal barely flinches. It maintains that aggressive heat, instantly searing the meat and preventing the juices from leaking out.
If cast iron is too heavy for your wrists, your next best option is a heavy carbon steel skillet. It offers the exact same heat retention and searing power as cast iron, but with a slightly lighter, more maneuverable profile. Both of these materials, once properly seasoned, will outlive you and will produce a crust that a non-stick pan could only dream of.
The Essential Tools for Burger Perfection
A craftsman is only as good as their tools. Stop making your life harder by using the wrong equipment.
First, stop guessing when your meat is done. Poking the patty with your index finger and comparing it to the fleshy part of your palm is a parlor trick, not a precise culinary method. Stop risking an overcooked puck or a foodborne illness by trusting a cheap meat thermometer that takes twenty seconds to stabilize. Invest in a high-quality, instant-read digital probe thermometer. Target 130°F to 135°F for a juicy medium-rare, or 140°F to 145°F for medium.
Second, your flipping tool matters. If you use a thick, blunt, plastic spatula, you will inevitably bulldoze your beautiful, hard-earned crust right off the meat, leaving it stuck to the pan. You need an ultra-thin, flexible, sturdy slotted fish turner. The sharp metal edge slides effortlessly under the caramelized crust, lifting the entire patty intact.
Finally, when you are slicing your heirloom tomatoes and crisp onions for toppings, do it on a substantial, end-grain wood block. Stop using those rock-hard, cheap bamboo cutting boards that destroy the edge of your chef’s knife after three uses. Respect your ingredients, and respect your blades.
Troubleshooting Common Burger Woes
The Bun-to-Meat Ratio Crisis
You can execute every single meat technique flawlessly, but if you put that perfect patty on a garbage bun, you have failed. The bun is not just a meat-delivery vehicle; it is a crucial textural component.
A cold, dry bun will instantly absorb the resting juices of your burger, turning into a soggy, disintegrating mess in your hands. You must toast your buns. Apply a thin layer of softened butter or mayonnaise to the cut sides of the bun and toast them face-down in a skillet until golden brown. This creates a hydrophobic, crispy barrier that repels the meat juices, maintaining the structural integrity of the sandwich from the first bite to the last.
Cheese Melt Failures
There is nothing sadder than a beautiful burger topped with a stiff, cold, unmelted square of cheese. Do not just lay the cheese on the patty, turn off the heat, and hope for the best.
To achieve that glossy, cascading, perfectly draped melt, you need to harness the power of steam. During the final 45 seconds of cooking, place your cheese on the patty. Immediately splash a tablespoon of water directly onto the hot surface of the pan (away from the meat itself) and quickly cover the pan with a tight-fitting lid or a metal mixing bowl. The water will instantly vaporize into steam, enveloping the burger in intense, humid heat that melts the cheese flawlessly in seconds without overcooking the beef.
At the end of the day, making a mind-blowing, restaurant-quality burger in your own kitchen is not about having a commercial flat-top griddle or a secret, closely guarded spice rub. It is one of those foolproof daily cooking secrets that relies entirely on understanding how ingredients react to heat and pressure.
You don’t need a culinary degree. You just need to respect the protein, manage your temperatures, keep your fat cold, implement the dimple trick, and use high-quality, non-toxic cookware that can actually handle the heat. Cooking is just applied physics with a much better reward at the end. Stop settling for tough, shrinking meatballs on a bun. Take control of your skillet, trust the science, and go smash some burgers. Your weekend dinner guests will thank you.


