Listen, I love you, but if you invite me over for a weekend brunch and serve me a bowl of dusty, fragmented, tragically crumbly oats, we are going to have a serious conversation. Weekdays are for surviving. Weekdays are for tossing whatever sad ingredients you have left in the fridge into a pan and praying it tastes decent enough to eliminate kitchen chaos before your 9 AM meeting. We rely on aggressive efficiency from Monday to Friday. But the weekend? The weekend is a sacred space. It is when we put on an apron, pour a painfully large cup of coffee, and act like the culinary perfectionists we were born to be.
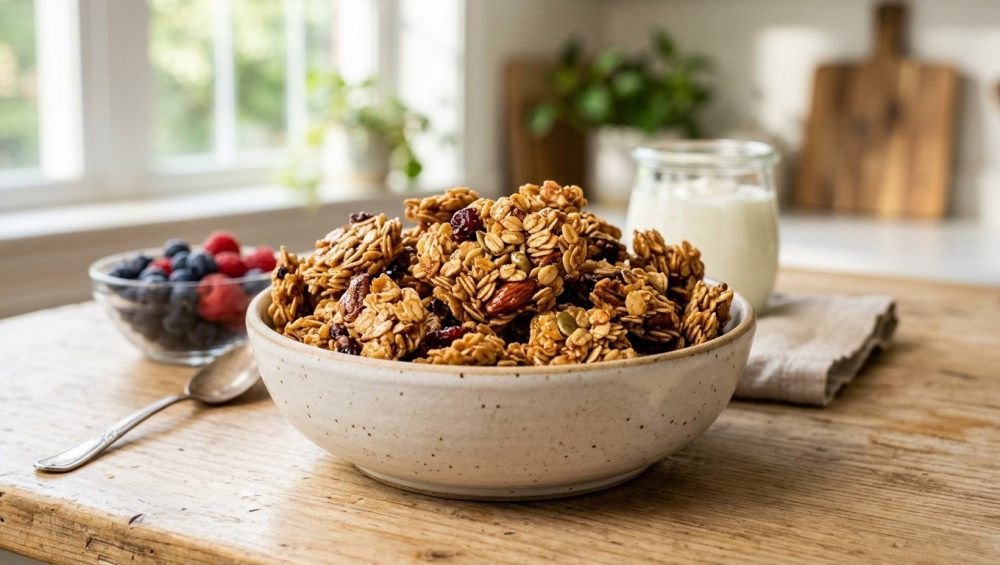
And nothing screams “I have my life completely together” quite like a sprawling, aesthetically flawless DIY yogurt bar anchored by a massive batch of homemade, bakery-style clustered granola.
The problem is that most home cooks operate under the delusion that making granola is just a matter of tossing oats, random nuts, and whatever sweeteners are lurking in the pantry into an oven and hoping for the best. That is exactly why eighty-nine percent of homemade granola recipes yield sad, loose oat dust instead of those massive, structural clusters that practically require a hammer to break apart. You do not need a culinary degree to make mind-blowing food, but you absolutely must respect the physics of baking.
The Great Granola Lie: Why Most Homemade Batches Crumble
The internet is full of lies, but the biggest culinary lie of the modern era is that granola is just “toasted cereal.” It is not. Granola is a highly dynamic colloidal system where oats act as porous starch scaffolds, oils serve as plasticizers and heat-transfer media, and sweeteners function as glass-forming agents.
If you already know the magic of toasting your oats first for your morning porridge to develop a deep, nutty flavor, you are halfway there. But getting those oats to bind together into giant, satisfying chunks requires a completely different set of rules. Granola failure is never a matter of bad luck; it is a predictable outcome of three intersecting physical phenomena: incomplete starch gelatinization, insufficient protein cross-linking, and premature fat phase separation.
When you follow a standard, poorly researched recipe, you are usually instructed to mix your dry ingredients with a meager splash of maple syrup and bake it at 350°F. This results in a loose, dry gravel that immediately disintegrates the moment it touches your yogurt. To build real clusters, we have to look at the exact ratios of carbohydrates to fats, the viscosity of our binding agents, and the precise thermal dynamics of our ovens.
The Science of Sugar Binding: Carbohydrate-to-Fat Ratios
I have zero patience for pretentious chef-speak, but if you want massive, structural clusters, we need to talk about the molecular chemistry of edible adhesives. Granola relies on sugar glasses and protein crosslinks to bind the ingredients together. If you have ever cried in frustration because your spices turn into hard bricks in the pantry due to ambient humidity, you already understand how moisture interacts with starches and sugars to form an unbreakable cement. We are going to harness that exact binding power deliberately.
For the perfect cluster, you need a precise baker’s percentage. The golden ratio for clustered granola is roughly 100% dry base (oats and nuts), 50% liquid sweetener, and 25% fat by weight. In practical home-kitchen terms, this looks like 3 cups of old-fashioned rolled oats (about 255 grams), 1/2 cup of a viscous liquid sweetener (like honey or maple syrup), and 1/3 cup of a fat that is solid at room temperature (like virgin coconut oil).
Too much liquid sweetener, and you end up with a soggy, chewy mess that never properly dehydrates in the oven, creating an environment ripe for microbial growth. Too much fat, and the lipids coat the oat starches so thoroughly that the sugars cannot properly adhere, leaving you with a greasy crumble that refuses to stick together. The fat is crucial—it acts as a plasticizer that keeps the granola crisp rather than rock-hard—but it must be balanced perfectly against the sticky carbohydrates.
The Magic of Viscous Binders (The Edible Glue)
While honey and maple syrup provide the foundational sugar glass, they often need structural support to create those legendary, fist-sized clumps. Oats contain 5 to 7 percent beta-glucan, a water-soluble fiber that forms viscous gels only when heated above 145°F and held there for at least ninety seconds. At room temperature, raw oats contribute absolutely negligible binding. This is why “no-bake” granola bars always fall apart unless they are glued together with a terrifying amount of industrial corn syrup.
To give your granola the ultimate structural integrity, you need a secondary binder. Enter the egg white. The protein in a single whisked egg white denatures at precisely 158°F, creating a stable, invisible network—an edible glue—that holds the oats together without making the mixture cloyingly sweet. If you are strictly plant-based or simply allergic to eggs, you are not out of luck. A few tablespoons of all-purpose flour, almond flour, or even a scoop of sourdough discard mixed into the wet ingredients will provide powerful starch gelatinization. As the moisture cooks out, these starches undergo retrogradation, absorbing excess liquid and binding the oats together like culinary cement.
Temperature Control: Mastering the Maillard Reaction
Most internet recipes will recklessly tell you to bake your granola at 350°F or even 375°F. This is a trap, and it is ruining your breakfast. Baking at 350°F triggers rapid, violent surface dehydration. The outside of the oat clusters burns while the inside steams, leaving you with a bitter, uneven mess.
You need to bake your granola at 275°F to 300°F. Low and slow is the only acceptable method in this kitchen. We are looking for controlled evaporation kinetics and a gentle, even Maillard reaction. The Maillard reaction is a chemical reaction between amino acids and reducing sugars that gives browned food its distinctive, complex flavor. Because honey and maple syrup contain a high concentration of simple reducing sugars (fructose and glucose), this browning reaction happens much faster than it would with complex starches alone. This makes the mixture incredibly prone to scorching if the heat is too high.
Furthermore, the type of fat and the timing of your mix-ins matter deeply. If you are using a high-quality extra virgin olive oil for a savory-sweet flavor profile—and please tell me you are storing it properly because you need an opaque dispenser to prevent rapid oxidation—it acts as a vital heat-transfer medium that ensures the granola crisps evenly.
You must also consider the oxidation temperatures of your nuts. Walnuts oxidize at 265°F, turning bitter and rancid if exposed to high heat for too long. Almonds require 285°F for optimal Maillard development. This means that throwing all your delicate nuts and seeds into the raw oat mixture at the very beginning is a rookie mistake. Toast your oats and robust nuts first, and fold in the more delicate seeds during the final fifteen minutes of baking.
The Danger of Case Hardening
When you blast granola with high heat, you cause a phenomenon known in food science as case hardening. Infrared thermography testing confirms that in a 350°F oven, the top 0.5 millimeters of a granola mixture will lose 90% of their moisture within the first twelve minutes. This aggressive heat immediately seals the exterior pores of the oats, trapping internal moisture inside the cluster.
When the granola eventually cools, those microscopic internal steam pockets collapse, leaving you with dense, gummy interiors and brittle, over-browned exteriors. By dropping the oven temperature to a gentle 275°F, you allow the internal moisture to slowly and evenly evaporate. The water activity (aw)—the measure of unbound water available for textural degradation—steadily drops to the optimal shelf-stable target of ≤ 0.55 without triggering premature browning or case hardening.
The “Cool Undisturbed” Protocol: Starch Retrogradation in Action
This is the step where ninety percent of you sabotage your own hard work. You pull the pan out of the oven, it smells like toasted cinnamon and caramelized maple heaven, and you immediately grab a spatula and start aggressively stirring it to “prevent sticking.” Stop touching it! Put the spatula down and step away from the baking sheet.
Cooling undisturbed is the single most critical phase of cluster formation. When the granola comes out of the oven, the sugars are still in a liquid, molten state. They have not yet undergone glass transition. The starches are fully gelatinized, and the egg white proteins are still setting. If you agitate the pan while the mixture is still above 140°F, you will violently shatter the fragile sugar and protein bonds before they have a chance to solidify.
If your goal is to host a relaxed dinner party or a stress-free weekend brunch, you need food that works for you, not against you. Let the granola cool completely, absolutely undisturbed on the pan for a minimum of 90 minutes. Yes, an hour and a half. Do not rush this. As the temperature drops to ambient room levels, the liquid triglycerides in your oils crystallize, the sugars harden into a rigid glass, and the starches undergo final retrogradation. Only when the pan is completely cool to the touch should you go in with your hands and fracture the massive, solid sheet of oats into those glorious, monolithic, bakery-style chunks.
The No-Go Rule on Toxic Gear: What You Actually Need
Now, we need to have a very serious talk about your equipment. I will preach about banishing toxic kitchen gear until I am blue in the face. You can perfectly execute every single scientific principle of carbohydrate binding, but if you bake your beautiful granola on a flimsy, scratched, mystery-metal non-stick baking sheet from a decade ago, you are committing a culinary crime.
Cheap non-stick coatings degrade at high temperatures, peel into your food, and leach forever chemicals into your meticulously sourced organic oats. We do not tolerate toxic, poorly manufactured cookware in this kitchen. You need durable, safe, high-thermal-mass equipment to achieve professional results.
The Baking Sheet Manifesto
Those cheap, thin supermarket baking pans warp violently under heat. When a pan warps and pops in the oven, it causes incredibly uneven heat distribution. The corners will burn to a crisp while the center remains a soggy, undercooked mess. If you are constantly wondering why your baking sheets keep warping the second they hit 300 degrees, it is because they completely lack the thermal mass required to absorb and distribute heat evenly.
You must invest in a commercial-grade, heavy-gauge bare aluminum half-sheet pan. They cost barely twenty dollars at a restaurant supply store, they will outlive you, and they will conduct heat perfectly evenly across your entire batch of granola, ensuring every single cluster caramelizes at the exact same rate.
The Parchment vs. Silicone Debate
Then there is the issue of the baking surface itself. Do not use silicone baking mats for granola. I have extensively covered the flaw in silicone baking mats before—they act as powerful thermal insulators. While they are great for preventing delicate macarons from burning, they trap moisture underneath the food and prevent the bottom of your granola from properly crisping and caramelizing.
Instead, line your heavy-duty aluminum pan with high-quality, unbleached parchment paper. It is safe, non-toxic, provides a perfect non-stick surface, and allows for proper conductive heat transfer.
Furthermore, when you are pressing your raw granola mixture into the pan before baking (a crucial step to minimize interstitial airspace and force the oats into binding contact), use a metal spatula or a flat-bottomed measuring cup. If you use a cheap, degraded silicone tool that has absorbed months of dishwasher detergent, your silicone spatulas taste like soap and will absolutely transfer that vile, chemical flavor to your delicate oats. Stick to stainless steel or solid wood.
Building the Ultimate Cozy Yogurt Bar
Now that you have massive, structural clusters of scientifically-perfected granola, it is time to build the yogurt bar. This is the ultimate, foolproof hack for hosting mindful gatherings. The beauty of a communal yogurt bar is that you do one hundred percent of the heavy lifting the day before. On the morning of your gathering, you are not sweating over a hot stove flipping pancakes to order, desperately trying to time the bacon, or apologizing for burnt toast. You are simply setting out beautiful ceramic bowls, pouring coffee, and actually enjoying the company of your guests.
Staging and Flavor Pacing
A proper yogurt bar requires contrasting textures, temperatures, and flavor pacing. You need a large, chilled bowl of full-fat, plain Greek yogurt. Do not use the watery, fat-free nonsense—we are treating ourselves, and the lactic tang of full-fat yogurt is required to cut through the rich sweetness of the granola. To keep the yogurt at a food-safe, refreshing temperature during a long, lazy brunch, nest the serving bowl inside a slightly larger bowl filled with crushed ice.
Next, prepare your fruit. Fresh berries are fine, but macerated berries are a revelation. The night before, toss strawberries and blueberries with a tiny splash of lemon juice and a pinch of sugar. This process breaks down the cellular walls of the fruit, releasing natural pectins that thicken into a glossy, vibrant syrup overnight.
Set out small, elegant jars of high-quality local honey or dark maple syrup for drizzling, a bowl of toasted coconut flakes, and perhaps some chia seeds or cacao nibs for bitterness. Finally, place your centerpiece on the table: a massive, overflowing bowl of your perfect, clumpy granola. Provide small serving tongs specifically for the granola so your guests can carefully select the largest, most impressive clusters without crushing them.
The Master Recipe: Bakery-Style Clustered Granola
This is the definitive, science-backed method for flawless clusters. Follow the ratios, respect the temperatures, and for the love of all things culinary, do not touch the pan while it cools.
The Dry Base:
- 3 cups (255g) old-fashioned rolled oats (Do not use quick oats; they lack the structural integrity to form clusters).
- 1 cup (140g) raw almonds or pecans, roughly chopped.
- 1/4 cup (30g) all-purpose flour or almond flour (Our starch gelatinization binder).
- 1 teaspoon ground cinnamon.
- 1/2 teaspoon fine sea salt (Crucial for flavor balancing).
The Wet Binder:
- 1/3 cup (70g) virgin coconut oil, melted (Our solid-at-room-temperature plasticizer).
- 1/2 cup (120g) pure maple syrup or honey.
- 1/4 cup (50g) tightly packed dark brown sugar (Provides molasses for deeper Maillard browning).
- 1 teaspoon pure vanilla extract.
- 1 large egg white, vigorously whisked until frothy (Our protein cross-linking glue).
The Post-Bake Add-Ins:
- 3/4 cup dried tart cherries or cranberries. (Never bake your dried fruit. It will carbonize into bitter, tooth-shattering rocks. Always fold it in after cooling).
The Execution:
- Preheat your oven to 275°F (135°C). Line a heavy-gauge bare aluminum half-sheet pan with unbleached parchment paper.
- In a large mixing bowl, thoroughly combine the oats, chopped nuts, flour, cinnamon, and salt.
- In a separate medium bowl, whisk together the melted coconut oil, maple syrup, brown sugar, and vanilla extract until the sugar is fully dissolved and the mixture is entirely homogenized.
- Pour the wet syrup mixture over the dry oat mixture. Use a sturdy wooden spoon or your hands to mix aggressively. You want every single oat flake completely coated in the fat and sugar glass.
- Once the mixture is thoroughly coated, pour in the frothy egg white. Fold it in gently but thoroughly until the mixture feels uniformly damp and sticky.
- Transfer the entire mixture to your parchment-lined baking sheet. Here is the secret: use a flat-bottomed measuring cup or a stainless steel spatula to press the mixture down firmly into an even, tight, compact layer. You are essentially making one giant oat cookie. Minimizing the interstitial airspace is what forces the clusters to bond.
- Bake on the center rack for 45 to 55 minutes. At the 25-minute mark, you may gently rotate the pan 180 degrees to ensure even heat distribution, but do not stir the granola. Leave the massive sheet intact.
- Remove the pan from the oven when the edges are a deep, golden brown and the center feels slightly dry to the touch. It will still feel soft—this is normal. The sugar glasses have not set yet.
- The Golden Rule: Place the pan on a wire cooling rack and walk away. Do not touch it. Do not stir it. Do not look at it with a spatula in your hand. Let it cool completely undisturbed for a minimum of 90 minutes.
- Once the pan is entirely cool to the touch, use your hands to fracture the giant sheet into massive, satisfying clusters. Fold in your dried fruit.
- Store in an airtight glass container at room temperature. Ensure the granola is 100% cool before sealing, or the trapped condensation will raise the water activity and instantly destroy your hard-earned clusters.
Mastering this single recipe will fundamentally change how you host weekend mornings. You are no longer a frantic cook desperately trying to manage four different pans on a Sunday. You are a prepared, serene host offering a stunning, scientifically flawless yogurt bar. Now pour yourself that coffee, set out the bowls, and enjoy your weekend. You’ve earned it.


