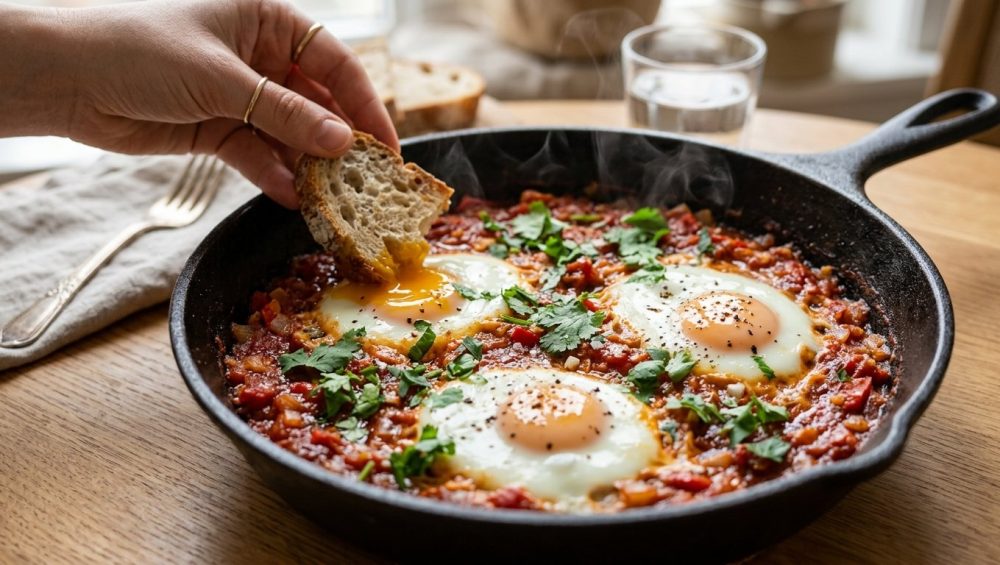
Picture this: It is Sunday morning, the coffee is brewing, and you have invited a few friends over for a communal, rustic brunch. You want to serve something visually stunning, interactive, and undeniably impressive. You decide on shakshuka—that glorious, bubbling skillet of spiced, crushed tomatoes studded with perfectly poached eggs. You envision your guests tearing off hunks of warm, crusty bread, dipping them into the pan, and being rewarded with a river of liquid gold as the yolks break. It is a beautiful fantasy.
But then, reality strikes. You bring the skillet to the table. The first piece of bread goes in, and instead of a luxurious, runny yolk, your guest hits a solid, chalky yellow golf ball. Meanwhile, the egg whites surrounding that overcooked yolk are somehow still translucent, snotty, and completely raw. You have officially served a pan of acidic tomato stew topped with ruined eggs.
As a culinary blogger and your resident sassy sous-chef, I see this tragedy happen every single weekend. Home cooks are constantly frustrated by the paradox of the shakshuka egg. How can the yolk be hard as a rock while the white remains a liquid mess? If you want to avoid the seven rookie kitchen mistakes that turn weekend entertaining into a stressful nightmare, you need to stop crossing your fingers and start understanding the science of your skillet. You do not need a culinary degree to make mind-blowing food, but you do need to understand how heat, acid, and protein interact in a pan. Shakshuka is the ultimate culinary flex when you barely know how to cook but still want to present a show-stopping, interactive meal to your friends. But to master it, we have to talk about the science of the egg.
The Anatomy of a Shakshuka Tragedy
To understand why your shakshuka eggs are betraying you, we have to look at the biological makeup of the egg itself. An egg is not a single, uniform ingredient; it is a complex structure made of two entirely different components that react to heat in completely different ways.
The Diva Whites and the Stubborn Yolks
Egg whites (the albumen) are primarily composed of water and a specific set of proteins, most notably ovotransferrin and ovalbumin. These proteins are incredibly sensitive to temperature. The whites begin to coagulate and turn opaque at around 140°F (60°C) and will fully set by the time they reach 149°F (65°C) [1].
The yolks, on the other hand, contain more fat and a different protein structure. They do not even begin to thicken until they hit 149°F (65°C), and they will not turn into that dreaded, chalky, crumbly texture until they reach about 158°F to 160°F (70°C to 71°C) [1].
Do you see the problem here? The window of perfection is incredibly tiny. You have a mere nine-degree margin of error. You need the entire egg white to reach 149°F so it sets, but you absolutely cannot let the yolk cross the 158°F threshold. When you simply crack an egg into a pan of hot sauce and leave it exposed to the open air, the bottom of the egg is subjected to intense, direct heat from the simmering tomatoes, while the top of the egg is exposed to the cool, ambient air of your kitchen. By the time the ambient air manages to cook the top of the egg white, the bottom of the yolk has already surpassed 160°F and turned into dry chalk. This is the exact same chemical breakdown that makes your scrambled eggs leak water onto the plate when you subject them to uncontrolled, aggressive heat.
The Invisible Enemy: Tomato Acidity
As if the temperature differential was not enough of a headache, we have to factor in the environment the egg is cooking in. Tomatoes are highly acidic, typically registering a pH level between 4.3 and 4.9 [2]. In the culinary world, acid is a powerful tool. It brightens flavors, tenderizes tough cuts of meat, and crucially, it drastically lowers the temperature at which proteins denature and coagulate.
When you drop a raw egg into a bubbling, acidic tomato sauce, the proteins in the egg white that are in direct contact with the sauce experience a rapid, violent shock. The acid forces them to seize and set almost instantly. Meanwhile, the top of the egg, which is safely above the sauce line, remains raw. This acidic environment halts the softening process of other ingredients, a tragedy similar to adding tomatoes too early when simmering a pot of dried legumes. The bottom cooks at warp speed, the top does nothing, and the yolk is caught in the crossfire. We have to change the thermodynamics of the pan to fix this.
The Pan Dictates the Brunch (And Why Yours Might Be Toxic)
Before we even talk about chopping an onion, we need to have a serious conversation about the vessel you are using to cook this dish. I have zero patience for pretentious chef-speak, but I have even less patience for cheap, toxic kitchenware that actively ruins your food and your health.
The “Forever Chemical” Nightmare
If you are planning to simmer a highly acidic tomato sauce for thirty minutes and then serve it directly from a scratched, peeling, ten-dollar non-stick Teflon pan, I am going to have to ask you to step away from the stove. Traditional non-stick coatings are made using PFAS (per- and polyfluoroalkyl substances), notoriously known as “forever chemicals” [3]. When these cheap pans are scratched by metal utensils, or when they are heated beyond their safe threshold, the chemical bonds begin to break down.
Simmering a highly acidic tomato base in a compromised non-stick pan is a recipe for disaster. The acid eats away at the micro-scratches, leaching those toxic synthetic compounds directly into your beautiful brunch [4]. I refuse to let you serve your friends a side of polymer fumes. If you buy cheap Teflon, you will inevitably discover the real reason those pans are losing their slip after just a few months of use. The coating degrades, the pan becomes a sticky nightmare, and your food absorbs the chemical fallout. Throw the scratched pan in the trash where it belongs.
The Only Acceptable Cookware Choices
For a proper shakshuka, you need a pan with substantial thermal mass. Thermal mass refers to a material’s ability to absorb, store, and evenly distribute heat. When you drop six cold eggs into a pan of simmering sauce, the temperature of that sauce is going to plummet. A thin, cheap aluminum pan will lose all its heat immediately, halting the cooking process and ruining the texture of the sauce.
You need either a high-quality, fully-clad stainless steel skillet or an enameled cast iron braiser. Enameled cast iron is the undisputed king of the shakshuka. The heavy iron core retains heat beautifully, ensuring a steady, gentle simmer, while the glass-like enamel coating provides a non-reactive surface that will not leach metallic flavors into your acidic tomatoes. If you only have raw, unenameled cast iron, you can use it, but be warned: simmering highly acidic tomatoes for an extended period can strip the hard-earned seasoning right off your pan and impart a slightly tinny, metallic taste to the food. Stick to stainless or enameled cast iron for the best results.
Building the Foundation: A Masterclass in the Sauce
A great shakshuka is not just hot salsa with eggs cracked into it. It is a deeply developed, heavily spiced, reduced aromatics base that commands attention. Weekday cooking is all about shortcuts, but weekend cooking is where we take our time and build flavor from the ground up.
The Allium Base and the Maillard Reaction
We start with onions and bell peppers. Do not just roughly chop them and throw them into a cold pan. Dice them uniformly so they cook at the same rate. Heat a generous glug of high-quality extra virgin olive oil in your skillet over medium heat. Add the onions and peppers and let them sweat. You are not looking to aggressively brown them; you want to slowly coax out their natural sugars until they are soft, translucent, and deeply sweet. This process takes time—usually about ten to twelve minutes.
Once the onions and peppers are soft, it is time for the garlic. Do not add the garlic at the beginning with the onions. Garlic cooks much faster than onions, and scorched, bitter garlic will instantly ruin the entire dish. This is precisely why your garlic always burns when you toss it into a screaming hot pan without thinking. Add the minced garlic during the last minute of the vegetable sauté, just until it becomes fragrant.
The Art of the Spice Bloom
Now comes the secret that separates bland, amateur shakshuka from restaurant-quality brilliance: the spice bloom. You are going to add your ground cumin, coriander, smoked paprika, and perhaps a pinch of cayenne pepper directly to the oily, oniony mixture. Do not wait to add the spices until after you pour in the tomatoes.
Spices contain volatile flavor compounds that are fat-soluble, meaning their true depth and aroma are only released when they are heated in fat. Do not skip the crucial step of blooming them in oil to unlock their fat-soluble flavor compounds. Stir the spices into the oil and vegetables for about sixty seconds. The mixture will look like a dark, muddy paste, and your kitchen will suddenly smell like a bustling spice market in the Levant. You can utilize the culinary magic of turning burnt bits into sauce by deglazing the pan with a splash of broth or wine if the spices begin to stick to the bottom.
The Tomato Reduction
Once the spices are bloomed, stir in a tablespoon of tomato paste and let it cook for a minute to cook out its raw, tinny flavor. Then, pour in a large can of high-quality whole peeled tomatoes. I prefer whole tomatoes that I crush by hand directly into the pan, as they tend to be of higher quality than pre-crushed or diced tomatoes, which are often treated with calcium chloride to maintain their shape.
Bring the mixture to a gentle simmer. Now, you must wait. The sauce needs to reduce. If you crack eggs into a watery, thin tomato soup, the eggs will sink to the bottom, spread out into a chaotic mess, and boil rather than poach. You want to simmer the sauce until it is thick, rich, and jammy. You will know it is ready when you can drag a wooden spoon through the center of the pan and the sauce leaves a distinct, temporary trail that takes a second to fill back in.
The Masterclass Technique for Flawless Eggs
Your sauce is thick, deeply spiced, and perfectly reduced. Now comes the moment of truth. This is where we solve the chalky yolk and snotty white paradox once and for all.
Step 1: The Divot Method
Because your sauce is properly reduced and thick, it has the structural integrity to hold a shape. Using the back of a spoon, press down into the sauce to create a distinct divot or well. You are essentially building a little nest for the egg. This nest serves two purposes: it prevents the egg white from spreading all over the pan, and it creates a thermal barrier between the bottom of the egg and the direct heat of the skillet. Crack the egg into a small ramekin first, then gently slide it into the divot. Repeat this for all the eggs, spacing them evenly around the perimeter of the pan with one in the center.
Step 2: The Heat Drop
The moment the last egg is in the pan, you must manage your thermal carryover. The heavy pan is holding a massive amount of heat. If you leave the stove on medium, the bottom of the sauce will scorch, and the bottoms of the eggs will turn to rubber. Immediately drop the heat to medium-low or even low, depending on the strength of your burners. You only want the gentlest, barely-there bubbling.
Step 3: The Pan-Steaming Miracle
This is the ultimate secret. This is how you conquer the temperature differential between the whites and the yolks. You must cover the pan with a tight-fitting lid.
By lidding the pan, you trap the steam rising from the simmering tomato sauce. This creates an enclosed, highly pressurized thermal environment. The ambient steam circulating above the eggs rapidly cooks the exposed, stubborn egg whites from the top down. Because steam transfers heat incredibly efficiently, the whites are forced to coagulate and turn opaque before the yolks have a chance to overcook from the bottom up.
Keep the lid on for exactly three to five minutes. Do not walk away. Do not check your phone. Stand there and watch. You are looking for the whites to turn completely opaque and slightly bouncy, while the yolks should still jiggle when you gently shake the pan. The yolks will develop a very thin, cloudy film over the top from the steam—this is perfectly normal and actually a sign that the technique is working. The moment the whites are set but the yolks still have a distinct wobble, pull the entire pan off the heat. Remember, the residual heat in that heavy skillet will continue to cook the eggs for another minute or two while you carry it to the table.
The Interactive Communal Brunch Setup
Shakshuka is not meant to be plated in the kitchen and served in individual, sterile portions. It is a communal, interactive experience. It is about gathering around a central vessel, sharing food, and enjoying the tactile pleasure of eating with your hands.
Prep-Ahead Strategies for the Lazy Host
The true secret to being able to host a relaxed dinner party or a weekend brunch is doing the heavy lifting the night before. You can build the entire tomato, onion, and spice base on Saturday evening. Let it simmer, let it reduce, and let it cool. Store it in an airtight container in the fridge overnight. The flavors will actually deepen and meld together beautifully as they rest.
On Sunday morning, while your guests are arriving and pouring their first mimosas, all you have to do is dump the pre-made sauce into your skillet, bring it back to a gentle simmer, make your divots, and drop in the eggs. You look like an effortless, relaxed culinary genius, and your kitchen is not covered in splattered tomato sauce and onion skins.
The Bread and the Table Dynamics
You cannot serve shakshuka without an aggressive amount of bread. The bread is your utensil. It is the vehicle for scooping up the jammy tomatoes and mopping up the liquid yolks. Thick slices of toasted challah, warm and fluffy pita bread, or heavily charred, crusty sourdough are all excellent choices.
Bring the hot skillet directly to the center of the table. Place it on a sturdy trivet. Garnish it right in front of your guests. A heavy shower of roughly chopped fresh cilantro or flat-leaf parsley adds a necessary hit of bright, herbaceous freshness. Crumbled sheep’s milk feta cheese adds a creamy, salty tang that cuts through the richness of the eggs. A drizzle of high-quality extra virgin olive oil over the top finishes the dish with a luxurious mouthfeel.
Troubleshooting Your Kitchen Disasters
Even with the best techniques, things can go sideways. Here is how to fix the most common shakshuka emergencies on the fly.
The Sauce is Too Watery
If you accidentally bought a can of tomatoes that was mostly water, and your sauce refuses to thicken, do not panic. Do not add cornstarch—that will turn your rustic stew into a glossy, artificial-looking pie filling. Instead, just turn up the heat and let it rapidly boil for a few extra minutes before you add the eggs. The water will evaporate. If you are truly out of time, stir in an extra tablespoon of tomato paste to act as a natural thickener and flavor booster.
The Sauce is Too Acidic or Flat
Sometimes, canned tomatoes are aggressively acidic and lack natural sweetness. Taste your sauce before you add the eggs. If it makes you pucker, add a tiny pinch of granulated sugar or a drizzle of honey to balance the pH. Conversely, if the sauce tastes muddy and flat, it needs a wake-up call. It is a fundamental rule of flavor building, much like understanding why a flat-tasting soup actually needs acid rather than another handful of salt. Squeeze half a lemon into the pan or add a splash of apple cider vinegar right before creating your egg divots. The acid will immediately brighten the spices and lift the entire dish.
The Eggs Cooked Too Fast
If you lidded the pan and got distracted, and now the yolks are hard, you cannot un-cook an egg. But you can pivot. Take a fork and gently break up the eggs, swirling them into the sauce to create a rich, creamy, almost scrambled-egg texture within the tomato base. It is no longer a classic shakshuka, but it is still a delicious, savory tomato and egg scramble that will taste phenomenal scooped up with toasted pita. Own the mistake, rename the dish, and serve it with confidence.
Cooking is not about achieving unattainable, rigid perfection; it is about understanding the materials you are working with and manipulating them to do what you want. By ditching the toxic, scratched pans, taking the time to properly bloom your spices, and utilizing the simple science of pan-steaming, you completely eliminate the guesswork of the Sunday brunch. You transform a stressful, chaotic morning into a relaxed, masterful display of culinary artistry. Now go buy a decent pan, crush some tomatoes, and show those eggs who is boss.


