The frustration is universal. Picture this: It is a Friday evening. You have poured yourself a generous glass of wine, kicked off your work shoes, and decided to treat yourself. You went to the butcher, spent an embarrassing amount of money on a beautifully marbled ribeye or a pristine filet of wild-caught salmon, and you are ready to cook. You get your pan smoking hot. You pat the protein dry. You gently lay it down, expecting that glorious, aggressive sizzle that promises a steakhouse-quality crust.
But then, tragedy strikes. Within seconds, the edges of your beautiful cut of meat begin to buckle. The corners curl up toward the ceiling like a frightened armadillo. The center of the meat entirely lifts off the surface of the hot metal. Suddenly, that aggressive sizzle dies down into a depressing, wet sputtering sound. A pool of gray, murky liquid begins to gather underneath the lifted center. You are no longer searing your expensive dinner; you are boiling it in its own lukewarm juices.
If this sounds familiar, take a deep breath. It is not your fault, and you do not need to go to culinary school to fix it. As a home cook who has set off the smoke detector more times than I care to admit, I can tell you that you are simply losing a battle against physics. But today, we are going to win that battle. If you are in the process of gathering your crucial beginner kitchen tools, there is one unsung hero that you absolutely must add to your arsenal: the vented stainless steel chef’s press.
We are going to take a deep, unapologetically nerdy dive into the thermodynamics of your frying pan. We will explore exactly why your food curls, why trapped moisture is the ultimate enemy of flavor, and why tossing out your grandmother’s heavy, unhygienic cast-iron bacon weight in favor of a modern, vented chef’s press will completely revolutionize your weeknight dinners. Grab your wine, and let’s get into it.
The Anatomy of a Sad, Gray Steak (And Why It’s Not Your Fault)
To understand why we need a specialized tool to hold our food down, we first need to understand the microscopic violence that occurs when raw animal protein meets a hot pan. Cooking is not just about making food hot; it is a complex series of chemical and physical transformations. When you drop a piece of meat into a skillet, it does not just sit there passively. It reacts, it moves, and it fights back.
The Physics of Protein Contraction
Let’s skip the pretentious chef-speak and look at the raw science. Meat is essentially a complex matrix of water, fat, and protein fibers, all bundled tightly together by a network of connective tissue called collagen. When you apply high heat to this matrix, the proteins undergo a process called denaturation—they literally unfold, change their physical structure, and then violently snap back together in a tighter formation.
The two main proteins responsible for muscle contraction in living animals—myosin and actin—are the exact same proteins that dictate how your meat behaves in the pan. Myosin is the first to react, beginning to denature and coagulate at relatively low temperatures, specifically between 104°F and 122°F. As the temperature climbs, actin joins the party, denaturing in the higher range of 150°F to 163°F. When these proteins coagulate, they shrink the physical diameter of the muscle fibers, essentially wringing themselves out like a wet sponge.
But the real culprit behind the dreaded “meat curl” is the connective tissue. Collagen and fascia, particularly the silver skin or the bands of fat that line the outer edges of pork chops and strip steaks, react drastically to heat. As the meat cooks, these connective tissues lose moisture and contract at a much faster rate than the interior muscle. Because this shrinking band is attached to the outside edge of the meat, it acts like a tightening python. It pulls the edges inward, forcing the center of the steak to bow upward and completely lose contact with the pan.
The Enemy Unveiled: Trapped Moisture
When your meat curls and lifts off the cooking surface, it creates a hollow pocket underneath. This is where your dreams of a perfect sear go to die. Remember how those coagulating proteins act like a sponge being wrung out? As the internal temperature of the meat hits 150°F, the rate of moisture loss literally doubles. All of that expelled water has to go somewhere. Because gravity exists, it drips down into the hollow pocket created by the curled meat.
Now, instead of your steak sitting flush against a 450-degree stainless steel or cast-iron surface, it is resting on a puddle of its own water. This brings us to the most frustrating part of weeknight cooking: water is a thermal capacitor. It takes a massive amount of energy to convert liquid water into steam. As long as there is liquid water trapped under your meat, the temperature of that specific cooking zone is mathematically capped. It cannot and will not exceed the boiling point of water. You are effectively steaming your expensive steak, which is why you end up with a sad, gray, rubbery exterior instead of a crust.
This is exactly why keeping chicken breast juicy while still getting a golden-brown exterior feels so impossible for many beginners. The moisture escapes, pools under the curled edges of the breast, and steams the meat until it is chalky and overcooked inside, yet completely pale on the outside.
The Maillard Reaction: Your Ticket to Flavor Town
If you want to cook food that makes people close their eyes and groan in appreciation, you have to master the Maillard reaction. This is the holy grail of culinary science. It is the reason a seared steak tastes infinitely better than a boiled one, the reason bread crust is delicious, and the reason roasted coffee beans have complex aromas.
What Actually Happens When Meat Browns?
Named after the French chemist Louis-Camille Maillard who first described it in 1912, the Maillard reaction is a brilliant cascade of chemical reactions that occur between amino acids (the building blocks of proteins) and reducing sugars when exposed to heat.
It happens in distinct stages. First, the amino acids and sugars undergo a condensation reaction to form a highly unstable compound called a Schiff base. This base rapidly rearranges itself into Amadori products. As the heat continues to be applied, these Amadori products break down and fragment into hundreds of brand new, highly complex flavor and aroma compounds, including pyrazines and furans. Finally, these compounds polymerize to form melanoidins, which are the high-molecular-weight brown pigments that give your seared meat its gorgeous, dark mahogany crust.
This is not just about making the food look pretty. The Maillard reaction literally creates hundreds of new flavor profiles—notes of caramel, roasted nuts, earth, and savory umami—that simply did not exist in the raw meat.
The 300-Degree Threshold
Here is the brutal truth that every home cook needs to memorize: The Maillard reaction does not occur in any meaningful, rapid way below 280°F to 300°F (about 140°C to 150°C).
Let’s connect the dots. Water boils and turns to steam at exactly 212°F (100°C) at sea level. If there is liquid moisture trapped under your food, the temperature of the meat’s surface cannot rise above 212°F until every single drop of that water has evaporated. The heat energy from your burner is entirely consumed by the phase change of water to steam, rather than raising the temperature of the meat.
If your meat is curled, creating a pocket that constantly collects expelled juices, that evaporation takes forever. By the time the water finally cooks off and the surface temperature can climb toward the 300-degree threshold required for browning, the interior of your meat is hopelessly overcooked. Your quest for achieving the perfect crust has failed because you allowed steam to dictate the cooking temperature.
Enter the Vented Chef’s Press: The Ultimate Kitchen Equalizer
So, how do we force the meat to stay flat against the pan, maximizing surface contact, while simultaneously dealing with the moisture that the shrinking proteins are aggressively expelling? We use a vented chef’s press.
What Exactly Is a Vented Chef’s Press?
The original Chef’s Press was born out of pure, frantic necessity. In 2004, a brilliant Bay Area chef named Bruce Hill was running the stoves in the notoriously tiny kitchen of Bix Restaurant, located down a secret alley in San Francisco. In a high-end restaurant kitchen where every single second counts, Chef Hill was frustrated by the tools available to him.
His cooks were using old-school, solid cast-iron bacon weights to hold meat flat. But Chef Hill noticed a glaring flaw: those heavy cast-iron blocks were trapping the steam underneath them, creating a soggy cooking environment, and they were often too heavy for delicate foods like fish.
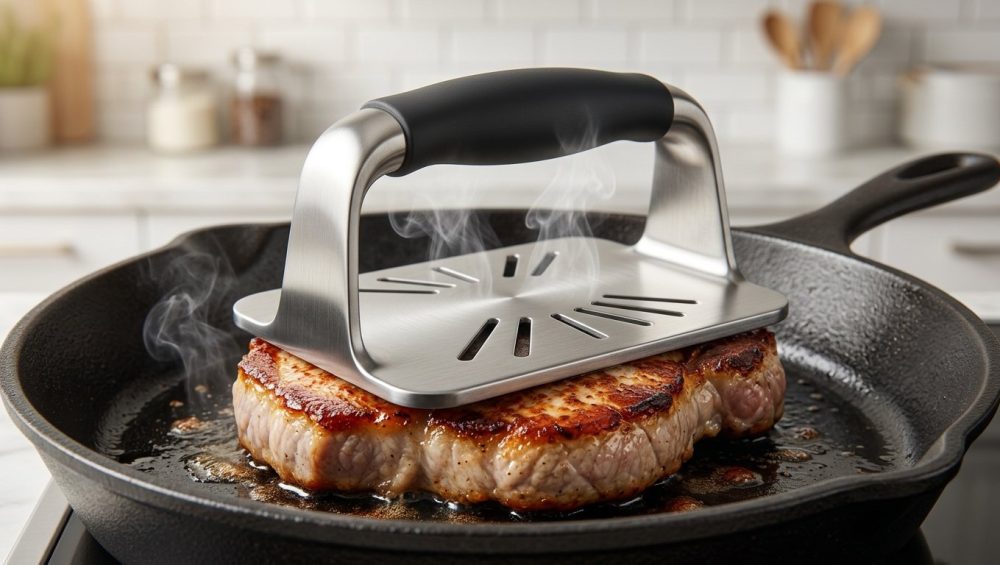
To solve this, he designed a completely new tool. The Chef’s Press is a sleek, rectangular weight made from a single, solid piece of rust-proof 18/10 stainless steel. It features a series of precisely cut ventilation slots across its surface, and it is intentionally designed to be stackable. It is a masterclass in functional, no-nonsense design, and it is the absolute best way to stop constantly fixing common cooking disasters and start preventing them in the first place.
Cast Iron Bacon Weights vs. Vented Stainless Steel: A Smackdown
Now, I know what some of you traditionalists are thinking. “But Sassy Sous-Chef, my grandmother left me her vintage cast-iron bacon press with the cute little wooden handle! Why can’t I just use that?”
Listen to me very carefully: Put the cast iron down. While cast iron is a phenomenal material for skillets and Dutch ovens, it is a fundamentally flawed material for a cooking weight.
First, standard cast-iron weights are solid blocks of metal. When you place a solid block over a cooking piece of meat, you are creating an impenetrable roof. As the meat expels moisture, that moisture turns to steam. Because the steam cannot escape through the solid cast iron, it gets trapped, condensing back into water and completely ruining your sear.
Second, cast-iron weights are incredibly heavy—often weighing between 3 and 4 pounds. That much unadjustable weight will completely crush a delicate piece of flaky white fish, a tender chicken breast, or a fluffy grilled cheese sandwich.
Finally, let’s talk about hygiene and maintenance. Cast iron requires constant upkeep. It must be hand-washed, thoroughly dried, and rubbed with oil to maintain its seasoning and prevent rust. Furthermore, most cast-iron presses feature wooden handles. Do you know what happens when you press a wooden handle into raw chicken juices, and then realize you can’t put that wood in the dishwasher? It becomes a terrifying, un-sanitizable bacteria trap. The Chef’s Press, being a single piece of stainless steel, goes straight into the dishwasher. Zero maintenance, zero rust, zero foodborne illness.
The Danger of “Mystery Metal” and Peeling Non-Stick Weights
If you have been reading my blog for any length of time, you know my strict “No-Go” rule. I absolutely despise cheap, toxic kitchenware. The market is currently flooded with knock-off grill presses made from cheap aluminum alloys coated in low-grade non-stick Teflon.
When you place a cheap non-stick weight onto a 500-degree steak, that coating degrades. It inevitably begins to flake and peel, leaving microscopic shards of toxic forever-chemicals embedded directly into your dinner. I am incredibly passionate about avoiding toxic cookware materials, and you should be too. A high-quality, food-grade stainless steel press will outlive you, it will never peel, and it will never leach mystery chemicals into your food. Buy it once, buy it right.
The Science of Surface Contact and Evaporation
Let’s get back to the pan and look at exactly how the vented press transforms your cooking process from a frustrating gamble into a precise, scientific certainty.
Maximizing the Sear Zone
Heat transfer in a frying pan relies on conduction—the direct transfer of heat energy from the hot metal of the pan to the surface of the food. Air is a terrible conductor of heat. When your meat curls and lifts, the air gap acts as an insulator, stopping the cooking process dead in its tracks.
By applying the gentle, consistent weight of a Chef’s Press, you forcefully flatten the protein. You are ensuring that 100% of the meat’s surface area is in direct, intimate contact with the hot pan. This massive increase in conductive heat transfer is why using a Chef’s Press allows food to cook 20% to 30% faster than it would without one.
More importantly, this full-surface contact is absolutely crucial for preventing sticking in stainless steel skillets. When meat sears evenly across its entire surface, the Maillard reaction creates a dry, non-stick crust that naturally releases from the metal. If the meat is curled, the edges burn and stick while the center remains raw and glued to the pan.
The Magic of Ventilation: Letting the Steam Escape
This is where Chef Bruce Hill’s design elevates from “good” to “genius.” The vents in the stainless steel press change the entire thermodynamic environment of the pan.
As the meat cooks and the muscle fibers violently squeeze out their water, that moisture hits the screaming-hot pan and instantly vaporizes into steam. Instead of being trapped under a solid cast-iron dome, the steam flows freely up and out through the precision-cut vents of the Chef’s Press.
Because the steam is immediately evacuated from the cooking zone, the surface of the meat is allowed to dry out rapidly. Without the thermal cap of liquid water holding the temperature back at 212°F, the surface temperature rockets past the 300°F threshold. The Maillard reaction kicks into overdrive. You get a deep, edge-to-edge, mahogany crust in a fraction of the time, while the interior of the meat remains perfectly juicy and tender.
Beyond the Steak: The Versatility of a Chef’s Press
While I have spent a lot of time talking about steak, a vented press is far from a unitasker. Once you have one in your kitchen, you will find yourself reaching for it constantly. It is the ultimate secret weapon for elevating weekday meals when time is money and efficiency is your top priority.
Conquering Curly Bacon Once and For All
Bacon is notorious for curling. The strips are composed of alternating bands of fat and lean muscle. As we learned earlier, these different tissues contract at drastically different rates when exposed to heat. The lean muscle tightens up quickly, while the fat renders and melts, causing the bacon to twist into unrecognizable, wavy shapes.
This curling means that some parts of the bacon sit in the hot fat and burn, while the lifted pockets remain chewy, rubbery, and unrendered. When it comes to cooking bacon evenly, dropping a vented press over the strips forces them to lay completely flat. Every millimeter of the bacon renders at the exact same rate, resulting in shatteringly crisp, perfectly straight, restaurant-quality strips.
The Ultimate Crisp-Skinned Salmon
If you have ever tried to pan-sear a salmon filet skin-side down, you know that fish skin shrinks violently and instantly the moment it touches a hot pan. The filet bows up, and you are left desperately pressing it down with your spatula, burning your knuckles in the sputtering oil.
A single, lightweight 8-ounce Chef’s Press is the perfect solution. It provides just enough gentle pressure to keep the delicate fish skin pinned flat against the hot oil without crushing the tender, flaky flesh. The vents let the fish’s moisture escape, guaranteeing a skin so crispy it shatters like a potato chip. And because the skin cooks perfectly, you will have an incredibly flavorful fond left behind when you are deglazing those burnt pan bits for a quick pan sauce.
Next-Level Smashed Burgers and Crispy Sandwiches
If you struggle with getting ground meat to brown, the vented press is your new best friend. You can use it to firmly smash burger patties down into a ripping hot cast-iron or carbon steel skillet, creating that highly sought-after, lacy, crispy edge that defines a true smashburger.
It is also the ultimate tool for grilled cheese sandwiches, paninis, and quesadillas. Because the presses are stackable, you can customize the exact amount of weight you need. One press gives a gentle toast, while stacking two or three will compress a thick, deli-style sandwich, ensuring the heat penetrates deeply enough to melt the cheese perfectly while crisping the bread to a golden brown.
Submerging and Sous-Vide Hacks
Here is a brilliant off-label use for your stainless steel press: because it is rust-proof and sanitary, it is the perfect tool for submerging foods. If you are brining a chicken, fermenting vegetables in a crock, or cooking with a sous-vide setup, foods have an annoying habit of floating to the top of the liquid. Simply drop a Chef’s Press on top of your vacuum bag or your vegetables. The weight keeps everything safely submerged, and the stainless steel won’t react with the acidic brines or rust in the water bath.
How to Choose and Use Your Vented Chef’s Press
Not all food requires the same amount of pressure, which is why the modular, stackable design of the authentic Chef’s Press is so brilliant.
Weight, Stacking, and Sizing
The presses are typically available in 8-ounce, 13-ounce, and 18-ounce rectangular sizes, as well as a larger round version.
If I had to recommend a starting point, I would tell you to buy two of the 13-ounce presses. The 13-ounce weight is the Goldilocks zone—heavy enough to flatten a thick pork chop, but light enough not to obliterate a delicate sandwich.
The true genius lies in their stackability. The handles are designed to interlock. If you are cooking a massive, stubborn, thick-cut ribeye that refuses to lay flat, you can simply stack two or three presses on top of each other to create a customized 26-ounce or 39-ounce weight.
Furthermore, if you are cooking a long, awkward cut of meat like a flank steak or a whole butterflied chicken, you can “shingle” the presses. You lay them side-by-side, slightly overlapping, to create a continuous, vented blanket of weight that covers the entire surface area of the food.
Cleaning and Maintenance (Spoiler: It’s Easy)
I do not have the time or the patience for high-maintenance kitchen gear on a Tuesday night. When you are done cooking, you simply toss the stainless steel Chef’s Press directly into the dishwasher. There is no scrubbing, no seasoning with oil, and no worrying about rust.
Because the press speeds up cooking times by up to 30%, you do need to keep a close eye on your food. Your intuition about when a steak is “done” will be slightly skewed by the increased efficiency of the conductive heat transfer. This is exactly why you need accurate temperature readings. Always use a high-quality, instant-read digital thermometer to verify the internal temperature of your meat, rather than relying on a kitchen timer.
Conclusion: Stop Babysitting Your Meat
Cooking should be an enjoyable, creative outlet, not a stressful wrestling match with a curling pork chop. You do not need a culinary degree to make mind-blowing, restaurant-quality food in your own home. You just need to understand a little bit of basic physics, and you need to equip yourself with tools that actually work.
Trapped steam is the enemy of flavor. Solid, heavy, unhygienic cast-iron weights are relics of the past that belong in an antique store, not in a modern, efficient home kitchen. By utilizing a vented, stackable stainless steel chef’s press, you are taking complete control over the thermodynamics of your skillet. You are forcing maximum surface contact, accelerating the Maillard reaction, and allowing flavor-destroying moisture to safely evaporate.
So do yourself a favor. Ditch the toxic non-stick gear, throw out the rusty old bacon weights, and invest in a tool that actually respects the science of cooking. Your steaks will be crustier, your bacon will be flatter, your fish skin will shatter, and you will finally be able to pour that glass of wine and actually enjoy your Friday night in the kitchen. Now get out there, get your pan smoking hot, and stop steaming your meat.


