Picture this: It is a Tuesday night. You are exhausted. The kind of bone-deep tired that makes the idea of chopping an onion feel like a Herculean labor. You don’t want a culinary project; you want comfort. You want carbohydrates, and you want melted dairy. A grilled cheese sandwich is the obvious, undeniable answer. When it comes to mastering simple weeknight dinners, efficiency is everything, and a grilled cheese should be the epitome of low-effort satisfaction.
But then, disaster strikes. You pull a stick of butter from the depths of your refrigerator. It is rock solid, possessing the structural integrity of a masonry brick. You grab a butter knife and attempt to aggressively drag this dairy glacier across a delicate, pillowy slice of brioche or soft white bread. What happens next is a tragedy we have all experienced. The bread yields. It tears. It completely disintegrates into a mangled, hole-riddled mess. You try to press the torn pieces back together like a sad culinary puzzle, but the damage is done. Your sandwich is ruined before it ever hits the heat.
Tearing your bread is one of those common beginner cooking mistakes that is entirely avoidable. You do not need to pre-plan your comfort food by leaving butter on the counter for two hours to soften. You do not need to attempt dangerous microwave softening hacks that inevitably result in a pool of melted butter exploding all over your turntable. You just need to open your refrigerator door a little wider and grab the jar of mayonnaise.
Yes, mayonnaise. I can already hear the purists gasping, clutching their pearls and their blocks of Kerrygold. But I am here to tell you, as someone who has burned more dinners than I care to admit before figuring this out: swapping cold butter for mayonnaise is the single greatest upgrade you can make to a grilled cheese sandwich. It is not a gimmick. It is not a viral social media stunt. It is cold, hard, delicious food science.
The Butter Problem: A Lesson in Thermodynamics
Before we can truly appreciate the genius of the mayonnaise swap, we need to understand exactly why butter fails us in this specific application. Don’t get me wrong—I love butter. Butter is the foundation of French cuisine, the soul of baking, and a generally magical substance. But in the context of a quick, weeknight grilled cheese, it is a thermodynamic nightmare.
Butter is a water-in-oil emulsion, typically consisting of about 80% butterfat, 16% water, and 4% milk proteins and solids. When butter is cold, the fat molecules are tightly crystallized, making it incredibly hard. Attempting to spread it requires a shear force that far exceeds the tensile strength of soft bread’s crumb structure.
Even if you manage to perfectly soften your butter, you still have to contend with its behavior in the skillet. Those milk solids I mentioned? They are the Achilles’ heel of butter when exposed to direct, prolonged heat. Butter has a relatively low smoke point, meaning it begins to smoke and burn at around 350 degrees Fahrenheit. If your skillet is even slightly too hot, or if your cheese is taking its sweet time to melt, those milk solids will quickly cross the line from beautifully toasted to acrid, bitter, and carbonized. You are left with a sandwich that is blackened on the outside while the cheese inside remains stubbornly solid.
The Science of Mayonnaise: What Even Is It?
To understand why mayonnaise is the ultimate grilled cheese savior, we must look at its anatomical structure. Mayonnaise is a stable emulsion of oil, egg yolk, and an acidic component, usually vinegar or lemon juice.
Unlike butter, which is solid when chilled, mayonnaise remains perfectly soft, pliable, and spreadable straight out of the refrigerator. This is because it is primarily composed of liquid oil (often soybean, canola, or olive oil). The egg yolk acts as a magical emulsifier—specifically, a phospholipid called lecithin—which binds the oil and water components together into a thick, luxurious cream.
Because it is an emulsion of liquid oil, it glides over your bread with zero resistance. You can coat your sandwich edge-to-edge in seconds without a single tear. Furthermore, if you’ve ever wondered why your dinner actually needs acid, mayo is a perfect example of how a tiny bit of vinegar balances out heavy fats. While you won’t taste a distinct sourness in the final sandwich, that subtle acidity works behind the scenes to cut through the extreme richness of the melted cheese.
The Maillard Reaction: Why Mayo Wins the Browning Battle
We need to talk about browning. When you place a sandwich in a hot skillet, you are not just warming it up; you are initiating one of the most important chemical processes in all of cooking: the Maillard reaction.
The Maillard reaction is a complex chemical reaction between amino acids (proteins) and reducing sugars that occurs when food is subjected to heat. It is the exact same process that gives a seared steak its crust, a roasted coffee bean its depth, and a freshly baked loaf of bread its golden color. Understanding this reaction will transform your daily meals from pale and sad to golden and glorious.
For the Maillard reaction to occur rapidly and evenly, you need heat, you need proteins, and you need a relatively dry environment. Here is where mayonnaise absolutely obliterates butter. Mayonnaise contains egg yolks, which are packed with extra proteins. When you smear mayo on the outside of your bread and hit it with heat, those egg proteins combine with the carbohydrates in the bread to supercharge the Maillard reaction.
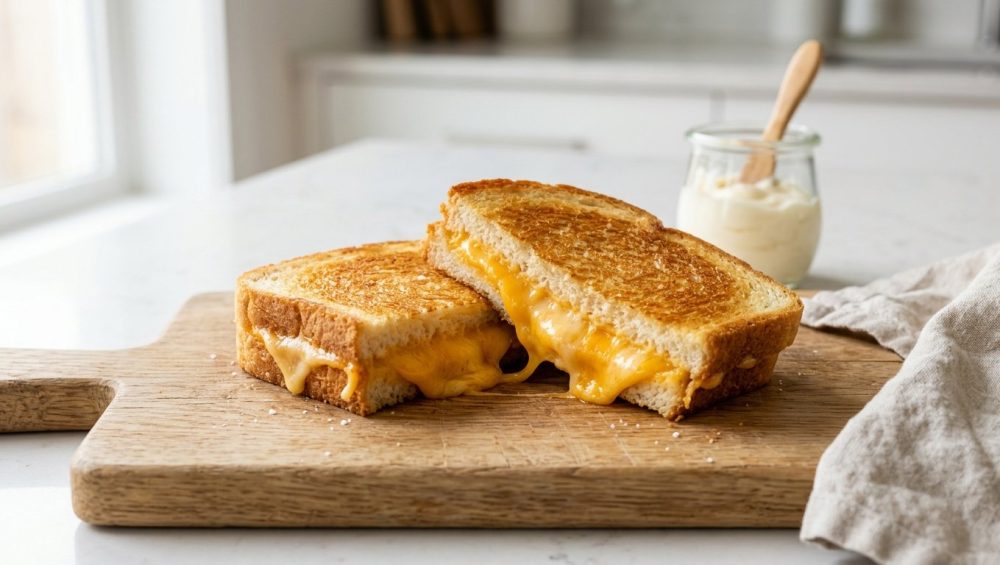
The result? An edge-to-edge, deeply golden, shatteringly crisp crust that butter simply cannot replicate. Because mayo spreads so evenly, you don’t get the splotchy, uneven browning that occurs when dabs of butter melt and pool in the pan. You get a uniform, microscopic layer of frying oil and protein that creates a crust so perfect it looks like it came out of a professional kitchen.
Smoke Points and Heat Tolerance: Pushing the Limits
If you’re focused on fixing rookie kitchen mistakes, learning to manage heat is step one. The biggest challenge of making a grilled cheese is the race against time: you need the cheese in the center to fully melt before the bread on the outside burns.
As we established, butter begins to burn at 350 degrees Fahrenheit. This gives you a very narrow thermal window. You have to cook the sandwich low and slow, babysitting the pan, praying the cheese melts before the milk solids turn to ash.
Mayonnaise, on the other hand, is predominantly made of refined oils like soybean or canola oil. These oils have significantly higher smoke points. Depending on the brand, mayonnaise can withstand temperatures up to roughly 450 degrees Fahrenheit before it begins to smoke and burn.
This extra 100 degrees of thermal runway is a game-changer. It means the fat coating your bread is far less likely to burn in the hot pan, giving the cheese ample time to reach its maximum melty, oozy potential. You can achieve a hotter, faster sear for maximum crispiness without the lingering anxiety of setting off your smoke detector.
The “No-Go” Rule: Stop Poisoning Your Sandwiches
Now, before we get to the actual cooking technique, we need to have a serious conversation about your hardware. As your sassy sous-chef, I have zero patience for cheap, toxic kitchenware, and I am completely unapologetic about banishing toxic kitchen gear from your home.
If you are currently making your grilled cheese sandwiches in a lightweight, ten-dollar non-stick pan that has visible scratches, peeling black flakes, or a warped bottom, I need you to take that pan and throw it directly into the garbage. Do not pass go. Do not donate it. Throw it away.
Most cheap non-stick pans are coated with polytetrafluoroethylene (PTFE), commonly known by the brand name Teflon. While PTFE is heavily marketed as a convenience for eggs and grilled cheese, it comes with severe thermal limitations. When a PTFE-coated pan is heated above 500 degrees Fahrenheit (260 degrees Celsius), the chemical coating begins to rapidly degrade and decompose.
When this degradation occurs, the pan releases microscopic particles and toxic fluorocarbon gases into the air—and right into your food. Inhaling these fumes can lead to a very real, documented medical condition known as “polymer fume fever,” characterized by intense flu-like symptoms including chills, fever, coughing, and severe headaches. Furthermore, the breakdown of these coatings exposes you to PFAS (per- and polyfluoroalkyl substances), which are notorious “forever chemicals” linked to a horrifying laundry list of health issues, including kidney damage, liver toxicity, endocrine disruption, and an increased risk of certain cancers.
This is exactly why you notice your cheap pans losing their non-stick slip after just a few months of use. The coating is literally vaporizing and chipping away under the heat of your stove. A lightweight non-stick pan preheated on high can reach over 500 degrees in just two and a half minutes. If you are relying on high heat to crisp your sandwich, you are playing a dangerous game with your health.
You do not need toxic chemicals to make a sandwich. You need proper thermal mass and a little bit of technique. Invest in high-quality stainless steel skillets or, even better, traditional cast iron. If you want a naturally non-stick surface without the cancer risk, a perfectly seasoned carbon steel skillet will outlive you and provide an infinitely superior crust. Cast iron and carbon steel hold onto heat beautifully, providing the steady, radiant energy required to melt the cheese evenly while crisping the bread to perfection.
Choosing Your Weapons: The Bread and The Cheese
A masterclass technique demands proper ingredients. You can use the mayo trick on any bread, but if you want to elevate your sandwich to a religious experience, you must choose your components wisely. Mastering these ingredient pairings is the true art of the home kitchen.
The Bread
You need a bread that strikes a balance between structural integrity and a tender crumb.
- Sourdough: The undisputed king. The natural tang of sourdough perfectly complements the richness of the cheese, and its sturdy, hole-filled structure holds up beautifully to the mayo and the heat.
- Brioche: If you want absolute decadence, brioche offers a slightly sweet, incredibly tender base. Just be warned: brioche already contains a high amount of sugar and fat, so it will brown very quickly. Keep your heat strictly at medium-low.
- Thick-Cut White or Texas Toast: The nostalgic classic. It provides a blank canvas that allows the cheese and the crispy mayo crust to be the absolute stars of the show.
Avoid breads that are heavily seeded on the outside, as the seeds will burn before the sandwich is done. Also, avoid extremely dense, heavy rye breads unless you plan on cooking the sandwich for a very long time, as the heat struggles to penetrate the dense crumb to melt the cheese.
The Cheese
A great grilled cheese requires a cheese that actually melts. This sounds obvious, but you would be surprised how many people try to make a grilled cheese with aged, crumbly cheeses that simply sweat oil instead of turning gooey.
- American Cheese: Do not turn your nose up at it. American cheese contains sodium citrate, an emulsifying salt that guarantees a perfectly smooth, liquid melt. It is the gold standard for texture.
- Sharp Cheddar: For flavor, nothing beats a good sharp cheddar. However, cheddar can separate and get greasy when melted. The pro move is to blend it: use one slice of cheddar for flavor, and one slice of American or Monterey Jack for texture.
- Gruyère: If you want to feel fancy, Gruyère is a phenomenal melting cheese with a nutty, complex flavor profile that pairs beautifully with sourdough.
- Provolone and Fontina: Both offer incredible stretch and a mild, creamy flavor that acts as a great base for adding other ingredients.
The Step-by-Step Masterclass: Making the Ultimate Mayo Grilled Cheese
We have covered the science. We have thrown away the toxic pans. Now, it is time to cook. Follow these steps exactly, and I promise you will never go back to butter again.
Step 1: Pre-Heat the Skillet
Place your cast iron, carbon steel, or heavy-bottomed stainless steel skillet on the stove over medium-low heat. Do not rush this. You want the pan to be thoroughly and evenly heated, but not screaming hot. If the pan is too hot, the bread will scorch before the thermal energy can penetrate the center to melt the cheese.
Step 2: The Mayo Application
Take your two slices of bread. Open your jar of full-fat mayonnaise. (Do not use low-fat mayo or Miracle Whip; they contain too much water and sugar, which will lead to steaming and burning rather than crisping).
Using a butter knife or an offset spatula, spread a thin, even layer of mayonnaise on one side of each slice of bread. When I say edge-to-edge, I mean it. The crust needs love, too. You do not need a thick, gloppy layer. A thin, translucent coating is all that is required to provide the necessary fat and protein for the Maillard reaction.
Step 3: The Assembly
Place one slice of bread, mayo-side down, directly into the pre-heated skillet. Immediately layer your cheese on top. Do not pile the cheese three inches high, or the center will never melt. Two to three standard slices, or about a third of a cup of grated cheese, is the optimal ratio.
Place the second slice of bread on top, mayo-side facing up toward the ceiling.
Step 4: The Lid Trick
This is a crucial secret for stubborn cheeses. If you are using a thicker bread or a hard-to-melt cheese like an aged cheddar, place a lid or a metal mixing bowl over the sandwich in the skillet for the first two minutes. This traps the ambient heat and steam, creating a mini-oven effect that jumpstarts the melting process from the top down, ensuring your cheese is perfectly gooey by the time the bread is toasted.
Step 5: The Flip
After about 3 to 4 minutes, remove the lid. Slide a thin, flexible spatula under the sandwich. Lift the edge slightly to check the color. You are looking for a deep, rich, uniform golden brown.
When it is ready, confidently flip the sandwich. Do not press down on the sandwich with your spatula! Pressing compresses the delicate crumb of the bread, squeezing out the air pockets and turning your fluffy sandwich into a dense, greasy puck. Let gravity and heat do the work.
Step 6: The Finish
Cook the second side for another 2 to 3 minutes until equally golden and crisp. The second side usually cooks slightly faster than the first because the pan is fully heat-saturated and the bread is already warm.
Remove the sandwich from the skillet and place it on a wire cooling rack for exactly sixty seconds. This allows the excess steam to escape without making the bottom of the bread soggy. Slice diagonally (because triangles unequivocally taste better; the diagonal cut maximizes the exposed surface area, allowing more volatile aromatic compounds to reach your nose), and serve immediately.
Addressing the Skeptics: “But Will It Taste Like Mayo?”
This is the number one question I get from hesitant home cooks. “I hate mayonnaise. I don’t want my grilled cheese to taste like a hot egg salad.”
Let me put your fears to rest: Your sandwich will not taste like mayonnaise.
When you expose the thin layer of mayonnaise to the direct, conductive heat of the skillet, a transformation occurs. The water content in the mayo evaporates. The vinegar cooks off. The oil fries the bread, and the egg yolk proteins undergo the Maillard reaction. The distinct “mayo” flavor profile is completely dismantled by the heat.
What you are left with is not the taste of a condiment, but the taste of deeply savory, profoundly rich, perfectly fried bread. It tastes like a better, crispier, more complex version of a buttered crust. Even the most ardent mayonnaise haters in my life have devoured these sandwiches without ever detecting the secret ingredient. The mayo is not there to flavor the sandwich; it is a mechanical tool used to facilitate ideal browning and crisping.
Advanced Level Upgrades: Taking Your Sandwich to the Next Level
Once you have mastered the basic mayo-seared grilled cheese, you have built a foundation that can support infinite variations. Here are three ways to take your new superpower and elevate it to restaurant-quality status.
1. The Garlic Bread Hybrid
Because mayonnaise is soft and emulsified, it is the perfect delivery system for dry spices. Before spreading the mayo on your bread, mix a tablespoon of mayonnaise with a heavy pinch of garlic powder, a dash of onion powder, and a sprinkle of dried parsley. Spread this compound mayo on the outside of your bread. As it fries in the skillet, the spices will toast and bloom in the oil, transforming the exterior of your sandwich into a shatteringly crisp piece of garlic bread.
2. The Frico Crust (The Inside-Out Grilled Cheese)
If a crispy, golden bread crust isn’t enough for you, let’s add a cheese crust. The Italians call it a “frico”—a crisp wafer of fried cheese.
To achieve this, spread your mayo on the bread as usual. Then, take a handful of finely grated, hard cheese—like Parmesan, Asiago, or Pecorino—and press it directly into the mayonnaise layer. The mayo acts as a glue, holding the grated cheese to the bread.
When you place the sandwich cheese-side down into the skillet, the Parmesan will fry in the mayo’s oil, creating an impossibly crunchy, salty, umami-bomb crust on the absolute exterior of the sandwich.
3. The Acidic Counterpunch
While the outside of the sandwich is taking care of the crunch, the inside needs to be balanced. Melted cheese is heavy, fatty, and rich. To prevent palate fatigue, you need a counterpunch of acidity on the inside.
Before assembling, spread a very thin layer of Dijon mustard, a dollop of pepper jelly, or a few dashes of hot sauce on the inside of the bread slices. This hidden layer of sharpness will cut through the dairy fat, brightening every single bite and making the sandwich infinitely more addictive.
The Final Verdict
Cooking does not have to be a stressful, tear-inducing chore. You do not need a culinary degree to make mind-blowing food, and you certainly do not need to wrestle with cold, unyielding blocks of butter on a Tuesday night.
By understanding the basic properties of your ingredients—the emulsion of mayonnaise, the thermal limits of butter, the science of the Maillard reaction—you empower yourself to cook smarter, not harder. You save time, you save your bread, and you achieve a result that is objectively superior in texture, color, and crunch.
So, the next time the craving hits, leave the butter in the fridge. Grab the mayo, fire up your trusty carbon steel skillet, and treat yourself to the ultimate, foolproof grilled cheese. You deserve a sandwich that doesn’t fight back. Now get into the kitchen and make it happen.


