We have all been there. You have spent your entire Saturday carefully braising a spectacular pork shoulder. You have hand-diced an ungodly amount of onions, coaxed the perfect, smoky char onto your salsa verde, and curated a pitcher of margaritas that could easily double as a dangerous weapon. You invite your friends over, you lay out the gorgeous spread, and you hand them a warm, fragrant corn tortilla. They load it up, take one single, enthusiastic bite, and—crack.
The bottom falls out. The carnitas plummet onto the plate. The salsa ruins a perfectly good pair of jeans. Your beautiful, painstakingly crafted taco has just suffered a catastrophic structural failure, and suddenly, you feel like a complete culinary fraud.
Let me stop you right there. Take a deep breath, pour yourself a glass of wine, and listen to me: it is not your fault. Mastering the art of the home kitchen means understanding that professional-level results are completely achievable without a culinary degree—you just need to understand the science of your ingredients. You do not need to be chained to the stove, frantically flipping tortillas to order while your guests eat without you. By the end of this masterclass, you are going to understand the exact chemistry of why corn tortillas tear, and you will learn the precise, foolproof temperature and hydration methods required to stage a flawless, relaxed taco night.
The Tragedy of the Shattered Taco
Let’s get one thing straight: corn tortillas are not inherently fragile. They have sustained entire civilizations for millennia. The problem isn’t the corn; the problem is how you are treating it. Unlike wheat flour tortillas, which rely on the stretchy, forgiving elasticity of gluten to hold themselves together, corn tortillas derive their structural integrity entirely from a delicate matrix of hydrated starches.
When you buy fresh tortillas (or make them yourself) and expose them to the harsh, dry air of your kitchen, you are initiating a countdown clock. The moment they begin to cool, they begin to die. For the weekend culinary hobbyist, this creates an absolute nightmare scenario for entertaining. You want to set up a beautiful, interactive DIY taco bar so you can actually socialize with your friends. But because you are terrified of serving cold, brittle tortillas, you end up trapped in the kitchen. You become a short-order cook in your own home, flipping masa on a hot skillet and tossing them onto plates one by one, sweating over a burner while everyone else is in the living room having a great time.
This stressful, chaotic dynamic is exactly what we are going to eliminate today. To do that, we have to look under the microscope and understand the chemical betrayal happening inside your food.
The Science of the Tear: Demystifying Starch Retrogradation
I have zero patience for pretentious chef-speak, but we need to talk about thermodynamics for a minute. Do not let the terminology scare you; it is just basic chemistry. When corn is treated with an alkaline solution (a magical process called nixtamalization) and ground into masa, its starches are unlocked. When that masa is cooked on a hot griddle, those starches gelatinize. They absorb water, swell up, and create a flexible, cohesive web that allows you to fold your taco without it snapping in half.
But the second that tortilla comes off the heat, a process called starch retrogradation begins. Retrogradation is a thermodynamically driven recrystallization process where the starch chains realign themselves as they cool down.
The Amylose and Amylopectin Betrayal
Starch is primarily made up of two molecules: amylose and amylopectin. Think of them as the two architects of your tortilla’s doom.
Amylose is a linear molecule. Because of its straight shape, it crystallizes incredibly fast. Within just a couple of hours of cooling, amylose molecules rapidly align into rigid double helices. This is responsible for the short-term staling and that immediate stiffness you feel when a tortilla drops to room temperature.
Amylopectin, on the other hand, is a highly branched molecule. It takes much longer to crystallize—sometimes days—but once it does, it locks the tortilla into a state of long-term rigidity. As these two starches recrystallize, they fundamentally change the physical properties of the tortilla. The glass transition temperature shifts, and the material’s modulus of elasticity skyrockets. In plain English? Your soft, pliable flatbread literally turns into glass.
Moisture Loss: The Silent Killer
As the amylose and amylopectin chains tightly bind together during retrogradation, they physically contract. This contraction acts like a microscopic sponge being wrung out, actively squeezing water out of the starch network. This process is known in the scientific community as syneresis.
Your tortilla isn’t just “drying out” because the air in your kitchen is dry (though that certainly doesn’t help). It is chemically expelling its own internal moisture. The water migrates from the center of the tortilla to the surface, where it rapidly evaporates into the ambient air. You are left with a brittle, glassy phase at the edges and a weak, crumbling center. The moment you apply stress to it—like, say, folding it around a generous scoop of guacamole—it suffers a catastrophic fracture.
The Fake Fixes: Why Your Current Methods Are Failing
If you search the internet for ways to keep tortillas warm, you will be assaulted by terrible advice. It is time to get brutally honest about the viral “life hacks” that are actively ruining your dinners. Failing to understand the difference between hydration and sogginess is one of those classic rookie kitchen mistakes that will haunt your dinner parties forever. Let’s roast these fake fixes one by one.
The Microwave Massacre
The most common advice is to wrap a stack of cold tortillas in a damp paper towel and blast them in the microwave for a minute. On paper, this sounds logical: you are introducing heat and steam. In reality, it is a culinary crime.
Microwaves deliver highly non-uniform energy. Thermal imaging studies of microwaved tortillas show that the outer edges frequently exceed 200°F (95°C), while the dead center barely reaches 150°F (65°C). This extreme temperature differential causes localized starch hydrolysis. The trapped vapor boils the edges, turning them into a tough, rubbery chew toy, while the center turns into a soggy, disintegrating mush. Yes, they are technically warm, but their structural integrity has been completely compromised.
The Dry Skillet Delusion
The second most popular method is heating the tortillas one by one in a dry cast-iron skillet and tossing them onto a cold plate. Once I learned to control the thermal output of my cast iron, I finally stopped burning dinner and started actually enjoying the cooking process. However, a skillet alone is not enough.
When you heat a retrograded tortilla on a dry skillet, you are certainly melting the crystallized starches, but you are also accelerating moisture loss. The intense, dry heat evaporates the surface moisture instantly. If you throw that hot, dry tortilla onto a plate without trapping the steam, the ambient air will suck the remaining moisture out of it in minutes. By the time your guests sit down, the tortillas will be stiff, curled at the edges, and ready to crack.
The Toxic Plastic Warmer Trap
This is my absolute biggest pet peeve in the modern kitchen. If you look in the discount aisle of any home goods store, you will find cheap, neon-colored plastic tortilla warmers. I have written extensively about banishing toxic kitchen gear from your home, and these flimsy plastic containers are at the top of my hit list.
First, I fundamentally refuse to heat food inside cheap, mystery plastics that are prone to degrading and leaching endocrine-disrupting chemicals into my dinner. Second, they are thermodynamically useless. Plastic has incredibly poor thermal mass. It cannot hold onto heat. When you put hot tortillas inside a plastic warmer, the plastic rapidly cools down, causing the steam radiating from the tortillas to violently condense on the underside of the lid. That condensation then rains back down onto your food. You end up with a top tortilla that is a sweaty, dripping mess, while the heat escapes so rapidly that the bottom tortillas are stone cold in twenty minutes. Not to mention, just like the way your plastic containers stay greasy after a run through the dishwasher, these plastic warmers absorb rancid oil odors over time. Throw them in the recycling bin where they belong.
The Masterclass Solution: The 150°F to 170°F Sweet Spot
If you want to host a flawless, relaxed taco night, you need to engineer a specific, highly controlled microclimate. We are aiming to hold our tortillas in a precise 150°F to 170°F (65°C to 76°C) environment.
Why this specific temperature range? First, we have to look at food safety. The USDA mandates that 140°F (60°C) is the absolute minimum safe holding temperature to keep dangerous pathogens, like Clostridium perfringens and Bacillus cereus, from multiplying. But we want to aim slightly higher than the minimum to account for heat loss when the lid is opened.
More importantly, this 150°F to 170°F zone is the textural sweet spot for starch. Remember our architect, amylopectin? The crystal melting temperature of retrograded amylopectin is roughly between 122°F and 140°F (50°C – 60°C). By holding the environment just above this melting point, we ensure the starches remain fully relaxed, fluid, and gelatinized. If we go too hot (above 180°F), we risk turning the residual moisture into actively boiling steam, which will overcook the masa and turn it to mush.
Here is the exact, three-step scientific protocol to achieve this perfect holding environment.
Step 1: The Revival (Re-gelatinization)
You cannot simply take cold, retrograded tortillas out of a plastic bag, throw them into a warm container, and expect a miracle. You must actively break the crystallized starch bonds first. To do this, you need a quick burst of intense heat to melt the stubborn amylose crystals, which require much higher temperatures (around 302°F or 150°C) to fully dissolve.
Preheat a carbon steel or cast-iron skillet over medium-high heat until an infrared thermometer reads roughly 350°F (175°C). Do not add oil. Take your cold tortillas and dip them very briefly—literally one second—under a running faucet or in a bowl of cold water. This micro-dose of hydration compensates for the moisture lost during storage.
Instantly slap the damp tortilla onto the hot, dry skillet. The water will violently flash into steam, forcing moisture deep into the starch matrix while the intense heat of the pan melts the amylose crystals. Leave it for exactly 30 seconds, flip it, and give the other side 30 seconds. The tortilla will puff slightly, become incredibly pliable, and develop beautiful, flavorful charred spots.
Step 2: The Damp Towel Microclimate
As soon as the tortilla comes off the skillet, it needs to be protected from the dry ambient air. This is where the damp towel comes in.
Do not use a fluffy terry cloth bath towel unless you want your tacos to taste like laundry lint and fabric softener. You need a flat-weave, 100% cotton flour sack towel. Cotton is breathable, allowing excess steam to vent while trapping the necessary humidity.
Run your clean cotton towel under hot water, and wring it out. I mean aggressively wring it out. Your forearms should burn. The towel must be barely damp, not wet. If it is dripping, it will turn your tortillas into a soggy paste. Lay the damp towel flat, place your freshly seared, steaming hot tortillas in the center, and fold the edges of the towel over them to completely swaddle the stack.
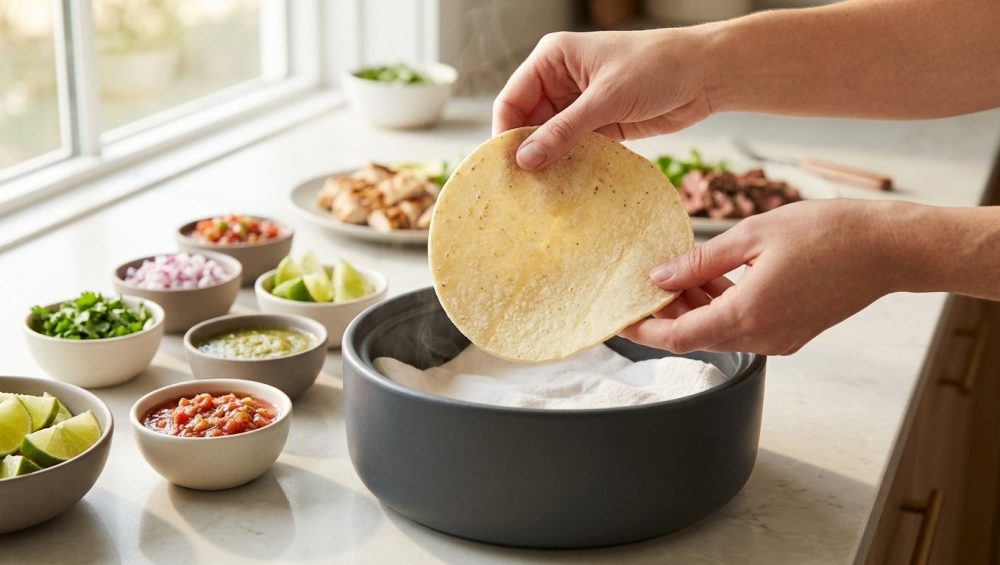
Step 3: The Ceramic Fortress
Now, we need a vessel to protect our swaddled tortillas and maintain that crucial 150°F to 170°F temperature zone. Enter the heavy-duty ceramic or stoneware tortilla warmer.
If you want to dive deeper into the physics of your serving ware, understanding the thermal retention in ceramic vessels will fundamentally change how you plan your dinner parties. Ceramic, stoneware, and terra cotta possess incredible thermal mass. Unlike cheap plastic, which instantly surrenders its heat to the surrounding air, dense ceramic absorbs thermal energy and radiates it back out slowly and evenly over a long period of time. Furthermore, unglazed terra cotta or partially glazed ceramics are slightly porous, which means they can absorb microscopic amounts of excess condensation, preventing the dreaded soggy bottom.
To utilize this fortress correctly, you must pre-heat it. About thirty minutes before you plan to serve dinner, place your empty ceramic warmer (and its lid) into a 250°F (120°C) oven. Let it absorb that heat for 15 to 20 minutes. Carefully remove it with oven mitts.
Place your damp cotton towel, fully loaded with your freshly seared tortillas, directly into the hot ceramic warmer and put the heavy lid on top. The residual heat from the ceramic will maintain the internal ambient temperature perfectly between 150°F and 170°F. The damp towel will continuously release a gentle, controlled vapor, ensuring the relative humidity stays high enough to prevent syneresis.
Your tortillas are now locked in a state of suspended animation. They will remain piping hot, incredibly soft, and structurally flawless for over an hour.
Hosting a Relaxed Taco Night: Execution and Staging
Now that you understand the science of the tortilla, we can talk about the logistics of entertaining. The true art of effortless hosting relies entirely on front-loading your labor. A DIY taco bar is the ultimate interactive dining experience, but it only works if the host is completely freed from the kitchen by the time the doorbell rings.
Pre-Heating and Pre-Staging
By employing proper food staging techniques, you eliminate the bottleneck of last-minute prep. Here is your exact timeline for a stress-free evening:
T-Minus 2 Hours: All of your cold toppings should be chopped, placed in their beautiful serving bowls, and waiting in the refrigerator. Your proteins should be fully cooked. Whether you are serving a slow-braised skirt steak or roasted chicken thighs, the magic of dry brining ensures your proteins remain juicy enough to complement the tortilla, even if they sit in a slow cooker on the “Warm” setting for an hour.
T-Minus 45 Minutes: Place your ceramic tortilla warmer into the 250°F oven to begin building its thermal mass.
T-Minus 30 Minutes: Begin the Revival protocol. Wet your flour sack towel, wring it out, and lay it on the counter. Fire up your skillet. Dip and sear your tortillas, stacking them directly onto the damp towel. Because you are doing this ahead of time, you can work methodically without anyone watching you sweat.
T-Minus 15 Minutes: Swaddle the stack of hot tortillas. Pull the hot ceramic warmer out of the oven. Drop the swaddled stack inside, and seal the lid. Move the warmer to the center of your dining table.
Showtime: When your guests arrive, the hard work is entirely finished. You can pour yourself a drink, point them toward the taco bar, and watch with smug satisfaction as they pull out perfectly pliable, steaming hot tortillas that refuse to tear.
Building the Ultimate DIY Taco Bar
The beauty of a taco bar is customization, but you still need to curate the flavor profiles. A structurally sound tortilla is a canvas; you need to paint it correctly.
Balance the heavy, rich fats of your proteins (like pork carnitas or beef barbacoa) with sharp, bright acidity. Before you reach for the salt shaker, remember why your dinner actually needs acid—a generous squeeze of fresh lime juice, a spoonful of pickled red onions, or a splash of vinegar-based hot sauce will wake up those heavy braised meats and cut through the richness of the avocado.
Provide textural contrasts. The tortilla is soft, the meat is tender, and the guacamole is creamy. You desperately need crunch. Finely shredded green cabbage (which holds up much better than watery iceberg lettuce), thinly sliced radishes, or toasted pepitas are mandatory additions to the spread.
Troubleshooting Common Taco Night Disasters
Even with the best scientific protocols, the kitchen can occasionally throw you a curveball. Here is how to troubleshoot the most common issues on the fly.
The tortillas are sticking together in the warmer:
If your tortillas are fusing into a solid block of masa, your moisture levels are too high. This usually happens for one of two reasons. Either you did not wring your cotton towel out aggressively enough, and it is actively steaming the tortillas into a paste, or you stacked the tortillas directly on top of each other the millisecond they came off the skillet. When a tortilla comes off a 350°F pan, it is off-gassing intense steam. Let it rest in your hand or on a cooling rack for exactly two seconds to vent the excess surface steam before adding it to the stack.
The edges are hard, but the center is soft:
This is a classic symptom of uneven heating. If you skipped the skillet and used the microwave, you know what you did wrong. However, if you used a skillet and still got hard edges, your pan was likely too small. If the edges of a large tortilla hang over the curved lip of a cast-iron skillet, they are not making contact with the hot metal. The amylose crystals in the center melt, but the edges remain retrograded and brittle. Always use a griddle or a skillet with a wide, flat cooking surface that accommodates the entire diameter of the tortilla.
The tortillas smell weird or soapy:
Corn masa is highly porous and will eagerly absorb ambient odors. If your tortillas taste faintly of lavender or fresh linen, your cotton towel is the culprit. Never wash your kitchen towels with heavily perfumed detergents or liquid fabric softeners. Wash your flour sack towels in hot water with unscented detergent and a splash of white vinegar to strip away any residual oils or odors.
What about flour tortillas?
While this masterclass has focused entirely on the notoriously finicky corn tortilla, the exact same holding principles apply to flour tortillas. Flour tortillas contain gluten, which makes them naturally more elastic and less prone to shattering. However, they are still vulnerable to moisture loss and staling. The 150°F to 170°F damp towel microclimate inside a ceramic warmer will keep flour tortillas unbelievably soft, pillowy, and warm for hours. Just skip the cold-water dip during the skillet phase; flour tortillas do not need the extra hydration to survive the sear.
Final Thoughts from the Sous-Chef
Cooking for people you care about should be an act of joy, not an exercise in anxiety. You do not need to settle for sad, broken tacos, and you certainly do not need to spend your entire evening acting as a stressed-out line cook while your friends have all the fun.
By respecting the chemistry of starch retrogradation, ditching the toxic plastic warmers, and investing in the thermal mass of a good ceramic vessel, you are taking control of your kitchen. You are engineering an environment where your food works for you, rather than the other way around.
So, the next time you plan a weekend gathering, front-load your prep, fire up that cast iron, and lock those tortillas in their ceramic fortress. Pour yourself a margarita, sit down at your own table, and enjoy the flawless, unbreakable tacos you deserve. You’ve got this.


