
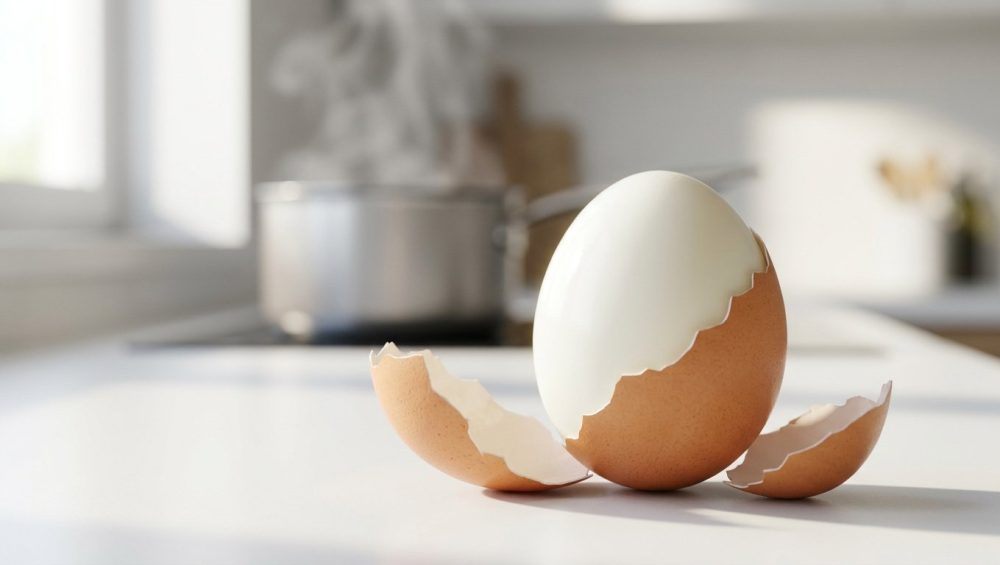
The Universal Kitchen Frustration We Need to Talk About
I do not care if your beloved grandmother, your favorite television chef, or your well-meaning neighbor Susan told you to start your eggs in a pot of ice-cold water. They are wrong. Scientifically, unequivocally, and demonstrably wrong.
We have all been there. You are prepping for a weekend brunch or trying to meal-prep your weekday protein, and you find yourself standing over the kitchen sink, furiously picking microscopic shards of shell off a mangled, pitted egg white while questioning all of your life choices. By the time you are done, the egg looks like it was aggressively chewed by a small dog, and you have lost half the edible white to the trash can. It is infuriating, it is a massive waste of food, and if you are making deviled eggs for a party, it is an absolute aesthetic nightmare.
As home cooks, our time is money. We do not have twenty minutes on a busy Tuesday morning to gently coax a stubbornly fused shell off an egg with the delicate precision of a forensic scientist. We need efficiency, we need reliability, and we need our food to work for us, not against us. If you have ever watched in horror as your hard-boiled eggs refuse to peel, leaving you with a disastrous mess, you are not alone. But the good news is that you do not need a culinary degree to fix this. You just need a basic understanding of kitchen physics and protein chemistry.
The secret to flawlessly peeled eggs every single time does not involve adding vinegar to your water. It does not involve baking soda. It does not involve complex lunar cycles or whispering sweet nothings to your poultry. It involves one fundamental rule: you must stop starting your eggs in cold water. Today, we are going to dive deep into the anatomy of an egg, the thermodynamics of cooking, and the definitive, scientifically verified masterclass on how to boil (or better yet, steam) an egg so that the shell practically slips off on its own.
The Anatomy of an Egg (And Why It Secretly Hates You)
To understand why your eggs are holding onto their shells for dear life, we first have to understand what an egg actually is. When I talk about beginner kitchen tools, I always emphasize that the most important tool you have is your brain. Understanding the ingredients you are working with is the only way to master them.
An egg is a marvel of biological engineering, but it is also a complex structural trap waiting to ruin your breakfast. Let us break it down layer by layer.
The Calcium Carbonate Shell
The outermost layer of the egg is the shell, composed almost entirely of calcium carbonate. It feels solid, but it is actually highly porous, containing thousands of microscopic holes that allow moisture and gases (like carbon dioxide) to pass through. This porosity is why eggs absorb odors from your fridge if left uncovered, and it is the exact mechanism that causes eggs to change internally as they age.
The Outer and Inner Membranes
Just inside the shell lie two crucial layers: the outer membrane and the inner membrane. These thin, transparent films are made of tough keratin and collagen proteins. The outer membrane is attached directly to the inside of the calcium carbonate shell, while the inner membrane sits snugly against the egg white. When you peel an egg successfully, you are actually separating the inner membrane from the egg white. When you fail, it is because the inner membrane has chemically fused to the egg white, acting like industrial superglue.
The Albumen (Egg White)
The egg white, scientifically known as the albumen, makes up about two-thirds of the egg’s liquid weight. It is roughly 90% water and 10% protein. There are over 40 different distinct proteins in the albumen, but the heavy hitter is ovalbumin, which makes up about 54% of the protein content. There is also ovotransferrin, which makes up about 12%. These proteins are tightly folded up in their raw, liquid state. When exposed to heat, they denature (unfold) and then coagulate, binding together to form a solid, three-dimensional matrix that traps the water inside.
The Yolk and the Air Cell
Finally, we have the yolk—a rich emulsion of fats, proteins, and water—and the air cell, a small pocket of air that forms at the wide, flat end of the egg as it cools after being laid. As the egg ages, it loses moisture through the porous shell, and the air cell grows larger. When you heat an egg, this air cell expands rapidly, which is why eggs sometimes crack in the pot.
The Cold Water Myth: Why You Have Been Lied To
For generations, well-meaning home economics teachers and cookbook authors have perpetuated the myth that you must place your raw eggs into a pot of cold water and slowly bring the whole thing to a boil. The logic behind this myth is somewhat understandable: a gentle, gradual increase in temperature is thought to prevent the delicate eggshells from cracking due to thermal shock.
While this method might save you from a minor hairline crack, it completely destroys your chances of a clean peel. Here is the brutal, scientific reality of what happens when you start an egg in cold water.
As the water slowly heats up, the proteins in the egg white heat up just as lazily. Egg white proteins begin to coagulate at relatively low temperatures. Ovotransferrin begins to set around 140°F (60°C), and the dominant ovalbumin begins to thicken at this stage, fully coagulating and becoming a solid mass between 144°F and 149°F (62°C and 65°C).
Because the temperature is rising gradually, these proteins have plenty of time to unfold slowly. As they uncoil, they reach out and look for other proteins to bond with. Unfortunately, the closest available proteins are the collagen and keratin fibers in the inner membrane. The ovalbumin forms incredibly strong chemical bonds with this membrane. By the time the water finally reaches a boil, the egg white and the inner membrane have fused into a single, inseparable entity.
When you try to peel this egg, you are not just fighting a shell; you are fighting a chemical bond. The membrane takes chunks of the coagulated egg white with it, leaving you with a ruined meal. It is exactly the same concept as why your kitchen knives go dull when you abuse them—improper technique leads to disastrous mechanical failure.
The Science of Thermal Shock: The Hot Start Method
If slow, gradual heating causes fusion, what is the solution? Violence. Culinary, thermodynamic violence.
You must subject the egg to immediate, aggressive thermal shock by dropping it directly into a fully boiling pot of water (or a raging steam basket). Just as the water drop test tells you when a skillet is hot enough to instantly sear meat and prevent sticking, a violently hot environment is required to prevent an egg from sticking to its own membrane.
When a cold egg hits 212°F (100°C) water or steam, the outermost layer of the albumen—the part sitting directly against the inner membrane—is instantly flash-cooked. The proteins denature and coagulate so rapidly that they immediately bond to each other rather than having the time to cross-link with the collagen in the membrane. This rapid coagulation creates a firm, solid barrier of cooked egg white that shrinks slightly away from the shell, leaving the membrane attached to the shell, not the egg.
Do not just take my word for it. This was definitively proven by culinary scientist J. Kenji López-Alt in his monumental research for The Food Lab. He cooked and peeled literally hundreds of eggs, testing every single old wives’ tale on the internet: vinegar, baking soda, old eggs, fresh eggs, poking holes, you name it. His exhaustive testing revealed that the absolute most critical factor for a clean peel is the starting temperature of the water. Starting hot yields easily peelable eggs; starting cold yields a sticky, fused mess.
Yes, dropping cold eggs into boiling water increases the risk of a shell cracking slightly due to the rapid expansion of the air cell. But I would rather have a perfectly peelable egg with a tiny cosmetic crack than an intact shell that requires a chisel and an hour of my time to remove.
Why Steaming is Actually Superior to Boiling
Now that we have established that a hot start is mandatory, let us upgrade your technique even further. Boiling water is good, but steam is vastly superior. I am a fierce advocate for the home cook, and I want you to use the most efficient methods possible.
Here is the physics problem with boiling: When you take six large, 40°F (4°C) eggs out of your refrigerator and plunge them into a pot of boiling water, the temperature of that water plummets immediately. It can take several minutes for the water to return to a rolling boil, especially if you are using a smaller pot. During those minutes, you are losing the crucial thermal shock required to flash-cook the outer layer of the egg white. You are inadvertently recreating a mild version of the cold-water start.
Steam, on the other hand, does not suffer from this problem. Steam in a covered pot remains at a constant 212°F (100°C). When you drop cold eggs into a steamer basket, the steam immediately envelops them, transferring heat rapidly and efficiently without suffering a massive temperature drop. The thermal shock is sustained, ensuring the proteins coagulate instantly.
Furthermore, steaming is much gentler on the eggs. In a vigorously boiling pot of water, eggs are thrown around violently, smashing into each other and the sides of the pot, which leads to cracks and leaked whites. In a steamer basket, the eggs sit peacefully while the steam does all the heavy lifting.
If you are going to steam your eggs, please ensure you are using safe, high-quality gear. A standard stainless steel steamer basket insert is perfect. Do not use cheap, peeling non-stick pots to boil your water. Just like toxic bamboo cutting boards harbor bacteria and ruin your blades, cheap coatings leach chemicals into your food and air. You are already ruining your nonstick pans with high heat and metal utensils; do not use them for high-heat boiling or steaming. Stick to pure stainless steel.
The pH Factor: Does the Age of Your Eggs Actually Matter?
If you have ever complained about peeling eggs, someone has undoubtedly smugly told you, “You need to use older eggs.” This is one of the most pervasive kitchen myths, and while it has a tiny kernel of scientific truth, it is ultimately irrelevant if you use the proper cooking technique.
Here is the science behind egg aging: When an egg is freshly laid, the albumen has a relatively neutral pH of around 7.6 to 7.9. At this slightly lower pH, the ovalbumin proteins bind incredibly tightly to the glycoproteins in the inner membrane. As the egg sits in your refrigerator for days or weeks, it naturally loses carbon dioxide gas through its porous shell. As the carbon dioxide escapes, the pH of the egg white rises, becoming more alkaline (eventually reaching a pH of around 8.7 to 9.2).
At this higher, alkaline pH, the chemical bonds between the egg white and the membrane weaken significantly. This is why, historically, older eggs were easier to peel than fresh eggs.
However, we are modern, resourceful home cooks. We do not have time to buy groceries and wait two weeks for them to age before we can eat them. This is where the magic of the hot start comes in. The violent thermal shock of boiling water or steam completely overrides the pH factor. When you flash-cook the outer proteins, it does not matter if the egg was laid three weeks ago or three minutes ago; the proteins will bond to each other instead of the membrane.
You do not need to age your eggs. You do not need to add baking soda to the water to artificially raise the pH (which just makes the eggs taste strangely soapy and sulfurous anyway). You just need heat, and you need to monitor that heat accurately. Just as you rely on a simple oven thermometer to ensure your baking environment is correct, you must trust the physics of a 212°F (100°C) steam bath to do its job.
The Ice Bath: The Unsung Hero of the Perfect Peel
Cooking the egg correctly is only half the battle. How you cool the egg is equally critical. Once your timer goes off, you cannot simply turn off the stove and let the eggs sit in the hot pot. If you do this, carryover cooking will ruin the texture of the yolk, and the slow cooling process will reverse all the hard work you did to separate the membrane.
You must immediately transfer the eggs into an aggressive ice bath. I am not talking about running them under a lukewarm tap for ten seconds. I am talking about a large bowl filled with equal parts cold water and ice cubes.
The ice bath serves two vital functions:
First, it halts the cooking process dead in its tracks. Egg yolks contain iron, and egg whites contain sulfur. When an egg is heated for too long, these two elements react to form iron sulfide, which creates that dreaded, chalky, sulfurous green ring around the outside of the yolk. Plunging the egg into ice water rapidly drops the internal temperature, preventing this chemical reaction and ensuring your yolks remain beautifully vibrant and creamy. Nobody wants to eat soggy roasted veggies, and nobody wants to eat a chalky, green-ringed egg yolk.
Second, the ice bath induces thermal contraction. As the egg cools rapidly, the egg white physically shrinks and pulls away from the shell and the inner membrane. This creates a microscopic layer of space between the edible egg and the shell, making peeling an absolute breeze.
For the best results, leave the eggs in the ice bath for a minimum of 15 minutes. They need to be completely chilled all the way to the core before you attempt to peel them.
The Definitive, Foolproof Step-by-Step Method
We have covered the anatomy, the chemistry, and the physics. Now, let us put it all together into a practical, no-nonsense weekday routine. This is the only method you will ever need to boil (steam) an egg.
Step 1: Prep the Steam Bath
Place a stainless steel steamer basket into a pot. Add about an inch of water to the bottom of the pot—just enough so it sits below the steamer basket. Cover the pot with a tight-fitting lid and bring the water to a raging, rolling boil over high heat.
Step 2: Prepare the Ice Bath
While the water is coming to a boil, fill a large bowl with cold tap water and at least two handfuls of ice cubes. Set it right next to the stove. Efficiency is key.
Step 3: The Gentle Lower
Take your cold eggs straight from the fridge. Using a stainless steel spider skimmer, gently lower the eggs into the steamer basket. Do not just drop them in with your hands; you will crack the shells and burn your fingers.
Step 4: The Precise Timing
Immediately cover the pot and set a timer. Because steam is a constant 212°F (100°C), the timing is incredibly reliable regardless of how many eggs you are cooking.
- 6 Minutes: A liquid, runny yolk with a soft, set white. Perfect for ramen.
- 8 Minutes: A jammy, gooey yolk that holds its shape but is still wet.
- 10 Minutes: A firm but creamy yolk. Great for egg salad.
- 12 Minutes: A fully hard-boiled egg with a firm, pale yellow yolk. The ideal texture for deviled eggs.
Step 5: The Shock
The second your timer goes off, use your spider skimmer to remove the eggs and plunge them directly into the ice bath. Do not let them sit on the counter. Do not pass go. Straight into the ice. Leave them there for at least 15 minutes.
Step 6: The Underwater Peel
Once the eggs are completely chilled, take an egg and tap it gently all over on the countertop until the shell is covered in a mosaic of cracks. Do not just crack it once; crack it everywhere. Then, submerge the egg back into the ice water (or hold it under a gentle stream of cold running water) and peel it. The water will seep through the cracks, getting underneath the membrane and lubricating the egg, allowing the shell to slide off in large, satisfying sheets.
Troubleshooting Common Egg Disasters
Even with the perfect scientific method, things can occasionally go awry in the kitchen. Here is how to troubleshoot the most common egg-boiling frustrations.
“My eggs keep cracking when they hit the hot steam!”
This happens because the air pocket inside the egg expands rapidly when heated, blowing out the side of the shell. To prevent this, you can take a thumbtack or a specialized egg piercer and poke a tiny hole in the fat, wide end of the egg before cooking. This gives the expanding air an escape route, ensuring your shell stays intact and resulting in a perfectly round egg without a flat bottom.
“My yolks are dry, chalky, and have a green ring!”
You overcooked them, plain and simple. If your meat thermometer is lying to you, your roast is ruined; if your kitchen timer is ignored, your eggs are ruined. Twelve minutes is the absolute maximum time a large egg should spend in steam. Furthermore, if you skip the ice bath, the residual heat inside the egg will continue cooking the yolk for several minutes after you take it off the stove. Respect the timer, and respect the ice.
“The shell is still coming off in tiny, annoying shards!”
If the membrane has successfully separated from the egg white but the shell is breaking into a million tiny pieces, you did not crack the shell thoroughly enough before peeling. You need to roll the egg gently on the counter under the palm of your hand until the entire shell is highly fractured. Peeling underwater is non-negotiable here; the water acts as a wedge, forcing the membrane away from the white.
“My eggs are impossible to peel, even with this method!”
If you followed every single step perfectly and your eggs are still fusing to the shell, check your altitude. Water boils at a lower temperature at high elevations (for example, water boils at 202°F/94°C in Denver). This lower boiling point means the thermal shock is less aggressive. If you live at a high altitude, you may need to rely on a pressure cooker (like an Instant Pot) to achieve the necessary temperature and pressure to properly shock the egg proteins and separate the membrane.
Conclusion: Reclaiming Your Time and Your Breakfast
Cooking should not be a source of stress, and it certainly should not end with you throwing half your breakfast into the garbage disposal. The frustration of peeling hard-boiled eggs is entirely preventable once you stop treating cooking as a guessing game and start treating it as applied science.
By ditching the cold-water myth, embracing the violent thermal shock of steam, and respecting the power of an aggressive ice bath, you can achieve flawless, professional-level results in your own home kitchen. You do not need expensive gadgets, and you definitely do not need to wait weeks for your eggs to age. You just need to understand how proteins react to heat.
So the next time you are tasked with making a massive platter of deviled eggs for a family gathering, do not panic. Fire up the steamer basket, get your ice bath ready, and show those eggs who is boss. You have got this.






