
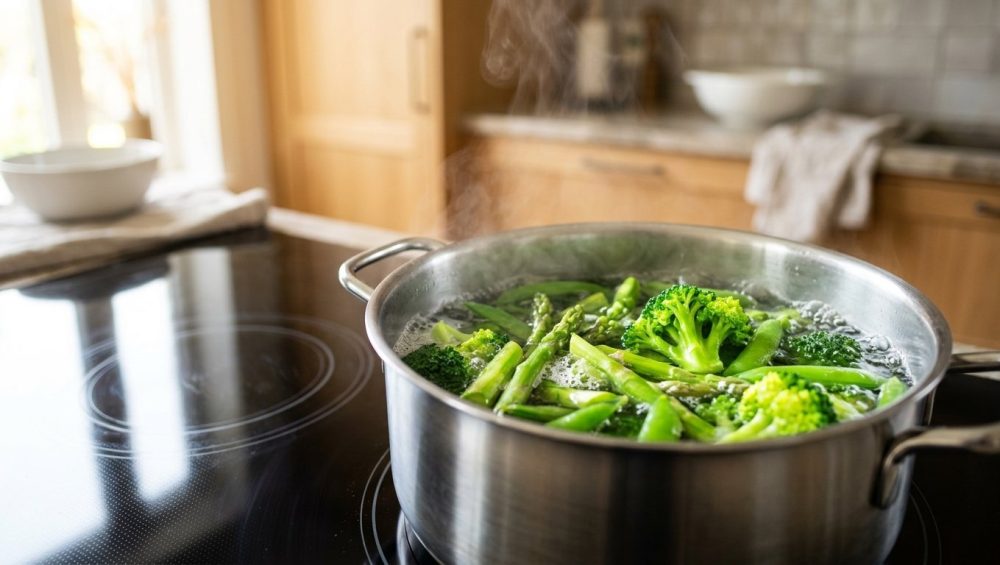
The Great Green Bean Betrayal
Picture this: It is a beautiful Saturday evening. You have spent premium money at the local farmer’s market on a gorgeous, vibrant batch of organic haricots verts. You are hosting a dinner party, the wine is breathing, the roast is resting, and you are ready to execute the perfect, brightly colored vegetable side dish. You drop your pristine green beans into a pot of boiling water, proudly pop the lid on top to “speed things up,” and walk away to mingle with your guests.
Ten minutes later, you return to the stove, lift the lid in a cloud of dramatic steam, and stare in absolute horror. Your brilliant, jewel-toned green beans have transformed into a sad, olive-drab, military-surplus-looking pile of mush. They look exactly like the tragic cafeteria vegetables you were forced to eat in middle school. The betrayal is real, and frankly, it feels personal.
If this exact scenario has ever played out in your kitchen, take a deep breath and pour yourself another splash of Pinot Noir. You are not a bad cook. You do not lack natural culinary talent, and you certainly do not need a ridiculously expensive culinary degree to fix this. What you are experiencing is not a failure of skill; it is a simple, highly predictable failure of basic food chemistry.
As a home cook, you are juggling a million things at once. I know that conquering weeknight cooking anxiety is hard enough without your produce actively sabotaging your self-esteem. But here is the brutally honest truth: that lid you put on your pot is the sole reason your vegetables look like a swamp.
Today, we are going to dive deep into the fascinating, slightly nerdy, and incredibly empowering science of why green vegetables lose their color. I am going to teach you the exact molecular mechanics behind this culinary tragedy, and more importantly, I am going to give you a foolproof, science-backed masterclass on how to guarantee perfectly vibrant, visually stunning side dishes every single time you turn on the stove. Spoiler alert: It all comes down to taking the lid off.
The Culprit: Chlorophyll and the Chemistry of Color
To understand why your vegetables are turning gray, we have to put on our lab coats for a brief moment and talk about the pigment that makes plants green in the first place. Welcome to Food Chemistry 101.
Meet the Magnesium Molecule
The vibrant green color of your broccoli, asparagus, spinach, and green beans is entirely entirely due to a miraculous little pigment called chlorophyll. In the culinary world, we primarily deal with two types of this pigment: Chlorophyll a, which has an intense, slightly blue-green hue, and Chlorophyll b, which leans more toward a bright yellow-green. Together, they create the lush, appetizing colors we associate with fresh, healthy produce.
Structurally, a chlorophyll molecule is built around a complex chemical ring known as a porphyrin ring. You do not need to memorize that term for a pop quiz, but you do need to know what sits right in the dead center of that ring: a single, highly important magnesium ion.
Think of this magnesium ion as the VIP holding together the most exclusive nightclub in the plant cell. As long as the magnesium ion stays safely in the center of the porphyrin ring, your green beans will remain beautifully, vividly green. But the moment that magnesium ion gets kicked out of the club, the color collapses. And unfortunately, just as you might wonder why your kitchen knives get dull when you mistreat them, your vegetables get dull when you subject them to the wrong cooking environment.
The Initial Color Pop: The Illusion of Success
Have you ever noticed that when you first drop green vegetables into boiling water, they instantly turn an even brighter, more electrifying shade of green? For the first thirty to sixty seconds, you feel like an absolute kitchen genius.
This happens because raw vegetables have microscopic air pockets trapped in the spaces between their cells. These tiny air bubbles actually cloud our vision, slightly obscuring the true intensity of the chloroplasts inside the plant. When you plunge the vegetables into boiling water, the sudden blast of heat causes those trapped gases to rapidly expand and escape. With the cloudy air pockets gone, the pure, unmasked pigment shines through directly.
It is a beautiful illusion. Because while you are admiring that vibrant color, the boiling water is aggressively breaking down the plant’s cell walls, setting the stage for a chemical disaster.
Why the Lid is Your Ultimate Enemy
Here is where the chemistry turns against you, and where that innocent-looking pot lid becomes the villain of your dinner party.
Trapping the Volatile Organic Acids
Every green plant contains its own naturally occurring acids. These are known as volatile organic acids, and they include compounds like acetic acid, lactic acid, and citric acid. In their raw state, these acids are safely locked away inside the cellular structure of the vegetable, kept far away from the delicate chlorophyll molecules.
However, as your vegetables boil and the heat begins to violently rupture the cell walls, these organic acids are released directly into the cooking water. Because these acids are “volatile,” their natural physical response to heat is to evaporate. They want to turn into vapor and float away into the air of your kitchen.
If your pot is uncovered, this is exactly what happens. The acids evaporate, the steam carries them away, and your cooking water remains relatively neutral.
But if you cover the pot with a lid, you completely trap these escaping acids. The acidic steam rises, hits the relatively cooler underside of your lid, condenses into liquid droplets, and rains right back down into the pot. You are effectively creating a closed-loop greenhouse effect, brewing a highly concentrated, increasingly acidic bath for your vegetables to drown in. We have all experienced the heartbreak when our roasted veggies turn out soggy due to trapped steam, but trapped steam in a boiling pot results in an entirely different kind of destruction.
The Pheophytinization Process (The Graying Effect)
Why is this acidic water bath so catastrophic? Because acids are absolutely loaded with hydrogen ions. And hydrogen ions are chemical bullies.
As the trapped volatile organic acids lower the pH of your cooking water (making it more acidic), millions of tiny hydrogen ions flood the pot. These hydrogen ions are highly attracted to the porphyrin ring of the chlorophyll molecule. They aggressively invade the ring and physically kick out that VIP magnesium ion we talked about earlier.
Once the magnesium is displaced by hydrogen, the molecule undergoes a permanent chemical transformation. It is literally no longer chlorophyll. It becomes a completely different compound called pheophytin.
When Chlorophyll a loses its magnesium, it turns into pheophytin a, which is a dull, grayish-green color. When Chlorophyll b loses its magnesium, it turns into pheophytin b, which is an unappetizing olive-yellow. This chemical reaction is entirely irreversible. No amount of wishing, praying, or butter will turn pheophytin back into chlorophyll. Your green beans are permanently gray.
The “Toxic Gear” Warning: Don’t Let Bad Cookware Ruin Good Veggies
Before we get into the exact step-by-step masterclass on how to boil vegetables perfectly, we need to have a very serious, brutally honest conversation about the pots you are using. I have zero patience for pretentious chef-speak, but I also have absolutely zero tolerance for cheap, toxic kitchen equipment that actively ruins your food and your health.
When it comes to banishing toxic kitchen gear, your boiling pots should be the first place you look. If you are boiling vegetables in an old, scratched-up non-stick pot where the Teflon coating is peeling off into your pasta water, throw it in the garbage immediately. Not only are you leaching forever chemicals into your family’s dinner, but thin, cheap aluminum pots are highly reactive.
Reactive metals, such as bare aluminum and unlined copper, will chemically interact with the volatile organic acids released by your vegetables. This metallic reaction actually accelerates the degradation of chlorophyll and can impart a distinct, highly unpleasant tinny or metallic taste to your food. You are essentially fighting a losing battle before the water even comes to a boil.
You do not need a massive collection of expensive gear, but you do need safe, non-reactive cookware. I strongly advocate for high-quality, multi-clad stainless steel pots or heavy enameled cast iron Dutch ovens for boiling vegetables. These materials are completely inert. They will not react with acidic water, they hold heat beautifully, and they will last you a lifetime. And while we are on the subject of ruining good pans, remember that cooking spray is the enemy of any quality cooking surface, so keep those aerosol cans far away from your beautiful stainless steel.
The Baking Soda Myth: A Culinary Crime
If you spend enough time reading old-school cookbooks or listening to well-meaning grandmothers, you will eventually come across a famous “hack” for keeping vegetables green: adding a pinch of baking soda to the boiling water.
Let’s address this right now. Do not ever do this.
Yes, baking soda is an alkaline substance (the opposite of an acid). If you add it to your cooking water, it will aggressively neutralize the volatile organic acids released by the vegetables, raising the pH of the water. Because the water remains alkaline, the hydrogen ions never get the chance to attack the chlorophyll, and the magnesium stays safely in place. Your vegetables will emerge from the pot looking incredibly, almost unnaturally green.
But at what cost?
Alkaline water is absolute kryptonite to hemicellulose, the structural carbohydrate that gives plant cell walls their firm, crisp texture. Boiling vegetables in baking soda water causes the cell walls to instantly disintegrate. Your green beans might look bright green, but they will have the structural integrity of wet tissue paper. They will turn into a slimy, mushy disaster in your mouth.
Furthermore, alkaline environments rapidly destroy water-soluble vitamins, particularly Vitamin C and the B-complex vitamins (like thiamine). You are essentially stripping the vegetable of its nutritional value just to cheat the color system. Stick to the science of heat and evaporation, and leave the baking soda for your chocolate chip cookies.
The Foolproof Masterclass: How to Boil Green Vegetables Perfectly Every Time
Now that you understand the molecular warfare happening inside your pot, it is time to take control. Boiling green vegetables is not a passive activity; it is a rapid, active technique known as blanching. Recent culinary data from 2026 confirms that home cooks who follow strict thermal physics retain up to 90% more of their vegetables’ natural color and snap compared to those who just “wing it.”
Here is your definitive, step-by-step masterclass to achieving restaurant-quality, vibrantly green vegetables in your own home kitchen.
Step 1: The Oceanic Pot and the Rolling Boil
The first mistake most home cooks make is using a pot that is entirely too small. If you cram a pound of asparagus into a tiny saucepan, two things happen. First, the temperature of the water plummets the second the cold vegetables hit it, meaning they will sit in tepid water slowly turning to mush while you wait for the boil to return. Second, there is not enough water volume to dilute the volatile organic acids.
You need a large pot—at least 4 to 6 quarts for a standard bunch of greens. Fill it generously with water and bring it to a violent, aggressive, rolling boil. A massive volume of boiling water holds immense thermal mass. When you drop your vegetables in, the water temperature will barely drop, ensuring the cooking process starts instantly. Furthermore, a large volume of water acts as a massive diluent. Any organic acids that do not evaporate are heavily diluted by the sheer amount of water, rendering them too weak to mount a serious hydrogen attack on your chlorophyll.
Step 2: Salt Like You Actually Like Food
Once your water is at a rolling boil, you need to salt it. And I do not mean a timid, polite little sprinkle. I mean a heavy, aggressive handful of kosher salt. The water should taste like the ocean.
Salt serves two critical functions here. First, it seasons the vegetables from the inside out, penetrating the cell walls as they expand. If you wait to salt your vegetables until they are on the plate, they will just taste like bland water with salt sitting on top of them.
Second, sodium ions in the salt actually interact with the pectin in the plant’s cell walls. Pectin is the glue that holds the plant cells together. The salt helps stabilize this pectin, preventing it from breaking down too quickly in the boiling water. This is the secret to achieving that perfect “crisp-tender” snap.
Step 3: Uncover and Conquer
This is the golden rule, the entire point of this masterclass: Do not, under any circumstances, put the lid on the pot.
Leave the pot completely uncovered. Let the steam billow up and out into your kitchen. By leaving the pot open, you are giving the volatile organic acids (the acetic, lactic, and citric acids) an escape route. They will vaporize and vanish into the air, leaving your cooking water neutral and your magnesium ions perfectly safe.
Keep your eye on the clock. The thermal physics of chlorophyll dictate a strict “7 Minutes or Less” rule. Laboratory tests show that after 4 to 5 minutes of submersion, pectin solubilization peaks. If you push past 7 minutes, the cell walls collapse so thoroughly that pheophytin conversion skyrockets to over 90%, regardless of whether the lid is off.
For delicate greens like spinach, you need 60 to 90 seconds. For snap peas, 2 minutes. For standard green beans or asparagus, 3 to 5 minutes is your sweet spot. Do not walk away. Do not check your emails. Stand there and watch them.
Step 4: The Ice Bath Shock (Stopping the Clock)
You have successfully boiled your vegetables uncovered. They are bright green and perfectly crisp-tender. You pull them off the heat and drain them in the sink. You are done, right?
Wrong.
If you leave hot vegetables sitting in a colander or on a serving platter, the residual heat trapped inside their cellular structure will continue to cook them. This is called carryover cooking. The internal temperature of the vegetable remains high enough to continue breaking down cell walls, releasing more acids, and eventually turning the vegetable gray right before your eyes.
You must stop the thermal clock immediately. Before you even drop your vegetables into the boiling water, you should have a large bowl filled with cold water and ice cubes sitting on your counter. The moment your vegetables reach perfect tenderness, use a stainless steel spider skimmer to swiftly rescue them from the boiling water and plunge them directly into the ice bath.
This technique, known as “shocking,” instantly drops the core temperature of the vegetable, halting all enzymatic and thermal degradation. Let them sit in the ice water for exactly as long as you boiled them (usually about 3 to 5 minutes), then drain them well and pat them dry. Your vegetables are now locked in a state of vibrant, emerald perfection.
Weeknight Efficiency: Time-Saving Shortcuts for Vibrant Greens
I am a realist. I know that on a chaotic Tuesday evening, the idea of boiling giant pots of oceanic water and preparing elaborate ice baths might make you want to order takeout. Time is money, and efficiency is the name of the game for the modern home cook. Fortunately, science offers us a few brilliant shortcuts that still respect the rules of chlorophyll.
The Microwave Hack (When You’re Really in a Rush)
If you are exhausted and just need to get a green vegetable on the table without sacrificing color, the microwave is your best friend.
Microwaving works on a completely different thermal principle than boiling. Instead of heating the environment around the food, microwaves directly excite the water molecules inside the vegetable itself. Because you only need a tiny splash of water in the bottom of a microwave-safe glass bowl, the vegetables essentially steam themselves from the inside out in a fraction of the time.
Place your trimmed green beans in a glass bowl, add two tablespoons of water, cover loosely with a microwave-safe plate (to trap steam but allow excess pressure to vent), and microwave on high for 2 to 3 minutes. Because the cooking time is so drastically reduced, the volatile acids simply do not have enough time to displace the magnesium in the chlorophyll. You get bright green, tender vegetables in three minutes flat, with only one bowl to wash.
The Sunday Blanch-and-Shock
If you want the absolute best of both worlds—restaurant-quality texture and weeknight speed—you need to embrace batch prepping.
On Sunday afternoon, when you have the time and patience, set up your large boiling pot and your ice bath. Blanch and shock all of your green beans, asparagus, and broccoli florets for the week. Once they are completely cooled in the ice bath, dry them thoroughly with paper towels. Moisture is the enemy of storage, so make sure they are bone dry. Store them in the refrigerator in an airtight glass container lined with a dry paper towel.
On Wednesday night, when you are ready to eat, your vegetables are already perfectly cooked and vibrantly green. All you have to do is toss them into a hot skillet with a little butter, garlic, and sea salt for exactly 60 seconds just to heat them through. You look like a culinary superstar, and it took you less time than setting the dining table.
Troubleshooting Other Green Vegetable Disasters
You have mastered the uncovered boil and the ice bath shock. But chlorophyll is a fragile diva, and there are still a few post-cooking traps that can ruin your hard work.
Acidic Dressings: The Post-Cook Color Killer
Let’s say you have perfectly blanched and shocked your green beans for a beautiful Nicoise salad. You toss them in a bright, punchy vinaigrette made with lemon juice and white wine vinegar. You set the salad on the buffet table, and an hour later, the green beans have turned gray.
What happened? The acid attack struck again.
Chlorophyll does not care if the acid comes from its own internal cell walls or from a bottle of expensive vinegar. If you expose green vegetables to an acidic environment, the hydrogen ions will eventually displace the magnesium, even at room temperature. Even if you rely on the power of dijon mustard to perfectly emulsify your vinaigrette and coat the vegetables evenly, that acidic coating will steadily destroy the color over time.
The fix is incredibly simple: never dress green vegetables until the exact moment you are ready to serve them. Keep the blanched vegetables and the dressing separate. Toss them together right as you carry the bowl to the table. The vegetables will be eaten long before the acid has time to turn the pheophytin gray.
Storage Nightmares
Improper storage can also degrade the color and texture of your greens before you even get a chance to cook them. Just as you have likely discovered why your fresh herbs turn to slime when trapped in unventilated plastic bags, green beans and asparagus will rot and yellow if they are suffocated in excess moisture. Always store fresh green vegetables in the crisper drawer with adequate airflow, and do not wash them until right before you plan to cook them.
Conclusion: Reclaiming Your Culinary Confidence
Cooking is not magic; it is applied science. The difference between a frustrated amateur and a confident home cook is simply understanding the “why” behind the rules.
You now know that chlorophyll relies on a delicate magnesium ion to keep its brilliant color. You know that heat releases acidic hydrogen ions that want to destroy that color. And most importantly, you know that a simple pot lid traps those acids and guarantees failure.
By utilizing a large volume of aggressively salted boiling water, keeping the pot completely uncovered, and utilizing the thermal shock of an ice bath, you have completely neutralized the chemical threats against your food. Whether you are deglazing a pan and turning burnt bits into sauce, or simply boiling a handful of green beans, mastering these scientific principles will elevate your daily meals from stressful chores into genuine kitchen artistry.
So the next time you bring home beautiful, vibrant produce from the market, do not let it intimidate you. Grab your biggest stainless steel pot, pour a glass of wine, and leave the lid in the cabinet where it belongs. You’ve got this.






