
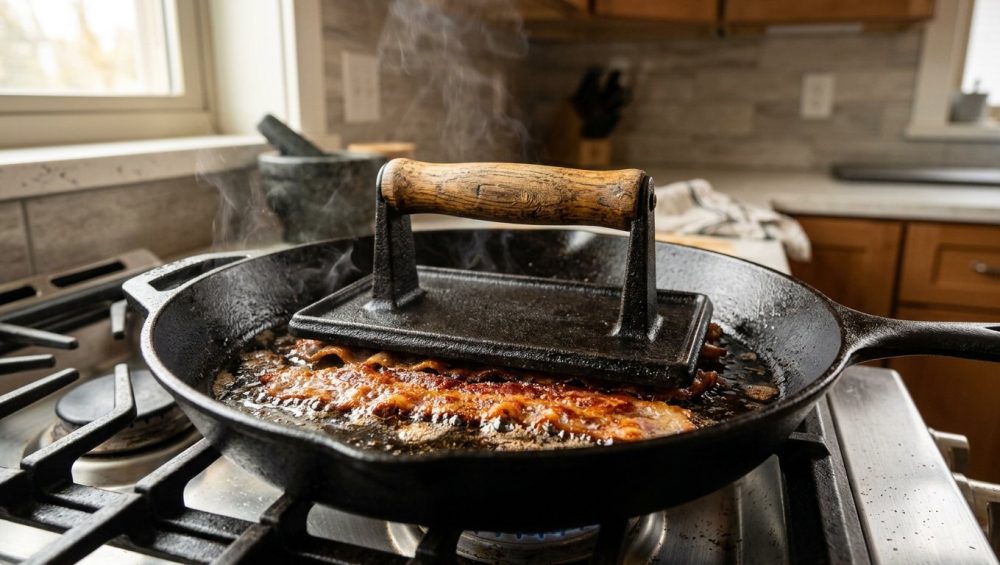
Picture this: It is a beautiful weekend morning. You have a pot of decent coffee brewing, the eggs are on standby, and you are ready to treat yourself to a glorious, diner-style breakfast. You lay those beautiful, expensive strips of thick-cut bacon into your skillet. They sizzle. They smell like absolute heaven. And then, right before your eyes, they betray you. They buckle, twist, and contort into sad, floppy meat ribbons. The edges are charred to a bitter crisp, while the fatty centers remain flabby, chewy, and entirely unappetizing.
It is a culinary crime scene.
If you are nodding your head in frustration right now, take a deep breath. It is not your fault. You are not a bad cook, and you do not need to attend culinary school to fix this. You are simply losing a battle against the fundamental laws of thermodynamics and cellular biology. But I am here to tell you that you can absolutely win this war. You just need the right tool.
As a home cook who has set off the smoke detector more times than I care to admit, I rely on clever, efficient hacks to survive the weekday dinner rush. Time is money, and I do not have time for nonsense on a Tuesday night. But when the weekend rolls around? I demand absolute perfection. I want my bacon flat, evenly rendered, and shatteringly crisp. I want professional-level results in my standard home kitchen, and I refuse to accept anything less.
The secret to achieving this restaurant-quality perfection isn’t some mystical, pretentious chef technique. It is a heavy, unapologetic piece of metal: the cast iron grill press.
Today, we are going to dive deep into the fascinating, slightly infuriating science of why your breakfast meats throw a temper tantrum in the pan. We will explore the mechanics of fat rendering, the physics of heat transfer, and why adding a heavy weight to your skillet changes absolutely everything. Grab your coffee, because this is your definitive masterclass on reclaiming your breakfast.
The Physics of the Curl: Why Your Bacon Throws a Tantrum in the Pan
To understand how to fix the problem, we first have to understand why the problem exists. Bacon does not curl out of spite, even if it feels that way when hot grease is hitting your forearm. It curls because of a microscopic tug-of-war happening within the meat itself.
The Anatomy of a Strip: The Muscle vs. Fat Tug-of-War
A standard strip of streaky bacon is not a uniform piece of food. It is a complex sandwich of two very different tissues: a layer of lean muscle and a strip of fat, joined together but possessing completely different physical responses to heat.
When you place that strip into a hot skillet, those two layers embark on entirely different journeys. As the temperature climbs, the fat cells begin to rupture. The solid lipids melt into liquid grease (a process known as rendering), and the remaining connective tissue contracts dramatically. Meanwhile, the lean muscle undergoes its own transformation. The proteins within the muscle fibers begin to denature and shrink, but they do so at a much slower rate and to a lesser extent than the fat.
The result? The fat side of the strip shrinks faster and tighter than the meat side can keep up with. Because they are physically attached to one another, this unequal contraction forces the entire strip to bow inward toward the fat. It is the exact same physics that causes a bimetallic strip to bend inside a thermostat. Your breakfast is quite literally tearing itself apart under the stress of uneven thermal expansion.
The Moisture Evaporation Factor
If the muscle-to-fat ratio was the only issue, curling would be manageable. But modern food manufacturing has introduced a much more insidious culprit: water.
Unless you are buying expensive, traditionally dry-cured bacon from a local butcher, you are likely purchasing commercial wet-cured bacon. To speed up the curing process and boost profit margins, industrial processors inject pork bellies with a liquid brine solution. Consequently, standard supermarket bacon can consist of roughly 30% to 50% water by weight. In fact, the issue of water-pumped meat is so prevalent that regulators have frequently debated strict labeling laws for bacon that releases excessive watery sludge.
When this water-logged meat hits a hot pan, the moisture rapidly heats up and evaporates into steam. This violent evaporation accelerates the tightening of the muscle fibers. The rapid moisture loss shocks the protein lattice, causing it to seize up and buckle instantly. While adding a splash of water to the pan at the beginning of the cook can sometimes help regulate the rendering temperature and slow down this violent shock, the structural damage is often inevitable without physical intervention.
The Thermodynamics of Rendering Fat
Cooking bacon is not really “cooking” in the traditional sense; it is an exercise in controlled fat rendering. Rendering is the process of melting solid animal fat into a liquid form. For this to happen perfectly, the heat must penetrate the fat cells slowly.
If you blast your bacon with high heat right out of the gate, the exterior of the meat sears and seals before the internal fat has a chance to reach its melting point. The proteins tighten aggressively, the unrendered fat turns rubbery and stringy, and the edges burn to a cinder. The curl becomes permanent because the structure of the meat has been rigidly set in its contorted shape.
The Tragic Consequences of Curled Bacon
We have established the science of the curl, but let’s talk about why it actually ruins your meal. A curled strip of meat is not just an aesthetic failure; it is a textural disaster and a safety hazard.
The Chewy-Crunchy Paradox
When a strip of bacon curls, it lifts away from the flat surface of the skillet. Suddenly, only the very tips and edges of the meat are making direct contact with the hot metal.
Because cast iron and stainless steel pans rely on conductive heat transfer (heat transferring through direct physical contact), the parts of the meat touching the pan cook incredibly fast. The parts that have arched up into the air are relying on convective heat (the ambient hot air and steam rising from the pan), which is highly inefficient.
This creates the dreaded chewy-crunchy paradox. The edges that touch the pan burn and turn to ash, while the elevated centers remain pale, flabby, and undercooked. You are left chewing through a rubbery pocket of unrendered fat surrounded by a halo of burnt carbon. It is a wildly disappointing bite that completely defeats the purpose of eating bacon in the first place.
The Splatter Zone (and Kitchen Safety)
Curled bacon is also an active menace to your safety and your kitchen’s cleanliness. When the meat buckles, it creates little pockets and domes underneath the strip. As the fat renders and the water evaporates, steam gets trapped inside these pockets.
Eventually, the pressure builds up, and the steam violently bursts through the layer of liquid grease in the pan. This is what causes those aggressive, painful pops and splatters that cover your stovetop in a fine mist of oil and leave you with tiny grease burns on your wrists. By keeping the meat perfectly flat, you eliminate these steam pockets, drastically reducing the amount of violent splattering.
Enter the Cast Iron Grill Press: Your Kitchen’s Heavy Enforcer
You cannot change the cellular biology of pork belly, and you cannot rewrite the laws of thermodynamics. But you can overpower them with sheer, unadulterated physical force. This is where the cast iron grill press steps in to save your weekend.
What Exactly Is a Cast Iron Grill Press?
A grill press (sometimes called a bacon press or a steak weight) is exactly what it sounds like: a heavy, flat piece of metal with a handle attached to the top. It is designed to be placed directly on top of your food while it cooks in a skillet or on a griddle.
By applying constant, even, downward pressure, the press forces the entire surface area of the meat to remain in direct contact with the hot pan. It physically prevents the fat and muscle fibers from buckling, neutralizing the tug-of-war and ensuring a perfectly flat, uniform cook.
Why Cast Iron Reigns Supreme (and Why We Reject Toxic Alternatives)
Now, let me be brutally clear about something: I have a strict “no-go” rule when it comes to cheap, toxic kitchenware. The market is currently flooded with lightweight aluminum presses coated in mystery non-stick chemicals. Do not buy them.
Non-stick coatings degrade, scratch, and eventually peel off directly into your food—especially when subjected to the high heat of a searing pan. I am a fierce advocate for banishing toxic kitchen gear from your home immediately. You do not want flakes of polytetrafluoroethylene (PTFE) embedded in your breakfast.
Furthermore, aluminum presses are simply too light to do the job effectively. You need mass. Cast iron is the undisputed king of the kitchen press. It is virtually indestructible, it is completely non-toxic once properly seasoned, and it possesses the heavy, dense thermal mass required to boss your food around. A proper cast iron press will easily outlive you, making it one of the smartest, most economical investments you can make for your kitchen arsenal.
The Science of the Press: How Weight and Heat Transform Your Breakfast
Using a cast iron press is not just about squishing your food; it fundamentally alters the thermal dynamics of your cooking environment.
Conductive Heat Transfer and the Maillard Reaction
The ultimate goal of cooking any meat is to trigger the Maillard reaction. This is the complex chemical process where amino acids and reducing sugars react under heat to create hundreds of new flavor compounds, resulting in that deeply savory, browned crust we all crave.
According to culinary science, the optimal temperature range for the Maillard reaction to occur in bacon is between 280°F and 330°F (140°C to 165°C). If your meat curls away from the pan, it drops out of this optimal temperature zone. Sometimes, when meat sticks to stainless steel, it is because it hasn’t achieved a proper, even sear to release itself from the metal.
By applying a heavy cast iron press, you guarantee that 100% of the meat’s surface area is pressed firmly against the 300°F metal of your skillet. This maximizes conductive heat transfer, ensuring that every single millimeter of the bacon undergoes the Maillard reaction simultaneously. The result is a strip that is uniformly browned, deeply flavorful, and incredibly crisp from end to end.
Preventing Structural Deformation
The sheer weight of the cast iron press physically overrides the kinetic energy of the shrinking proteins and rupturing fat cells. As the fibers attempt to contract and curl, the heavy iron simply says, “No.”
While some cooks prefer to use a lighter vented chef’s press for delicate tasks like searing fish or keeping a grilled cheese from squishing too much, bacon requires heavy-duty intervention. The dense, unyielding weight of solid cast iron forces the internal structure of the meat to set in a flat, straight line as it cooks. Once the fat has fully rendered and the proteins have set, the bacon will retain its perfectly flat shape even after the press is removed.
How to Choose the Ultimate Cast Iron Grill Press
Not all presses are created equal. If you want to cook like an expert without the culinary degree, you need to select a tool that actually works. Here is exactly what you need to look for when shopping for a cast iron grill press.
Weight Matters: Finding the Sweet Spot
The entire purpose of the press is to provide downward force. If it is too light, the bacon will simply lift it up as it curls. If it is too heavy, it will crush delicate foods and squeeze all the natural juices out of your burgers and steaks.
The sweet spot for a standard home kitchen grill press is between 1.5 and 3 pounds. This is heavy enough to keep thick-cut bacon perfectly flat, but light enough to easily maneuver with one hand while you are juggling a spatula and a cup of coffee.
Shape and Surface Area: Round vs. Rectangular
Grill presses generally come in two shapes: round and rectangular. Your choice here depends entirely on the cookware you use most often.
If you primarily cook in a standard 10-inch or 12-inch round cast iron or stainless steel skillet, a round press (usually 8 to 9 inches in diameter) is your best bet. It mimics the shape of the pan, allowing you to cover the maximum amount of surface area without the corners of the press bumping into the sloping walls of the skillet.
If you cook on a large, flat griddle (like a Blackstone) or a rectangular stovetop grill pan, a rectangular press is ideal. The straight edges allow you to line up multiple strips of bacon perfectly and cover them all at once.
The Handle: Ergonomics and Heat Resistance
Because cast iron is an exceptional conductor of heat, a press made entirely of a single piece of iron will quickly become too hot to touch. You do not want to be fumbling with oven mitts while trying to flip delicate food.
Look for a press that features a heat-resistant handle. Traditional models often feature a thick wooden handle bolted to the iron base. Wood is a fantastic natural insulator, meaning the handle will stay cool to the touch even if the press has been sitting in a hot pan for ten minutes. Alternatively, some modern presses feature spiraled stainless steel “cool-touch” handles, which dissipate heat rapidly and are oven-safe (unlike wood).
Step-by-Step Masterclass: Cooking Perfect Bacon with a Grill Press
Having the right tool is only half the battle. Knowing exactly how to deploy it is what separates the weekend culinary hobbyist from the chaotic, smoke-alarm-triggering amateur. Here is my foolproof, step-by-step method for achieving mind-blowing, perfectly flat bacon.
Step 1: The Cold Pan Start (Crucial!)
Do not preheat your skillet. I repeat: do not put your bacon into a hot pan.
If you drop fatty pork belly into a 400°F skillet, the proteins will seize instantly, the fat will burn before it renders, and the curling will be so aggressive that even a heavy press will struggle to contain it. The magic of a cold pan is that it allows the temperature of the meat and the metal to rise together gradually.
Lay your strips of bacon flat in your cold skillet. They can be close together, but try not to let them overlap, as overlapping areas will steam rather than crisp.
Step 2: Prepping and Applying the Press
While your pan is still cold, gently place your cast iron grill press directly on top of the bacon. You do not need to press down or apply extra body weight; simply let gravity do the work.
Turn your stovetop burner to medium-low. Patience is your greatest ally here. As the pan slowly heats up, the fat will begin to gently melt and render out into the pan. Because the press is resting on top, the bacon has no choice but to remain perfectly flush against the bottom of the skillet.
Pro-Tip: Some cooks like to preheat their grill press on a separate burner before applying it to the meat, which cooks the bacon from both the top and the bottom simultaneously. While this works brilliantly for steaks and burgers, I find it unnecessary for bacon. A room-temperature press works perfectly fine and is much safer to handle early in the morning.
Step 3: Heat Management and Flipping Mechanics
After about 6 to 8 minutes on medium-low heat, you will hear a distinct change in the sound coming from the pan. The initial wet, sputtering sounds of evaporating water will transition into a rhythmic, high-pitched sizzle. This means the water is gone, and the meat is now frying in its own rendered fat.
Carefully lift the grill press by its insulated handle. The bacon should look perfectly flat and beautifully browned on the bottom. Use a pair of tongs to flip each strip over.
Once flipped, place the grill press back down on top of the meat. Let it cook for another 3 to 5 minutes. Because the press has now absorbed ambient heat from the pan, it will lightly sear the top of the bacon while the bottom finishes crisping.
Step 4: Draining and Resting
When the bacon has reached your desired level of crispness, remove the press and set it aside on a heat-safe surface. Use your tongs to transfer the flat, rigid strips of bacon to a wire cooling rack set over a baking sheet (or a plate lined with paper towels).
Allow the meat to rest for at least two minutes. As it cools, the residual liquid fat on the surface will solidify slightly, giving the bacon that final, shatteringly crisp texture. You will be left with gorgeous, uniform strips that look like they were styled for a food magazine.
Beyond Bacon: The Unexpected Versatility of a Grill Press
If you think I am recommending you buy a heavy piece of cast iron just for Sunday morning breakfast, you do not know me very well. I despise unitaskers. A cast iron grill press is an incredibly versatile culinary workhorse that will elevate your weeknight dinners just as much as your weekend brunches.
Smash Burgers That Actually Sear
If you are tired of wondering why your burgers always shrink into thick, dense meatballs that resemble hockey pucks, the grill press is your salvation.
To make a proper diner-style smash burger, you need intense heat and immense pressure to maximize the Maillard reaction on the surface of the beef. Place a loosely packed ball of ground beef onto a ripping hot cast iron skillet. Place a small square of parchment paper over the beef, and use your grill press to smash the meat down as flat as you possibly can. Hold it there for 10 seconds. The heavy iron provides the leverage needed to flatten the patty, resulting in a burger with a spectacularly crusty, caramelized exterior and a juicy interior.
Next-Level Grilled Cheese and Paninis
You do not need an expensive, bulky electric panini press taking up real estate on your kitchen counter. You just need a skillet and your cast iron weight.
Build your sandwich. I highly recommend utilizing the magic of mayonnaise on the outside of the bread instead of butter for a more even, golden-brown crust. Place the sandwich in a medium-low skillet and set the grill press on top. The weight compresses the bread, forcing the interior cheese to melt rapidly while ensuring the exterior toasts evenly from edge to edge. Flip halfway through, replace the press, and enjoy the crispiest, gooiest sandwich of your life.
Searing Steaks and Poultry Like a Pro
Cooking a chicken breast with the skin on, or trying to get an aggressive sear on a thick steak, can be frustrating because the meat naturally bows and curls when it hits a hot pan. The center of the meat lifts away from the oil, resulting in a pale, flabby surface.
First, ensure your meat is bone-dry. The magic of a paper towel is essential here to remove surface moisture that would otherwise cause steaming. Once dry, place the meat into a hot, oiled skillet and immediately weigh it down with your cast iron press. The press forces the skin or the surface of the steak to remain completely flush against the hot metal. You will achieve a golden, crackling chicken skin and a steakhouse-quality crust that is simply impossible to replicate with a spatula.
Caring for Your Cast Iron Press (So It Outlives You)
Because your press is made of raw cast iron, it requires the exact same care and respect as your favorite cast iron skillet. Do not panic; caring for cast iron is incredibly easy once you understand the basics. If you treat it right, it will never rust, and it will develop a naturally non-stick patina over time.
Cleaning Without Ruining the Seasoning
Rule number one: Never, ever put your cast iron grill press in the dishwasher. The harsh detergents and prolonged exposure to water will strip the seasoning and cause the iron to rust almost immediately.
After you are done cooking, let the press cool down slightly. While it is still warm, wipe away any excess grease with a paper towel. If there are stubborn, burnt-on bits of food stuck to the bottom, run the press under warm water and gently scrub it. I highly recommend using a chainmail scrubber for this task. It easily knocks away hardened food debris without scratching or stripping the polymerized oil layer that protects the iron.
Once clean, dry the press completely with a towel. Never let it air dry. Finally, place it on a warm stovetop burner for a few minutes to evaporate any microscopic moisture, and rub a tiny drop of neutral cooking oil (like canola or grapeseed) over the surface before storing it away.
The Art of Re-Seasoning
If you accidentally neglect your press and it develops a spot of rust, or if the bottom starts looking dull and gray, it simply needs to be re-seasoned.
Seasoning is not about flavor; it is about the science of polymerization. When liquid oil is heated past its smoke point, it undergoes a chemical reaction, bonding to the porous surface of the iron and transforming into a hard, slick, protective plastic-like coating.
To re-season your press, scrub away any rust with steel wool. Wash it, dry it completely, and rub the entire piece of iron (top, bottom, and sides) with a very thin layer of high-smoke-point oil. Wipe off as much of the oil as you can—it should look almost dry. Place the press upside down in a 450°F oven and bake it for one hour. Turn off the oven and let it cool inside. Your press will emerge with a glossy, jet-black finish, ready to dominate your next batch of breakfast meats.
The Final Verdict: Reclaiming Your Weekend Breakfast
Cooking should not be an exercise in frustration. You do not need to settle for mediocre, curled-up, half-burnt, half-raw bacon just because you are cooking at home. By understanding the cellular mechanics of meat and the simple physics of heat transfer, you can take control of your kitchen.
A cast iron grill press is a brilliant, low-tech, highly effective tool that solves a universal culinary annoyance. It forces your food to behave, maximizes flavor development, and drastically reduces the mess on your stovetop. It is the ultimate enforcer for the weekend culinary hobbyist who refuses to compromise on quality.
So, do yourself a favor. Ditch the peeling non-stick junk, invest in a heavy slab of seasoned cast iron, and start your pan cold. Your Saturday mornings will never be the same, and you will finally get to eat the perfectly flat, shatteringly crisp bacon you actually deserve. Now, go pour yourself another cup of coffee and get cooking. You’ve got this.






