
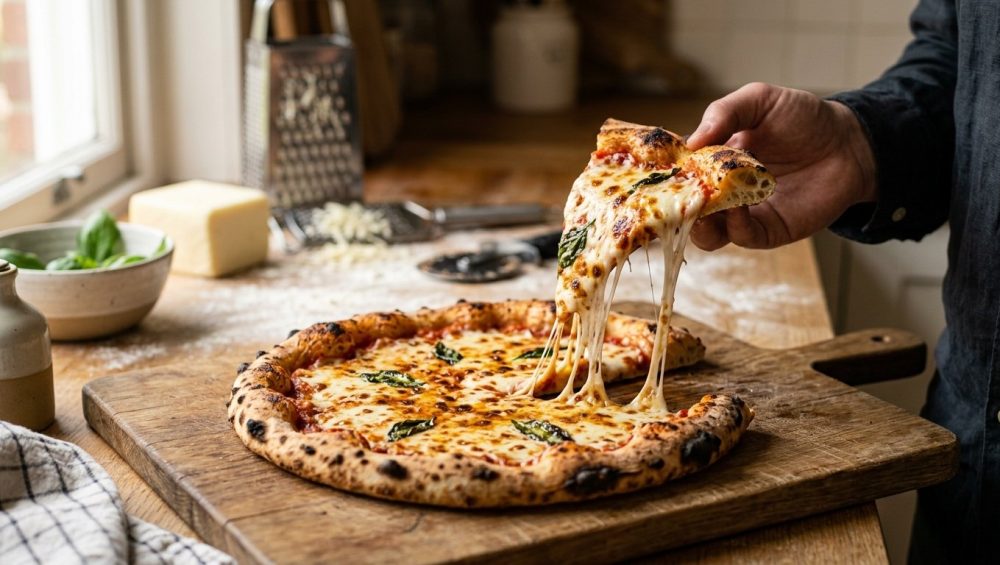
Picture this: It is Friday night. You have survived another grueling week of endless emails, meetings that definitely should have been emails, and the general chaos of modern existence. You decided that tonight, you are not ordering the greasy, overpriced takeout from the local chain. No, tonight, you are going to be a culinary artisan. You made your dough from scratch. You simmered a beautiful, vibrant tomato sauce. And, because you wanted to treat yourself to an “authentic” experience, you splurged on the expensive, artisan ball of fresh mozzarella floating in a picturesque little tub of brine.
You stretch the dough, ladle the sauce, tear off beautiful, rustic chunks of that premium cheese, and slide your masterpiece into the oven. You pour a glass of wine and wait for the magic to happen.
Ten minutes later, you open the oven door and your heart sinks.
Instead of a crispy, blistered, restaurant-quality pie, you are staring at a swamp. The center of your pizza has transformed into a murky, milky puddle. The crust underneath is gummy, pale, and entirely raw. When you try to lift a slice, the tip immediately collapses, dumping a waterfall of hot cheese-water onto your plate. You haven’t made a pizza; you have made mozzarella soup in a bread bowl.
Welcome to the most common, heartbreaking trap in the home kitchen. As a home cook, you absolutely do not need a culinary degree to make mind-blowing, professional-level food. But you do need to understand the basic food science of the ingredients you are working with. Today, we are going to brutally dismantle the myth of the fresh mozzarella pizza, explain the unforgiving thermodynamics of your home oven, and teach you exactly how to achieve a perfectly crisp, structurally sound crust every single time.
The Thermodynamics of a Pizza Puddle
Before we put the cheese on trial, we need to talk about the physics of baking. Why does a little bit of excess water completely ruin a pizza crust? It all comes down to the science of heat transfer and the boiling point of water.
In order for pizza dough to transform from a sticky, pale paste into a crispy, golden-brown crust, it needs to undergo the Maillard reaction. This is the chemical reaction between amino acids and reducing sugars that gives browned food its distinctive flavor and crunch. However, the Maillard reaction only occurs rapidly at temperatures above 285°F (140°C).
Here is the problem: water boils at 212°F (100°C).
When your fresh mozzarella releases a massive puddle of water onto the surface of your pizza, it creates a thermal barrier. As long as there is liquid water sitting on top of that dough, the temperature of the dough directly underneath it cannot—and will not—exceed 212°F. The heat energy from your oven is entirely consumed by the process of trying to boil and evaporate that water, rather than baking the bread.
Until that puddle completely evaporates, your crust is essentially being gently steamed. By the time the water finally cooks off in a standard home oven, the outer edges of your crust are burnt to a crisp, the cheese has separated into a greasy, rubbery mess, and the center of the dough is still a floppy, underbaked disaster.
The Science of Mozzarella: Fresh vs. Low-Moisture
To understand why your cheese is sabotaging you, we have to look at how it is made. Not all mozzarella is created equal, and treating them interchangeably is the fastest way to ruin your dinner.
The Hydration Bomb: Fresh Mozzarella
Fresh mozzarella—whether it is Fior di Latte (made from cow’s milk) or Mozzarella di Bufala (made from water buffalo milk)—is a high-moisture cheese. During the cheese-making process, the curds are heated, stretched, and formed into balls, which are then immediately plunged into water, whey, or brine to maintain their delicate, soft texture.
Because it is barely aged and stored in liquid, fresh mozzarella is essentially a dairy sponge. By FDA definitions, fresh mozzarella contains upwards of 50% to 60% water. It is incredibly delicious, milky, and perfect for a Caprese salad. But when you subject that delicate, water-logged sponge to the intense heat of an oven, the protein matrix tightens and rapidly squeezes out all that trapped moisture directly onto your dough.
The Unsung Hero: Low-Moisture Mozzarella
Low-moisture mozzarella is the undisputed MVP of the home pizza kitchen. After the curds are stretched, this cheese is soured longer and carefully dried out, dropping its water content down to around 45% or lower. It is firm, dense, and usually sold in solid blocks in the dairy aisle.
Because the excess water has been removed, low-moisture mozzarella melts beautifully, stretches into those iconic cheese pulls, and browns perfectly without weeping a single drop of liquid onto your crust. It is the foundation of the classic New York-style slice.
A quick, mandatory warning from your favorite snarky sous-chef: always buy the solid block and grate it yourself. The convenience of buying pre-shredded cheese is a massive trap. Those bags of pre-grated cheese are heavily coated in cellulose (wood pulp) and anti-caking agents to prevent the shreds from clumping in transit. That powdery coating prevents the cheese from melting into a cohesive layer, leaving you with a gritty, greasy, uneven texture. Take the extra sixty seconds to grate the block yourself. Your palate will thank you.
The Pretentious Pizza Snob Trap
If low-moisture cheese is so vastly superior for baking, why do so many recipes and food blogs insist that you must use fresh mozzarella for an “authentic” pizza?
Because they are leading you into the Pretentious Pizza Snob Trap.
We have all encountered the culinary purists who took one trip to Naples and suddenly believe that anything other than imported buffalo mozzarella is a crime against Italian heritage. They will tell you that a true Margherita pizza demands fresh cheese, and they aren’t technically wrong—if you happen to live in a commercial pizzeria.
Here is the brutal reality check: that pretentious chef is baking his pizza in a custom-built, wood-fired oven that reaches a blistering 900°F (500°C).
At 900°F, the thermodynamics of baking change entirely. A Neapolitan pizza cooks in exactly 60 to 90 seconds. The ambient heat is so violently intense that when the fresh mozzarella releases its water, that moisture is flash-evaporated into steam almost instantly. The puddle never has a chance to form, and the crust bakes through in a matter of seconds.
You, on the other hand, are cooking in a standard residential kitchen. Even if you have a simple oven thermometer confirming that your appliance actually hits its maximum advertised setting of 500°F or 550°F, it is nowhere near hot enough to vaporize that volume of water in a short timeframe. Instead of flash-evaporating, the water just bleeds out slowly over a 10-to-12-minute bake, soaking into your dough and ruining your night.
You cannot blindly apply 900-degree techniques to a 500-degree oven. Embrace the low-moisture block.
How to Actually Use Fresh Mozzarella (If You Refuse to Listen to Me)
I know some of you are incredibly stubborn. You bought the expensive fresh mozzarella, you love the aesthetic of those beautiful white pools of cheese on your pie, and you are determined to make it work.
I respect the tenacity. If you absolutely must use high-moisture fresh mozzarella in a home oven, you cannot just pull it out of the tub and throw it on your pizza. You have to actively intervene and extract the water yourself. Here is the foolproof, step-by-step masterclass on wringing out your cheese.
Step 1: Slice and Drain Early
Do not wait until your dough is stretched to prep your cheese. Hours before you plan to bake, take the mozzarella out of its liquid. Before your cheap cutting board keeps cracking from being constantly saturated in acidic tomato juices and cheese brine, get your prep done on a clean, dry surface. Slice the mozzarella into thin medallions, or tear it into small, bite-sized chunks.
Place the pieces into a fine-mesh sieve or a colander suspended over a bowl. Let gravity do the initial work. Leave it in the fridge for at least an hour. You will be horrified by the amount of milky water that collects in the bowl below—water that was destined to ruin your crust.
Step 2: The Paper Towel Press
Gravity isn’t enough. After the cheese has drained, lay the slices out flat on a triple layer of heavy-duty paper towels. Place another layer of paper towels on top, and gently press down to wick away the surface moisture.
If you want to get truly scientific, sprinkle a tiny pinch of salt over the cheese slices during this stage. Through the magic of osmosis, the salt will draw even more trapped moisture out of the protein structure. Just remember to wipe the excess moisture away before assembly.
Step 3: The Mid-Bake Pivot
Even after draining and pressing, fresh mozzarella will still release some liquid when it hits 500°F. To protect your crust, you need to stagger your bake time.
Stretch your dough, apply your sauce, and put the pizza in the oven without the cheese. Let the dough bake and establish a firm, crispy top layer for about 4 to 5 minutes. Once the crust has set and the sauce has reduced slightly, pull the pizza out, quickly distribute your meticulously dried fresh mozzarella, and return it to the oven for the final few minutes. The cheese will melt beautifully, and your pre-baked crust will be strong enough to withstand any residual moisture.
Beyond the Cheese: Other Puddle Culprits
While fresh mozzarella is the primary offender in the tragedy of the soggy pizza, it usually has accomplices. If you have switched to low-moisture cheese and are still getting a floppy center, you need to audit the rest of your ingredients.
The Watery Sauce Sabotage
Tomatoes are mostly water. If you are using raw, crushed canned tomatoes for a Neapolitan-style sauce, you are introducing a massive amount of liquid to the top of your dough.
To fix this, pour your crushed tomatoes into a fine-mesh strainer and let the excess watery juice drain away for 20 minutes before seasoning it. Alternatively, you can simmer your sauce on the stove to reduce the water content and concentrate the flavor. Just ensure you are using high-quality, non-reactive cookware. If you simmer highly acidic tomatoes in a cheap, unlined aluminum or cast-iron pot, your tomato sauce tastes metallic and your dinner is ruined anyway.
The Raw Vegetable Trap
Loading a pizza with raw mushrooms, bell peppers, and onions is a rookie mistake. Vegetables are essentially water balloons made of plant fiber (mushrooms are over 90% water). When they hit the heat of the oven, they collapse and dump all that liquid directly into your cheese and dough.
Always sauté your watery vegetables in a skillet before they go anywhere near your pizza. Cook the water out of them first. And if you find that your food constantly sticks to stainless steel pans while you are trying to prep your toppings, you need to learn proper temperature control (utilizing the Leidenfrost effect) before blaming your equipment. Pre-cook your veggies, drain them, and then top your pie.
The Gear: Banishing Toxic Trash and Upgrading Your Arsenal
We need to have a very serious conversation about what your pizza is sitting on while it bakes. You can have the perfect low-moisture cheese, the most robust, deeply fermented dough, and a perfectly reduced sauce, but if you are baking it on garbage equipment, you will get garbage results.
The “No-Go” Rule on Toxic Pizza Pans
I have absolutely zero patience for cheap, toxic kitchenware. If you are currently baking your homemade pizzas on a flimsy, dark-coated, non-stick pizza pan that you bought for $12 at a big-box store, I want you to walk into your kitchen and throw it in the garbage immediately.
Most of these cheap non-stick pans are coated with PTFE (Teflon) or other PFAS “forever chemicals”. These coatings are inherently dangerous for high-heat cooking. When heated past 500°F—which is exactly the temperature you need to bake a good pizza—these chemical coatings begin to degrade and break down, releasing toxic polymer fumes that can literally cause a condition known as “polymer fume fever” or “Teflon flu”.
Furthermore, these cheap coatings are notoriously fragile. After a few uses and a couple of passes with a pizza cutter, the coating inevitably begins to peel, flaking black, toxic specks directly into the bottom of your crust. We do not serve chemical flakes to our friends and families. Period.
Beyond the toxicity, thin aluminum or steel pans are terrible at heat retention. They lack the thermal mass required to shock the dough into rising. This lack of structural integrity is exactly why your cheap baking sheets warp with a terrifying, loud “POP” the second they hit high heat.
The Ultimate Upgrade: The Baking Steel
If you want professional, pizzeria-quality results in a standard residential oven, you need massive thermal conductivity. You need the magic of a baking steel.
For decades, home cooks relied on ceramic or cordierite pizza stones. While a stone is infinitely better than a flimsy non-stick pan, it is still a flawed material. Ceramic is an insulator; it absorbs heat well, but it is very slow to release it.
A baking steel is a heavy, thick slab of highly conductive carbon steel. Because of its metallurgical properties, carbon steel conducts heat roughly 18 times faster than a traditional ceramic pizza stone.
Why does this matter? Because when you slide your room-temperature, sauce-covered dough onto a 500°F baking steel, the steel rapidly dumps a massive amount of stored heat directly into the bottom of the pizza in the first 15 seconds. This violent transfer of heat creates explosive “oven spring” (the crust puffing up rapidly) and instantly sears the bottom of the dough, creating a crispy, blistered undercarriage that completely seals the bottom of the pie. Even if a little moisture drops down from your cheese, the crust is already too well-baked and crispy to absorb it.
A baking steel is virtually indestructible, completely non-toxic, and will outlive you. It is the single greatest investment a weekend pizza enthusiast can make.
Putting It All Together: The Foolproof Home Pizza Strategy
With the average large cheese pizza at a chain restaurant now costing upwards of $17, mastering the art of the homemade pie isn’t just a culinary flex; it is basic financial self-defense. Let’s review the master plan for a flawless, puddle-free pizza night.
1. Preheat Like a Professional:
Place your baking steel on the top-middle rack of your oven and preheat it to the absolute maximum temperature your oven allows (usually 500°F or 550°F) for at least one full hour before you plan to bake. The steel needs time to absorb enough thermal energy to shock the dough.
2. Master the Dough Handling:
When it is time to stretch your dough, be gentle. If your dough keeps shrinking back like a rubber band every time you try to pull it, you are fighting the gluten network. Stop fighting. Cover it with a damp towel, walk away, pour yourself another drink, and let it rest for 15 minutes. Once the gluten relaxes, it will stretch effortlessly.
3. Choose Your Cheese Wisely:
Grate a block of high-quality, low-moisture, whole-milk mozzarella. If you are using fresh mozzarella, ensure it has been sliced, drained, and pressed with paper towels hours in advance.
4. Assemble with Speed:
Build your pizza on a wooden peel dusted lightly with semolina flour. Do not overload the pie with a mountain of watery sauce and raw vegetables. Less is always more. Work quickly so the sauce doesn’t have time to seep into the raw dough.
5. The Launch and The Cleanup:
Slide the pizza onto the screaming hot steel. Watch as the crust bubbles and blisters in minutes. Once it is done, let the pizza rest on a wire cooling rack for three minutes before slicing, which prevents the bottom from getting soggy from its own trapped steam.
And when you are left with a kitchen counter covered in sticky dough remnants and flour, remember that you need a bench scraper to effortlessly scrape the mess straight into the trash. Stop ruining your expensive dish sponges trying to scrub wet flour.
The Final Slice
Cooking is not magic; it is applied science with a side of intuition. By respecting the thermodynamic limits of your home oven, aggressively banishing toxic and inefficient pans from your kitchen, investing in a conductive baking surface, and choosing the right cheese for the job, you can completely eliminate the tragedy of the soggy pizza.
Embrace the low-moisture block. Wring out your fresh curds. Stop letting water ruin your weekend projects. When you finally pull that masterpiece out of the oven—crispy, structurally sound, perfectly caramelized, and completely devoid of puddles—you will be ready to host a mindful pizza party that will make your friends genuinely wonder if you secretly installed a commercial brick oven in your garage.
Now go preheat that steel, grate your own cheese, and show that dough who is boss.






