
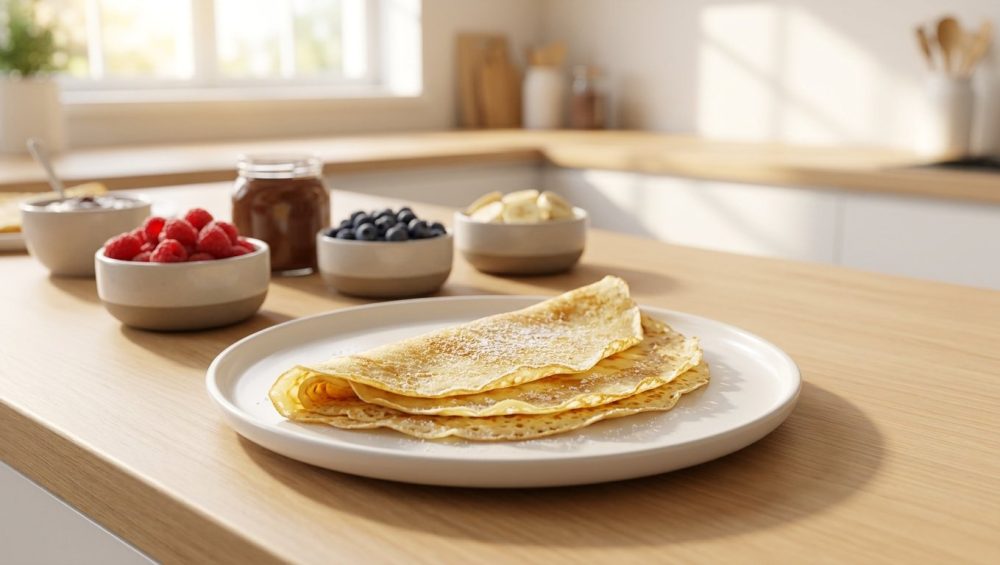
Listen, we need to have a serious talk about your weekend brunch spread. I know exactly what happened last Sunday. You invited a few friends over, promised them an elegant, Parisian-style morning, and confidently poured a ladle of thin batter into a lukewarm skillet. Thirty seconds later, you were frantically scraping a shredded, gummy wad of pale dough into the trash can, wondering why your culinary ambitions always end in tears. You probably blamed the recipe, or maybe you blamed your own lack of a French culinary degree.
I am here to tell you that you do not need to graduate from Le Cordon Bleu to make a flawless, paper-thin crepe. You just need to understand a little bit of basic kitchen science, respect the laws of thermodynamics, and stop using terrible equipment. As a home cook who has ruined more meals than I care to admit before finally figuring out the mechanics of food, I can assure you that professional-level results are entirely achievable in your standard, slightly cramped home kitchen.
If you are tired of serving your guests mangled dough and are constantly wondering why your crepes get rubbery, you have come to the right place. Today, we are stripping away the pretentious chef-speak and diving deep into the molecular reality of gluten hydration, starch gelatinization, and precise temperature control. By the end of this masterclass, you will not only know how to execute the perfect crepe without breaking a sweat, but you will also have the exact logistical blueprint to set up an interactive, DIY crepe station that will make you look like an absolute hosting genius. Grab your whisk, pour yourself a coffee (or a mimosa, I won’t judge), and let us fix your brunch.
The Anatomy of a Crepe Disaster
To fix the problem, we first have to understand why it is happening. The structural failure of a homemade crepe usually comes down to a fundamental misunderstanding of what a crepe actually is.
Most weekend culinary hobbyists treat crepe batter like pancake batter. They throw some flour, milk, and eggs into a bowl, whisk it aggressively until their arm hurts, and immediately dump it into a pan. With pancakes, you can somewhat get away with this because pancakes rely on chemical leavening agents—like baking powder or baking soda—to create a thick, fluffy, forgiving structure. A crepe, on the other hand, is entirely naked. It has no leavening agents to hide behind. It relies 100 percent on the delicate, microscopic network of proteins and starches to hold itself together while being stretched to a fraction of a millimeter in thickness.
When your crepe tears the moment you try to flip it, it is crying out for structural integrity. When it turns out thick, pale, and chewy like a wet paper towel, it is a victim of improper heat transfer. Making a crepe is a balancing act between creating enough gluten to give the dough tensile strength so it can bend and fold, but not so much gluten that it becomes a rubbery disc. It requires a batter that flows like heavy cream but sets instantly upon contact with a properly heated surface.
The Science of the Batter: Hydration and Gelatinization
Let us get into the chemistry, because hoping for the best is not a cooking strategy. The secret to a crepe that is simultaneously delicate, flexible, and strong lies in two distinct scientific processes: gluten hydration and starch gelatinization.
The Role of Gluten Hydration
Flour contains two main proteins: glutenin and gliadin. When these proteins come into contact with a liquid (in this case, milk and eggs), they begin to bond together to form a highly elastic network known as gluten. This network is what gives baked goods their chew and structure.
When you first vigorously whisk your crepe batter, you are agitating these proteins and causing the gluten network to tighten up like a coiled spring. If you were to pour that freshly mixed batter directly into a hot pan, that tight gluten network would immediately seize up from the heat. The result? A tough, chewy crepe that forcefully contracts in the pan, leading to uneven thickness and inevitable tearing when you try to slide a spatula underneath it.
Starch Gelatinization and the Mandatory Rest Period
Alongside the proteins, flour is packed with microscopic starch granules. When you mix the batter, these dry, hard little granules are suddenly swimming in milk and water. However, they do not absorb that liquid instantly. They need time to drink it in, swell up, and soften.
If you cook the batter before the starches have had time to fully hydrate, the liquid in the batter will rapidly evaporate in the hot pan, leaving the unhydrated starches behind as a brittle, fragile matrix. This is exactly why your batter needs to rest before it ever sees a stove.
When you let the batter sit undisturbed for a minimum of 30 minutes—though 45 minutes to an hour in the refrigerator is vastly superior—two magical things happen. First, the tightly coiled gluten network relaxes, turning the batter from a tense, rubbery mess into a smooth, extensible liquid that will spread effortlessly across the pan. Second, the starch granules fully hydrate and swell. When these plump, hydrated starches hit the hot pan, they undergo a process called gelatinization. They burst and lock together, forming a flexible, continuous web that holds the crepe intact. This rested batter is the ultimate secret to a crepe that will fold, roll, and flip without a single tear.
Heat Dynamics: The 400°F Sweet Spot
Now that you have a perfectly rested, scientifically optimized batter, we need to talk about your stove. The second most common reason home cooks destroy their crepes is terrible temperature control.
If your pan is too cold, the batter will sit there, slowly drying out rather than actively cooking. The starches will not gelatinize quickly enough to form a seal, and the crepe will fuse to the metal, resulting in a pale, sticky nightmare. If your pan is too hot, the batter will instantly cook the millisecond it touches the metal, preventing you from swirling it into a thin, even layer. You will end up with a thick, lumpy pancake with burnt, brittle edges.
The scientifically proven sweet spot for a crepe pan is right around 400°F (204°C). At this exact temperature, the residual heat of the pan transfers enough thermal energy to instantly set the bottom layer of the crepe, creating a microscopic barrier of steam that prevents sticking, while keeping the top layer fluid just long enough for you to swirl it to the edges.
The “No-Go” Rule on Toxic Gear
We cannot talk about high-heat cooking without addressing the elephant in the kitchen: your peeling, scratched, mysteriously flaky non-stick pans. I have absolutely zero patience for cheap, disposable kitchenware that poisons your food, so we are banishing toxic kitchen gear from your life right now.
Most budget non-stick pans are coated with Polytetrafluoroethylene (PTFE), commonly known as Teflon. Here is the brutally honest truth: when these pans are heated above 500°F (260°C)—a temperature an empty pan can easily reach in just a few minutes on a modern stovetop—the chemical coating begins to rapidly degrade and release toxic per- and polyfluoroalkyl substances (PFAS) into the air. These “forever chemicals” have been linked to a laundry list of severe health issues, including immune system suppression, thyroid disruption, and liver toxicity.
Even worse, when you use cheap aerosol cooking sprays on these toxic pans, the soy lecithin in the spray burns and polymerizes onto the weak non-stick coating, creating an irreversible, sticky residue. You are essentially ruining your nonstick pans while simultaneously exposing your family to chemical fumes. It is a complete disaster.
Instead, I rigorously advocate for investing in high-quality, safe materials. For crepes, you want a pan with excellent thermal mass and heat retention. I highly recommend naturally seasoned carbon steel pans. Carbon steel is the industry standard in professional French crêperies because it conducts heat beautifully, develops a naturally slick, non-toxic polymerized patina over time, and can easily withstand the 400°F (204°C) heat required for the perfect golden-brown sear. High-quality enameled cast iron or a thick, reputable ceramic-titanium composite pan will also do the trick safely and effectively.
The Technique: Pouring, Swirling, and Flipping
You have your hydrated batter. You have your non-toxic, properly heated pan. Now it is time for the physical execution. Do not let this intimidate you. Making a crepe is not an art; it is just a mechanical procedure.
The Pour and Swirl
The goal is to get a scant 1/4 cup of batter into the pan and spread it to the edges before the proteins coagulate. Forget the wooden T-shaped spreaders you see street vendors using—those are for massive, 16-inch commercial griddles. In a standard 10-inch home skillet, you just need your wrist.
Lift the heated pan off the burner with your non-dominant hand. Hold it at a slight angle. With your dominant hand, pour the batter directly into the upper quadrant of the pan. Immediately—and I mean within a fraction of a second—begin tilting and rotating your wrist in a fluid, circular motion. You want gravity to pull the liquid batter around the perimeter of the pan, coating the entire base in a paper-thin layer before the heat locks the starches into place. Place the pan back on the burner.
The Flip
Here is where home cooks panic. Do not touch the crepe. Do not poke it. Do not try to shimmy a spatula under it yet. Let the heat do its job.
Watch the edges of the crepe. After about 60 to 75 seconds, the moisture will evaporate from the thin perimeter, causing the edges to turn golden brown, dry out, and naturally curl away from the sides of the pan. The surface of the crepe will lose its wet, glossy sheen and turn totally matte.
This is your visual cue. Take a thin, flexible fish spatula or a long offset icing spatula—which happens to be one of those essential tools every beginner needs for delicate work—and gently slide it under the lifted edge. Slide it about a third of the way under the crepe, lift confidently, and flip. Because you rested your batter and allowed the gluten to relax and the starches to gelatinize, the crepe will possess incredible tensile strength. It will not tear. Cook the second side for a mere 15 to 20 seconds just to set the dough, and slide it onto a plate.
The Blueprint for a Mindful Crepe Bar
Now that you have mastered the standalone crepe, it is time to scale this up. Cooking a single crepe is a fun Tuesday morning activity; cooking for eight people requires military-grade logistics.
The biggest mistake casual hosts make is trapping themselves over a hot stove for two hours while their guests mingle in the living room. That is a recipe for resentment, not a party. If you want to actually host a relaxed dinner party or weekend brunch, you must separate the cooking phase from the assembly phase.
Pre-Making and Thermal Holding
Crepes hold up beautifully when made in advance. This is the ultimate time-saving hack. You can stand at your stove on a quiet Saturday morning, blast some music, and crank out twenty crepes in peace. As each crepe finishes, slide it onto a wire cooling rack for exactly thirty seconds to let the initial blast of steam escape (this prevents them from getting soggy). Then, stack them on a warm plate, placing a square of parchment paper between each crepe so they do not fuse together.
Once your stack is complete, wrap the entire plate tightly in aluminum foil. You can keep them warm in an oven set to its lowest possible temperature (usually around 170°F or 75°C) for up to an hour before your guests arrive. When it is time to eat, the crepes will be warm, pliable, and ready for filling, and you will be completely free to actually speak to your friends.
Designing the Station
When you plan mindful gatherings, you are essentially designing user experiences for your kitchen. A DIY crepe bar is brilliant because it transfers the labor of assembling the food from the host to the guest, making the meal interactive and highly customizable.
To make this work seamlessly, you must design your kitchen island or dining table in a logical, linear flow. You need to physically eliminate bottlenecks so that people are not bumping elbows while trying to reach the whipped cream.
Divide your station into three distinct zones:
- The Base Station: This is the starting point. Place your warm, foil-wrapped stack of crepes here, along with a stack of warm plates and a pair of tongs.
- The Savory Zone: Group all your warm, savory fillings and corresponding sauces together.
- The Sweet Zone: Group all your fruits, spreads, and sugary toppings at the end of the line.
Sweet and Savory: Curating the Fillings
The beauty of a crepe is that it is a blank, slightly buttery canvas. It is structurally neutral enough to handle the richest, heaviest savory fillings, yet delicate enough to complement bright, acidic fruits and sweet creams.
The Savory Zone
For the savory side, you want to focus on ingredients that offer rich umami and textural contrast. Do not just put out cold deli meat.
- The Classics: Grated Gruyère or sharp white cheddar cheese, thinly sliced high-quality black forest ham, and caramelized onions. (Pro tip: caramelize those onions the night before to save yourself 45 minutes of weekday stress).
- The Earthy Options: Sautéed cremini mushrooms with fresh thyme and a splash of dry white wine, paired with wilted baby spinach and a dollop of whole-milk ricotta.
- The Crunch: Always include a textural element. Toasted pine nuts or crispy fried shallots add a necessary crunch to the soft, folded crepe.
The Sweet Zone
This is where weekend perfectionism shines. Ditch the store-bought, heavily processed syrups and focus on high-impact, simple ingredients.
- The Parisian Standard: Good quality unsalted butter, freshly squeezed lemon juice, and a dusting of powdered sugar. It is simple, acidic, and flawless.
- The Decadent Route: Warmed chocolate hazelnut spread, freshly sliced strawberries, and toasted slivered almonds.
- The Fruit Compote: Simmer frozen mixed berries in a saucepan with a splash of orange juice and a pinch of salt until it reduces into a thick, jammy compote. It takes ten minutes and tastes infinitely better than raw fruit.
As your guests build their masterpieces, inevitably, powdered sugar, melted chocolate, and rogue spinach leaves will end up all over your counter. Do not stress. When the meal is winding down, grab your trusty stainless steel bench scraper and simply sweep the debris directly into the trash in one swift motion. Efficient cleanup is just as important as efficient cooking.
Conclusion
Making perfect crepes at home is not a mystical art reserved for professional chefs in white coats. It is a highly predictable, easily masterable sequence of scientific events. By allowing your batter to rest so the starches can hydrate, by strictly controlling your pan temperature to around 400°F (204°C), and by refusing to use toxic, peeling non-stick cookware, you completely eliminate the variables that cause tearing and rubbery textures.
You have the knowledge, you have the logistical blueprint, and you have the permission to stop sweating over the stove while your guests have all the fun. So go prep that batter, pour yourself that glass of wine, and get ready to host the most effortless, mind-blowing weekend brunch your friends have ever seen. You absolutely have this handled.






