Picture this: You have invited your favorite people over for a weekend get-together. You wanted to serve something elegant but approachable, so you decided on classic tomato bruschetta. You spent an hour meticulously dicing heirloom tomatoes, tearing fresh basil, and toasting delicate little slices of baguette. You arrange them beautifully on a wooden serving board, feeling like an absolute culinary genius.
Twenty minutes later, your guests arrive. You proudly present your masterpiece, only to realize that your beautiful, crusty toasts have transformed into a sad, disintegrating pile of wet sponges. The bread has completely collapsed under the weight of the tomato juice, leaving a soggy, unappetizing mess that requires a spoon to eat.
We have all been there. It is one of the most frustrating, universally experienced rookie kitchen mistakes that well-meaning hosts make. But here is the brutal truth: assembling bruschetta in the kitchen and letting it sit on a platter before serving is fundamentally flawed from a scientific perspective. You are fighting a losing battle against the immutable laws of moisture migration and cellular osmosis.
Do not panic. You do not need a culinary degree to fix this, and you certainly do not need to banish bruschetta from your entertaining repertoire. The secret to flawless, forever-crispy appetizers is to stop building them yourself. Instead, we are going to deconstruct the entire process and create an interactive, stress-free DIY Crostini Bar. This method not only guarantees perfect texture for every single bite, but it also frees you up to actually enjoy your own party.
As your resident sassy sous-chef, I am here to tell you that professional-level results are entirely achievable in your standard home kitchen. Let’s dive deep into the food science of the sog, learn how to weaponize salt to our advantage, and completely overhaul your approach to appetizers so you can host like a seasoned expert.
The Physics of the Fail: Why Bruschetta Gets Soggy
To defeat the enemy, you must first understand the enemy. In this case, the enemy is a phenomenon known in food science as moisture migration, compounded by the realities of starch retrogradation.
When you bake a loaf of bread, the intense heat of the oven drives moisture from the exterior (the crust) toward the interior (the crumb). When you take that bread, slice it, and toast it for crostini, you are intentionally dehydrating the surface to create a brittle, crystalline structure. You are essentially building a network of microscopic, highly absorbent straws. Capillary action—the ability of a liquid to flow into narrow spaces without the assistance of external forces—means that porous, toasted bread is practically begging to absorb any liquid it touches.
Now, consider the tomato. A ripe summer tomato is roughly 94% to 96% water. However, it is not just plain water; it is a complex, enzyme-rich intracellular fluid containing sugars, acids, and flavor compounds. When you chop a tomato, your knife physically severs the cell walls, causing that fluid to instantly bleed out.
If you take a pile of freshly chopped, weeping tomatoes and dump them directly onto a dehydrated, porous slice of toast, the result is instantaneous and catastrophic. The capillary pathways in the bread violently suck the tomato juice straight into the crumb. The starch granules inside the bread (amylose and amylopectin) rehydrate immediately. As they absorb the water, they swell, lose their rigid crystalline structure, and turn into a gummy, unpalatable paste.
This is why pre-assembled bruschetta has a structural half-life of about four minutes. You cannot fight the laws of thermodynamics and fluid dynamics with sheer willpower. If you want to elevate your appetizer game and master modern recipes without the stress, you have to change your methodology. We need to address the water source (the tomatoes) and waterproof the sponge (the bread).
The Tomato Masterclass: Weaponizing Cellular Osmosis
The biggest mistake home cooks make with bruschetta is treating the tomato like a passive ingredient. A tomato is a highly active biological system, and if you do not control it, it will ruin your dish.
First, a non-negotiable rule: never, ever put your tomatoes in the refrigerator. Storing tomatoes below 55°F permanently damages their volatile aromatic compounds. The cold temperature actually alters the gene expression of the fruit, effectively turning off the production of the enzymes that make a tomato taste like a tomato. Keep them on your counter at room temperature.
The Osmotic Extraction Process
To prevent soggy bread, we must extract the excess water from the tomatoes before they ever get near the crostini. We do this by weaponizing cellular osmosis.
When you dice your tomatoes, you must immediately toss them with a generous pinch of kosher salt. Salt creates a hypertonic environment on the outside of the tomato cells. Because nature seeks equilibrium, the water trapped inside the remaining intact cells will move across the semi-permeable cell membranes from an area of low solute concentration (inside the cell) to an area of high solute concentration (the salted exterior).
Here is your exact workflow:
- Core and dice your tomatoes (heirloom or Roma work best) into uniform ½-inch cubes. Use a highly sharpened knife; a dull knife will crush the flesh and turn it into mush.
- Place the diced tomatoes into a fine-mesh strainer or a colander set over a mixing bowl.
- Sprinkle generously with kosher salt and toss gently.
- Walk away for 15 to 30 minutes.
Do not rush this step. It takes at least 15 minutes for the salt to effectively draw out the excess moisture. However, do not let them sit for over 45 minutes, or the cellular structure will break down entirely, leaving you with tomato paste instead of a vibrant topping.
Liquid Gold: Do Not Waste the Tomato Water
When you return to your colander, you will see a significant amount of pale red liquid in the bowl underneath. Do not throw this away! That liquid is seasoned tomato water, and it is packed with intense umami flavor. Save it in a jar in your fridge. Use it to deglaze a pan, whisk it into a vinaigrette, or add it to a pasta sauce. Utilizing every byproduct of your prep is one of those foolproof cooking secrets that separates amateur cooks from the pros.
The Acidulation Step
Once your tomatoes are drained, transfer them to a clean bowl. Now, we need to stabilize them. Tomatoes contain an enzyme called polyphenol oxidase (PPO). When exposed to oxygen, PPO catalyzes the oxidation of phenolic compounds, which causes browning and flavor degradation.
To halt this enzymatic reaction, we must drop the pH of the mixture. Add a small splash of high-quality sherry vinegar or red wine vinegar. The acid inhibits the PPO enzyme, keeping your tomatoes bright red, fresh, and structurally sound for hours. Finally, toss in your torn fresh basil and a drizzle of extra virgin olive oil. Your tomatoes are now structurally optimized and ready for the bar.
Building the Ultimate Lipid Moisture Barrier
We have successfully dehydrated the tomatoes, but they still possess some surface moisture. To guarantee that our crostini remain shatteringly crisp, we must waterproof the bread. We achieve this by building a lipid moisture barrier.
Lipids (fats) are inherently hydrophobic, meaning they repel water. By coating the bread in fat and applying high heat, we can create a protective shield that prevents the bread’s starch matrix from absorbing any rogue tomato juices.
The Olive Oil Application
Do not just lightly spritz your bread with oil. You need to use a pastry brush to generously coat both sides of each slice with a high-quality extra virgin olive oil. The triglycerides in the oil will seep into the outermost microscopic crevices of the bread. Because oil and water do not mix, any wet topping placed on the bread will sit on top of the oil layer rather than soaking into the crumb.
The Maillard Reaction and Toasting
Once oiled, arrange the slices in a single layer on a baking sheet. Bake them at 400°F (200°C) for about 8 to 10 minutes, flipping halfway through.
Why 400°F? We are aiming for the Maillard reaction—the complex chemical reaction between amino acids and reducing sugars that gives browned food its distinctive flavor and color. This reaction typically accelerates at temperatures above 285°F. As the exterior of the bread browns, the proteins and sugars fuse into a hardened, complex polymer matrix. This physical hardening, combined with the lipid layer, creates an impenetrable fortress against moisture.
Understanding how to manipulate heat and fat to control texture is a fundamental pillar of the art of the kitchen. It is the difference between food that just tastes okay and food that boasts an unforgettable mouthfeel.
The Aromatic Finish
As soon as you pull the golden, sizzling crostini from the oven, take a raw, peeled clove of garlic, cut it in half, and rub the cut side vigorously across the hot, textured surface of the bread. The abrasive, toasted crust acts like a microplane, grating microscopic amounts of garlic directly into the hot oil. The residual heat of the bread gently melts the garlic, releasing allicin (the primary flavor compound) without burning it. Never rub the garlic on before toasting; oven temperatures will scorch the allicin, leaving a bitter, acrid taste.
Bread Architecture: Selecting and Slicing the Canvas
Your toppings are only as good as the foundation they sit upon. Choosing the wrong bread or slicing it incorrectly will ruin your DIY Crostini Bar before it even begins.
The Right Loaf
Avoid dense, whole-grain, or heavily seeded breads for crostini. Their tight crumb structure does not toast well; instead of becoming light and crispy, they turn into impenetrable, jaw-breaking hockey pucks.
You want a bread with a medium-to-open crumb structure that offers a balance of chew and crunch. A classic French baguette is the gold standard. A slender Italian ciabatta or a mild sourdough batard also works beautifully. You want a crust that is relatively thin but sturdy.
The Geometry of the Slice
Do not hack at your bread with a chef’s knife. You will crush the delicate air pockets inside the crumb. Use a sharp, long serrated bread knife, and let the teeth do the work with a smooth sawing motion.
The culinary standard for crostini thickness is exactly 3/8-inch to 1/2-inch. If you slice it any thinner (like a 1/4-inch), the bread will dehydrate entirely in the oven, turning into a brittle cracker that shatters into a million pieces down your guests’ shirts when they take a bite. If you slice it any thicker (like a full inch), the ratio of bread to topping will be completely unbalanced, and your guests will feel like they are eating a dry sandwich.
Slice the bread on a slight diagonal (a bias cut). This elongated oval shape increases the total surface area for toppings while keeping the width narrow enough to comfortably fit into a person’s mouth in two graceful bites.
If you have ever wondered why your baking sheets keep warping when you try to toast a massive batch of bread, it is because you are likely using the wrong equipment. Which brings me to my next, extremely important point.
The “No-Go” Rule: A Warning on Toxic Bakeware
As your sassy culinary guide, I am fully committed to helping you save time and money. However, there is one area where I absolutely refuse to compromise, and that is the safety of your kitchen equipment. I have zero patience for cheap, toxic kitchenware.
If you are currently toasting your crostini on a flimsy, scratched, non-stick baking sheet that you bought for five dollars at a discount store, we need to have a serious intervention.
The Dangers of PFAS and PTFE
Most conventional, cheap non-stick baking sheets are coated with PTFE (polytetrafluoroethylene), commonly known by the brand name Teflon, or other chemicals in the PFAS (per- and polyfluoroalkyl substances) family. These are widely referred to as “forever chemicals” because they do not break down in the environment or in the human body.
When you crank your oven up to 400°F or 450°F to get that perfect Maillard browning on your crostini, you are pushing these cheap non-stick coatings to their absolute limit. When PTFE is heated to high temperatures, it begins to degrade and off-gas toxic fumes. In extreme cases, these fumes can cause a condition known as polymer fume fever in humans, and they are notoriously lethal to pet birds.
Furthermore, these cheap, thin pans cannot handle rapid thermal expansion. Have you ever been baking something and heard a sudden, violent “POP” from inside the oven, only to pull out a pan that is permanently twisted? That is thermal warping, and it leads to incredibly uneven heat distribution, meaning half your crostini will burn while the other half remains pale and chewy.
The Aluminum Leaching Issue
Raw, uncoated aluminum baking sheets are slightly better for heat conduction, but they come with their own set of problems. Aluminum is highly reactive. If any acidic tomato juice spills off your crostini and bakes directly onto the raw aluminum, the metal can actually leach into the food, creating a metallic, off-putting taste.
The Safe Alternatives
It is time to commit to banishing toxic kitchen gear from your home once and for all. For perfectly toasted, evenly browned, and completely safe crostini, you must invest in heavy-gauge, multi-clad stainless steel baking sheets, or high-quality ceramic-coated stoneware.
Stainless steel is incredibly durable, completely non-reactive, and boasts excellent thermal mass. It will not warp, it will not off-gas, and it will not leach metals into your food. Yes, it requires a bit more elbow grease to clean, but simply lining your high-quality stainless steel pan with unbleached parchment paper before arranging your olive-oiled bread will completely eliminate any sticking or cleanup issues.
Designing the DIY Crostini Bar Station
Now that we have perfected the components, it is time to assemble the experience. The DIY Crostini Bar is not just a culinary hack; it is a strategic hosting maneuver. By allowing your guests to build their own bites, you completely eliminate the logistical nightmare of appetizers dying on a tray.
However, a successful interactive food station requires thoughtful organization. You cannot just throw a bunch of bowls on a table and hope for the best. You must employ scientific food staging techniques to ensure a smooth, intuitive flow that prevents traffic jams in your kitchen.
The Flow of the Station
Set up your Crostini Bar on a kitchen island, a sideboard, or a dedicated folding table away from your primary cooking zone. Arrange the components in a linear, logical progression from left to right (or right to left, depending on your room layout).
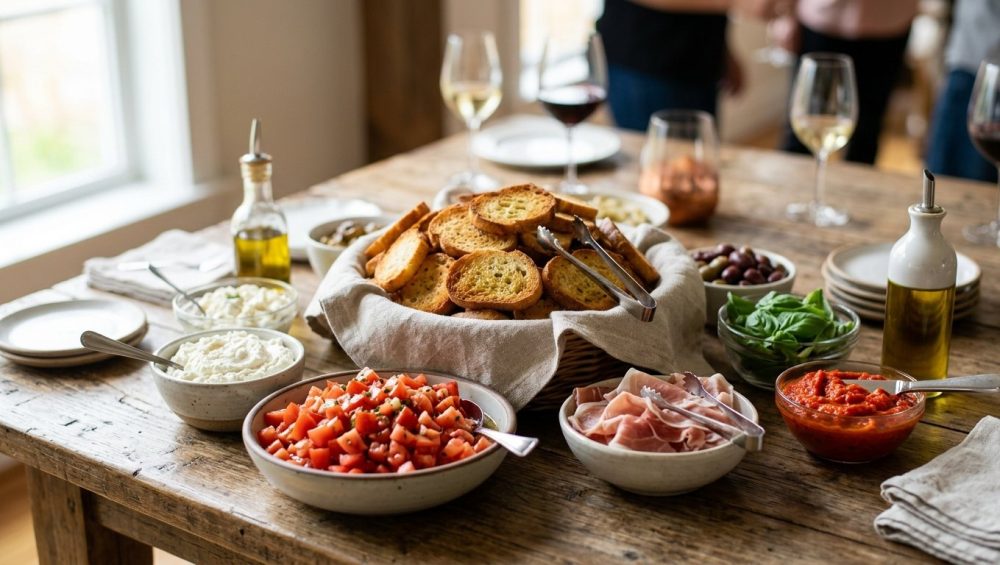
- The Foundation Zone: Start with a stack of small appetizer plates and cocktail napkins. Next to the plates, place a beautiful, wide, shallow basket lined with a clean linen cloth. Pile your perfectly toasted, garlic-rubbed crostini high in this basket. The linen will absorb any residual ambient moisture, keeping the bread crisp.
- The Barrier Spreads: Next, offer the base layers (we will discuss these in the Flavor Architecture section below). Provide small, dedicated spreading knives for each bowl to prevent cross-contamination.
- The Main Attractions: This is where your spectacularly drained, seasoned, and acidulated heirloom tomatoes live. Serve them in a beautiful ceramic bowl. Crucial Detail: You must serve the tomatoes with a slotted spoon. Even though we drained them earlier, tomatoes will continue to release tiny amounts of juice over time. A slotted spoon ensures that any rogue liquid stays in the bowl and does not make it onto the guests’ plates.
- The Finishing Garnishes: At the end of the line, provide the finishing touches. A small dish of flaky sea salt (like Maldon), a pepper grinder, a bowl of extra torn fresh basil, and perhaps a small squeeze bottle of high-quality balsamic glaze.
Temperature Management
One of the greatest benefits of this setup is temperature resilience. The toasted bread should remain at room temperature. The tomatoes should also be at room temperature to maximize their volatile flavor compounds. You do not need chafing dishes, ice baths, or constant monitoring. The food sits happily, safely, and deliciously at ambient room temperature for the duration of the cocktail hour.
Flavor Architecture: Beyond the Tomato
While a classic tomato bruschetta is a masterpiece, a true DIY Crostini Bar offers variety. Providing multiple topping options caters to different dietary preferences and elevates the experience from a simple snack to an interactive culinary event.
This modular approach to appetizers is absolutely perfect for make-ahead grazing boards and large gatherings. Here are three foolproof, high-impact additions to your bar that require minimal active cooking time:
1. Whipped Ricotta and Hot Honey
This is a phenomenal base layer that actually reinforces your lipid moisture barrier. Place whole milk ricotta in a food processor with a pinch of salt, a crack of black pepper, and a squeeze of fresh lemon juice. Whip it for two minutes until it transforms into a silky, cloud-like spread. Transfer it to a serving bowl and drizzle the top generously with chili-infused hot honey. The high dairy fat in the ricotta acts as a secondary waterproof layer on the bread, making it an excellent base for the tomatoes, or it can be eaten entirely on its own.
2. Cannellini Bean and Roasted Garlic Puree
For a hearty, vegan-friendly option, drain and rinse a can of high-quality cannellini beans. Blend them with a head of sweet, caramelized roasted garlic, a healthy glug of extra virgin olive oil, fresh rosemary, and a splash of lemon juice. The resulting puree is creamy, earthy, and packed with protein. It spreads beautifully onto the crostini and pairs wonderfully with a topping of peppery arugula or a slice of cured meat.
3. Olive Tapenade and Cured Meats
Provide a briny, intensely savory option to balance the sweetness of the tomatoes. A simple tapenade made from Kalamata olives, capers, parsley, and olive oil can be made days in advance. Alongside the tapenade, fan out a selection of thinly sliced prosciutto, spicy capicola, or mortadella. The high fat content of the cured meats provides yet another protective barrier for the bread, ensuring maximum crunch.
By offering a spread (ricotta or bean puree), a primary topping (tomatoes or tapenade), and a garnish (herbs or balsamic), you are giving your guests the tools to architect their own perfect, customized bites.
Host Logistics: The Make-Ahead Timeline
The ultimate goal of the DIY Crostini Bar is to protect your sanity. You should never be sweating over a hot stove or frantically chopping vegetables while your guests are trying to hold a conversation with you. Efficient time management is the cornerstone of the art of effortless hosting.
Because we rely on food science and stabilization techniques, almost every single component of this bar can be prepped well before the doorbell rings. Here is your stress-free countdown timeline:
Up to 48 Hours Before
- Make the Spreads: The whipped ricotta, the cannellini bean puree, and the olive tapenade can all be made two days in advance. Store them in airtight containers in the refrigerator. Their flavors will actually deepen and meld over time.
- Roast the Garlic: If you are making the bean puree, roast your garlic ahead of time.
4 to 6 Hours Before
- Slice the Bread: Slice your baguettes on the bias. To prevent them from drying out prematurely, store the raw slices in a large, airtight plastic bag or a sealed container at room temperature.
- Prep the Aromatics: Mince your garlic for the tomato mixture. Wash and thoroughly dry your fresh basil leaves. (Do not tear the basil yet; it will turn black. Just have the dry leaves ready to go).
1 Hour Before
- Toast the Crostini: Brush your bread slices with olive oil and bake them. Once they come out of the oven, immediately rub them with the raw garlic halves. Let them cool completely on a wire rack. Once cooled, they can be piled into your linen-lined serving basket. Because of the lipid barrier, they will stay perfectly crisp at room temperature for hours.
- Prep the Station: Set out your plates, napkins, serving spoons, and empty bowls on your designated staging table.
30 Minutes Before
- Execute the Tomato Osmosis: Dice your tomatoes, toss them with kosher salt, and place them in the colander to drain.
- Pull the Spreads: Take the ricotta, bean puree, and tapenade out of the refrigerator so they can take the chill off and become easily spreadable.
10 Minutes Before
- Final Assembly: Transfer the drained tomatoes to their serving bowl. Toss them with the sherry vinegar, olive oil, and freshly torn basil. Place the bowl on the station.
- The Most Important Step: Pour yourself a glass of wine, take a deep breath, and put on your favorite playlist.
When your guests arrive, you will not be trapped in the kitchen frantically assembling appetizers that are actively disintegrating. Instead, you will be standing by the door, completely relaxed, ready to welcome them to a relaxed dinner party where the food is flawless, the host is present, and the bruschetta is never, ever soggy.
Conclusion: Reclaiming Your Party
Entertaining should be a joyful expression of hospitality, not a logistical nightmare that leaves you exhausted and resentful of your own menu. By understanding the simple physics of moisture migration and utilizing the chemical magic of cellular osmosis, you can permanently eliminate the anxiety of soggy appetizers.
The DIY Crostini Bar is the ultimate testament to working smarter, not harder, in the kitchen. It respects the integrity of the ingredients, it protects your high-quality, non-toxic cookware, and most importantly, it honors your time as a host. You are empowering your guests to engage mindfully with their food, mixing and matching flavors to their exact preferences, all while ensuring that every single bite retains that satisfying, audible crunch.
So the next time you find yourself planning a weekend gathering, step away from the pre-assembled platters. Embrace the science, build the lipid barriers, and let your guests do the heavy lifting. You have earned the right to step out of the kitchen, raise a glass, and actually enjoy the spectacular food you have created. Now go forth, salt those tomatoes, and toast that bread with confidence. You’ve got this.


