Listen up, my fellow weekend culinary warriors. We all know the drill. Monday through Friday, we are merely surviving. We are throwing together twenty-minute stir-fries, leaning heavily on our microwaves, and doing whatever it takes to get a semi-nutritious dinner on the table before we collapse onto the couch in a state of sheer exhaustion. Time is money, and on a Tuesday night, ruthless efficiency is the only chef allowed in my kitchen. But then the weekend arrives. The emails stop pinging. The schedule clears. And suddenly, we have the ultimate luxury: time. This is when we transform from frantic weekday survivors into meticulous, uncompromising culinary artists.
Today, we are going to talk about a weekend project that separates the amateurs from the home-cooking legends: homemade Pho. Specifically, we are diving incredibly deep into the elusive, highly coveted, crystal-clear beef bone broth. If you have ever spent twelve hours hovering over a stockpot only to end up with a murky, greasy, cloudy liquid that looks more like dishwater than dinner, I promise you are not alone. There is a very specific, unforgiving science to achieving clarity in a meat-based soup, and if you want to keep your homemade broth clear, you have to understand the thermodynamics at play. We are going to dissect the physics of fat emulsification, the absolute necessity of the bone-blanching phase, and the sheer, unadulterated magic of the gentle simmer.
But we aren’t just making soup in a vacuum. We are going to use this liquid gold as the centerpiece for a Mindful Pho Night. Because frankly, the traditional dinner party is fundamentally broken, and I am going to show you exactly how to fix it so you can actually sit down and enjoy your own friends. Put down the bouillon cubes, roll up your sleeves, and let’s get into the science of the simmer.
The Anatomy of the Perfect Bone Blend
Before we can even talk about temperature control, we have to talk about your shopping list. You cannot walk into a grocery store, grab a random pack of generic beef bones, and expect to yield a restaurant-quality broth. A truly spectacular pho broth requires a highly specific architectural blend of bones to achieve the holy trinity of soup: rich flavor, gelatinous body, and clean clarity.
You need to source three distinct types of bones from your local butcher. First, you need marrow bones (often cut from the leg). These are the hollow bones filled with fatty, nutrient-dense marrow. They provide the deep, luxurious, buttery mouthfeel that coats your tongue. Second, you need knuckle bones. Knuckles look like giant, knobby joints, and they are absolutely loaded with cartilage. As cartilage cooks down over a long period, it converts into gelatin, which is what gives a proper broth its silky, lip-smacking texture. Without knuckle bones, your broth will feel thin and watery, no matter how long you cook it. Finally, you need meaty bones, such as oxtail or beef shank. Marrow and cartilage provide texture, but the actual beefy flavor comes from the meat attached to the bone.
When you combine marrow for fat, knuckles for gelatin, and shank for flavor, you create a balanced matrix that is ready to be transformed. But do not just toss them in the pot yet. We have a violent cleansing ritual to perform first.
The Science of the Scum: Why You Must Blanch Your Bones
Let’s get one thing straight right now: you cannot just throw raw beef bones into a pot of cold water, turn the heat to high, and walk away. If you do that, you are actively choosing failure, and I cannot help you. The journey to a translucent, jewel-like broth begins with a brief but aggressive process known as blanching.
Raw beef bones are packed with natural impurities. When I say “impurities,” I am not talking about dirt from the butcher’s floor. I am talking about biological compounds—specifically coagulated proteins like myoglobin and albumin, as well as trace amounts of blood and unwanted surface fats. When these specific proteins are exposed to heat, they denature and coagulate. If this coagulation happens slowly while you are trying to build your final broth, these proteins will break apart into microscopic, grayish fragments and permanently suspend themselves in your liquid. The result is a cloudy, murky soup that tastes slightly metallic.
To prevent this disaster, we execute a hard blanch. Place your raw bones in your largest stockpot and cover them completely with cold water. Put the pot on your highest burner and bring it to a roaring, aggressive boil. Let it boil hard for a solid 15 to 20 minutes. During this time, you are going to witness something incredibly unappetizing. A thick, grey, foamy layer of “scum” will violently rise to the surface of the water. Do not panic; this is exactly what we want. We are forcing the bones to purge their surface impurities into a batch of water that we have absolutely no intention of keeping.
Once the 20 minutes are up, take the pot off the heat. Dump the entire contents—water, scum, and all—directly into a clean sink. Yes, dump all that water down the drain. Now, take your tongs and thoroughly rinse each individual bone under warm running water, scrubbing away any clinging grey matter until the bones look clean and bare.
But you are not done yet. Look at your empty stockpot. The sides will be coated in a nasty, sticky ring of cooked-on protein scum. You must scrub that pot with soap and water until it is sparkling clean before the bones go back in. If you lazily skip the scrubbing step, those stuck-on proteins will eventually dissolve into your fresh batch of water and completely ruin your clarity.
The Physics of a Cloudy Broth: Fat Emulsification Explained
Now that we have pristine, blanched bones and a spotless pot, we can talk about the actual cooking process. This is the exact moment where most well-meaning home cooks completely destroy their broth. The culprit? The rolling boil.
Let’s talk about the physics of liquids. Bone broth fundamentally consists of water, and as the bones slowly cook, they release rendered animal fat and gelatin. Basic science tells us that water and fat do not naturally mix; they repel each other. In a calm, undisturbed environment, the rendered beef fat will simply float to the top of the water in a distinct, separate layer, which can easily be skimmed off later.
However, if you subject that pot to a rolling, vigorous boil, the violent churning action of the water acts exactly like a high-speed blender. The mechanical force of the rapidly bursting bubbles smashes the fat droplets into microscopic particles and violently forces them to mix with the water and the extracted proteins. This chemical process is called emulsification.
Once emulsified, the fat becomes permanently suspended within the liquid. Because these microscopic fat droplets scatter light rather than letting it pass through, the broth takes on a milky, opaque, cloudy appearance. It might still taste somewhat beefy, but it will feel heavy, greasy, and muddy on the palate, completely lacking the delicate, refined mouthfeel that defines an authentic, high-quality pho. You cannot undo an emulsion once it happens. If you want a clear soup, you must treat your stockpot with the utmost respect, patience, and thermal restraint.
The Gentle Simmer: Finding the “Smile”
The ultimate secret to extracting deep, complex flavor from beef bones without triggering a disastrous fat emulsification is mastering the gentle simmer. Once your clean bones are back in your clean pot and covered with fresh, cold water, you will bring the pot up to a boil just long enough to reach temperature, and then immediately drop the heat to its absolute lowest possible setting.
You are aiming for a highly specific temperature window between 180°F and 205°F. At this precise temperature, the collagen in the knuckle bones slowly melts into gelatin, giving the broth its signature silky body, but the water remains calm enough to leave the fat completely undisturbed. If you are the kind of cook who doubts their stove’s settings or constantly second-guesses themselves, do not guess—use a reliable digital meat thermometer to periodically check the temperature of the liquid.
In professional kitchens, however, we rarely look at thermometers for broth; we look at the surface of the water. You are looking for what traditional chefs lovingly call the “smile” of the broth. You want to see a lazy, gentle bubble break the surface of the liquid every few seconds. It should look like the pot is gently breathing, not violently boiling.
It takes immense psychological discipline to leave the heat low. You will be tempted to crank it up to make things go faster. Do not do it. A proper pho broth needs to simmer for a minimum of 12 hours, and ideally up to 24 hours. Time and gentle heat are the only ways to coax out the marrow and collagen without turning the pot into a cloudy, emulsified disaster. Let it go low and slow, and skim any excess fat that pools at the top with a ladle every few hours.
The Non-Negotiable Gear for Proper Broth
I cannot write a definitive masterclass on broth without aggressively addressing your equipment, because your pot is quite literally the foundation of your success. If you are attempting a 24-hour simmer in a flimsy, paper-thin aluminum pot you bought at a discount store in college, you are going to scorch your bones, burn your aromatics, and ruin your entire weekend.
As the Sassy Sous-Chef, you know I have a strict, uncompromising “no-go” rule on toxic, cheap kitchenware. I have absolutely zero patience for mystery metals or peeling, scratched Teflon pots that leach forever-chemicals into your family’s dinner. When you are simmering an acidic, mineral-rich liquid for an entire day, the metallurgical quality of your vessel matters immensely. You must prioritize banishing toxic kitchen gear from your home, starting with whatever massive pot you use for soups and stews. Furthermore, doing a long, sustained simmer in a cheap nonstick pot is a fantastic way of ruining your nonstick pans entirely, as prolonged heat degrades the chemical coating and causes it to flake directly into your food.
You need a heavy-bottomed stockpot with exceptional thermal mass and heat distribution. A high-quality, multi-clad stainless steel stockpot (at least 12 to 16 quarts) is the gold standard for home cooks. The thick aluminum or copper core sandwiched between layers of surgical-grade stainless steel ensures that the heat from your burner is distributed evenly across the entire base of the pot. This prevents the dreaded “hot spots” that cause proteins to scorch and stick to the bottom. Alternatively, a massive enameled cast-iron Dutch oven can work beautifully for smaller batches, as the heavy cast iron holds heat like a champion, allowing you to maintain that perfect, lazy simmer even on the absolute lowest burner setting. Invest in good gear once, and it will serve you for a lifetime.
The Aromatics: Charring and Toasting for Depth
A clear beef broth is only half the battle; the other half is the intoxicating, deeply spiced flavor profile that makes pho instantly recognizable from a block away. This flavor does not come from tossing raw onions and a handful of dusty, expired spices into the water. It comes from intentional, applied heat and chemical transformation.
The Maillard Reaction on Alliums
First, we address the alliums. You need to take whole yellow onions and large knobs of fresh, unpeeled ginger, cut them in half, and subject them to intense, direct heat until they are visibly blackened and charred. You can do this by placing them cut-side down directly on the grates of a gas stove, or by putting them on a foil-lined baking sheet under your oven’s broiler for about 15 minutes.
This charring process is crucial. It triggers the Maillard reaction, caramelizing the natural sugars in the onion and ginger and bringing out a profound, mellow sweetness. Furthermore, the blackened, charred bits add a subtle, smoky depth to the broth that you simply cannot replicate with raw vegetables. Once charred, use a spoon to lightly scrape off the thickest layers of black ash (to prevent the broth from turning too dark), and toss them into the gently simmering pot.
Awakening the Spices
Next, the spices. Authentic pho relies on a highly specific blend of warm aromatics: star anise, cassia cinnamon sticks, whole cloves, coriander seeds, fennel seeds, and black cardamom. Do absolutely not use pre-ground spices. Ground spices will instantly cloud your broth, alter the color to a muddy brown, and leave a gritty, unpleasant texture at the bottom of the bowl.
Furthermore, if you have had the same jars of pre-ground cinnamon sitting in the back of your pantry since 2019, you need to throw them away immediately. To stop spices turning into bricks of flavorless, oxidized dust, you must buy whole spices and store them in airtight containers away from direct sunlight.
Before adding the whole spices to your broth, you must toast them. Toss them into a dry skillet over medium-low heat for about five minutes, tossing frequently, until your kitchen smells like a bustling Hanoi street market. Toasting awakens the volatile essential oils within the spices—like the anethole in the star anise and the eugenol in the cloves—bringing them to the surface. Once beautifully toasted and fragrant, tie them securely in a piece of cheesecloth or a muslin spice bag, and drop them into your gently simmering broth for the final three hours of cooking. Do not leave the spices in for the full 24 hours, or they will over-extract, releasing bitter tannins that will overpower the delicate beef flavor.
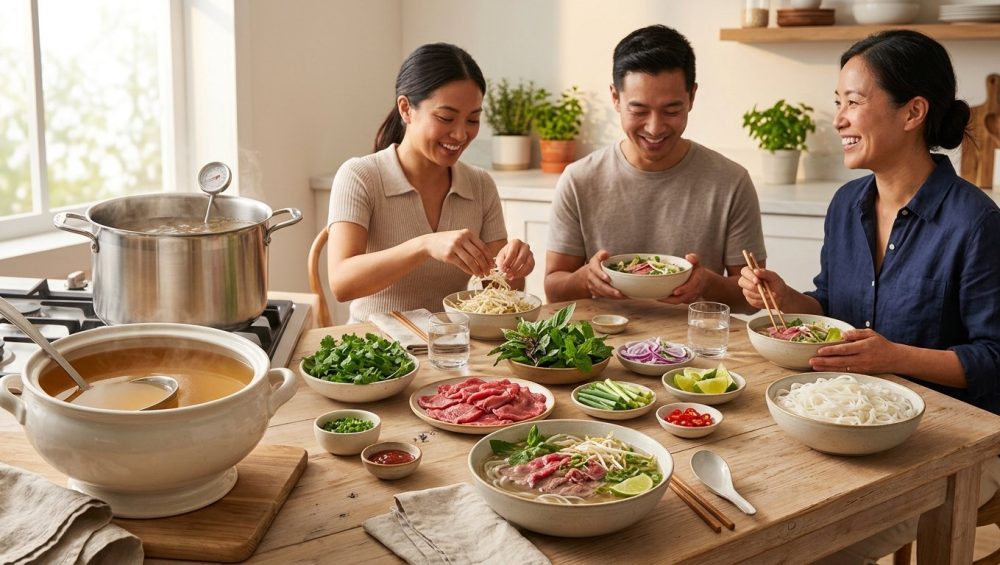
The Mindful Pho Night: Hosting Without the Breakdown
Now that you have spent your entire weekend meticulously crafting a flawless, crystal-clear, deeply aromatic broth, it is time to consume it. But we are not just eating soup in sweatpants; we are hosting a Mindful Pho Night.
Let’s be brutally honest for a moment: the traditional, formal dinner party is a relic of a bygone era, and it is actively destroying our mental health. According to recent 2025 polling data from the American Psychiatric Association, 75% of Americans are highly anxious about the economy, and nearly half report severe stress regarding hosting, social obligations, and family dynamics. A separate, eye-opening study by Circana found that 43% of people who host holiday meals or dinner parties are actively worried that the food will not come out as planned, and 27% are stressed about timing everything perfectly.
This is absolute madness. We are inviting people into our homes to connect, yet we spend the entire evening sweating over a hot stove, aggressively whisking a pan sauce that threatens to break, and having a silent panic attack because the roast is dry. The host is trapped in the kitchen, missing the conversation, while the guests feel guilty for not helping. If you want to actually enjoy your own gatherings and maintain your sanity, you need to learn the art of effortless hosting. You need a meal concept that is 90% prepped before the doorbell even rings.
Enter the communal Pho Bar.
Data from the 2025 World Happiness Report explicitly highlights that sharing meals is one of the most vital, foundational drivers of human happiness and social connection, counteracting the devastating modern trends of isolation and loneliness. But that connection only happens if the host is actually present at the table.
Pho is the ultimate deconstructed, communal meal. The host’s only job on the night of the party is to keep the glorious broth simmering gently on the stove and to provide the canvas. The guests do the rest. This interactive, build-your-own-bowl format completely eliminates plating anxiety. It allows you to host a relaxed dinner party where you actually get to sit down, sip a glass of wine, and look your friends in the eye while they marvel at your culinary genius.
The Blueprint for Your DIY Pho Bar
To pull off a flawless, stress-free Pho Night, you need to set up a staging area. Your kitchen island or dining room table will become a vibrant, colorful, interactive assembly line of fresh herbs, noodles, and proteins. Here is exactly how to execute it like a pro.
Prepping the Herbs and Aromatics
A massive, overflowing platter of fresh garnishes is non-negotiable for pho. You need heaps of crisp bean sprouts, fresh cilantro, Thai basil, mint, and lime wedges. The stark contrast between the rich, hot, savory broth and the bright, crunchy, cold herbs is the defining characteristic of the dish. However, fresh herbs are notoriously fragile and prone to wilting. To prevent your herbs getting slimy before the guests even arrive, wash them gently in cold water, spin them completely dry in a salad spinner, and store them in the fridge wrapped in a barely-damp paper towel inside a plastic bag until the very last second.
Next, you must prep the aromatics for the bowl. You need paper-thin slices of raw white onion and jalapeño or bird’s eye chilies. When I say paper-thin, I mean translucent. If you find yourself hacking at an onion and crying uncontrollably while trying to achieve these delicate slices, remember that dull knives are to blame, not the onions themselves. A sharp, well-honed chef’s knife will slice cleanly through the onion’s microscopic cell walls rather than crushing them, significantly reducing the release of the volatile sulfur compounds that irritate your eyes.
The Noodle Execution
For the starch, you will be using flat rice noodles, commonly labeled as banh pho. Do not, under any circumstances, boil the noodles directly in your precious, clear beef broth. The starches released from the rice noodles will instantly thicken the liquid and cloud your beautifully clear soup, undoing 24 hours of meticulous temperature control.
Instead, bring a separate, large pot of plain water to a rolling boil on the stove. Use a stainless steel spider skimmer to dunk individual portions of the dried or fresh noodles into the boiling water. They only need a few seconds to a minute to become tender. Lift the spider skimmer out, violently shake off the excess starchy water into the sink, and place the perfectly cooked noodles directly into the bottom of the guests’ large serving bowls.
The Raw Beef Phenomenon
Finally, we arrive at the protein. Traditional Pho Bo is served with extremely thin slices of raw beef—usually eye of round, sirloin, or tri-tip. I know that serving raw meat to your guests at a dinner party might sound like a massive liability, but this is where the thermodynamics of our blazing hot broth come back into play to perform a culinary magic trick.
You will slice the raw beef as thinly as humanly possible, cutting strictly against the grain to ensure tenderness. Pro-tip from the trenches: place the steak in the freezer for about 30 to 45 minutes before slicing to firm up the fat and muscle fibers; this makes achieving paper-thin shavings infinitely easier and safer. Arrange these beautiful, ruby-red slices on a chilled platter.
When your guests build their bowls, they will lay the raw beef slices directly on top of their hot noodles and herbs. Then comes the grand finale. You, the host, will ladle the steaming hot, 200°F clear broth directly over the raw beef. Because the slices are so incredibly thin, the immense thermal energy of the broth cooks the beef instantly right in the bowl. The meat transforms from raw red to a tender, delicate brown in a matter of seconds. This traditional method ensures the beef remains melt-in-your-mouth tender and delicate, rather than turning into the tough, chewy, overcooked leather that results from boiling meat for hours in a stew.
Final Thoughts from the Sassy Sous-Chef
Creating a truly spectacular, crystal-clear pho broth is not about possessing a fancy culinary degree from a French institute, and it certainly isn’t about buying a $500 imported stockpot just to show off on social media. It is about respect. Respect for the raw ingredients, respect for the chemical process, and above all, respect for the science of temperature control.
It requires the patience to let a pot sit on a gentle, lazy simmer for a full day, resisting every single urge to crank the heat and rush the process. It requires the diligence to blanch and scrub your bones when you would rather just throw everything into a slow cooker and go to bed.
But when you finally ladle that liquid gold into a massive ceramic bowl, surrounded by your friends, completely free of the usual dinner party panic and hosting anxiety, you will realize that the effort was worth every single minute. You have successfully bypassed the overpriced takeout menus, conquered the complex science of fat emulsification, and curated an evening of genuine, mindful connection. You have proven that a home kitchen, armed with a little bit of science and a lot of patience, can produce absolute magic.
Now, stop reading this article, go find a reputable local butcher who sells good marrow bones, and get to blanching. Your weekend culinary masterpiece awaits, and I expect nothing less than crystal-clear perfection.


