
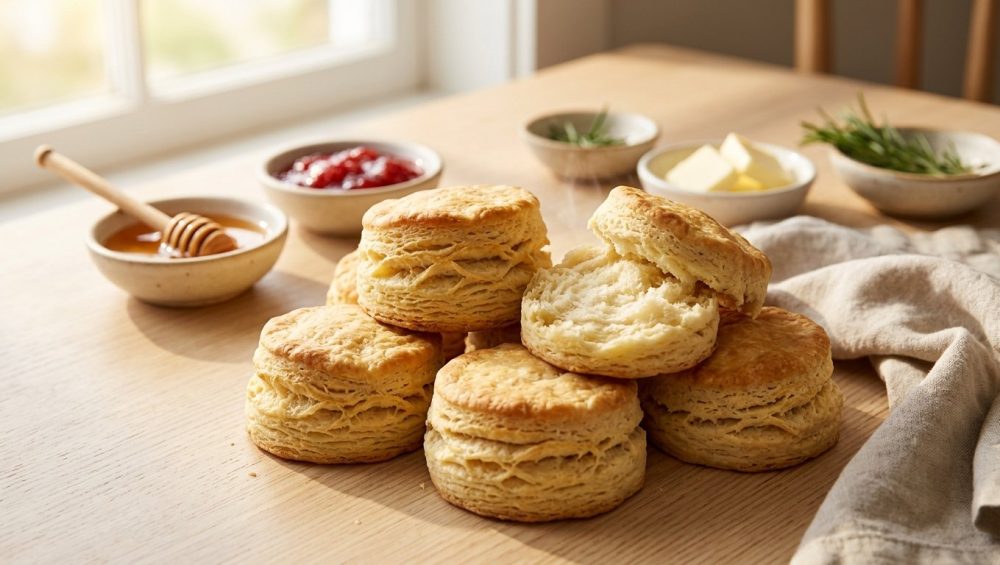
You woke up on a Saturday morning, wildly ambitious and heavily caffeinated. You decided today was the day you were going to conquer the weekend breakfast. You were going to channel your inner Southern grandmother and whip up a batch of towering, golden, scratch-made buttermilk biscuits. You mixed, you rolled, you baked, and what emerged from the oven twenty minutes later wasn’t a tray of flaky masterpieces. It was a pan of dense, sad, heavy hockey pucks.
I know this because I have been exactly where you are. The smoke detector and I are old friends, and I have baked enough leaden lumps of dough to build a small retaining wall in my backyard.
Here is the brutal truth that pretentious culinary schools don’t want you to know: baking is not magic, and you do not need a degree from Le Cordon Bleu to make mind-blowing food in your standard, slightly cramped home kitchen. Baking is just edible chemistry. When your biscuits fail, it isn’t because the universe hates you; it is simply because you inadvertently broke a few basic rules of thermodynamics and gluten management.
During the week, I am all about survival. Time is money, and my weeknight dinners rely heavily on taking every clever shortcut in the book. But the weekend? The weekend is when we slow down. It is when we play, experiment, and demand absolute perfection from our baked goods. Today, we are going to tear down the science of biscuit making so you understand exactly why your dough is betraying you. Then, we are going to take that newfound knowledge and use it to host a “Mindful Biscuit Bar”—a stress-free, customizable, interactive weekend brunch gathering that will make you look like an absolute culinary genius without requiring you to sweat over a hot stove while your guests are drinking mimosas.
Grab your coffee. Let’s fix your food.
The Anatomy of a Hockey Puck: Why Your Biscuits Are Flat
To understand how to make a biscuit rise to the heavens, you first have to understand how you have been murdering them. A biscuit relies on two distinct types of leavening (the stuff that makes dough rise): chemical and mechanical. If you mess up either of these, you are eating a paperweight. Here are the three cardinal sins of biscuit making.
The Warm Butter Catastrophe
Let’s talk about the mechanical leavening first. The secret to a flaky biscuit is steam. When you cut butter into flour, you are creating thousands of tiny, distinct pockets of fat suspended in the dry ingredients. When that dough goes into a fiercely hot oven, the water trapped inside those little pockets of butter rapidly evaporates. This sudden burst of steam pushes the surrounding dough upward, creating distinct, airy layers.
Here is where it all goes wrong: your hands are hot. If you use your bare hands to rub warm, room-temperature butter into your flour, the butter melts before it ever reaches the oven. You are no longer creating distinct pockets of fat; you are just coating the flour in grease. When that dough hits the oven, there is no steam. There is no lift. You have essentially just made a very thick, savory shortbread cookie.
The butter must be freezing cold. Not “I took it out of the fridge ten minutes ago” cold. I mean rock solid. The absolute best trick for a home cook who struggles with this is to simply grate your frozen butter using a standard cheese grater right into your bowl of dry ingredients. It creates perfectly uniform, tiny shards of butter that incorporate into the flour in seconds, long before your warm hands can melt them.
The Overworked Dough Disaster
If warm butter destroys your mechanical leavening, overworking the dough destroys your texture. Flour contains two proteins called glutenin and gliadin. The moment you add a liquid (like buttermilk) to flour and start moving it around, these proteins link together to form a strong, elastic network called gluten.
When you are making a pizza crust or a loaf of sourdough, gluten is your best friend. You want to knead that dough until it is tough and stretchy. But when you are making biscuits? Gluten is your worst enemy.
One of the most common rookie kitchen mistakes is treating biscuit dough like playdough. If you aggressively knead, squish, and roll the dough back and forth, you are developing massive amounts of gluten. The resulting biscuit will be tough, chewy, and entirely incapable of rising because the gluten network is acting like a rubber band, pulling the dough back down. You must treat biscuit dough like it is a delicate, ticking time bomb. Mix it until it just comes together into a shaggy, ugly mess, and then stop touching it.
The Biscuit Cutter Twist of Death
You kept your butter cold. You barely mixed the dough. You patted it out perfectly. And then, you ruined it all at the very last second with the cutter.
When you press a circular cutter into your dough, human instinct tells you to twist your wrist to help release the dough from the surrounding scrap. Do not do this. When you twist the cutter, the friction smears the wet edges of the dough together, effectively crimping and sealing the layers shut. It is like putting a padlock on an elevator door. The steam inside the biscuit wants to push the layers up, but the edges are glued together, so the biscuit stays flat.
You must push the cutter straight down with authority, and pull it straight back up. No wiggling. No twisting. Honestly, twisting the biscuit cutter is an offense punishable by dish duty in my house.
The Science of the Flake: Demystifying Dough Lamination
If you want to achieve those towering, pull-apart layers that you see in high-end bakeries, you need to understand a technique called lamination.
Lamination sounds like a pretentious piece of chef-speak, or perhaps something you do to a fake ID, but in the pastry world, it is simply the process of folding dough over itself to create alternating layers of fat and flour. Traditional lamination—the kind used to make croissants—is a grueling, multi-day process of pounding blocks of butter and rolling dough to millimeter precision. We are not doing that. We are home cooks, and we have lives.
Instead, we are going to use “rough lamination,” specifically a technique called the letter fold. According to recent 2026 bakery industry data, a staggering 71% of consumers now prioritize texture over flavor when evaluating baked goods, a movement food scientists have dubbed “Textural Maximalism”. People are bored of uniform softness; they want a shattering, flaky exterior that yields to a pillowy, steaming interior. Rough lamination is how you engineer that exact mouthfeel at home.
Here is how you do it without losing your mind:
Once your shaggy dough is turned out onto your counter, gently pat it out with your hands into a rough rectangle about half an inch thick. Now, visually divide that rectangle into thirds. Fold the right third over the middle, and then fold the left third over the top of that—exactly like you are folding a business letter to put into an envelope.
Turn the dough 90 degrees, gently pat it out into a rectangle again, and repeat the letter fold. Do this a total of three or four times. With every fold, you are stacking those little pockets of cold butter on top of each other. By the time you cut your biscuits, you have engineered dozens of distinct, horizontal layers into the dough that will violently puff up in the oven.
The Golden Rules of Ingredients
You can have flawless technique, but if your raw materials are garbage, your biscuits will suffer.
Flour Power and Protein Percentages
Not all flour is created equal. The protein content of your flour dictates how much gluten will form. Southern grandmothers swear by White Lily flour, which is milled from soft winter wheat and has a remarkably low protein content (around 8-9%). This makes it almost impossible to overwork the dough.
If you are using standard supermarket All-Purpose flour (which usually sits around 10-11% protein), you have to be extra gentle. Furthermore, you must stop scooping your flour directly out of the bag with a measuring cup. Doing so packs the flour down, meaning you are accidentally adding up to 25% more flour to your recipe than intended, resulting in a dry, crumbly mess. Invest in a cheap digital kitchen scale and weigh your ingredients in grams. It is faster, it creates fewer dirty dishes, and it is mathematically foolproof.
The Acid Trip: Buttermilk and Chemical Leavening
While steam provides the dramatic lift, chemical leavening provides the fluffy, tender crumb. Most biscuit recipes call for baking powder, baking soda, or a combination of both.
Baking powder is usually “double-acting,” meaning it reacts once when it gets wet, and a second time when it hits the heat of the oven. Baking soda, however, is purely reactive. It needs an acidic ingredient to trigger it. This is where buttermilk comes in.
Do not use regular milk. Do not use water. You need the thick, tangy, lactic acid of real cultured buttermilk to react with the baking soda and create carbon dioxide bubbles. (And please, spare me the “milk mixed with a tablespoon of white vinegar” hack. It works in a desperate pinch, but it lacks the fat and viscosity of real buttermilk, and your biscuits will lack richness.)
The “No-Go” Rule on Toxic Kitchen Gear
We need to have a serious talk about your equipment. I am a fierce advocate for the home cook, which means I absolutely despise the cheap, toxic kitchenware pushed onto consumers by big-box stores.
If you are currently baking your food on a flimsy, dark-colored, non-stick baking sheet that is scratched, warped, or peeling mysterious black flakes into your meals, I need you to walk into your kitchen and throw it in the garbage. Right now. I will wait.
We are banishing toxic kitchen gear from our lives permanently. You cannot achieve professional-level results using equipment that actively fights against you.
Bare Aluminum or Stainless Steel Baking Sheets
Dark baking pans absorb and radiate heat much faster than light-colored pans. If you bake biscuits on a dark non-stick pan, the bottoms will burn black before the centers have a chance to cook through. You need heavy-gauge, uncoated, light-colored aluminum half-sheet pans, or high-quality stainless steel pans. They conduct heat evenly, they will outlive you, and you will never again have to wonder why your baking sheets keep warping and sounding like a gunshot going off in your oven at 400 degrees.
The Unsung Hero: The Bench Scraper
Remember how we talked about keeping the butter freezing cold and not touching the dough with your warm hands? You need a bench scraper. It is a simple, cheap, rectangular piece of stainless steel with a handle. It acts as an extension of your hand, allowing you to scoop, fold, and maneuver the shaggy biscuit dough during the lamination process without ever transferring your body heat to the butter. It also makes cleaning the flour off your countertops take approximately three seconds.
A Proper Metal Biscuit Cutter
Stop using an upside-down drinking glass or a plastic cup to cut your biscuits. The rim of a glass is thick and blunt. When you press it into the dough, it pinches and crushes the edges together, sealing the layers just as badly as twisting does. You need a dedicated, thin-walled, sharp metal biscuit cutter. Keep it floured, press straight down, and marvel at the clean edges.
Enter the Mindful Biscuit Bar: Your Weekend Brunch Savior
Now that you possess the scientific knowledge to bake a flawless biscuit, it is time to put it to use. Hosting friends or family for the weekend can be incredibly stressful if you are chained to the stove, flipping eggs to order while everyone else is laughing in the living room.
This is where the “Mindful Biscuit Bar” comes in. It is the ultimate strategy for a relaxed dinner party or weekend brunch. The concept is simple: you provide a towering basket of piping hot, flaky biscuits, and a sprawling board of sweet and savory spreads, compound butters, and toppings. Your guests build their own culinary adventures. It is highly interactive, visually stunning, and most importantly, it requires almost zero active cooking while your guests are present.
The Make-Ahead Strategy
The secret to this stress-free gathering is that biscuit dough actually loves the freezer. The power of chilling dough is immense. You can make your dough, laminate it, cut the biscuits, and place them on a parchment-lined baking sheet days before your event.
Freeze the raw, cut biscuits solid. Once frozen, you can transfer them to a freezer bag. On the morning of your brunch, you do not need to measure flour or grate butter. You simply preheat your oven to a blistering 425°F (220°C), place the frozen biscuits on your heavy-duty aluminum sheet pan (making sure their edges are slightly touching so they support each other as they rise), and bake them straight from frozen. Just add about 3 to 5 extra minutes to the baking time. You get all the glory of fresh-baked pastries with zero morning-of mess.
Staging the Biscuit Bar
While the biscuits are baking and making your house smell like a rustic bakery, you set up your staging area. Use a large wooden cutting board or a marble slab. Place a beautiful, cloth-lined basket in the center to hold the hot biscuits, and surround it with small ceramic bowls and ramekins filled with your spreads. Provide plenty of small spreading knives and spoons so no one is waiting in line to build their biscuit.
The Spread Selection: Sweet and Savory
A proper Mindful Biscuit Bar needs a balance of rich, acidic, sweet, and savory elements. Because you saved so much time prepping the biscuits in advance, you can dedicate your Friday evening to making a few spectacular, elevated toppings.
The Savory Elements:
- Whipped Garlic Herb Butter: Take high-quality European butter, let it soften to room temperature, and whip it furiously with a hand mixer. Fold in finely minced roasted garlic, fresh thyme, flaky sea salt, and a crack of black pepper.
- Southern Pimento Cheese: Ditch the store-bought tubs. Grate sharp cheddar by hand (pre-shredded cheese is coated in anti-caking agents that ruin the texture), and mix it with a dollop of high-quality mayonnaise, diced pimentos, a splash of hot sauce, and a pinch of cayenne.
- Hot Honey Bacon: Bake thick-cut bacon on a wire rack until shatteringly crisp, then chop it into bite-sized pieces and toss it in honey infused with red pepper flakes.
- Classic Sausage Gravy: For the traditionalists. A simple roux made from sausage drippings and flour, whisked with whole milk and heavily seasoned with coarse black pepper. Keep it warm in a small cast-iron Dutch oven on the bar.
The Sweet Elements:
- Quick Berry Compote: Toss fresh or frozen berries in a saucepan with a squeeze of lemon juice and a spoonful of sugar. Simmer until the berries burst and the liquid reduces to a thick, jammy syrup.
- Cinnamon Maple Butter: Whip softened butter with real maple syrup, a heavy dash of cinnamon, and a pinch of salt. It tastes like a warm hug.
- Lemon Curd: The sharp, bright acidity of a good lemon curd cuts perfectly through the rich, buttery fat of the biscuit.
Troubleshooting Your Biscuit Nightmares
Even armed with science, the kitchen can occasionally throw you a curveball. If your biscuits come out looking less than stellar, consult this rapid-fire troubleshooting guide before you throw in the towel.
“My biscuits spread outward into flat puddles instead of rising upward.”
Your butter got too warm before it hit the oven, or your oven wasn’t hot enough. Biscuits need a blast of high heat (at least 400°F to 425°F) to rapidly create steam before the gluten structure sets. Additionally, make sure your biscuits are nestled close together on the baking sheet. If their edges are just barely touching, they will support each other and force each other to climb upward rather than spreading outward.
“My biscuits are dense, heavy, and taste slightly metallic.”
Two things happened here. First, you likely overworked the dough, developing too much gluten. Second, your baking powder might be expired, or you used too much of it (which causes that bitter, metallic aftertaste). Test your baking powder by dropping a spoonful into hot water; if it doesn’t immediately fizz and bubble aggressively, throw it away and buy a fresh can.
“My biscuits are burnt on the bottom but raw in the middle.”
You are using a dark, thin baking sheet that is scorching the bottoms, or your oven rack is positioned too low. Move your oven rack to the middle or upper-middle position, and switch to a heavy-gauge, light-colored aluminum pan. If you only have thin pans, try “double-panning” by stacking one baking sheet inside another to create an insulating layer of air between the heat source and your biscuits.
The Final Crumb of Advice
Cooking for the people you love should never induce a panic attack. A meaningful dinner party or weekend brunch is ultimately about the connection around the table, not achieving Michelin-star perfection.
However, understanding the basic food science behind what you are doing in the kitchen removes the anxiety from the equation. When you know why frozen butter creates steam, why lamination creates layers, and why twisting a cutter seals the dough, you are no longer blindly following a recipe and praying for a good outcome. You are in total control.
So this weekend, banish the toxic gear, grate that frozen butter, respect the gluten, and set up a sprawling, beautiful biscuit bar. Pour yourself a strong cup of coffee, let your guests build their own messy, glorious biscuit sandwiches, and bask in the fact that you just conquered the kitchen without breaking a sweat.






