
We have all been there. You are standing in your kitchen on a busy Tuesday evening, glass of wine in hand, ready to whip up that gorgeous weeknight dinner you planned. You open the refrigerator, pull open the crisper drawer, and reach for that vibrant, expensive bunch of cilantro you bought just three days ago. But instead of crisp, fragrant leaves, your fingers close around a dark, liquefied, swampy mass of green goop.
It is infuriating. It is a waste of your hard-earned money. And frankly, it is enough to make any home cook throw in the towel and order takeout.
If you are tired of watching your grocery budget literally rot in the bottom of your fridge, pull up a chair. I have zero patience for pretentious chef-speak, but I am fiercely passionate about empowering everyday home cooks to achieve professional-level results in a standard kitchen. You do not need a culinary degree to master ingredient preservation; you just need a little bit of science and some clever, time-saving techniques. If you want to stop throwing away sad veggies and wilted greens, you have to understand the biological warfare happening inside your refrigerator.
Consider this your masterclass. We are going to break down exactly why delicate plant cell walls rupture, the critical differences between cold-sensitive soft herbs and tough woody herbs, and the precise, science-backed storage methods that will keep your ingredients vibrant for weeks.
The Great Green Tragedy: The Economics of Food Waste
Before we dive into the cellular biology of your parsley, we need to address the staggering reality of food waste. When you throw away that slimy bunch of mint, you might think it is just a minor inconvenience, but you are participating in a massive global issue.
Recent statistics from the United Nations and the USDA paint a grim picture. Globally, we waste roughly 1.3 billion tons of food every single year. In the United States alone, households throw away 30% to 40% of their fresh produce, and in the UK, approximately 9.5 million tonnes of food waste is generated annually. A shocking 73% of household food waste consists of perfectly edible items like bread, meat, and fresh produce.
Think about the resources that went into growing that bunch of dill—the fresh water, the agricultural labor, the fuel for transportation. Over $48.3 billion worth of food is thrown away worldwide each year. When we let our herbs liquefy in the fridge, we are not just wasting our own money; we are squandering vital resources. By mastering proper storage techniques, you are taking a stand for your wallet and the planet.
The Science of the Slime: What Actually Happens in Your Fridge
To stop the rot, you have to understand the enemy. Why exactly do fresh herbs turn to slime so quickly? The answer lies in the microscopic architecture of the plant itself.
Unlike hardy root vegetables like carrots or potatoes, which are dense and built for long-term underground survival, leafy herbs are incredibly delicate. Biologically speaking, even after they are harvested and bundled at the grocery store, these plants are still alive. They are actively respiring—taking in oxygen, breaking down stored sugars, and releasing carbon dioxide and water vapor.
The Cellular Collapse
Herbs have extremely thin cell walls and a remarkably high water content. These plant cells are held together by pectin, a structural carbohydrate that acts like the mortar between bricks. When herbs are subjected to excess moisture and a lack of airflow, they cannot breathe.
If the temperature drops too low (especially in older refrigerators with uneven cooling zones), the water outside the plant cells begins to freeze. Because the fluid inside the cell contains metabolites and soluble sugars, it requires a lower temperature to freeze than the pure water on the outside. To balance this concentration gradient, the water inside the cell rushes out across the membrane, effectively dehydrating the cell from the inside out.
This causes the cell walls to deform, rupture, and collapse. The structural integrity of the leaf is destroyed. Just as your dull knife crushes and bruises an onion rather than slicing it cleanly, improper cold storage crushes the cellular structure of your herbs.
Enter the Slime Makers
Once those cell walls rupture, the plant releases its internal enzymes and fluids, creating a damp, nutrient-rich environment. This is the exact moment when opportunistic bacteria—specifically Pseudomonas and Erwinia—invite themselves to the party.
These microbes absolutely thrive in stagnant, warm, low-oxygen water. When you leave your herbs sealed in the tight, unbreathable plastic bags from the grocery store, you are essentially building a luxury resort for bacteria. They colonize the stem tissue and break down the plant matter into that dreaded, foul-smelling green goop.
Soft Herbs vs. Woody Herbs: Know Your Plant Anatomy
One of the biggest rookie mistakes in the kitchen is treating all green things exactly the same. You cannot toss a bundle of delicate cilantro into the same environment as a sturdy sprig of rosemary and expect them both to survive. Consider this your essential kitchen survival guide for categorizing your produce.
The Soft and Tender Divas
Soft herbs are characterized by their tender, flexible stems and delicate leaves. They have a very high moisture content and a rapid respiration rate. Because they are so watery, they lose their vibrant flavor and turn grassy or dull if you try to dry them out. They must be kept fresh, hydrated, and cool.
The most common soft herbs include:
- Cilantro (Coriander)
- Parsley (Flat-leaf and curly)
- Mint
- Dill
- Tarragon
- Chervil
The Tough and Woody Warriors
Woody herbs, on the other hand, evolved in hot, arid climates (often the Mediterranean). They have tough, bark-like stems and firm, low-moisture leaves. Their cellular structure and potent essential oils are literally built by nature to withstand dehydration and harsh conditions. Because of their low water content, they are incredibly resilient and dry beautifully.
The most common woody herbs include:
- Rosemary
- Thyme
- Oregano
- Sage
- Marjoram
- Bay Leaves
Understanding this fundamental anatomical difference dictates exactly how you should store them. Soft herbs need to be treated like a bouquet of fresh-cut flowers. Woody herbs need to be treated like damp moss in a terrarium.
The Basil Exception: Why Your Fridge is a Death Trap
Now that we have established the rules, we must immediately discuss the one massive, glaring exception: Basil.
If you take nothing else away from this masterclass, remember this: Never put fresh basil in the refrigerator. By conquering weeknight cooking anxiety, you learn to rely on fast, flavorful ingredients, and ruined basil is a surefire way to derail a quick pasta dish.
The Tropical Origins of Ocimum basilicum
Basil is a tropical plant. It thrives in hot weather and warm soil. Its cellular metabolism is entirely tuned to warm temperatures. When you place basil in a standard refrigerator (which typically hovers around 35°F to 38°F), you induce a physiological trauma known as “chilling injury”.
Research shows that temperatures below 50°F (10°C) cause severe damage to basil. The cold temperatures cause the delicate cell membranes to stiffen and lose their integrity. The plant’s natural antioxidant defenses are weakened, and metabolic changes trigger the release of enzymes that cause auto-oxidation.
The Symptoms of Chilling Injury
If you have ever pulled basil out of the fridge and noticed that the leaves have turned black, developed dark necrotic spots, or look water-soaked and translucent, you have witnessed chilling injury firsthand. The cold literally causes the veins of the leaves to bronze and the tissue to die.
Basil must be kept at room temperature. We will cover the exact countertop isolation method in the storage section below, but remember: keep it out of the cold, away from drafts, and out of direct, scorching sunlight.
The Invisible Assassin: Ethylene Gas
You have separated your soft herbs from your woody herbs, and you have rescued your basil from the fridge. But there is another invisible enemy lurking in your kitchen that can destroy your produce overnight: Ethylene gas.
What is Ethylene?
Ethylene (C2H4) is a colorless, odorless, naturally occurring hydrocarbon gas. In the plant world, it acts as a powerful aging and ripening hormone. Many fruits release high levels of ethylene gas as they ripen.
While this gas is incredibly useful if you are trying to ripen a rock-hard avocado in a paper bag, it is an absolute disaster for your fresh herbs.
The Impact on Sensitive Greens
Herbs, leafy greens, and vegetables like broccoli and cucumbers are highly sensitive to ethylene. When exposed to this gas, their internal aging process goes into hyperdrive. Ethylene causes chlorophyll (the green pigment) to break down, resulting in rapid yellowing (chlorosis), wilting, and the premature dropping of leaves.
If you are tossing your fresh parsley into the same crisper drawer as your apples, you are essentially gassing your herbs to death. You might as well just throw your money directly into the compost bin.
High Ethylene Producers to Avoid
To protect your herbs, you must absolutely isolate them from the following high-ethylene producing fruits:
- Apples
- Bananas (especially as they ripen and spot)
- Tomatoes
- Avocados
- Stone fruits (Peaches, Plums, Nectarines, Apricots)
- Cantaloupes and Honeydew melons
- Pears
A brilliantly organized kitchen utilizes zoning. Keep your ethylene-producing fruits in a fruit bowl on the counter or in a completely separate, designated crisper drawer with the vent open (to allow the gas to escape). Keep your sensitive herbs in a different zone entirely. Mastering this kind of kitchen logic is the fastest way to cure cooking anxiety and stop second-guessing your ingredient prep.
The Masterclass Techniques for Bulletproof Herb Storage
We have covered the biology, the thermodynamics, and the chemical warfare. Now, let us get down to business. These are the rigorous, time-tested, science-backed methods that will keep your fresh herbs vibrant, crisp, and flavorful for up to three weeks.
Rule Number One: Step Away from the Sink
Before we do anything, we must address the most common and fatal mistake home cooks make: Washing herbs the second they get home from the grocery store.
Do not do it. Never wash your herbs before storing them.
As we established earlier, surface moisture is the primary catalyst for bacterial growth and slime. Even if you use a salad spinner, microscopic droplets of water will remain trapped in the tiny crevices between the leaves. You should only ever wash your herbs immediately before you are going to chop and use them. If your herbs are visibly wet from the supermarket misters when you buy them, gently pat them completely dry with a paper towel before proceeding to the storage steps.
Method 1: The Water-Jar Technique (For Soft Herbs)
This method is for your cilantro, parsley, mint, and dill. Because these herbs have high water content and rapid respiration, they need continuous hydration drawn up through their stems, just like a bouquet of cut flowers.
Step 1: The Trim
Remove the rubber band or twist tie binding the herbs. Sort through the bunch and ruthlessly pluck out any leaves that are already bruised, yellowing, or slimy. One decaying leaf will spread bacteria to the rest of the bunch rapidly. Next, take a sharp knife or kitchen shears and snip about half an inch off the bottom of the stems. This removes the dried-out ends and opens up the vascular tissue, allowing the plant to drink.
Step 2: The Jar
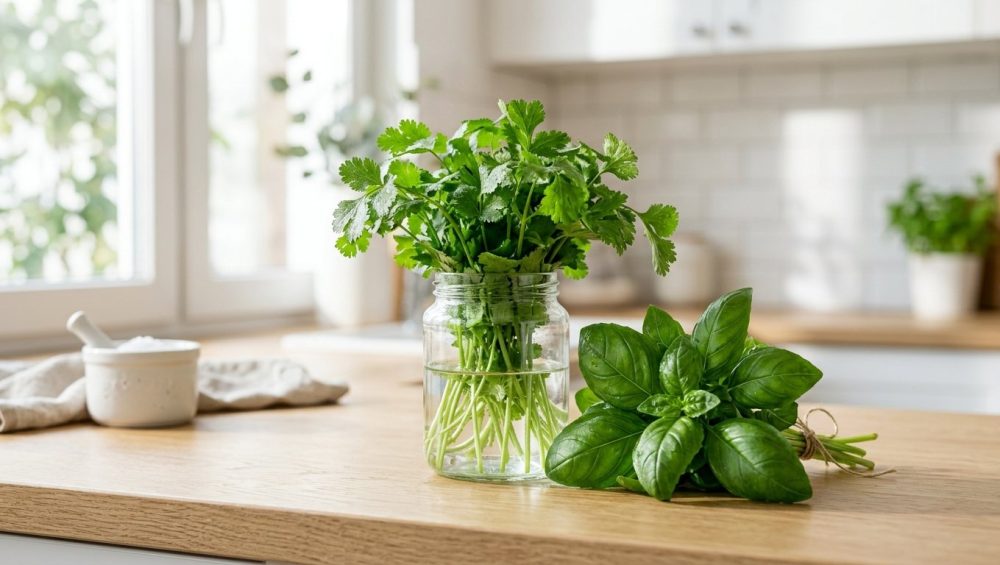
Fill a clean glass jar (a mason jar or a heavy-bottomed drinking glass works perfectly) with about one to two inches of fresh, cold water. Place the herbs into the jar, stems down. Make absolutely sure that no leaves are submerged in the water; only the bare stems should be touching the liquid. Submerged leaves will rot instantly.
Step 3: The Microclimate
To prevent the dry air of the refrigerator from dehydrating the leaves, you need to create a humid microclimate. Take a reusable, food-grade silicone storage bag (or a standard plastic produce bag if you must) and place it loosely over the top of the herbs, covering the jar. Do not seal it tight! The plant still needs to respire and exchange gases.
Step 4: Refrigerator Placement
Place the jar upright in the refrigerator, ideally on a middle shelf where the temperature is consistent. Avoid pushing it all the way to the back of the fridge, as the back wall is often much colder and can inadvertently cause freezing injury.
Maintenance: Every two to three days, check the water. If it looks cloudy, that means bacteria are multiplying. Dump it out, rinse the jar, and refill it with fresh water.
Method 2: The Damp Towel Wrap (For Woody Herbs)
This method is for your rosemary, thyme, oregano, and sage. These tough herbs do not need to drink from a jar; they just need a slightly humid environment to prevent them from drying out entirely.
Step 1: The Wrap
Take a piece of unbleached paper towel or a clean, breathable cotton kitchen cloth. Dampen it slightly with cold water. It is crucial that the towel is barely damp, not soaking wet. Wring it out aggressively until it feels like it can hold no more water.
Step 2: The Roll
Lay the woody herbs flat on the damp towel and roll them up gently, like a loose cigar. This provides a consistent, low-level humidity that keeps the essential oils intact without encouraging rot.
Step 3: The Container
Place the wrapped bundle into a high-quality, airtight glass storage container or a sealed silicone bag. Store it in the crisper drawer (away from your apples and tomatoes, remember!). These herbs will easily last two to three weeks using this method.
Method 3: The Countertop Isolation (For Basil)
As we learned, basil will die a swift, black, necrotic death in the refrigerator. It demands luxury treatment.
Step 1: The Trim
Just like the soft herbs, snip the bottom half-inch off the stems of your fresh basil to open up the vascular pathways.
Step 2: The Jar
Place the basil stems in a glass jar filled with an inch of room-temperature water. Again, ensure no leaves are submerged.
Step 3: The Location
Leave the jar sitting right on your kitchen countertop. It needs to be kept at room temperature (ideally between 60°F and 70°F). Keep it out of direct, harsh sunlight, which can scorch the delicate leaves, and keep it away from drafts or heat vents.
Step 4: The Optional Tent
Basil likes humidity (around 90% relative humidity is ideal). If your house is very dry, you can loosely drape a thin plastic bag over the top of the basil bouquet to trap some moisture, but ensure it is heavily vented so the plant can breathe. Change the water every couple of days to keep it fresh.
The “No-Go” Rule: Banish Toxic and Cheap Kitchen Gear
As your sassy sous-chef, I have a strict philosophy: I absolutely despise cheap, toxic kitchenware. You are spending good money on beautiful, organic produce; why on earth would you store it in flimsy, chemical-leaching, single-use plastics? I am a relentless advocate for banishing toxic kitchen gear from your home entirely.
When it comes to food storage, your gear matters. The cheap, thin plastic bags provided in the produce aisle are designed for transport, not for long-term storage. They offer zero temperature insulation and trap condensation in a way that suffocates your food. Furthermore, old, degraded plastic containers stay greasy, harbor microscopic bacteria in their scratches, and can leach microplastics and endocrine disruptors into your food.
Invest in Safe, Durable Solutions
If you are serious about eliminating food waste, you need to invest in a few key pieces of safe, durable storage equipment. High-quality glass mason jars, heavy-duty borosilicate glass food storage containers with locking lids, and 100% food-grade platinum silicone bags are essential tools every beginner needs.
A Crucial Warning on Metal Lids: If you are using the water-jar method with a mason jar, be very careful with standard two-piece metal canning lids. The exudates (plant juices) from cut herb stems can be slightly acidic. Over time, even brief contact with this moisture can corrode the cheap metal seals on standard lids, causing them to rust and leach trace metals into the water. Instead, invest in reusable, BPA-free plastic or silicone lids specifically designed for mason jars.
By upgrading your storage gear, you are not just extending the life of your herbs; you are protecting your health and reducing your reliance on disposable plastics.
Troubleshooting: When Good Herbs Go Bad
Even with the most meticulous, science-backed system, occasionally things go awry. Think of these failures not as a defeat, but as a diagnostic clue to fine-tune your kitchen environment.
Problem: The herbs are wilting and looking limp, but they aren’t slimy.
Diagnosis: Dehydration. Your refrigerator environment is too dry, or the herbs are not able to draw up water.
The Fix: If using the water-jar method, check the stems. Did they heal over? Give them a fresh snip. Ensure the plastic or silicone bag covering the top is actually trapping enough humidity.
Problem: The water in the jar is cloudy and smells foul.
Diagnosis: Bacterial bloom.
The Fix: You waited too long to change the water, or a leaf fell into the liquid and began to rot. Dump the water, wash the jar thoroughly with hot soapy water, rinse the herb stems, and start fresh. Make it a habit to change the water every two days.
Problem: My rosemary is turning brown and molding in its towel.
Diagnosis: The towel is too wet.
The Fix: Woody herbs hate excess moisture. You likely did not wring the towel out enough. It should feel almost dry to the touch. Remove the moldy sprigs, let the remaining herbs air dry for an hour, and re-wrap them in a much drier cloth.
Problem: Everything I put in my crisper drawer turns to mush.
Diagnosis: Ethylene gas poisoning or incorrect humidity settings.
The Fix: Check what else is in the drawer. Are there apples or ripening peaches nearby? Evict them immediately. You already know exactly why berries mold so fast when trapped with excess moisture and gas; herbs suffer the same fate. Adjust your crisper drawer settings. Most modern fridges have a slider for humidity. Herbs and leafy greens need high humidity (slider closed to trap moisture), while fruits generally need low humidity (slider open to vent ethylene gas).
The Final Word: Reclaiming Your Kitchen
Cooking should be a joyful, creative release at the end of a long day, not a stressful race against rotting produce. The frustration of throwing away expensive ingredients is enough to demoralize anyone, but you now possess the exact biological knowledge and practical techniques to prevent it.
You understand the fragility of plant cell walls. You know how to defend against freezing injury and the slime-inducing Pseudomonas bacteria. You respect the tropical diva that is basil, and you know how to quarantine the ethylene-producing apples that threaten your delicate greens.
By taking an extra three minutes when you unpack your groceries to snip stems, fill jars, and wrap woody sprigs, you are buying yourself weeks of vibrant, fresh flavor. You are saving money, reducing your environmental footprint, and setting yourself up for culinary success.
So, pour yourself that glass of wine, pull a perfectly crisp, bright green sprig of cilantro from your meticulously organized fridge, and get cooking. You’ve got this.






