
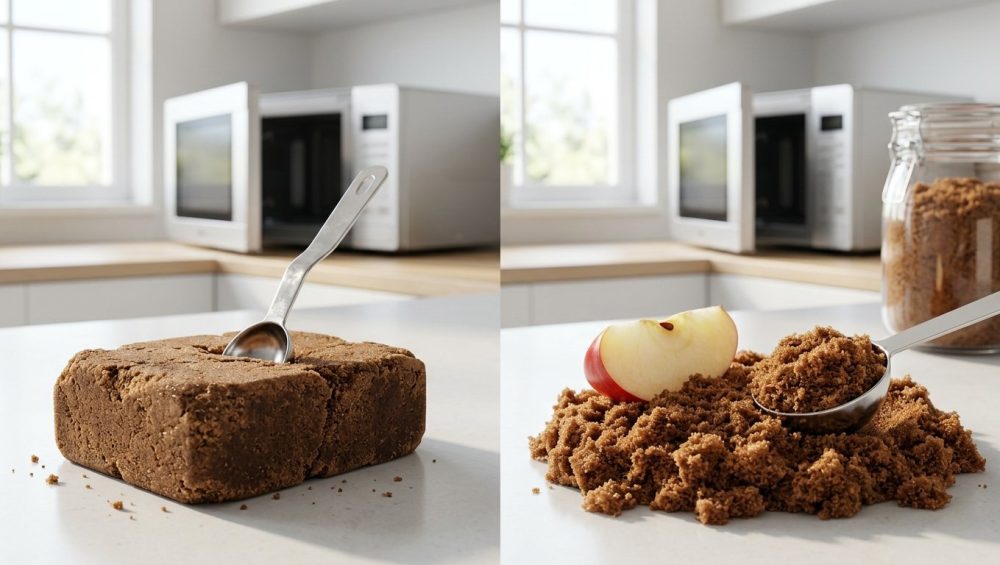
Picture this: It is a rainy Friday evening. You have survived another grueling workweek, and you are finally ready to tackle that elaborate weekend baking project you have been dreaming about since Tuesday. Your butter is perfectly softened on the counter. Your stand mixer is locked and loaded. You reach into the dark recesses of your pantry for the brown sugar, pull out the plastic bag, and realize with a sinking feeling that you are holding a solid, impenetrable, geological specimen. You poke it. You squeeze it. You consider taking a hammer to it.
Listen, I have been there. When it comes to surviving kitchen disasters, dealing with a petrified block of sugar is practically a rite of passage for any home cook. But you do not need a culinary degree to fix this, and you certainly do not need to throw that sugar in the trash. I firmly believe that anyone can master the kitchen with a little bit of food science and a lot of common sense. I have zero patience for pretentious chef-speak, and I have even less patience for wasting good ingredients.
Today, we are going to break down exactly why this frustrating phenomenon happens, how to reverse it immediately using foolproof kitchen hacks, and how to store your pantry staples so you never have to chisel away at a sugar brick again. No fluff, no endless anecdotes about my childhood—just hard science, efficient techniques, and brutally honest advice. Let us get to work.
The Anatomy of Brown Sugar (What Even Is It?)
Before we can fix the brick, we need to understand what we are actually dealing with. A lot of people assume that brown sugar is some sort of raw, unrefined, natural product pulled straight from the earth. That is a lovely, rustic thought, but it is entirely inaccurate.
Commercial brown sugar is actually just highly refined white granulated sugar (which is 99.95% pure sucrose) that has had a very specific, calculated amount of molasses added back into it. Historically, brown sugar was simply sugar that had not been fully refined, leaving some of the natural molasses from the sugarcane intact. However, in modern commercial production, manufacturers completely refine the sugar into white crystals first, and then mechanically coat those crystals in molasses. This ensures absolute consistency in flavor, color, and moisture content across every single batch.
The amount of molasses added dictates the type of brown sugar you are buying:
- Light Brown Sugar: Contains approximately 3.5% molasses by weight. It has a delicate, mild caramel flavor and is the standard workhorse for most chocolate chip cookie recipes and blondies.
- Dark Brown Sugar: Contains approximately 6.5% molasses by weight. It boasts a deeper, richer, slightly more acidic and bitter toffee profile. It is the undisputed champion for gingerbread, baked beans, and heavy barbecue glazes.
That thin, viscous coating of molasses is the magic ingredient. It gives the sugar its signature sandy, packable texture, its acidic punch, and its moisture. But just like how certain pantry spices will turn into hard bricks if left unsealed, brown sugar is highly sensitive to its environment. The very thing that makes brown sugar so delicious—the moisture in the molasses—is exactly what causes it to turn into concrete when neglected.
The Science of the Brick (Why Does It Happen?)
Some culinary textbooks will refer to brown sugar as a “metastable colloidal suspension.” Please. We are trying to bake a pie, not launch a satellite into orbit. Let us skip the pretentious jargon and look at the practical physics of your pantry.
Molasses is inherently hygroscopic. In plain English, this means it actively attracts and holds onto water molecules from its surrounding environment. When your brown sugar is fresh out of the factory sealed bag, that molasses coating is plump, hydrated, and slippery, allowing the sucrose crystals to slide past one another easily. This is why fresh brown sugar feels so soft and malleable.
However, hygroscopic ingredients are a double-edged sword. While they can pull moisture in, they can also lose it if the surrounding air is too dry. When you leave a bag of brown sugar improperly sealed, the ambient air begins to interact with the molasses. If the relative humidity in your kitchen drops below 60%—which happens in almost every home during the winter when the central heating is blasting—the moisture within the molasses film rapidly evaporates. In fact, a USDA stability study noted that at 30% relative humidity, brown sugar can lose 2.1% of its moisture weight in just 48 hours.
When that water evaporates, the molasses shrinks and physically transforms from a slippery liquid coating into a rigid, sticky glue. The sucrose crystals become fused together through processes known as capillary adhesion and hydrogen bonding. Contrary to popular belief, the sugar is not actually “crystallizing” into rock candy; it is undergoing physical agglomeration. The individual grains are simply cemented together by dehydrated molasses.
Understanding the “why” is the first step to help you eliminate kitchen chaos for good. Because the hardening process is just a simple loss of water vapor, the solution is equally simple: we just need to put the water back. Reintroducing moisture rehydrates those dried molasses films reversibly, restoring the sugar’s flowability without compromising its flavor or safety.
Emergency Triage: How to Soften Brown Sugar IMMEDIATELY
Time is money. When you are trying to throw together a quick weeknight marinade or you are mid-recipe on a Saturday afternoon, you do not have 24 hours to wait for an apple slice to do its job. You need that sugar softened right now. Here are the three most efficient, brutally effective ways to force moisture back into your sugar brick in a matter of minutes.
The Microwave Steam Bath (The Fastest Hack)
This is my absolute go-to method for weekday cooking when efficiency is the only thing that matters. We are going to use the microwave to create a localized, high-intensity steam room that forces water vapor directly into the dehydrated molasses.
The Steps:
- Place your rock-hard chunk of brown sugar into a microwave-safe glass or ceramic bowl. Do not use plastic for this.
- Take a heavy-duty paper towel and wet it completely under the kitchen faucet.
- Crucial Step: Wring the paper towel out aggressively until it is merely damp. If the towel is dripping wet, the excess liquid water will dissolve the sucrose and leave you with a puddle of unusable brown syrup.
- Drape the damp paper towel over the top of the bowl, ensuring it completely covers the opening to trap the steam, but try to avoid letting it directly touch the sugar.
- Microwave the bowl on 50% power in short, 15 to 20-second bursts.
- After each burst, carefully lift the towel (watch out for the hot steam) and use a sturdy fork to scrape and fluff the sugar.
- Repeat this process until the sugar is completely soft and pliable.
The Warning: You must use short increments and reduced power. If you blast the sugar on high for a full minute, the molasses will physically cook and melt. Melted sugar alters the structural integrity of your baked goods, which is exactly why your cookies spread into sad, greasy little puddles on the baking sheet. Heat it gently, steam it slowly, and fluff it frequently.
The Low-Oven Rescue (For Larger Batches)
If you do not own a microwave, or if you have a massive, five-pound brick of brown sugar that will not fit in a standard bowl, the oven is your next best friend. This method uses gentle, ambient heat to relax the rigid hydrogen bonds holding the molasses together.
The Steps:
- Preheat your oven to exactly 250°F (120°C). Do not be tempted to crank the heat to speed up the process; sugar burns incredibly fast, and burnt molasses tastes like bitter ash.
- Line a heavy-duty, warp-resistant baking sheet with unbleached parchment paper or aluminum foil.
- Place your sugar brick in the center of the pan.
- Place the pan in the oven and watch it like a hawk. Check it every two to three minutes.
- As the ambient heat penetrates the brick, the molasses will begin to soften. Use a spoon to gently press on the sugar; once it yields and crumbles, immediately pull the pan from the oven.
The Warning: You must measure and use the oven-softened sugar immediately while it is still warm. Because this method uses dry heat rather than introducing new moisture, the sugar will harden into an even more impenetrable rock the second it cools down to room temperature. Furthermore, do not try to incorporate hard, un-softened lumps into your cookie dough, as they will not dissolve during the creaming process, which is exactly why your cookies bake unevenly.
The Brute Force Blender Method (The Mechanical Breakdown)
I only recommend this method if you are completely desperate, lack a microwave, and do not have time to preheat an oven. It is loud, it is aggressive, and it does not actually rehydrate the sugar—it simply pulverizes the brick into a usable powder.
The Steps:
- Take a heavy rolling pin or the back of a cast-iron skillet and smash the sugar brick inside a heavy-duty zip-top bag just enough to break it into golf-ball-sized chunks. (Do not put a solid three-pound brick directly into your food processor, or you will destroy the motor).
- Toss the chunks into a high-powered food processor or blender.
- Pulse the machine aggressively until the blades mechanically shear the cemented crystals apart, reducing the chunks back into a sandy texture.
The Warning: This method will change the texture of the sugar slightly, making it finer than its original state. It is perfectly fine for marinades, rubs, and oatmeal, but it may alter the aeration slightly if you are creaming it with butter for delicate cakes.
The “Overnight Shift”: Slow and Steady Softening Hacks
If you want to transform your chaotic cooking routine, prepping your ingredients the night before is a massive lifesaver. If you check your pantry on a Thursday and realize your sugar is hard for your Friday bake, you have the luxury of time. These slow, overnight methods are actually superior to the emergency heat methods because they naturally and permanently restore the moisture balance to the molasses without any risk of melting or cooking the sugar.
These methods all rely on the exact same scientific principle: placing a highly moist item inside a sealed environment with the hygroscopic brown sugar. The dry molasses will aggressively pull the water vapor out of the moist item until an equilibrium is reached.
The Apple Slice Trick
This is the classic, old-school method your grandmother probably used. Take half of an apple (any variety will do, though a juicy Granny Smith or Honeycrisp works wonders), cut it into a few thick slices, and place them directly into the airtight container with your hardened brown sugar. Seal the lid tightly. Over the next 12 to 24 hours, the sugar will absorb the ambient moisture released by the fruit. By the next day, the apple slices will look shriveled and dry, and your sugar will be perfectly soft and fluffy. Remove the apple slices immediately once the sugar is soft to prevent any mold growth.
The Bread Slice Trick
If you do not want to waste a perfectly good apple, reach for your breadbox. Take a single slice of standard, soft white sandwich bread and place it on top of the hardened sugar in a sealed container. The science here is identical to the apple trick. The molasses acts as a moisture vampire, sucking the water directly out of the bread crumb. When you open the container the next morning, the bread will be as hard as a stale crouton, and the sugar will be completely revitalized. Throw the rock-hard bread away and enjoy your baking.
The Jumbo Marshmallow Trick
This is a fantastic, slightly less messy alternative to the bread and apple tricks. Toss two or three jumbo marshmallows into your sugar container and seal it up. Marshmallows are essentially whipped sugar, water, and gelatin. The gelatin traps a significant amount of moisture. The dry brown sugar will slowly leech that moisture out of the marshmallows over a few days. The beauty of this method is that you can just leave the marshmallows in the container indefinitely; they will not mold or rot like an apple slice might.
Fort Knox: How to Store Brown Sugar So It Never Hardens Again
As a seasoned home cook, I can tell you that prevention is always cheaper, faster, and less stressful than the cure. You should never have to microwave a damp paper towel if you simply store your ingredients correctly in the first place. The factory plastic bags that brown sugar comes in are notoriously terrible at retaining moisture once they have been ripped open. You need to build a fortress for your sugar.
The “No-Go” Rule on Toxic Storage Gear
Let us get one thing straight: I absolutely despise cheap, flimsy, bargain-bin plastic storage containers. You know exactly the ones I am talking about—the cloudy plastic tubs you saved from your takeout orders, or the dollar-store bins with peeling lids. That’s exactly why your plastic containers turn orange when you put tomato sauce in them—they are porous, low-quality garbage.
Not only do these cheap plastics warp in the dishwasher and leach mystery chemicals into your food, but they are also completely ineffective at blocking airflow. Micro-drafts of dry air will easily penetrate a cheap plastic lid, rendering your storage efforts useless and turning your sugar into a brick anyway.
I am a huge advocate for banishing toxic kitchen gear from your home. Invest in high-quality, durable, food-safe storage. You want thick borosilicate glass jars with heavy-duty silicone gaskets and stainless-steel latching mechanisms. If you prefer acrylic, ensure it is high-grade, BPA-free, and features a push-button vacuum seal. A truly airtight environment is the only way to stop the moisture in the molasses from evaporating into the atmosphere.
The Magic of the Terra Cotta Disk (The Sugar Bear)
Even with the best glass jar in the world, every time you open the lid to scoop out some sugar, you are letting dry air into the container. To combat this, you need a continuous moisture regulator.
Listen to me: you need a terra cotta disk. Often sold in kitchen supply stores shaped like little bears or leaves, these inexpensive disks are the ultimate secret weapon for pantry preservation.
Terra cotta is an unglazed, highly porous natural clay. Here is how you use it:
- Submerge the clean terra cotta disk in a bowl of cold tap water for 15 to 30 minutes.
- Remove the disk and pat the outside completely dry with a towel. You want the water inside the microscopic pores of the clay, but you do not want the surface to be dripping wet.
- Bury the disk directly into your airtight container of brown sugar.
Over the course of several months, the clay will slowly, steadily release a micro-climate of humidity into the sealed jar, perfectly counteracting any dry air that sneaks in. It keeps the molasses perfectly hydrated indefinitely. When you notice the sugar starting to feel a little stiff again a few months later, simply pull the disk out, re-soak it, and toss it back in. It is a brilliant, non-toxic, infinitely reusable solution.
Vacuum Sealing for the Hardcore Prepper
If you buy brown sugar in massive bulk quantities (say, a 10-pound bag from a warehouse club) and know you will not use it all for a year, portion it out and use a vacuum sealer. By completely evacuating the oxygen and air from the heavy-duty plastic bag and heat-sealing it, you halt the evaporation process entirely. You can even throw the vacuum-sealed bags into the freezer for infinite storage, as the freezing temperatures will lock the moisture into the molasses without damaging the sucrose structure.
The Ultimate Hack: Making Your Own Brown Sugar on the Fly
Sometimes, a brick of sugar is so old, so pale, and so thoroughly desiccated that no amount of microwaving or terra cotta soaking is going to bring it back to its former glory. Or perhaps you are mid-recipe and realize you completely forgot to buy brown sugar in the first place.
Do not panic, and do not run to the grocery store. If you have standard white granulated sugar and a jar of molasses in your pantry, you can manufacture your own fresh, incredibly soft brown sugar in about sixty seconds. Consider this recipe your ultimate kitchen survival guide for impromptu baking sessions.
The Ratios:
- For Light Brown Sugar: Combine 1 cup of granulated white sugar with 1 level tablespoon of unsulfured molasses.
- For Dark Brown Sugar: Combine 1 cup of granulated white sugar with 2 level tablespoons of unsulfured molasses.
The Technique:
Place the white sugar in a medium mixing bowl and pour the sticky molasses directly over the top. You can use a sturdy fork to mash and rub the molasses into the sugar crystals, but this takes a bit of elbow grease. For the best, most uniform results, dump the ingredients into the bowl of your stand mixer fitted with the paddle attachment. Turn it on medium speed and let it run for two to three minutes.
The mechanical action of the paddle will efficiently coat every single grain of white sugar with the dark syrup. You will know it is ready when the mixture looks like soft, wet sand and holds its shape when you squeeze a handful of it together. Because you just made it fresh, the moisture content is at its absolute peak, making it incredibly luxurious to bake with.
Frequently Asked Questions About Brown Sugar Preservation
To leave absolutely no stone unturned, let us address some of the most common questions and misconceptions that plague weekend bakers when dealing with this temperamental ingredient.
Does Brown Sugar Actually Expire?
No. Commercially produced brown sugar has an indefinite shelf life. Sugar is a natural preservative; it creates an environment with such high osmotic pressure that bacteria and mold simply cannot survive or reproduce in it. As long as you keep your sugar protected from pantry pests (like ants and weevils) and free from external moisture contamination (like dripping water into the jar), it will never “go bad” or spoil. It will only suffer from quality degradation—namely, drying out and hardening. A rock-hard brick of ten-year-old brown sugar is still perfectly safe to eat; it is just incredibly annoying to cook with.
Can I Substitute White Sugar for Brown Sugar in a Pinch?
If you are entirely out of brown sugar and out of molasses, you can use white sugar, but you must understand the consequences. Because white sugar lacks the moisture and acidity of molasses, your baked goods will behave differently. Cookies made with 100% white sugar will spread thinner, bake up crispier, and lack that chewy, soft center that brown sugar provides. You will also miss out on the deep, caramel flavor profile. It is a functional substitute in an absolute emergency, but it is not a 1-to-1 flavor or texture match.
Is Brown Sugar Healthier Than White Sugar?
I hear this myth constantly, usually from people trying to justify eating a second slice of cake. Let me be brutally honest: sugar is sugar. While it is true that the molasses in brown sugar contains trace amounts of minerals like calcium, potassium, iron, and magnesium, the quantities are so microscopically small that they offer absolutely zero measurable health benefits. You would have to consume pounds of brown sugar a day to hit your recommended daily intake of iron, at which point the sugar would kill you long before the iron helped you. Nutritionally speaking, brown sugar and white sugar are virtually identical. Treat it as an indulgence, not a health food.
Why Does My Recipe Call for “Packed” Brown Sugar?
Because of its sticky, moist nature, brown sugar does not flow freely into a measuring cup like white sugar or flour does. If you gently scoop brown sugar into a cup, you will end up with massive air pockets, meaning you are actually adding significantly less sugar than the recipe requires. “Packing” the sugar means using the back of a spoon or your fingers to aggressively press the sugar down into the measuring cup until it is completely dense and level with the rim. When you turn the cup over, the sugar should fall out holding the exact shape of the cup, like a little sandcastle. This ensures an accurate, consistent measurement every single time. (Though, if you really want to be a perfectionist, ditch the measuring cups entirely and use a digital kitchen scale to weigh your ingredients in grams).
Final Thoughts
Baking should be a joyful, rewarding experience, not a stressful battle against your own pantry staples. Armed with the science of hygroscopic molasses, the immediate rescue power of a damp paper towel in the microwave, and the long-term protection of a high-quality airtight jar and a terra cotta disk, you are now fully equipped to handle this ingredient like a professional.
Stop throwing away hardened ingredients, stop settling for toxic storage containers, and stop letting a little evaporated moisture ruin your Friday night cookie plans. Get into the kitchen, reclaim your brown sugar, and start baking. You have got this.






