
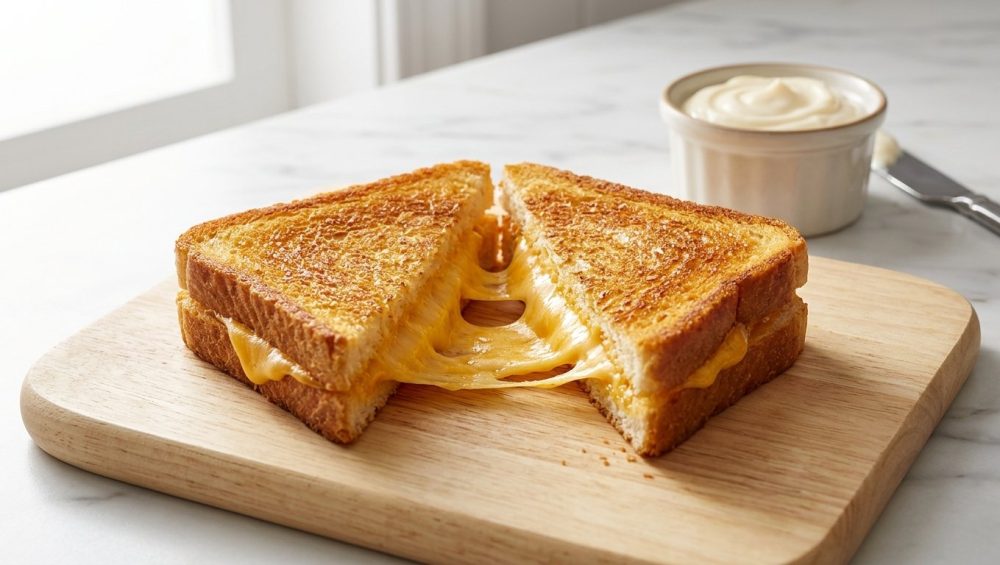
The Weeknight Comfort Food Conundrum
Picture this scenario: It is 7:30 PM on a random, exhausting Tuesday. You have just survived a grueling workday, your brain is functioning at roughly ten percent capacity, and the absolute last thing you want to do is mince garlic, julienne carrots, or pretend you are starring in a high-stakes culinary competition. You want comfort. You want carbohydrates. You want molten, gooey cheese. You want a classic grilled cheese sandwich.
So, you grab your favorite skillet, a block of sharp cheddar, a couple of slices of bread, and a stick of butter straight from the unforgiving chill of the refrigerator. You take a knife and attempt to spread that rock-hard butter across the soft, delicate crumb of your bread. Immediately, disaster strikes. The bread tears into a mangled, pathetic mess, leaving gaping holes where your cheese is destined to leak out and burn. Frustrated, you throw the butchered sandwich into a hot pan anyway, hoping for a culinary miracle. Two minutes later, the smoke detector is screaming its head off, the bread is charred to a bitter black crisp, and the cheese inside is still stubbornly, tragically solid.
Congratulations. You have just committed one of the most classic rookie kitchen mistakes that plagues everyday home cooks.
But listen to me closely: it does not have to be this way. You do not need a culinary degree from an overpriced institute in Paris to make a mind-blowing, perfectly golden, edge-to-edge crispy sandwich. You just need to understand a little bit of basic kitchen science, and you need to be willing to completely abandon tradition. We are going to ditch the butter for a humble jar of mayonnaise. Yes, you heard me correctly. Mayonnaise is the ultimate, foolproof, science-backed secret to the greatest grilled cheese you will ever eat in your life. Let us break down exactly why this simple pantry staple outshines butter in every conceivable metric.
The Betrayal of Butter: A Scientific Breakdown
Do not get me wrong—I love butter. I bake with it, I baste steaks with it, and I slather it on fresh biscuits. But when it comes to the highly specific thermodynamic environment of frying bread in a skillet, butter is a fundamentally flawed medium. To understand why your sandwich is failing, we have to look at the chemical composition of commercial butter.
The Water Content Problem
In the United States, standard commercial butter is composed of roughly 80% butterfat, 1% to 2% milk solids (proteins and sugars), and a whopping 16% to 18% water. When you place a buttered slice of bread into a hot skillet, the very first thing that happens is that the water begins to evaporate. That familiar sizzling sound you hear? That is water rapidly turning into steam.
This creates a massive problem for your bread. Instead of immediately frying in hot fat, the bread is initially being steamed. This moisture barrier prevents the bread from achieving an even, crispy texture right out of the gate. By the time the water has completely cooked off and the fat can finally begin the frying process, you have already wasted precious time—time that your cheese desperately needs to melt.
The Smoke Point Dilemma
The second, and far more destructive, issue with butter is its exceedingly low smoke point. The milk solids in butter—primarily casein and whey proteins, along with lactose sugars—are highly sensitive to heat. They begin to brown and eventually burn at temperatures between 302°F and 350°F (150°C to 175°C).
When you are trying to melt a thick layer of cheese between two slices of bread, you need sustained, moderate heat. But because the milk solids in butter scorch so quickly, the exterior of your sandwich turns from golden to carbonized black in the blink of an eye. This is the exact scientific reason why your butter always burns before the ambient heat can penetrate the bread and melt the cheese inside. You are forced to play a frantic, stressful game of culinary chicken, constantly flipping the sandwich and praying the cheese melts before the bread turns into charcoal. Weeknight cooking should not raise your blood pressure. We need a better fat.
The Magic of Mayonnaise: Your New Secret Weapon
Enter mayonnaise. If you are wrinkling your nose at the idea of spreading a cold condiment on the outside of your sandwich, I need you to suspend your disbelief and look at this strictly from a culinary chemistry perspective. Mayonnaise is not just a sandwich spread; it is a highly stable emulsion of oil, egg yolks, and an acidic component (usually vinegar or lemon juice). This specific combination of ingredients makes it a thermodynamic powerhouse in the skillet.
The Anatomy of an Emulsion
Commercial mayonnaise is predominantly made of neutral oils, such as soybean oil or canola oil. Unlike butter, which is weighed down by water and fragile milk solids, these refined oils boast a significantly higher smoke point, often exceeding 400°F (204°C). This higher heat tolerance is the golden ticket. It provides you with a massive thermal buffer zone. You can leave the sandwich in the pan longer, allowing the heat to deeply penetrate the bread and turn the cheese into a glorious, molten lava, all without the terrifying risk of the bread bursting into flames.
The Maillard Reaction on Steroids
Now, let us talk about the true magic: The Maillard reaction. Named after the French chemist Louis-Camille Maillard who first described it in 1912, this is the complex chemical reaction between amino acids (proteins) and reducing sugars when exposed to heat. It is the exact same process that gives a seared steak its savory crust, turns roasted coffee beans brown, and makes baked bread smell heavenly.
For the Maillard reaction to occur optimally, you need temperatures between 280°F and 330°F, a dry environment, and a rich source of proteins and sugars. Bread already contains the necessary carbohydrates, but mayonnaise brings a secret weapon to the party: egg yolks. Egg yolks are incredibly rich in proteins and amino acids. When the thin layer of mayonnaise hits the hot skillet, the oil fries the bread perfectly, while the egg proteins rapidly accelerate the Maillard reaction. The result? An absolutely flawless, edge-to-edge, deeply savory, golden-brown crust that butter simply cannot replicate.
Structural Integrity: The Spreadability Factor
Beyond the chemistry of heat and browning, we have to address the sheer mechanics of sandwich construction. As I mentioned earlier, cold butter is the mortal enemy of soft bread. Unless you are the kind of meticulously organized person who remembers to leave a stick of butter out on the counter to soften hours before dinner (and let us be honest, none of us are doing that on a Wednesday), you are stuck trying to spread a solid block of fat.
When you drag a knife full of cold butter across a slice of sandwich bread, the friction and drag completely destroy the delicate crumb structure. You end up with torn bread, compressed edges, and massive, uneven clumps of fat. When that unevenly buttered bread hits the pan, the thick clumps of butter melt into greasy puddles, leaving other dry spots of the bread completely bare. The result is a patchy, greasy, unevenly cooked crust.
Mayonnaise completely eliminates this frustration. Because it is an emulsion of liquid oil, it remains perfectly soft, pliable, and spreadable straight out of the refrigerator. You can effortlessly glide a thin, perfectly even layer of mayonnaise across the softest, most delicate brioche or shokupan without a single tear. This even application guarantees that every single millimeter of the bread makes contact with the fat, resulting in a uniform, shattering crunch across the entire surface of the sandwich. Time is money, and skipping the butter-softening phase is a massive win for the busy home cook.
Pan Selection and Thermal Dynamics
You can have the best ingredients in the world, but if you are cooking them in the wrong vessel, you are setting yourself up for failure. I have zero patience for pretentious chef-speak, but I also have zero tolerance for cheap, toxic garbage in the kitchen.
The Danger of Toxic Cookware
Let us get one thing straight: I am aggressively passionate about banishing toxic kitchen gear from your home. If you are currently cooking your meals in a flimsy, scratched, ten-dollar non-stick pan where the mysterious chemical coating is actively peeling off into your food, you need to throw it in the trash immediately. You cannot achieve a beautiful, crispy, professional-level crust on a pan that is leaching forever chemicals into your dinner.
Furthermore, you must stop using aerosolized cooking sprays to lubricate your pans. Those sprays contain chemical propellants and emulsifiers (like soy lecithin) that burn at low temperatures and bond to the surface of your cookware, creating a sticky, polymerized residue that is nearly impossible to wash off. This is the number one culprit behind ruining your nonstick pans. Since we are coating the bread directly with mayonnaise, your pan does not need any extra grease.
Heat Management and Warping
For the ultimate grilled cheese, you need a pan that offers superior heat retention and even distribution. Heavy-bottomed cast iron, thick carbon steel, or high-quality multi-clad stainless steel are your best options. However, you must respect the thermodynamics of the metal. Never take a cold pan, slap it on a burner, and crank the dial to maximum heat. This rapid temperature swing causes thermal shock, which is precisely why your frying pans keep warping and spinning like tops on your stove.
Instead, place your pan on the stove and turn the heat to medium-low. Let the pan preheat gradually for three to five minutes.
Mastering Stainless Steel and Cast Iron
If you are using a stainless steel skillet and are terrified that the bread will stick, you simply need to understand temperature control. You can utilize the water drop test to gauge if the pan is ready. Flick a tiny drop of water into the pan; if it immediately sizzles and evaporates, the pan is too cold. If it forms a perfect bead and glides across the surface like a mercury marble (the Leidenfrost effect), your pan is properly heated. For grilled cheese, we want a gentle, medium-low heat. The mayonnaise provides all the fat necessary to create a non-stick barrier between the bread and the metal, ensuring a clean release and a flawless flip.
The Cheese Matrix: Melting Dynamics
The exterior crust is only half the battle. A grilled cheese is judged by its interior—that glorious, molten, stretchy pull of dairy. Because the higher smoke point of mayonnaise buys us extra time in the pan without burning the bread, we have the luxury of letting the heat do its job. But you must choose your cheese wisely.
The Pre-Shredded Illusion
If you are buying bags of pre-shredded cheese from the supermarket out of convenience, you are sabotaging your sandwich before you even turn on the stove. Pre-shredded cheese is aggressively coated in anti-caking agents—usually cellulose (which is literally wood pulp) or potato starch. These powders are designed to absorb moisture and prevent the shreds from clumping together in the bag.
Unfortunately, these exact same powders completely ruin the melting dynamics of the cheese. When heated, the cellulose prevents the casein proteins and fats from binding smoothly, resulting in a broken, greasy, grainy mess rather than a smooth, velvety melt. Do not fall into the trap of pre-shredded cheese. Buy a high-quality block of cheese and grate it yourself. It takes exactly forty-five seconds.
Once you have grated a generous mountain of cheese on your cutting board, you will quickly realize that transferring it to the bread with your hands is messy, and using the blade of your chef’s knife to scoop it up will ruin the knife’s edge. This is exactly why you need a bench scraper. A simple stainless steel bench scraper allows you to scoop up the entire pile of grated cheese in one swift motion and deposit it neatly onto your bread, keeping your workspace clean and your knives razor-sharp.
Optimal Cheese Selection for the Perfect Melt
Not all cheeses are created equal. You need a cheese with a high moisture content and a relatively young age to achieve that iconic stretch.
- American Cheese: Say what you want about its authenticity, but American cheese is loaded with sodium citrate, an emulsifying salt that guarantees a flawless, glossy melt every single time. It is a classic for a reason.
- Medium Cheddar: Offers a sharp, tangy flavor punch, but avoid extra-aged or sharp cheddars. As cheese ages, it loses moisture and the protein structures tighten, meaning an aged cheddar will separate into a greasy oil pool rather than melting smoothly.
- Gruyère or Fontina: These alpine-style cheeses are the absolute undisputed kings of melting. They offer a nutty, complex flavor and a texture that turns into pure liquid gold under heat.
- Low-Moisture Mozzarella: Excellent for stretch and texture, though mild in flavor. Best used in combination with a sharper cheese.
For the ultimate weeknight masterpiece, I highly recommend a 50/50 blend of medium cheddar for flavor and Gruyère for texture.
The Flavor Debate: Will It Taste Like a Picnic Salad?
This is the number one objection I hear from skeptics: “I don’t want my grilled cheese to taste like hot mayonnaise!”
I completely understand the hesitation. The idea of eating warm potato salad is horrifying. But you have to remember that we are fundamentally altering the chemical structure of the mayonnaise through high-heat frying. When the mayonnaise hits the hot skillet, the acidic components (the vinegar or lemon juice) rapidly cook off and evaporate. The egg yolks undergo the Maillard reaction, transforming from a creamy emulsion into a rich, savory, deeply umami flavor profile. The oil simply acts as the frying medium.
The final result does not taste tangy, sour, or “mayo-like” in the slightest. It tastes like an incredibly savory, rich, perfectly fried piece of bread. It enhances the flavor of the cheese rather than competing with it.
However, if you are an absolute, die-hard butter purist who simply cannot live without that specific dairy richness on the outside of your sandwich, there is a brilliant compromise. You can create a 50/50 blend. Take a tablespoon of softened butter and aggressively whisk it together with a tablespoon of mayonnaise. You get the high smoke point, the spreadability, and the Maillard-boosting egg proteins from the mayo, combined with the unmistakable flavor of the butter. It is the best of both culinary worlds.
The Masterclass: Step-by-Step Instructions to Perfection
Now that you understand the deep culinary science behind the ingredients, it is time to execute. Follow this foolproof method, and you will achieve a diner-quality masterpiece in your own kitchen.
Step 1: The Bread Selection
Do not use flimsy, ultra-thin diet bread. It will disintegrate under the weight of the cheese and the heat of the pan. You need a sturdy foundation. A classic, thick-cut white bread, a robust sourdough, or a plush Japanese shokupan (milk bread) are your best options. The bread should be dense enough to hold the cheese, but porous enough to absorb a fraction of the fat for crispness.
Step 2: The Mayo Application
Take your room-temperature bread and a butter knife. Scoop a modest amount of full-fat mayonnaise (I strongly advocate for Duke’s or Hellmann’s/Best Foods, as they have the best oil-to-egg ratios). Spread a thin, even layer across the entire surface of the bread, going all the way to the absolute edges.
Do not treat this like you are frosting a birthday cake. If you apply a thick, heavy glob of mayonnaise, the bread will become saturated, soggy, and greasy. You want a sheer, translucent coating—just enough to lubricate the bread and provide the fat necessary for frying.
Step 3: The Cheese Architecture
Flip one slice of the bread over so the dry side is facing up. Pile your freshly grated cheese evenly across the surface. Do not skimp, but do not build a mountain so high that it refuses to melt. A solid half-cup to three-quarters of a cup of loosely packed, grated cheese is the sweet spot. Place the second slice of bread on top, with the mayonnaise-coated side facing outward.
Step 4: The Pan Execution
Place your heavy-bottomed skillet on the stove over medium-low heat. Let it preheat for a few minutes. Carefully place the assembled sandwich into the dry skillet. You will immediately hear a gentle, satisfying sizzle.
Leave it alone. Do not poke it, do not press it down with the force of a thousand suns, and do not constantly lift it up to check. Let the mayonnaise do its job. After about 3 to 4 minutes, gently lift one corner with a thin, flexible spatula. If it is a deep, gorgeous golden brown, it is time to flip.
Slide the spatula completely under the sandwich, support the top slice with your fingertips, and confidently flip it over. Cook the second side for another 2 to 3 minutes until equally golden. If your cheese needs a little extra encouragement to melt, you can place a lightweight lid or a stainless steel melting dome over the sandwich for the final 60 seconds to trap the ambient heat.
Remove the sandwich from the pan, place it on a wire cooling rack for exactly one minute (this prevents the bottom from getting soggy from trapped steam), slice it diagonally (because science proves diagonal slices taste better), and serve immediately.
Troubleshooting Common Disasters
Even with the magic of mayonnaise, things can occasionally go awry if you ignore the basic rules of heat management. Here is how to troubleshoot the most common issues:
The Bread is Greasy and Soggy:
You applied way too much mayonnaise. Remember, the mayonnaise is acting as a frying medium, not a filling. Dial back the amount next time. Alternatively, your pan was entirely too cold when you added the sandwich, causing the bread to soak up the oil like a sponge rather than frying in it.
The Bread is Burnt, but the Cheese is Cold:
Your heat is drastically too high. Mayonnaise has a high smoke point, but it is not invincible. If your burner is cranked to medium-high or high, the exterior will carbonize before the heat can travel through the bread to melt the cheese. Turn the dial down to medium-low and exercise some patience.
The Sandwich Tastes… Weird:
Check your tools. If you are using cheap, low-quality silicone spatulas to flip your food, they might be ruining your meal. Low-grade silicone contains fillers that absorb the synthetic oils and fragrances from your dishwasher detergent. When exposed to heat, those trapped chemicals release into your food. If your silicone spatulas taste like soap or impart a bitter, chemical flavor to your sandwich, throw them out and invest in 100% platinum-grade silicone or a classic stainless steel fish turner.
The Cheese Separated into a Greasy Pool:
You likely used an extremely aged cheese (like a 3-year sharp cheddar) that lacks the moisture and intact protein structure necessary for a smooth melt. Next time, blend your sharp cheese with a high-moisture melting cheese like Gruyère or Monterey Jack to stabilize the emulsion.
Conclusion: Reclaiming Your Weeknight Dinners
Cooking at home should not be a source of stress. You do not need to spend hours meticulously prepping ingredients just to enjoy a satisfying, deeply comforting meal after a long day. By simply swapping out stubborn, low-smoke-point butter for a thin, easily spreadable layer of mayonnaise, you are actively utilizing culinary science to guarantee a superior result.
This is about working smarter, not harder. It is about understanding the chemistry of the Maillard reaction, respecting the thermal dynamics of your cookware, and refusing to settle for torn bread and burnt crusts. Implementing this one incredibly simple kitchen hack is a massive step toward helping you cure cooking anxiety and reclaim your weeknights.
So the next time you find yourself staring blankly into the refrigerator on a Tuesday night, craving the nostalgic comfort of a grilled cheese sandwich, leave the butter in the butter dish. Reach for the mayonnaise, fire up your skillet, and prepare to experience the absolute crispiest, most evenly golden, stress-free sandwich of your culinary life. You have the knowledge. Now go make some magic.






