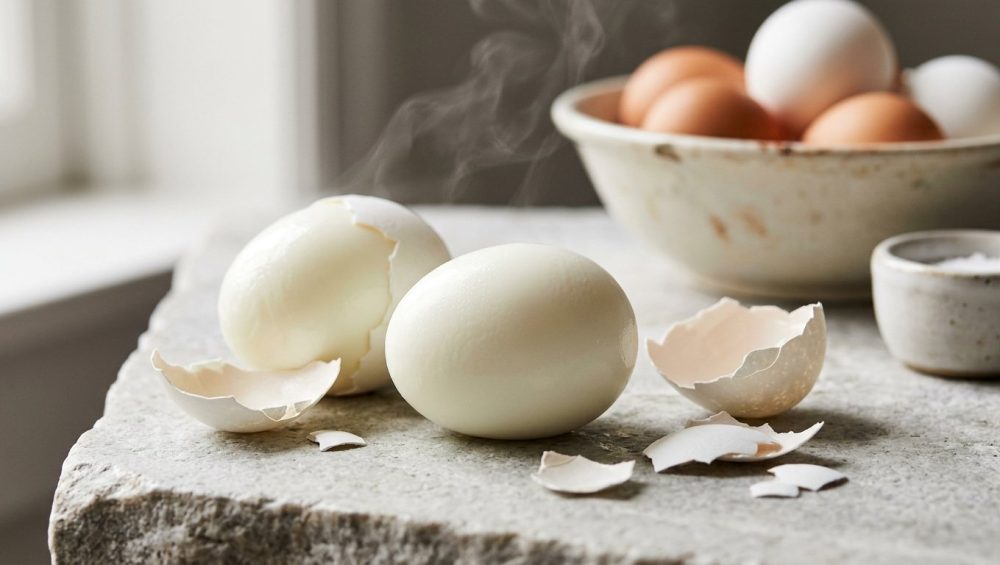
Listen up, weekend culinary warriors. We need to have a serious talk about one of the most universally infuriating, soul-crushing tasks in the modern home kitchen. You know exactly what I am talking about. You decide you want to meal-prep some healthy snacks for the week, or perhaps you have grand ambitions of bringing a beautiful platter of deviled eggs to a Sunday potluck. You boil your eggs, you cool them down, and you start to peel.
But instead of a smooth, pristine, pearlescent oval of protein, the shell clings to the egg white for dear life. As you desperately chip away at the fragments, chunks of the delicate white tear away. By the time you are finished, your kitchen counter looks like a calcium-carbonate warzone, and the egg in your hand resembles a pockmarked lunar landscape. You are left staring at a mangled, ugly mess, wondering why your hard-boiled eggs refuse to peel despite you following all the “tricks” you read on some random internet forum.
I have zero patience for this kind of kitchen heartbreak, and neither should you. Time is money, people. When we are trying to survive the weekday grind, we rigorously prioritize efficiency. We don’t have twenty minutes to spend delicately performing microscopic surgery on a stubborn eggshell.
The good news? You absolutely do not need a culinary degree to fix this. You don’t need to add baking soda to your water, you don’t need to add vinegar, and you certainly don’t need to perform a rain dance. The secret to effortless, slide-right-off peeling lies entirely in the fundamental laws of thermodynamics and protein chemistry. Today, we are going to ditch the pretentious chef-speak and dive deep into the thermal science of egg membranes. We are going to learn exactly why boiling water is the enemy of a smooth egg, and why utilizing a rapid hot steam bath is the ultimate game-changer.
The Universal Struggle: Why We Hate Peeling Hard-Boiled Eggs
Let’s validate your frustration for a moment, because the struggle is incredibly real. Peeling a stubborn batch of eggs is not just annoying; it is a profound waste of your precious time. For the everyday home cook and the weekly meal prepper, efficiency is the name of the game. If a recipe or a prep task takes twice as long as it should because of a flawed technique, it throws a wrench into your entire evening.
When the egg white fuses to the shell, it creates a structural nightmare. The inner membrane acts like industrial-grade superglue. As you pick at the shell, the membrane tears the coagulated albumen (the white) right along with it. Not only does this ruin the aesthetic presentation of the food—which is devastating if you are making egg salad, Niçoise salad, or deviled eggs—but it also literally wastes food. You end up washing a quarter of your usable protein down the garbage disposal.
The internet is absolutely flooded with terrible advice on how to solve this. People will tell you to use older eggs, to add copious amounts of salt to the water, to add a splash of white vinegar, or to crack the eggs slightly before boiling. Some of these myths have a tiny kernel of scientific truth to them, but they completely miss the bigger picture. Understanding how to manipulate temperature to your advantage is a core component of any essential kitchen survival guide. To conquer the egg, we first have to understand the opponent we are fighting.
The Anatomy of an Egg: What You Are Actually Fighting
To understand why your eggs are acting like stubborn little jerks, we have to look under the hood. An egg is a marvel of biological engineering, and it is far more complex than just a shell, a white, and a yolk.
The Calcium Carbonate Fortress
The outermost layer is the shell, composed almost entirely of calcium carbonate. It feels solid to the touch, but it is actually highly porous. A standard chicken egg has anywhere from 7,000 to 17,000 microscopic pores. These pores allow the egg to breathe, exchanging gases with the outside environment. This permeability is a critical factor in how the egg ages and how its internal chemistry changes over time.
The Inner and Outer Membranes
Immediately inside the hard shell lie two incredibly thin, transparent layers called the outer and inner shell membranes. They are made of strong keratin proteins—the same stuff that makes up human hair and nails. The outer membrane clings directly to the inside of the shell, while the inner membrane encases the liquid egg white. When you are struggling to peel an egg, it is this inner keratin membrane that you are fighting. During the cooking process, if the temperature is not managed correctly, the proteins in the egg white will chemically bond to the keratin in this inner membrane, fusing them together permanently.
The Albumen (Egg White)
The egg white, scientifically known as the albumen, makes up about 60% of the egg’s total weight. It is roughly 90% water and 10% protein. But it is not just a uniform puddle of goo. The albumen is actually divided into distinct layers: a watery outer layer, a thick and viscous inner layer, and the chalaziferous layer that tightly hugs the yolk. The proteins in the albumen, primarily ovalbumin and ovomucin, are tightly folded up like little balls of yarn when the egg is raw. When exposed to heat, these protein structures unravel (denature) and then tangle up with one another (coagulate), turning the clear liquid into a solid, opaque white gel.
The Air Cell
At the wide base of the egg, between the inner and outer membranes, sits a small pocket of air. When an egg is freshly laid, this air cell is tiny. As the egg ages and loses moisture and carbon dioxide through its porous shell, the contents of the egg shrink slightly, and the air cell expands. This air pocket is the reason why older eggs often have a flattened bottom when hard-boiled.
The Science of Sticking: It Is All About pH and Proteins
Now that we know the anatomy, let’s talk about the chemistry of why that inner membrane turns into superglue. It all comes down to two things: the pH level of the egg white, and the speed at which the proteins denature.
The pH Factor: Fresh vs. Aged Eggs
If you have ever tried to boil a farm-fresh egg that was laid that very morning, you have likely experienced the absolute pinnacle of peeling misery. There is a rigid scientific reason for this.
When a chicken lays an egg, the albumen is relatively acidic, boasting a pH level of around 7.6. At this lower pH, the proteins in the egg white are highly reactive and bond exceptionally tightly to the keratin in the inner shell membrane when exposed to heat.
However, as the egg sits in your refrigerator over a period of days and weeks, a chemical shift occurs. The egg is breathing through those thousands of microscopic pores. It is slowly exhaling carbon dioxide (CO2). Because dissolved carbon dioxide forms carbonic acid inside the egg, the loss of this gas causes the internal environment to become less acidic. Over a few weeks, the pH of the albumen rises, eventually reaching a highly alkaline level of around 9.2.
This shift in alkalinity is crucial. The higher the pH, the weaker the chemical bond becomes between the egg white proteins and the inner shell membrane. This is the scientific truth behind the old wives’ tale that you should only boil “old” eggs. Yes, aged eggs naturally peel easier because their alkaline environment prevents the proteins from clinging to the membrane. But who has the time or the fridge space to age their eggs for three weeks just to make a decent egg salad? We need a method that works flawlessly on eggs of any age, which brings us to the most important factor of all: temperature.
The Protein Problem: Denaturation Speed
The speed at which the egg white proteins heat up dictates how they behave. When you heat an egg, the tightly coiled proteins in the albumen begin to violently vibrate. Eventually, the bonds holding them in their folded shape break, and the proteins unravel (denaturation). Once unraveled, they bump into other unraveled proteins and link together, forming a solid, three-dimensional mesh (coagulation).
If this heating process happens slowly, the unraveled albumen proteins have plenty of time to seek out the keratin proteins in the inner shell membrane and form strong, unbreakable cross-links with them. If this heating process happens instantly, the outermost layer of the albumen denatures and links to itself so rapidly that it forms a solid, smooth barrier before it ever has a chance to bond with the membrane.
The Great Cold-Water Myth: Why Your Mother’s Method is Ruining Your Eggs
For generations, well-meaning home cooks have been taught to place their raw eggs into an empty pot, cover them with cold tap water, place the pot on the stove, and slowly bring the whole thing up to a boil. I am here to tell you, with brutal honesty, that this is one of the seven rookie kitchen mistakes that you must immediately eliminate from your routine.
Starting your eggs in cold water is a thermodynamic disaster if your goal is an easy peel. By slowly raising the temperature of the water, you are slowly raising the temperature of the egg white. As we just learned, slow heating gives the proteins in the albumen an abundance of time to unfold, reach out, and form permanent, glue-like bonds with the inner shell membrane.
By the time the water finally reaches a rolling boil, the damage is completely irreversible. The egg white and the membrane are now one single entity. No amount of ice water, peeling under a running faucet, or praying to the culinary gods will save you. The cold-water start is the primary reason why millions of people dread making hard-boiled eggs.
The Thermal Shock: Why a Hot Start is Non-Negotiable
If we want to prevent the proteins from bonding to the membrane, we have to use the element of surprise. We need to subject the egg to a rapid, aggressive thermal shock.
A “hot start” means introducing the cold, raw egg directly into a fiercely hot environment. When a cold egg hits an environment of 212°F (100°C), the outermost fraction of a millimeter of the egg white—the part directly touching the inner membrane—heats up instantly. The proteins in this microscopic outer layer denature and coagulate in a fraction of a second.
Because they lock into a solid mesh with each other so incredibly fast, they literally do not have the time to form chemical bonds with the keratin in the shell membrane. The egg white essentially forms a smooth, self-contained skin that pulls away from the shell. Mastering this hot-start thermal shock is one of the ten foolproof cooking secrets that separates the frustrated amateur from the confident home cook.
But how do we deliver this hot start? Most people assume the answer is to drop the eggs directly into a giant pot of rapidly boiling water. While a boiling water drop is certainly better than a cold-water start, it is still deeply flawed.
Steaming vs. Boiling: The Thermodynamic Showdown
This is where we separate the good methods from the definitively perfect methods. We are going to completely abandon the concept of “boiling” eggs. We are going to steam them.
Why Boiling Fails
When you fill a large pot with quarts of water and bring it to a rolling boil, you have created a hot environment. But what happens when you take six large, refrigerator-cold eggs and drop them into that water?
The laws of physics dictate that the temperature of the water will immediately plummet. The cold mass of the eggs absorbs the heat energy from the water, dropping the water temperature well below the boiling point. It can take several minutes for your stove to recover that lost thermal energy and bring the water back up to a boil.
This recovery time creates two massive problems. First, it ruins your timing. If a recipe tells you to boil an egg for exactly 9 minutes, does that 9 minutes start when you drop the eggs in, or when the water returns to a boil? The inconsistency guarantees that your yolks will be overcooked one day and undercooked the next. Second, you have partially recreated the hidden trap of cold water. The temperature drop means the outermost layer of the egg white isn’t getting that instant, sustained 212°F thermal shock it needs to prevent sticking.
Furthermore, a rolling boil is physically violent. The aggressive convection currents of boiling water throw the eggs around the pot, smashing them into each other and into the metal walls. This leads to cracked shells, leaked egg whites, and a watery mess.
The Magic of the Steam Bath
Steaming is the ultimate, scientifically superior method. Instead of submerging the eggs in water, you place a steamer basket in a pot with just one inch of water at the bottom. You bring that small amount of water to a furious boil, place the lid on the pot, and let the steam do the work.
Why is steam so magical? It comes down to a concept in physics known as the latent heat of condensation. When water turns into steam, it expands by roughly 1,600 times and holds a massive amount of thermal energy. When that 212°F steam hits the cold surface of the eggshell, it instantly condenses back into liquid water.
This phase change—from gas back to liquid—releases an enormous, rapid burst of heat energy directly into the egg. Steam transfers heat to the egg much faster and more efficiently than liquid water does. More importantly, the temperature inside a covered steam pot does not drop when you add the eggs. The environment remains a constant, aggressive 212°F, delivering the ultimate thermal shock to the egg white and guaranteeing that the proteins will not stick to the membrane.
Beyond the physics of the peel, steaming is the ultimate time-saver. Bringing one inch of water to a boil takes about two minutes. Bringing a massive four-quart pot of water to a boil can take fifteen minutes. When you are rushing to prep food on a Tuesday night, saving thirteen minutes of standing around waiting for water to bubble is crucial for transforming your daily cooking from a chore into a seamless routine. Finally, because the eggs are resting peacefully in a steamer basket rather than being violently thrown around in a rolling boil, they rarely ever crack during cooking.
The Ice Bath: The Unsung Hero of the Perfect Peel
You have successfully steamed your eggs, delivering the perfect hot start. But the science doesn’t stop when the timer goes off. The way you cool the eggs is just as critical as the way you heat them. If you take your eggs out of the steamer and just let them sit on the counter, your hard-boiled eggs won’t peel cleanly.
You must immediately plunge the hot eggs into a bowl of heavily iced water. This ice bath serves two vital functions.
First, it immediately halts “carryover cooking.” Eggs hold a tremendous amount of internal heat. If left at room temperature, the residual heat will continue to cook the yolk for several minutes. This overcooking is exactly what causes the dreaded, sulfurous green ring around the yolk. That green ring is a chemical reaction between the sulfur in the egg white and the iron in the yolk, and it only happens when the egg is subjected to prolonged, excessive heat. The ice bath stops the cooking process dead in its tracks, ensuring your yolks remain bright, beautiful yellow (or orange).
Second, the ice bath induces thermal contraction. Just as heat causes things to expand, extreme cold causes things to contract. When the blazing hot egg hits the freezing ice water, the egg white and yolk shrink slightly, pulling themselves physically away from the shell and the inner membrane. This creates a microscopic layer of space between the edible egg and the shell, making the peeling process feel practically frictionless.
The Sassy Sous-Chef’s Foolproof Steam Bath Method
Alright, we have covered the biology, the chemistry, and the thermodynamics. It is time to put the science into practice. Here is my definitive, no-nonsense method for cooking eggs that will slide out of their shells so easily you will think it is magic.
Step 1: The Setup
Grab a heavy-bottomed pot with a tight-fitting lid. Place a steamer basket insert into the pot. Add exactly enough tap water to the pot so that it comes up to just below the bottom of the steamer basket (usually about half an inch to an inch of water). You do not want the water touching the eggs.
Step 2: The Boil
Place the pot on the stove over high heat and put the lid on. Wait for the water to come to a vigorous, rolling boil. You want the pot to be completely filled with hot, aggressive steam.
Step 3: The Drop
Take your eggs directly out of the refrigerator. Do not let them sit on the counter to come to room temperature; we want them cold to maximize the thermal shock. Remove the lid from the pot (carefully, so the steam doesn’t burn your face), and gently place the cold eggs into the steamer basket in a single layer. Immediately replace the lid to trap the steam.
Step 4: The Timer
The second the lid goes back on, start your timer. Because steam provides a perfectly consistent cooking environment, you can time your eggs down to the exact texture you desire:
- 6 Minutes: The perfect soft-boiled egg. The white is fully set, but the yolk is completely liquid and runny. Ideal for ramen or dipping toast soldiers.
- 8 Minutes: The jammy egg. The white is firm, and the yolk is thick, fudgy, and translucent in the center. The ultimate choice for salads and avocado toast.
- 11 to 12 Minutes: The classic hard-boiled egg. The yolk is fully set and opaque, but still creamy and bright yellow. Perfect for deviled eggs and egg salad.
Step 5: The Ice Bath
While the eggs are steaming, prepare a large bowl filled with cold water and a generous amount of ice cubes. Do not skimp on the ice; the water needs to be freezing cold. The moment your timer goes off, use tongs to immediately transfer the eggs from the steamer basket directly into the ice bath. Let them sit in the ice water for a minimum of 15 minutes. Do not rush this step. The core of the egg needs time to chill and contract.
Step 6: The Crack and Peel
Once fully chilled, take an egg and tap it gently all over on the kitchen counter. You want the shell to look like a mosaic of tiny cracks. Then, roll the egg gently between your palms, applying very light pressure. You will feel the shell loosen. Start peeling from the wide end of the egg, where the air pocket is located.
Pro-Tip: Peel the egg while holding it submerged under the cold water in your ice bath bowl, or under a gentle stream of running tap water. The water will seep under the cracked membrane, acting as a lubricant and helping the shell slip off in large, satisfying sheets.
The “No-Go” Rule: Ditching Toxic Gear for Your Steam Bath
As your resident sassy culinary advocate, I have a strict, non-negotiable rule when it comes to the equipment you use in your kitchen. I absolutely despise cheap, toxic kitchenware, and banishing toxic kitchen gear is a hill I am entirely willing to die on.
When you are utilizing the steam method, you are boiling water rapidly in a highly enclosed, pressurized environment. If you are using a cheap, scratched non-stick pot, you are making a grave mistake. When non-stick Teflon coatings (PTFE) are subjected to high heat, especially if the water happens to boil dry, they can begin to degrade and off-gas toxic “forever chemicals” into your food and your lungs.
Similarly, you should avoid cheap, lightweight aluminum pots or mystery-metal steamer baskets you bought for two dollars at a discount store. Cheap aluminum can warp under high heat and can leach metallic flavors into the steam environment. Furthermore, mystery metals often rust, degrade, and flake off onto your food.
You deserve better. High-quality, durable equipment is not a luxury; it is a necessity for safe, efficient cooking. When assembling your beginner kitchen tools, invest in a heavy-bottomed, multi-clad stainless steel pot (like 18/10 food-grade stainless steel). Stainless steel is incredibly durable, non-toxic, non-reactive, and distributes heat beautifully. Pair it with a high-quality stainless steel folding steamer basket. These tools are completely safe at high temperatures, they will never off-gas toxic chemicals, and they will literally last you a lifetime if you treat them right. Stop replacing cheap garbage every two years and invest in gear that respects your health and your food.
Troubleshooting Common Egg Disasters
Even with the perfect scientific method, the kitchen can occasionally throw you a curveball. Here is how to troubleshoot the most common egg-boiling woes.
The Dreaded Green Ring
If you cut into your beautifully peeled egg and discover an ugly, grayish-green ring surrounding the yolk, you have failed at temperature management. As mentioned earlier, this is iron sulfide. It happens for one of two reasons: you either left the eggs in the steam bath for way too long (past 14 minutes), or you skipped the ice bath and allowed the residual heat to overcook the yolk. Stick strictly to the 11-12 minute timer for hard-boiled, and plunge them immediately into ice water.
The Exploding Shell
Occasionally, when you place a cold egg into a 212°F steam bath, the rapid expansion of the air inside the egg’s air cell causes the shell to crack, leaking white albumen into the steamer. To prevent this, you can use a thumbtack or a specialized egg piercer to poke a tiny, microscopic hole in the wide end of the shell (where the air cell is) before steaming. This allows the expanding air to vent safely without shattering the shell.
The Lopsided Yolk
Have you ever sliced a deviled egg in half, only to find the yolk pushed all the way to one side, leaving a paper-thin layer of white that easily tears? This happens because the yolk is buoyant and can float off-center as the egg sits in the carton. If you want perfectly centered yolks for a flawless presentation, store your egg carton on its side in the refrigerator for 12 to 24 hours before cooking. This forces the yolk to center itself within the albumen.
Conclusion: You Can Master This
Cooking does not have to be a stressful, chaotic chore. When you understand the basic science behind what is happening in your pots and pans, you take total control over your food. You do not need to rely on superstition, luck, or old wives’ tales.
By simply ditching the cold-water myth and harnessing the thermodynamic power of a hot steam bath, you will never again have to wonder why your eggs are impossible to peel. You will be able to effortlessly produce perfectly smooth, beautiful, bright-yolked eggs every single time, buying back your precious time and saving your sanity.
So grab your stainless steel pot, fire up the stove, and show those eggs who is boss. You have absolutely got this. Now, go make some mind-blowing egg salad, and pour yourself a glass of wine while you do it. You’ve earned it.