
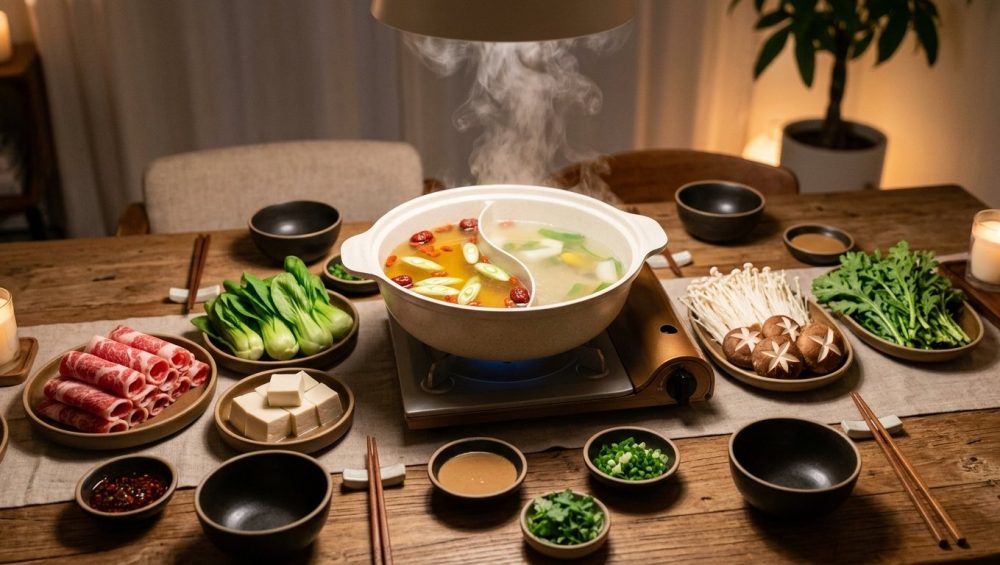
Welcome to the reality of weekend hosting. You’ve invited your favorite people over for a cozy, communal dinner. You’ve spent the better part of your Saturday meticulously simmering a deeply aromatic, crystal-clear soup base, skimming it to absolute perfection. You’ve arranged gorgeous platters of paper-thin marbled beef, vibrant leafy greens, and delicate mushrooms. Everyone sits down, the portable burner is fired up, the wine is poured, and within twenty short minutes, your pristine culinary masterpiece looks like murky dishwater. It’s thick, it’s sludgy, the bottom of the pot is scorched, and the delicate flavor profile you worked so hard to build has been completely obliterated.
What happened? You fell victim to the chaotic free-for-all that ruins most DIY dinners. As a home cook who has hosted more of these gatherings than I can count, let me be brutally honest: I have zero patience for pretentious chef-speak, but I have even less patience for a ruined meal. Communal dining is supposed to be the ultimate relaxing, mindful gathering. It requires minimal active cooking once your guests arrive, naturally encourages deep conversation, and allows everyone to eat at their own pace. But there is a strict science to the sequence. You cannot just let your guests treat the boiling liquid like a garbage disposal, dumping everything in at once and hoping for the best.
If you’ve ever wondered why your broth gets cloudy halfway through the meal, it’s not because the universe hates you; it’s because you are ignoring the fundamental rules of kitchen thermodynamics and ingredient pacing. Anyone can cook like an expert and facilitate a mind-blowing, restaurant-quality experience in a standard home kitchen. You just need to understand the chemistry of what is happening inside that pot.
The Physics of the Sludge: Why Your Broth is Betraying You
Let’s get one thing straight: cooking is just edible chemistry. When your beautiful, translucent soup turns into a heavy, opaque sludge, it is a direct result of physical reactions between heat, water, starches, and proteins. If you understand the enemy, you can defeat it.
Starch Gelatinization: The Ultimate Enemy of Clarity
The single biggest culprit behind a ruined, thickened soup base is starch. Starch is a carbohydrate consisting of a massive number of glucose units joined together, primarily made up of two molecules: amylose and amylopectin. When you drop a starchy ingredient—like a slice of raw taro root, a chunk of potato, or a bundle of fresh wheat noodles—into a hot liquid, the starch granules immediately begin to absorb water and swell.
Once the temperature of the liquid hits a critical threshold (usually between 140°F and 160°F, depending on the specific vegetable or grain), these swollen granules literally burst open. They irreversibly dissolve, releasing their structural gels directly into your soup. This process is scientifically known as starch gelatinization. Now, if you are making a Thanksgiving gravy or a thick stew, starch gelatinization is exactly what you want. But in a delicate, communal simmering pot? It is an unmitigated disaster. It artificially thickens the liquid, turning it opaque and heavy, which mutes the delicate flavors of the seafood and aromatics. Even worse, this heavy, thickened liquid sinks to the bottom of the pot, where it inevitably catches on the heat source and scorches, giving your entire meal a bitter, burnt undertone.
Protein Coagulation: The Scum Factor
Next up on the roster of broth-ruining culprits is protein. Meat, particularly beef and pork, contains water-soluble proteins and myoglobin (the protein that gives meat its red color). When you drop a slice of raw meat into boiling liquid, the sudden, extreme heat shock causes the proteins on the surface of the meat to rapidly denature and coagulate.
Because they are essentially being boiled rather than seared, these proteins clump together and float to the surface, creating that highly unappetizing grayish-brown foam you often see bubbling at the edges of the pot. This foam is commonly referred to as “scum.” If left unchecked, this coagulated protein matrix dissolves back into the liquid, lending a muddy, dirty appearance to your once-pristine soup.
The Emulsification of Fats: Why Boiling is Ruining Everything
Finally, we have to talk about temperature control and the emulsification of fats. Highly marbled meats are a luxury, but they render a significant amount of animal fat into the liquid as they cook. Fat and water naturally separate—unless you force them together.
When you allow your pot to sit at a violent, aggressive, rolling boil, the intense bubbling turbulence acts exactly like a mechanical blender. It aggressively whips the rendered animal fat, the coagulated protein scum, and the water together into a crude emulsion. This instantly turns your clear soup into a greasy, murky, opaque mess. A rolling boil is the enemy of clarity.
The Golden Rule of Sequencing: A Masterclass in Hot Pot Pacing
To keep the liquid clear, vibrant, and deeply flavorful from the first bite to the last, you have to ruthlessly enforce a cooking order. You are the host, which means you are the culinary director of the evening. Do not let your guests toss a chaotic fistful of udon noodles into the pot at the very beginning of the meal. Traditional sequencing is designed to build flavor progressively, from light to rich, while protecting the integrity of the soup.
Phase 1: The Flavor Builders (Aromatics and Fungi)
When the pot first comes to a gentle simmer, the only things that should be taking a bath are the flavor builders. These are ingredients that actually improve the baseline flavor of the soup over time without releasing starches or muddying the waters.
Drop in your daikon radish, fresh tomatoes, scallions, and an absolute mountain of mushrooms (shiitake, enoki, wood ear, and oyster mushrooms are fantastic). Mushrooms are packed with natural glutamates, which will slowly release into the liquid, sweetening and deepening the umami profile. Let these simmer gently for a few minutes before anyone touches the meat.
Phase 2: The Proteins (Meat, Seafood, and Tofu)
Once the baseline flavor is established, it is time for the proteins. This phase should be treated with respect. Paper-thin slices of beef, lamb, or pork should be cooked one by one, swished gently in the hot liquid for just a few seconds until they change color (the classic “shabu-shabu” method). Do not dump an entire plate of frozen meat into the vessel at once; it will plummet the temperature of the liquid and cause the meat to boil unevenly.
Seafood, like shrimp and scallops, should also be cooked during this phase. They cook in a matter of seconds and will sweeten the liquid beautifully. If you are serving homemade meatballs or fish balls, drop them in now, but watch them closely. If your meatballs are tough and rubbery by the time you bite into them, it is because they were abandoned in the boiling depths for twenty minutes.
Phase 3: The Leafy Greens (Quick Wilters)
After you have enjoyed the proteins and the soup has taken on a rich, savory depth from the meat juices, it is time to cleanse the palate with leafy greens. Napa cabbage, bok choy, fresh spinach, watercress, and chrysanthemum leaves are essential.
These greens require mere seconds to wilt. You want them to retain a slight textural crunch and their vibrant green color. If you leave them in the liquid for more than a minute, they will turn into sad, stringy mush that disintegrates into the soup. We are weekend culinary hobbyists, not heathens; it is time to stop eating mushy veggies and start respecting the cook times of delicate produce.
Phase 4: The Starch Bomb (Root Vegetables and Noodles)
This is the grand finale. The soup is now incredibly rich, heavily fortified with the umami of mushrooms, the savory juices of the meat, and the sweetness of the vegetables. Now, and only now, do you add the starch bombs.
Drop in your thick slices of taro root, lotus root, sweet potato, and your heavy carbohydrates like udon, ramen, or fresh egg noodles. Because this is the end of the meal, it no longer matters if the starch gelatinization process clouds the liquid. In fact, the thickened, starchy broth will beautifully coat the noodles, creating a rich, satisfying, gravy-like finish to the evening. By holding the starches hostage until the final act, you preserve the clarity of the meal for the entire preceding hour.
Ingredient Deep Dive: Prepping for Absolute Clarity
When discussing weekday meals, I will rigorously prioritize efficiency, shortcuts, and time-saving hacks because time is money. But on the weekend, we buy ourselves the time to be absolute perfectionists. Proper prep work is non-negotiable if you want a flawless communal dining experience.
Meat Preparation: The Art of the Rinse and Slice
If you are slicing your own meat rather than buying it pre-sliced from an Asian grocer, you must partially freeze the cuts for about 45 minutes to an hour before slicing. This firms up the fat and muscle fibers, allowing you to achieve those gorgeous, paper-thin shavings.
More importantly, you must use a razor-sharp blade. If you hack at the meat with a blunt edge, you will tear the muscle fibers, causing the meat to bleed excessively into the soup and create massive amounts of protein scum. You must respect the ingredients and avoid the danger of dull knives if you want professional-level results. Once sliced, lightly pat the meat dry with a paper towel to remove excess surface moisture and myoglobin before plating.
Noodle Selection: Glass vs. Wheat
Not all carbohydrates are created equal in the eyes of a simmering pot. If you absolutely must have noodles earlier in the meal, do not use wheat-based noodles (like ramen or udon), which shed massive amounts of flour into the liquid.
Instead, opt for glass noodles made from mung bean starch or sweet potato starch. These translucent threads hold their structural integrity remarkably well in hot liquids and release significantly less ambient starch into the surrounding environment, keeping your liquid much clearer for much longer.
Vegetable Architecture: Cutting for Structural Integrity
How you cut your vegetables dictates how they will behave in the liquid. Root vegetables like taro and potato should be cut into thick, robust medallions. If you slice them too thin, the turbulent water will break them apart, dissolving them completely and ruining the clarity of the soup.
When prepping massive amounts of vegetables, work smart. Chop your ingredients efficiently and use a heavy-duty stainless steel bench scraper to scoop up large piles of produce from your cutting board and transfer them directly to your serving platters. It saves time, saves your knife edge, and keeps your prep space immaculate.
The Gear: The “No-Go” Rule on Toxic Pots
We need to have a serious conversation about equipment. I have a strict, uncompromising “No-Go” rule when it comes to toxic gear. I absolutely despise cheap, peeling non-stick coatings and mystery metals, and I will actively warn you against them. Far too many people host these communal dinners using flimsy, thirty-dollar electric pots coated in cheap Teflon. I refuse to let you serve your friends out of a toxic cauldron.
The Lethal Danger of Cheap Non-Stick (PTFE) at High Heat
Most cheap electric communal pots are coated with Polytetrafluoroethylene (PTFE), commonly known by the brand name Teflon. Under normal, low-heat conditions, PTFE is stable. But communal dining involves sitting around a continuous heat source for hours. If that pot boils dry for even a few minutes, or if it is preheated while empty, the temperature of that thin metal can skyrocket past 500°F incredibly fast.
When PTFE exceeds 500°F, the chemical coating begins to thermally decompose, releasing highly toxic, microscopic polymer fumes and fluorocarbon gases directly into the air you and your guests are breathing. In humans, inhaling these fumes causes a documented medical condition called “polymer fume fever,” widely known as the “Teflon flu,” which induces severe chills, headaches, chest tightness, and fever.
Even more horrifying, the respiratory systems of birds are so incredibly sensitive that these fumes are notoriously lethal to pet birds, killing them in a matter of minutes. Furthermore, as these cheap coatings inevitably scratch and peel from guests scraping the bottom with ladles, you aren’t just ruining your nonstick pans; you are literally feeding your friends flakes of synthetic forever-chemicals. Throw the cheap electric non-stick pot in the trash where it belongs.
Safe, High-Quality Alternative Vessels
Professional-level results require safe, high-quality, durable equipment that offers real value. You do not need an appliance with a cord attached to it. Invest in a high-quality portable induction burner and pair it with safe cookware.
A wide, shallow multiclad stainless steel pot is virtually indestructible, completely non-toxic, and provides incredibly even heat distribution. Alternatively, a wide enameled cast iron braiser holds thermal mass beautifully, keeping the liquid at a steady temperature even when cold ingredients are added. If you prefer traditional aesthetics, authentic seasoning cast iron or carbon steel woks are fantastic, non-toxic options that will last a lifetime if maintained properly.
For the ultimate mindful, aesthetic experience, I highly recommend investing in authentic Japanese clay pots. Specifically, modern induction-safe donabe pots have a carbon plate integrated into the base, allowing them to work flawlessly on a portable induction burner while providing the gorgeous, rustic thermal retention of traditional clay.
Mindful Hosting: Creating the Ultimate Communal Vibe
The food is only half the equation. The other half is the atmosphere. You want to write an experience that feels like you are having a glass of wine with a friend, not stressing out on the line during a dinner rush.
Prep-Ahead Strategies: Because Time is Money
The beauty of this style of dining is that 100% of the work can be done before the doorbell even rings. Wash every leaf, slice every mushroom, and plate every protein hours in advance. Wrap the platters tightly in plastic wrap and store them in the refrigerator. Set the table, build the sauce bar, and place your cooking vessel on the burner. When your guests arrive, your only job is to pour the wine, hit the power button on the induction burner, and sit down. Stress-free hosting is entirely reliant on your willingness to prep aggressively.
The Sauce Bar: Empowering Your Guests
You provide the pristine, clear soup base, but the guests are responsible for seasoning their own bites. A DIY sauce bar is mandatory. Set out small bowls filled with high-quality soy sauce, Chinese black vinegar, toasted sesame oil, rich sesame paste (or high-quality peanut butter thinned with warm water), violently spicy chili crisp, minced raw garlic, chopped cilantro, and sliced scallions.
Give everyone their own small dipping bowl to mix their custom concoction. More importantly, give everyone the right tools to retrieve their food. Do not make your guests fish around in boiling water with wooden chopsticks. Provide each guest with a personal stainless steel spider skimmer so they can safely lower delicate items into the liquid and retrieve them without losing them to the murky depths.
Temperature Control: Mastering the Simmer
As the host, you are the guardian of the thermostat. When you first bring the liquid up to temperature, you can use high heat. But the moment the food goes in, you must reduce the heat to maintain a gentle, rolling simmer—not a violent, aggressive boil. Remember, a violent boil emulsifies fat and protein scum into the water, ruining your clarity.
If you are making a soup base from scratch at the table by searing aromatics (like ginger, garlic, and scallions) in oil before adding the liquid, ensure your stainless steel pot is properly preheated. Utilize the water drop test to guarantee the metal is at the exact right temperature so your aromatics slide around effortlessly instead of scorching and sticking to the bottom.
Troubleshooting the Murk: Mid-Meal Fixes
Despite your best efforts and strict adherence to the golden rules of sequencing, a two-hour communal meal will eventually take a toll on the liquid. When the clarity starts to fade, you have two simple, effective tools at your disposal to rescue the meal.
The Art of Aggressive Skimming
Keep a fine-mesh skimmer and a small bowl of clean water next to your seat at the table. Throughout the meal, as the proteins release their inevitable foam, gently drag the fine-mesh skimmer across the surface of the simmering liquid to collect the coagulated scum. Tap the skimmer into the bowl of clean water to rinse it off. Doing this every fifteen minutes will drastically prolong the clarity and purity of your soup, preventing the foam from emulsifying into the liquid.
Dilution and Rescue: The Hot Water Rule
As the liquid simmers and evaporates, the concentration of salt, starches, and fats will naturally increase, making the soup overly salty and thick. You will need to top up the liquid at least once or twice during the evening.
Never add cold water or cold stock to the vessel. Dumping cold liquid into the pot will instantly kill the simmer, shocking the ingredients and drastically delaying the meal while you wait for it to return to temperature. Always keep a kettle of boiling water or a thermos of piping hot, unsalted chicken or vegetable stock nearby. When the liquid level drops, pour the hot liquid in. This dilutes the accumulated starches, cuts the saltiness, and keeps the meal flowing without missing a beat.
Hosting a mindful, communal dinner does not require a culinary degree. It requires a basic understanding of how ingredients react to heat, a strict refusal to use toxic equipment, and the confidence to tell your guests to step away from the starchy noodles until the very end of the night. Master the sequence, respect the chemistry, and you will never serve a cloudy, sludgy bowl of soup again. Now go prep your vegetables, pour yourself a glass of wine, and enjoy your weekend. You’ve earned it.






