
The Tragedy of the Broken Emulsion
Picture this: You’ve invited your favorite people over for a cozy, casual weekend gathering. You’ve promised them the ultimate comfort food experience—a decadent, interactive, DIY mac and cheese bar. You’ve spent forty dollars on premium, cave-aged Gruyère and extra-sharp cheddar. You’ve curated a beautiful spread of toppings. You stand at the stove, melting your expensive dairy into a pot, imagining the silky, cascading ribbons of liquid gold you are about to serve.
You turn your back for thirty seconds to pour a glass of wine. When you look back at the stove, your heart drops.
Your beautiful, promising sauce has violently separated. Instead of a velvety pool of comfort, you are staring at a horrifying, grainy clump of chalky proteins swimming in a neon-yellow oil slick. You stir frantically, praying you can whisk it back together, but it’s too late. The emulsion is broken. Your soul is crushed. You are now the host serving a greasy, gritty bowl of disappointment.
Take a deep breath. Put down the whisk. Take a sip of that wine.
As your resident Sassy Sous-Chef, I am here to tell you that this culinary tragedy is not a reflection of your worth as a cook. It is simply a matter of physics and chemistry. We don’t cry over split milk, and we certainly don’t order emergency takeout over a broken cheese sauce. Instead, we use a little bit of culinary science to bend food to our absolute will.
Today, we are going to master the chemical mechanics of a bulletproof cheese emulsion. We are going to explore the precise starch buffers and temperature controls required to keep your dairy perfectly smooth. And, because I firmly believe that hosting should not involve having a nervous breakdown in your kitchen while your guests are having fun without you, we are going to lay out a strategic prep plan. By the end of this masterclass, you will know exactly how to execute a flawless, mindful mac and cheese bar that leaves your guests in awe and leaves you with your sanity fully intact.
Why Good Cheese Goes Bad: The Anatomy of a Culinary Disaster
To prevent a cheese sauce from breaking, you must first understand what cheese actually is. I know we like to think of cheese as a solid block of deliciousness, but scientifically speaking, it is a delicate, precarious emulsion.
Cheese is essentially a matrix of dairy fat, water, and milk proteins—specifically, the casein protein network. In a block of solid cheese, these three components are living in perfect, peaceful harmony. The casein proteins form a microscopic mesh net, and trapped inside that net are suspended droplets of fat and water.
When you introduce heat to this delicate ecosystem, everything changes.
The Heat Threshold and Protein Panic
Heat is the great destabilizer. As you melt cheese, the fat liquefies and the protein network relaxes, allowing the cheese to flow and become gooey. This is the sweet spot. But if you push the temperature just a few degrees too high, or apply heat too rapidly, those casein proteins panic.
When overheated, the casein proteins violently contract and tighten up. Imagine a wet sponge being squeezed by a giant, invisible fist. As the protein network tightens, it forcibly expels all the fat and water it was holding onto. The proteins then tangle into tight, gritty, microscopic knots.
The result? The water evaporates, the fat separates and pools at the surface (creating that dreaded oil slick), and the proteins are left behind as a chalky, gritty mass. Once the proteins have contracted and separated from the fat, no amount of frantic whisking will force them back together. The emulsion is dead.
The Anti-Caking Sabotage
Temperature isn’t the only enemy of a smooth sauce; sometimes, the call is coming from inside the house. Or rather, from inside the plastic bag.
If you are trying to build a premium cheese sauce using bags of pre-shredded cheese from the supermarket, you are actively sabotaging your own dinner. Commercial shredded cheeses are heavily coated in anti-caking agents—usually cellulose (wood pulp) or potato starch—to prevent the shreds from sticking together during transit and storage.
While these powders keep the cheese fluffy in the bag, they wreak absolute havoc in a saucepan. The anti-caking agents disrupt the fat-to-protein ratio and prevent the cheese from melting cleanly, resulting in a sauce that feels powdery on the tongue. If you want a velvety texture, you must grate your own blocks of cheese. It takes exactly two minutes, it is significantly cheaper, and it is the only way to ensure a pure melt. If you are still buying pre-shredded cheese out of sheer weeknight laziness, you are setting your sauce up for an unavoidable failure.
The Holy Trinity of Emulsion: How to Bulletproof Your Sauce
Now that we know why the proteins panic, we can introduce buffers to keep them calm. To build a stable cheese sauce that can sit in a warming dish for two hours without splitting, we need to introduce chemical or physical barriers that prevent the casein proteins from clumping together.
There are three primary ways to achieve this, ranging from the traditional French method to a modern molecular miracle.
Method 1: The Traditional Starch Buffer (The Béchamel)
For centuries, the classic culinary solution to a broken cheese sauce has been the starch buffer. This is the foundation of a traditional French Mornay sauce, which begins its life as a béchamel.
You start by cooking equal parts butter and flour in a pan to create a paste called a roux. You slowly whisk in milk, simmering it until the starches in the flour swell, burst, and thicken the liquid. Finally, you remove the pan from the heat and gently stir in your grated cheese.
How does this work? The swollen starch molecules from the flour act as microscopic physical barriers. They wedge themselves between the cheese proteins, physically blocking them from tangling together and squeezing out their fat.
While this method is a classic for a reason, it has drawbacks. The flour dilutes the sharp, punchy flavor of the cheese, often leaving a muted, slightly doughy aftertaste. Furthermore, while a roux-based sauce is stable enough for immediate serving, it can still eventually break or turn incredibly gluey if left in a slow cooker for a prolonged party buffet.
Method 2: The Concentrated Protein Hack
If you want a sauce that tastes intensely of pure cheese without the muted flavor of a floury roux, you need to look at modern kitchen hacks. One of the greatest time-saving culinary breakthroughs for the weekend entertainer is utilizing the magic of evaporated milk to stabilize your emulsion.
Evaporated milk is simply milk that has had about 60% of its water content slowly simmered away. What is left behind is a liquid that is hyper-concentrated with milk protein micelles. These concentrated proteins act as incredibly powerful, natural emulsifiers.
By tossing your freshly grated cheese in a tiny bit of cornstarch (a much lighter starch buffer than a heavy flour roux) and melting it gently into a pot of warm evaporated milk, you create an incredibly stable, velvety sauce in a fraction of the time it takes to build a traditional béchamel. The resulting sauce is remarkably smooth, rich, and tastes entirely of the cheese you paid good money for.
Method 3: The Modernist Miracle (Sodium Citrate)
If you are hosting a serious gathering and you want a cheese sauce that is practically indestructible—a sauce that boasts the complex, aged flavor of a sharp cheddar but melts with the supernatural, glossy smoothness of processed American cheese—you need to employ a little bit of molecular gastronomy. You need sodium citrate (Na3C6H5O7).
Sodium citrate is a type of sour salt derived from citrus fruits. In 1912, a Canadian-born cheesemaker named James L. Kraft discovered that adding a small amount of this salt to cheese as it melted completely prevented it from turning into a greasy oil slick. He patented the process, and the processed cheese industry was born.
The chemistry behind it is fascinating. When you add sodium citrate to a heated liquid and whisk in your cheese, the sodium citrate actively alters the chemical structure of the dairy. It swaps out the calcium ions in the cheese’s casein network for sodium ions. This structural swap makes the proteins highly water-soluble. Instead of panicking and clumping together when heated, the proteins relax, spread out, and form a flawless, homogeneous emulsion with the fat and water.
A sauce made with sodium citrate requires no flour, no roux, and no heavy cream. It is just liquid (water, milk, or even beer), cheese, and a tiny sprinkle of this magical salt. It will not break, it will not separate, and it holds beautifully in a chafing dish for hours. The standard ratio used by modernist chefs is roughly 2% to 4% sodium citrate to the total weight of the cheese.
Banishing Toxic Cookware from Your Kitchen
Before we get to the master recipe, we need to have a serious conversation about the vessel you are using to melt your liquid gold. As a passionate advocate for the home cook, I have absolutely zero patience for cheap, toxic kitchenware that actively harms your health and ruins your food.
If you are planning to build a delicate cheese sauce in a flimsy, scratched, ten-dollar non-stick Teflon pan you bought at a discount store five years ago, I am going to have to ask you to immediately walk to your kitchen and throw that pan in the garbage.
The PFAS Problem
The slick coating on traditional non-stick pans is made from PTFE (polytetrafluoroethylene), which belongs to a family of synthetic compounds known as PFAS (per- and polyfluoroalkyl substances). These are widely referred to as “forever chemicals” because they simply do not break down in the environment, or in the human body.
Recent scientific studies and legislative actions in 2025 and 2026 have aggressively targeted these chemicals. States like Minnesota have already implemented sweeping bans on PFAS in cookware, and for incredibly good reason. Growing evidence links prolonged PFAS exposure to severe health issues, including liver damage, kidney disease, and various forms of cancer.
When you heat a cheap PTFE-coated pan above 500°F (260°C)—a temperature easily reached on a standard gas burner if you leave a pan unattended for a few minutes—the chemical coating begins to rapidly degrade, releasing toxic, invisible fumes into your kitchen air. Furthermore, a 2022 study demonstrated that a single, microscopic scratch in a Teflon coating can release thousands of microplastic particles directly into your food.
If your food always sticks to a ruined, peeling non-stick skillet, you are not just ruining your dinner; you are potentially feeding your family and your party guests a side of forever chemicals. We do not compromise on safety in this kitchen.
The Safe, High-Performance Alternatives
You do not need toxic chemicals to cook beautifully. For melting cheese sauces, building emulsions, and whisking up gravies, you need cookware with excellent thermal mass and even heat distribution to prevent hot spots that can scorch your dairy.
Your best investments are heavy-bottomed, fully-clad stainless steel or enameled cast iron. Specifically, for sauce work, I highly recommend upgrading to a high-quality curved saucier pan. Unlike a standard saucepan with sharp, 90-degree internal angles, a saucier has gently sloped, rounded sides. This ergonomic design ensures that your whisk makes continuous contact with every square inch of the pan’s interior. There are no hidden corners for cheese to hide in, stick to, and ultimately scorch.
Investing in safe, durable, highly-conductive cookware is not a luxury; it is one of the essential tools every beginner needs to elevate their cooking from stressful chores to effortless culinary artistry.
The Indestructible Master Cheese Sauce Recipe
For our Mindful Mac and Cheese Bar, we are going to utilize the evaporated milk and cornstarch method. It yields an incredibly rich, intensely cheesy, highly stable sauce, and it relies on pantry staples you can find in any grocery store, making it highly accessible for the weekend entertainer.
The Ingredients:
- 1 lb (16 oz) of high-quality cheese. (I recommend a 50/50 split: 8 oz of sharp cheddar for deep flavor, and 8 oz of Gruyère, Fontina, or Monterey Jack for superior meltability).
- 1 can (12 oz) of evaporated milk (Do not buy sweetened condensed milk, unless you want dessert pasta).
- 1 tablespoon of cornstarch.
- 1 teaspoon of dry mustard powder (This acts as an emulsifier and enhances the “cheesiness”).
- A dash of hot sauce (The acidity cuts the heavy fat, though it won’t make the sauce spicy).
- Kosher salt to taste.
The Execution:
- Prep the Cheese: Grate all of your cheese by hand using a box grater. Place the freshly grated cheese into a large bowl, sprinkle the tablespoon of cornstarch over the top, and toss it thoroughly until every shred is lightly coated.
- Heat the Base: In your stainless steel saucier, pour in the evaporated milk. Whisk in the dry mustard powder and the dash of hot sauce. Place the pan over medium heat and bring the liquid to a very gentle simmer. You should see small bubbles at the edges, but it should absolutely not be at a rolling boil.
- The Melt: Once simmering, immediately reduce the heat to the lowest possible setting. Grab a handful of your cornstarch-coated cheese and drop it into the warm milk. Whisk continuously and smoothly until that handful is completely melted and incorporated.
- Patience is Key: Add the next handful, whisking until smooth. Repeat this process until all the cheese is incorporated. Do not dump all the cheese in at once, and do not crank up the heat to speed up the process. If you rush this step and expose the dairy to a sudden spike in high heat, your cheese sauce gets grainy and separates. Let the gentle, residual heat do the work.
- Final Polish: Once all the cheese is melted, you will be left with a glossy, thick, gloriously velvety sauce. Taste it, and season with Kosher salt as needed.
Curating the Mindful Mac and Cheese Bar: Strategy and Prep
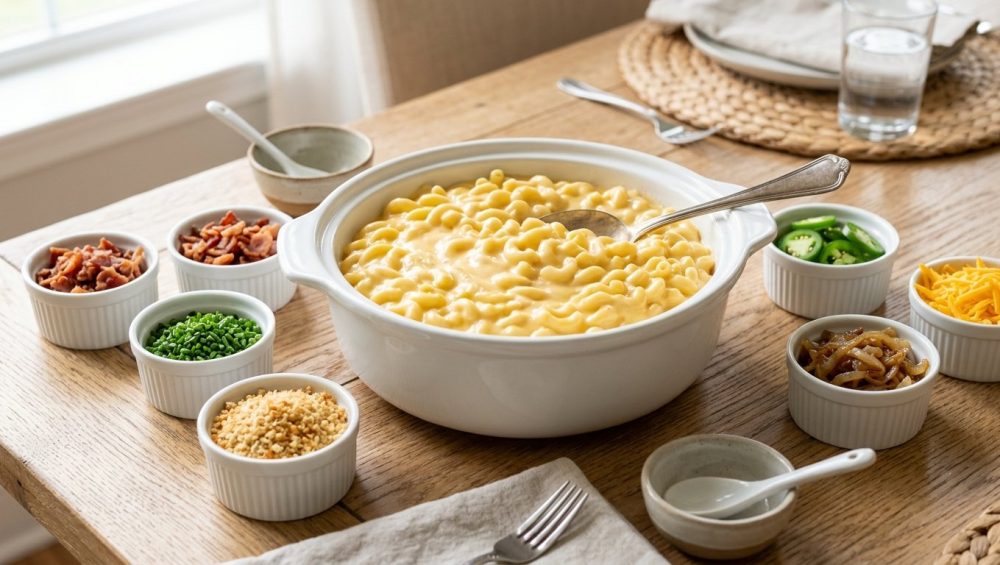
We call this a “mindful” gathering for a reason. Mindful entertaining means eliminating bottlenecks, preparing ingredients in advance, and staging your kitchen so that when your guests arrive, you can actually pour yourself a drink and enjoy their company. A DIY Mac and Cheese Bar is the ultimate hack for effortless hosting because the guests do the assembly work for you.
The Pasta Foundation
The vehicle for your cheese sauce matters. You want a pasta shape with structural integrity, deep ridges, and hollow cavities to catch and hold maximum amounts of that liquid gold. Cavatappi (corkscrews), medium shells, or classic elbow macaroni are your best choices. Long noodles or flat shapes will just leave the sauce pooling at the bottom of the bowl.
When cooking pasta for a buffet, cook it in heavily salted water until it is just past al dente. If you leave it too firm, it will absorb the moisture from your cheese sauce as it sits, drying out the dish.
Crucially, make sure you are using a pot with plenty of volume. If your pasta water always boils over, you are overcrowding a small pot, creating a concentrated, starchy foam volcano that makes a massive mess of your stovetop. Give your pasta room to swim.
Once drained, if you are holding the plain pasta in a serving dish, toss it immediately with a very light drizzle of neutral oil or a tiny pat of melted butter. If you skip this step, as the starches cool, your pasta clumps together into an impenetrable, un-scoopable brick on the buffet table.
The Toppings Matrix
A bowl of rich pasta and heavy cheese sauce is delicious, but it is also completely one-dimensional. Palate fatigue sets in after three bites. To elevate this from a child’s dinner to an adult culinary experience, your topping bar must provide contrasting textures and flavors. You need to hit three specific categories: Crunch, Acid, and Protein.
1. The Crunch (Texture)
You need something crispy to break up the soft, gooey monotony of the macaroni.
- Toasted Panko: Sauté panko breadcrumbs in brown butter with a pinch of garlic powder until golden brown.
- Fried Onions or Jalapeños: The crispy, store-bought kind work beautifully here.
- Crushed Kettle Chips: For a salty, rustic crunch.
2. The Acid (Brightness)
Fat coats the tongue; acid cuts through it, cleansing the palate and making you want to take another bite.
- Quick-Pickled Red Onions: Slice red onions incredibly thin and soak them in warm vinegar, sugar, and salt for 30 minutes before the party.
- Pickled Jalapeño Slices: For a sharp, vinegary heat.
- Diced Fresh Tomatoes: Tossed with a little balsamic glaze.
3. The Protein (Substance)
This transforms the bowl from a side dish into a hearty main course.
- Crumbled Bacon: An absolute must. (Pro-tip: If your bacon always shrinks into tough, curled-up nuggets, try starting your bacon in a cold skillet with a splash of water. The water helps render the fat slowly before the meat begins to crisp, resulting in perfectly flat, shatteringly crisp strips).
- Seasoned Ground Beef or Chili: A scoop of hearty chili turns this into a chili-mac masterpiece. When browning your beef in advance, ensure you sear it in batches in a blazing hot pan. If your ground beef steams in a pool of its own grey juices, you have overcrowded the pan, dropping the temperature and completely ruining the flavor-building Maillard reaction.
- BBQ Pulled Pork: The sweet, smoky flavor of BBQ sauce pairs flawlessly with sharp cheddar.
Buffet Thermodynamics: Holding and Serving
The final, and arguably most critical, hurdle of hosting a Mac and Cheese Bar is execution. You have built a beautiful, stable sauce. Now you have to keep it warm, fluid, and safe to eat for two to three hours while your guests graze.
The Danger Zone vs. The Breaking Point
You are operating in a very narrow thermal window. According to food safety guidelines, hot food must be held above 140°F (60°C) to prevent bacterial growth. However, as we discussed in our science lesson, if a cheese sauce is held at temperatures exceeding 160°F (71°C) for prolonged periods, the proteins will eventually fatigue, tighten, and break the emulsion.
Direct heat is your absolute worst enemy on a buffet line. Never place a pot of cheese sauce directly on a portable induction burner or a hot plate. The bottom will scorch, and the sauce will split in minutes.
Equipment for the Job
To hold your sauce perfectly, you need to rely on gentle, indirect heat and thermal mass.
The Slow Cooker (Crockpot) Method:
A slow cooker on the “Warm” setting is often the most accessible tool for home cooks. The heavy ceramic insert provides excellent thermal mass, radiating heat evenly. However, a word of caution: many modern slow cookers run dangerously hot, even on the lowest setting. Test your slow cooker by filling it with water and checking the temperature on “Warm” after an hour. If it exceeds 160°F, you will need to manually cycle the machine on and off during the party to prevent your sauce from breaking.
The Chafing Dish (Bain-Marie) Method:
If you entertain frequently, investing in a stainless steel chafing dish is highly recommended. Chafing dishes utilize a water bath (bain-marie) system. A pan of water sits directly above the sterno flame, and the pan holding your cheese sauce sits inside the hot water. Because water cannot exceed 212°F (100°C) and the heat is distributed evenly across the bottom and sides of the food pan, it provides a gentle, insulating barrier that protects your delicate emulsion from scorching.
Moisture Management on the Buffet Line
As your sauce sits in a warming vessel, water will inevitably evaporate, causing the sauce to thicken and eventually form a skin. To combat this, keep a small thermos of hot milk or reserved hot pasta water on the buffet table.
Every thirty minutes, do a quick quality control check. Give the sauce a thorough stir. If it is looking too thick or sludgy, splash in a tablespoon or two of the hot milk or water and whisk vigorously to restore the fluid, cascading texture.
Similarly, keep an eye on your hot toppings. If your roasted veggies turn mushy from sitting in a covered dish, leave the lid slightly cracked to allow steam to escape, preserving their texture.
You Are Now a Cheese Emulsion Expert
Congratulations. You have officially graduated from the Sassy Sous-Chef’s masterclass on dairy thermodynamics. You now possess a deeper understanding of the molecular structure of melted cheese, the stabilizing power of protein micelles, and the dangers of toxic cookware than the vast majority of the population.
You no longer have to fear the dreaded oil slick. You know how to bypass the anti-caking agents, how to leverage evaporated milk, and how to stage a buffet line that practically runs itself.
So go forth, banish those scratched Teflon pans to the garbage bin, buy a block of the good Gruyère, and invite your friends over. Pour yourself a generously sized glass of wine, set out your meticulously prepped toppings, and watch with smug satisfaction as your guests marvel at the silkiest, most indestructible cheese sauce they have ever tasted. You’ve earned it.






