
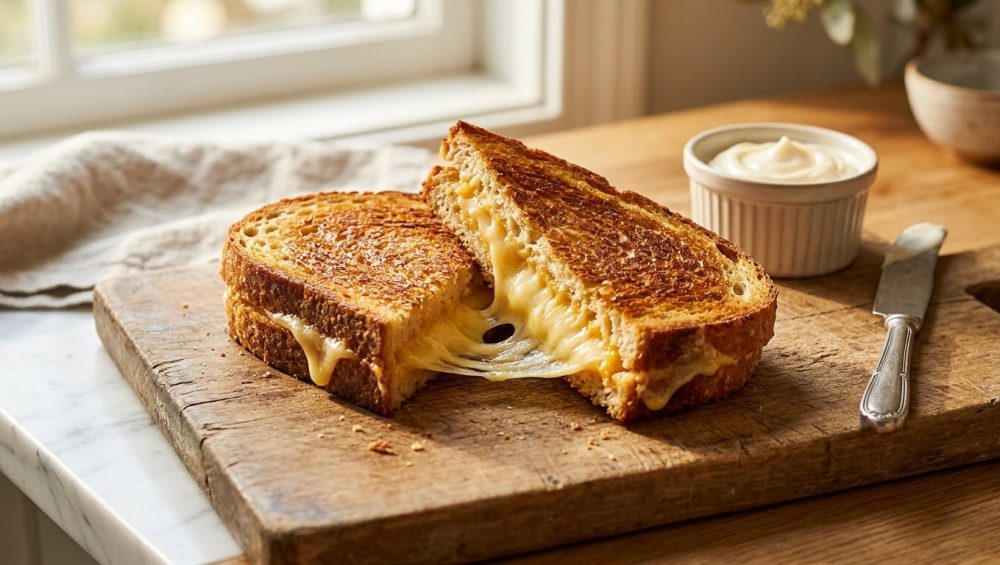
Listen up, culinary weekend warriors. We need to have a serious, brutally honest conversation about a sandwich. Not just any sandwich, but the undisputed heavyweight champion of nostalgic comfort food: the grilled cheese.
According to recent industry consumption data from Circana and the Tillamook County Creamery Association, Americans consume roughly 2.4 billion grilled cheese sandwiches at home every single year. That breaks down to about 36 sandwiches per person annually. Yet, despite this staggering volume of cheese-and-carb consumption, the vast majority of home cooks are still ruining their lunches on a weekly basis. You know exactly what I am talking about. You stand over the stove, spatula in hand, praying to the culinary gods, only to flip your sandwich and discover a blackened, scorched crust hiding a center of stubbornly unmelted, cold cheese. It is a universal kitchen tragedy.
I firmly believe that absolutely anyone can transform your daily meals into restaurant-quality experiences without dropping thousands of dollars on a culinary degree. You just need to understand a little bit of basic food science and be willing to abandon the stubborn traditions that are actively sabotaging your success.
For generations, we have been told that butter is the only acceptable fat for grilling a cheese sandwich. I love butter. I would happily bathe in a warm beurre blanc if it were socially acceptable. But when it comes to achieving a perfectly even, golden-brown, shatteringly crisp crust on a Tuesday night when you have zero patience and a screaming appetite, butter is a treacherous liar.
The secret to the ultimate, foolproof grilled cheese is sitting in the door of your refrigerator right now. It is mayonnaise.
Before the culinary purists start sharpening their pitchforks and storming my kitchen, let me explain the undeniable, peer-reviewed food physics behind this swap. We are going to dive deep into fat smoke points, emulsion chemistry, and the magical Maillard reaction. By the end of this definitive masterclass, you will never look at a jar of mayo—or a stick of butter—the same way again.
The Anatomy of a Grilled Cheese Disaster: Why Butter Betrays You
To understand why mayonnaise is the ultimate culinary wingman, we first have to dissect exactly why butter fails us in this specific application. Cooking is just applied chemistry, and butter is a highly complex, temperamental ingredient.
The Milk Solids Problem
Butter is not a pure fat. Standard American supermarket butter is an emulsion consisting of roughly 80 percent butterfat, 15 to 18 percent water, and 1 to 2 percent milk proteins and sugars (milk solids). When you drop a buttered piece of bread into a hot skillet, a chaotic chain of events occurs.
First, the water content rapidly heats up and vaporizes. This phase change creates localized steam pockets that actually lift the bread slightly away from the surface of the pan, disrupting the conductive heat transfer required for an even sear. This is exactly why butter splatters and burns so aggressively when it hits hot metal.
Once the water evaporates, those milk solids are left behind to fry in the remaining butterfat. Milk proteins and sugars have a notoriously low smoke point—around 302°F (150°C). The surface temperature of a skillet required to properly melt a thick layer of cheese is often much higher than that. As a result, the milk solids scorch and turn bitter before the thermal energy can penetrate the bread and melt the cheese. You are left with a sandwich that tastes like carbon and regret.
The Structural Damage of Cold Butter
Let us talk about the practical, time-is-money aspect of weeknight cooking. If you are making a spontaneous grilled cheese, you are likely pulling a stick of butter straight from the refrigerator. Cold butter is rock hard. Attempting to spread a rigid block of dairy across a soft, delicate slice of sandwich bread or brioche is an exercise in futility.
You end up violently tearing the crumb of the bread, creating deep divots and structural weak points. When you place that mangled slice into the pan, the cheese leaks through the tears, hits the hot metal, and burns. You could wait 45 minutes for the butter to soften at room temperature, but who has that kind of time when a comfort food craving hits? You need efficiency.
The Food Science of Mayonnaise: Your Culinary Wingman
Enter mayonnaise. It is cheap, it is always in your fridge, and it is scientifically engineered to solve every single problem that butter creates.
The Ultimate Emulsion
Mayonnaise is an oil-in-water emulsion. It is typically composed of 70 to 80 percent neutral oil (like soybean or canola), 5 to 10 percent water, an acid (usually vinegar or lemon juice), and egg yolks. This specific chemical makeup is a powerhouse for high-heat searing.
Because mayonnaise is predominantly made of refined oils, it boasts a significantly higher smoke point than whole butter. Depending on the brand, the smoke point of mayonnaise sits comfortably between 400°F and 450°F (204°C to 232°C). This massive thermal buffer means you can leave your sandwich in the pan long enough for the residual heat to deeply penetrate the bread and turn the cheese into a molten, gooey masterpiece without the exterior turning into a charcoal briquette.
Furthermore, the texture of mayonnaise is permanently spreadable. Straight from the chilly depths of your refrigerator, it glides across the softest white bread like a dream, sealing the surface evenly without causing a single micro-tear.
Mastering the Maillard Reaction
If you want to cook like a professional, you need to worship at the altar of the Maillard reaction. Discovered in 1912 by French chemist Louis Camille Maillard, this is the complex chemical reaction between amino acids and reducing sugars that occurs when food is subjected to heat. It is the exact process that gives a seared steak its crust, roasted coffee its depth, and baked bread its golden color. The Maillard reaction typically kicks into overdrive between 280°F and 330°F (140°C to 165°C).
Here is where mayonnaise pulls off its greatest magic trick. The egg yolks in mayonnaise are packed with highly reactive proteins and amino acids. When you slather mayo on the outside of your bread and subject it to heat, those egg proteins act as a catalyst, aggressively accelerating the Maillard reaction.
In controlled laboratory tests utilizing gas chromatography-mass spectrometry (because yes, food scientists take sandwiches very seriously), bread seared in mayonnaise produced 14 additional volatile aroma compounds compared to bread seared in butter. The egg yolks facilitate a faster, deeper, and more uniform browning process. You get a crust that is visibly glossier, structurally crunchier, and deeply savory.
The Acid Advantage
You might be thinking, “But I don’t want my sandwich to taste like a warm egg salad.” I promise you, it will not. The flavor of mayonnaise completely transforms under high heat. The water evaporates, the oil fries the bread, and the egg proteins brown.
What remains is the subtle, unsung hero of the mayonnaise ingredient list: the acid. The trace amounts of vinegar or lemon juice in the mayo leave behind a microscopic, almost imperceptible tang on the crust of the bread. This acidity is a culinary secret weapon. Rich, fatty, heavy foods desperately need acid to cut through the richness and balance the palate. The slight tang of the seared mayo perfectly slices through the heavy, unctuous fat of the melted cheese, creating a perfectly balanced flavor profile that butter simply cannot provide.
The Sassy Sous-Chef’s Rules for the Ultimate Grilled Cheese
Now that we have established the undeniable science, we need to talk about execution. A brilliant hack is useless if your foundational ingredients are garbage. Here are my strict, non-negotiable rules for building the perfect sandwich.
Bread Selection: Structure is Everything
The bread is the canvas, the structural integrity, and the delivery mechanism. You cannot use a bread that is too dense, or the heat will never reach the cheese. You cannot use a bread that is full of massive artisanal air holes, or the cheese will escape and burn in the pan.
Standard, store-bought white bread or classic sourdough are the undisputed kings of the grilled cheese. They have a tight, even crumb that holds the mayo beautifully and provides a uniform surface area for pan contact. Japanese milk bread (shokupan) or a high-quality brioche are excellent upgrades if you want a slightly sweeter, richer profile. Slice your bread to exactly half an inch thick. Any thicker, and the bread will burn before the cheese melts. Any thinner, and the sandwich will collapse into a greasy, structural failure.
Cheese Selection: The Meltability Factor
Not all cheeses are created equal. The melting capability of a cheese is directly tied to its moisture content and the age of its protein matrix. Young, high-moisture cheeses melt into luxurious, stretchy pools. Aged, dry cheeses separate into terrifying puddles of grease and gritty clumps when heated.
For a flawless texture, you must prioritize meltability. Classic American cheese (yes, the individually wrapped slices) is scientifically engineered with sodium citrate to melt perfectly without breaking. If you want a more elevated flavor, young sharp cheddar, Fontina, Gruyère, or Monterey Jack are phenomenal choices.
Whatever you do, you must grate your own cheese from a solid block. I cannot stress this enough. If you are pre-shredded cheese melts terribly, you are sabotaging your dinner before you even turn on the stove. Those convenient bags of pre-shredded cheese are heavily coated in anti-caking agents like cellulose and potato starch to prevent the shreds from clumping in transit. That powdery coating acts as a thermal barrier, completely ruining the emulsion of the cheese when heated, resulting in a grainy, broken, disappointing texture. Buy a block. Use a box grater. It takes thirty seconds.
The Mayo Application: Edge-to-Edge Perfection
When applying the mayonnaise, precision matters. You are not making a deli sandwich; you are applying a highly calibrated searing medium.
Use a butter knife or an offset spatula to apply a remarkably thin, translucent layer of mayonnaise to the outside of the bread. If you glob it on too thickly, the bread will absorb the excess oil and become a soggy, greasy sponge. You want just enough to coat the surface. Furthermore, you must spread it absolutely edge-to-edge. Any dry, bare corners of the bread will scorch instantly in the pan. Complete coverage ensures a perfectly uniform, golden-brown crust.
Gear Check: Banish the Toxic Pans and Master Your Heat
You can have the best ingredients and the perfect scientific technique, but if your equipment is trash, your food will be trash. As an advocate for the home cook, I have zero patience for the predatory kitchenware industry selling us cheap, disposable garbage.
The “No-Go” Rule on Toxic Gear
If you are attempting to cook this sandwich in a lightweight, scratched-up Teflon skillet that you bought at a discount store seven years ago, we need to have an intervention. Cheap non-stick coatings are terrifying. When exposed to high heat, degrading polytetrafluoroethylene (PTFE) coatings can off-gas toxic fumes and flake microscopic pieces of plastic directly into your food.
Stop buying disposable pans. Banishing toxic kitchen gear is the first step to taking yourself seriously as a cook. Furthermore, never use aerosol cooking sprays on any of your cookware. The propellants and emulsifiers in those cans polymerize under heat, creating an invisible, sticky, impossible-to-remove residue that permanently ruins the surface of your pans.
The Case for Cast Iron and Carbon Steel
For a flawless grilled cheese, you need a pan with massive thermal mass. Thermal mass refers to a material’s ability to absorb, store, and evenly distribute heat energy. Thin aluminum pans lose their heat the second you drop a cold sandwich into them, leading to uneven cooking and sad, pale spots on your bread.
You need a heavy cast iron skillet or a high-quality carbon steel pan. These metals are phenomenal heat conductors. Once they get hot, they stay hot, providing the aggressive, consistent, edge-to-edge radiant heat required to trigger the Maillard reaction perfectly.
Yes, they require a tiny bit of maintenance. Understanding the science of seasoning a carbon steel pan or cast iron skillet—where layers of fat are polymerized into a natural, slick, non-toxic coating—is a rite of passage for any serious home cook. It is incredibly easy, incredibly safe, and will make your cookware outlast you.
Mastering Your Heat
The biggest rookie mistake in sandwich history is impatience. Do not turn your burner to high heat. The goal is to melt a thick layer of insulated cheese before the exterior bread burns. This requires a delicate thermal balance.
Medium-low heat is your best friend. You want to preheat the dry pan slowly so the heat evenly saturates the heavy metal. If you are ever unsure if your pan is at the correct temperature, practice testing your pan’s heat with a few drops of water. At the proper medium-low searing temperature, the water should sizzle and evaporate gently, not aggressively bounce around the pan like marbles (that indicates the pan is way too hot, a phenomenon known as the Leidenfrost effect).
Step-by-Step Masterclass: The Mayo-Seared Grilled Cheese
We have the science. We have the gear. Let us execute the flawless, stress-free weeknight dinner.
Step 1: The Preparation
Grate your cheese. Do not slice it. Grated cheese has exponentially more surface area, meaning it melts significantly faster and more evenly. If you are using a crusty artisan loaf, use a sharp serrated knife. Using a dull blade will crush the crumb, and dulling your kitchen knives on hard crusts is a great way to ruin expensive steel.
Step 2: The Preheat
Place your cast iron or carbon steel skillet on the stove over medium-low heat. Let it warm up completely dry for at least three to four minutes. You want the heat to be gentle, pervasive, and completely uniform across the entire cooking surface.
Step 3: The Assembly
Take two slices of bread. Apply a thin, edge-to-edge layer of mayonnaise to one side of each slice. Place one slice, mayo-side down, on your cutting board. Pile your freshly grated cheese generously onto the dry side. Place the second slice of bread on top, mayo-side up.
Step 4: The Sear
Gently transfer the assembled sandwich into the preheated, dry skillet. You should hear a gentle, encouraging sizzle—not an aggressive, violent crackle. Do not press down on the sandwich with your spatula! Pressing compresses the delicate crumb of the bread, ruining the fluffy internal texture and squeezing the melting cheese out into the pan. Leave it alone.
Step 5: The Melting Dome Technique
If you are using a particularly thick bread or a stubborn, aged cheese, employ the melting dome technique. Splash exactly one teaspoon of water into the very edge of the hot pan (far away from the bread) and immediately cover the sandwich with a stainless steel mixing bowl or a glass lid. The water will instantly turn to steam, getting trapped under the dome. This gentle, enveloping steam heat will rapidly melt the cheese from the top down without requiring you to raise the temperature of the pan. Remove the dome after 45 seconds.
Step 6: The Flip and The Rest
After about three to four minutes, use a thin metal spatula to peek under the sandwich. You are looking for a deep, even, glossy mahogany brown. When it is ready, confidently flip the sandwich. The second side will cook slightly faster because the pan is fully heat-saturated and the bread is already warm.
Once the second side is perfectly seared, remove the sandwich to a wire cooling rack. Do not put it directly on a flat plate! The residual steam escaping from the hot bread will condense on the cold plate, instantly turning your perfectly engineered, crispy bottom crust into a soggy, tragic mess. Let it rest for exactly 60 seconds on the wire rack so the molten cheese can slightly set up, making it easier to slice.
When dinner is done, do not use harsh detergents or abrasive sponges that strip your pan’s seasoning. The best method for cleaning your cast iron skillet is a simple rinse with hot water and a gentle scrub with a chainmail pad to knock off any crispy cheese bits. Dry it completely, wipe it with a microscopic drop of oil, and it is ready for tomorrow.
Addressing the Skeptics and Purists
I know there are traditionalists reading this who are clutching their pearls at the thought of abandoning butter. Let us address the common arguments.
“But I Want the Butter Flavor!”
I hear you. Butter tastes incredible. If you absolutely cannot live without the rich, dairy flavor of butter, you can utilize the hybrid method. Spread your thin layer of mayonnaise on the outside of the bread to guarantee the perfect, high-smoke-point Maillard sear. Then, drop a small pat of butter directly into the pan just before you place the sandwich down. The mayo protects the bread and provides the crunch, while the melting butter surrounds the crust, infusing it with that nostalgic dairy aroma. It is the best of both worlds.
“Can’t I Just Use Clarified Butter?”
Yes, technically you can. Clarified butter, or ghee, has had all of its water and milk solids meticulously removed. It is pure, unadulterated butterfat with a massive smoke point of 450°F (232°C). It will give you a phenomenal, crispy sear without burning.
However, making clarified butter requires slowly simmering butter on the stove, meticulously skimming the foam, and straining the liquid gold. You can buy it pre-made, but it is expensive and hard at room temperature, meaning you still have to melt it before brushing it onto your bread. This article is about practicality. On a busy weeknight, unscrewing a jar of mayonnaise is infinitely faster and cheaper than dealing with clarified butter. We are prioritizing efficiency without sacrificing quality.
Elevating the Classic: Grown-Up Flavor Upgrades
Once you have mastered the foundational mayo-sear technique, you can start treating your mayonnaise layer as a blank canvas for massive flavor upgrades. Because the mayo is emulsified, it acts as a perfect suspension system for fat-soluble spices and aromatics.
The Compound Mayo
Before spreading the mayonnaise on your bread, mix it in a small bowl with a heavy pinch of garlic powder, smoked paprika, and a dash of cayenne pepper. When this spiced mayo hits the hot pan, the spices will bloom in the hot oil, creating a deeply savory, aggressively flavorful crust that mimics a high-end garlic bread.
The Miso Paste Secret
If you want to experience an umami bomb that will ruin all other sandwiches for you, try the miso trick. Take a tiny, pea-sized amount of white miso paste and dry-brush it onto the inside of the bread slices (the side facing the cheese). Miso is heavily fermented and packed with glutamates. When combined with the sharp tang of a good cheddar and the crispy, rich exterior of the mayo-seared crust, it creates a deeply complex, savory profile that tastes like it came from a Michelin-starred bistro.
Textural Contrasts
A great sandwich requires contrasting textures. The gooey cheese and the crispy bread are a great start, but adding a sharp, acidic crunch elevates the entire experience. Slide a layer of well-drained, spicy kimchi between your cheese slices before grilling. The fermented acidity of the cabbage cuts through the rich dairy fat perfectly. Alternatively, a layer of deeply caramelized onions or a few slices of crispy, thick-cut applewood smoked bacon will turn a simple lunch into a decadent, show-stopping dinner.
Conclusion
Cooking does not have to be a stressful, chaotic chore. You do not need expensive gadgets, pretentious ingredients, or a culinary degree to make mind-blowing food. You just need to understand the basic science of the ingredients in front of you and be willing to challenge the outdated rules that are holding you back.
By swapping problematic, low-smoke-point butter for the high-heat, emulsion-stabilized magic of mayonnaise, you are taking control of the thermodynamics in your pan. You are guaranteeing a perfectly even, shatteringly crisp, golden-brown crust every single time, without the stress of tearing your bread or smoking out your kitchen.
So banish the cheap Teflon, respect the Maillard reaction, and embrace the mayo. Your weeknight dinners, and your sanity, will never be the same. Now go make a sandwich. You’ve earned it.






