
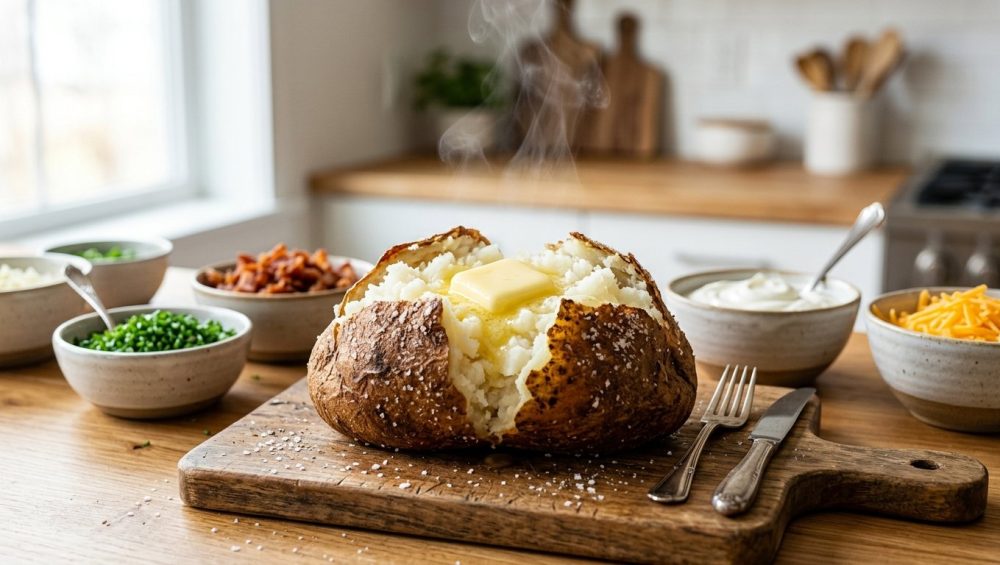
Listen, I love you, but if you are still throwing a dinner party by spending your entire Friday night sweating over a complicated reduction sauce while your guests awkwardly sip tap water in the living room, we need to have a serious talk. You do not need a culinary degree to blow people’s minds, and you certainly do not need to sacrifice your own sanity to be a good host. Time is money, and as a home cook, your weeknights are already chaotic enough. When the weekend rolls around, you deserve to actually enjoy the company of the people you invited over.
Enter the ultimate, foolproof, wildly customizable gathering concept: the mindful potato bar.
It sounds almost too simple, doesn’t it? But a properly executed potato bar is a masterclass in culinary logistics. It is incredibly budget-friendly, it naturally caters to every annoying dietary restriction your friends might have (vegan, gluten-free, dairy-free, you name it), and 90% of the prep work is done before anyone even rings your doorbell. However, there is a massive caveat. This entire concept hinges on your ability to bake a flawless, restaurant-quality potato. If you serve your guests a sad, gummy, wrinkled tuber, the whole illusion falls apart.
Today, we are stripping away the pretentious chef-speak and diving deep into the actual food science of the humble spud. We are going to fix your bad habits, banish toxic kitchen practices, and teach you exactly how to achieve a potato with glass-like, crispy skin and an interior so fluffy it looks like a cloud. Let’s get to work.
The Anatomy and Science of a Perfect Baked Potato
You cannot just grab any random bag of potatoes from the supermarket, throw them in the oven, and expect magic. The potato you choose determines everything from texture to browning to whether your dish holds its shape or collapses into a watery mess.
If you want a fluffy interior, the Russet potato (often sold as an Idaho potato) is the undisputed king. To understand why, we have to look at the microscopic architecture of the vegetable. Potatoes are essentially water and starch. The Russet has the lowest moisture content of common potato varieties, with a significantly higher percentage of its weight made up of starch.
Starch is a complex carbohydrate made up of long chains of glucose molecules, primarily in two configurations: amylose and amylopectin. When you expose a high-starch potato to heat, an incredible transformation occurs. The tightly packed starch granules begin to absorb the potato’s internal moisture. As the temperature rises, these granules swell and eventually gelatinize. The moisture turns to steam, expanding with immense force, physically separating the starch granules from one another.
This is the exact scientific mechanism that creates a fluffy baked potato. The water isn’t gone; it is bound within the gelatinized starch matrix rather than sloshing around loosely. If you use a waxy potato (like a red or Yukon Gold), there simply isn’t enough starch to absorb the higher water content, leaving you with a dense, creamy, or outright mushy texture. Understanding this is the first step to figuring out exactly why your baked potatoes get soggy when you use the wrong variety.
The Aluminum Foil Fallacy (And Why It Is Actually Dangerous)
I have zero patience for bad kitchen advice, and the widespread myth that you should wrap your baked potatoes in aluminum foil is perhaps the most offensive culinary lie of the modern era. Somewhere along the line, people were convinced that foil helps the potato cook faster and keeps it moist,.
Let me be brutally honest: wrapping a potato in foil ruins it.
When you wrap a potato in aluminum foil, you are creating a vapor barrier. As the internal moisture of the potato turns to steam, it has absolutely nowhere to go. Instead of dry baking, you are aggressively steaming the potato in its own juices. This completely halts the evaporative cooling process and prevents the skin from ever drying out enough to trigger the Maillard reaction—the chemical process responsible for browning and crisping,.
The result? A pale, flabby, unappetizing skin and an interior that is dense and waterlogged. If you have ever wondered why your baked potatoes are dense and gummy, look no further than that roll of foil.
But it gets worse. Wrapping potatoes in foil is not just a texture killer; it is a documented food safety hazard. Clostridium botulinum spores—the bacteria responsible for botulism—naturally exist in the soil and can be present on potato skins. These spores are incredibly resilient and can survive the baking process. Botulinum bacteria thrive in warm, moist, anaerobic (oxygen-free) environments,.
When you leave a foil-wrapped potato to cool on the counter, you are providing the exact perfect conditions for these spores to germinate and produce deadly toxins,. The foil traps the heat, keeping the potato in the bacterial “danger zone” for an extended period, while simultaneously cutting off the oxygen supply. Never, ever store or cool a baked potato in foil.
The Sassy Sous-Chef’s Foolproof Baking Method
Now that we have banished the foil to the trash can where it belongs, let’s go over the exact, step-by-step method for baking a flawless potato. This requires minimal active time, but you cannot skip the details.
Step 1: The Scrub and Dry
Russets grow in the dirt, and their thick, textured skins hold onto grit. Scrub them aggressively under cold water. Once they are clean, you must dry them completely with a clean kitchen towel. Any residual surface moisture will create steam in the oven, delaying the crisping process of the skin.
Step 2: The Crucial Puncture
You must pierce the potato. As we discussed, the internal moisture turns to steam and expands violently. If that steam does not have an escape route, the pressure will build until the potato literally explodes in your oven. Take a fork and stab each potato 6 to 8 times, going about half an inch deep. Save yourself the nightmare of scraping baked starch off your oven coils.
Step 3: The Naked Bake
Do not rub your potatoes with oil before putting them in the oven. I know every outdated recipe tells you to do this, but oiling them early traps the moisture inside the skin, leading to a leathery exterior instead of a crisp one. Place your naked, dry, pierced potatoes directly onto a wire cooling rack set inside a baking sheet.
Bake at 400°F (or 425°F if your oven runs cool). The wire rack is non-negotiable here; it allows the hot air to circulate 360 degrees around the potato, ensuring the bottom doesn’t steam in its own escaping juices.
Step 4: The Temperature Check
Stop guessing when your food is done. The squeeze test is unreliable. Instead, use a high-quality instant-read thermometer. If you don’t have one, or if you suspect your current meat thermometer is lying to you, upgrade immediately. A perfectly baked Russet potato is done when the internal temperature hits exactly 205°F to 210°F,. At this precise temperature, the starches have fully gelatinized, and the interior is at peak fluffiness. This usually takes between 50 and 60 minutes, depending on the size of the spud.
Step 5: The Late-Stage Oil and Salt
When the potatoes hit an internal temperature of about 195°F (usually with 10 to 15 minutes left to go), pull them out quickly. Now is the time to brush them lightly with a high-smoke-point oil (like avocado oil or beef tallow) and generously coat them in coarse kosher salt. Return them to the oven. Applying the oil at the very end essentially oven-fries the dehydrated skin, resulting in an audibly crunchy, shatteringly crisp exterior.
Step 6: The Immediate Fluff
The absolute second you pull the finished potatoes from the oven, you must act. Take a serrated knife, slice them open down the center, and give them a firm squeeze from the ends to push the interior up. You must let the trapped steam escape immediately. If you let a baked potato sit intact on the counter, the trapped steam will condense back into water, instantly turning your perfectly fluffy starch matrix into a gummy, heavy paste.
Essential Gear (And What to Toss)
I have a strict “no-go” rule when it comes to toxic, cheap, or useless kitchen equipment. You cannot achieve professional results if you are fighting against terrible gear.
First, throw away any flimsy, thin baking sheets that sound like a gunshot when they warp in the oven. If your baking sheets keep warping, they are creating uneven cooking surfaces and are likely made of cheap, degraded materials. Invest in heavy-duty, bare aluminum half-sheet pans. They are practically indestructible, conduct heat beautifully, and are what actual restaurant kitchens use.
Second, stop using pans with peeling, scratched non-stick coatings. Ingesting flakes of mystery chemicals is not on the menu. If you are constantly ruining your nonstick pans with aerosol cooking sprays (which contain propellants that bake into an impossible-to-remove sticky residue), it is time to switch to stainless steel or cast iron.
For the potato bar, your most valuable piece of equipment will be a stainless steel wire cooling rack that fits perfectly inside your heavy-duty sheet pan. This elevates the potatoes, promotes airflow, and prevents the bottoms from burning or getting soggy.
The Mindful Potato Bar: Strategy and Logistics
Now that you have mastered the vessel, let’s talk about the event itself. Hosting should not feel like a high-stakes restaurant service. The potato bar is the ultimate way to host a relaxed dinner party because the interactive element takes the pressure off you as the chef.
From a budget perspective, it is almost laughably economical. Even if you go absolutely wild with premium toppings, a potato bar typically costs a fraction of a traditional meat-and-two-sides dinner. Professional catering estimates for a loaded potato bar often range from $9 to $15 per person, but when you do it yourself at home, you can easily pull off an extravagant spread for under $5 per head.
The logistics are simple: you bake the potatoes, you set up the topping stations, and you let your guests build their own masterpieces. This completely eliminates the nightmare of trying to plate hot food for eight different people simultaneously. It also empowers your guests to control their own portions and navigate their own dietary needs without making a fuss.
Topping Architecture and Food Safety Protocols
A potato bar is only as good as its toppings, but you cannot just leave bowls of lukewarm food sitting on your kitchen island for three hours. We are going to divide your toppings into three distinct zones: Hot, Cold, and Crunch.
The Hot Zone
This is where the heavy hitters live. Think classic beef chili, slow-smoked pulled pork, roasted broccoli, and rich, velvety cheese sauce.
Food safety is paramount here. According to the FDA Model Food Code, hot foods must be held at a minimum of 135°F to prevent the rapid multiplication of harmful bacteria like Salmonella and E. coli,. However, many health inspectors and experienced chefs recommend aiming for 140°F to provide a safe buffer,.
To achieve this without drying out the food, utilize your slow cookers, Instant Pots (on the “Keep Warm” setting), or invest in an inexpensive chafing dish. Do not leave meat or dairy-based hot toppings sitting out at room temperature.
When preparing your hot toppings, quality matters. If you are serving a cheese sauce, do not use pre-shredded cheese from a bag. Those bags are coated in anti-caking agents (like cellulose) that prevent the cheese from melting smoothly. If you have ever wondered why your cheese sauce breaks and turns into a grainy, oily mess, that is the culprit. Grate your own sharp cheddar off the block.
Similarly, your chili needs to be robust and thick, not a watery soup that will turn your fluffy potato into a soggy disaster. If you struggle with consistency and wonder why your chili tastes watery, try simmering it uncovered to reduce the liquid, or incorporate a masa harina slurry to bind the juices.
The Cold Zone
This zone provides the necessary acidic and creamy contrast to the heavy, hot toppings. We are talking about full-fat sour cream, whipped compound butters, pickled red onions, jalapeños, and an abundance of fresh herbs like chives and cilantro.
Just like the hot zone, the cold zone has strict FDA temperature rules. Cold Time/Temperature Control for Safety (TCS) foods must be maintained at 41°F or below,. The easiest way to achieve this at home is to nestle your serving bowls into larger bowls filled with crushed ice.
Pay attention to your garnishes. Nothing ruins the aesthetic of a beautiful potato bar faster than wilted, blackening chives. If your fresh herbs turn slimy before the party even starts, it is because you are chopping them with a dull knife (which crushes the cell walls rather than slicing them) or storing them in a suffocating plastic bag with excess moisture. Use a razor-sharp chef’s knife, slice cleanly, and store them in a slightly damp paper towel until serving time.
The Crunch Zone
Texture is the unsung hero of a great meal. Your potato skin provides the baseline crunch, but you need accents. Crispy crumbled bacon, toasted pumpkin seeds, crispy fried onions, or even crushed tortilla chips belong in this zone. Because these items are low-moisture, they can safely sit at room temperature without violating any food safety codes.
Troubleshooting and Repurposing Leftovers
Even with the best planning, you might end up with leftover baked potatoes. As we discussed, do not wrap them in foil to store them in the fridge. Let them cool completely, uncovered, on a wire rack to room temperature (do this quickly to minimize time in the danger zone), and then transfer them to an airtight glass container in the refrigerator.
The next day, the starches will have retrograded, meaning the potato will be firmer and less fluffy. This actually makes them perfect for slicing and pan-frying in a cast-iron skillet for breakfast hash.
Whatever you do, do not try to turn leftover baked potatoes into mashed potatoes by throwing them into a food processor or blender. The high-speed blades will violently tear the gelatinized starch molecules apart, releasing a massive amount of sticky amylose. You will end up with a bowl of literal wallpaper paste. If you want to stop making gluey mashed potatoes, you must use a gentle mechanical force, like a stainless steel potato ricer or a food mill, and ideally, you should start with freshly boiled potatoes, not day-old baked ones.
The Mindful Host’s Final Word
Hosting a gathering should be an act of joy, not a stress-inducing chore that leaves you exhausted and resentful. By leaning into the science of the baked potato and setting up a mindful, organized topping bar, you are guaranteeing a spectacular meal that practically serves itself.
You are giving your guests the gift of a customized, comforting dinner, and you are giving yourself the gift of time. So ditch the toxic foil, buy a reliable thermometer, respect the FDA holding temperatures, and pour yourself a glass of wine. You’ve got this.






