
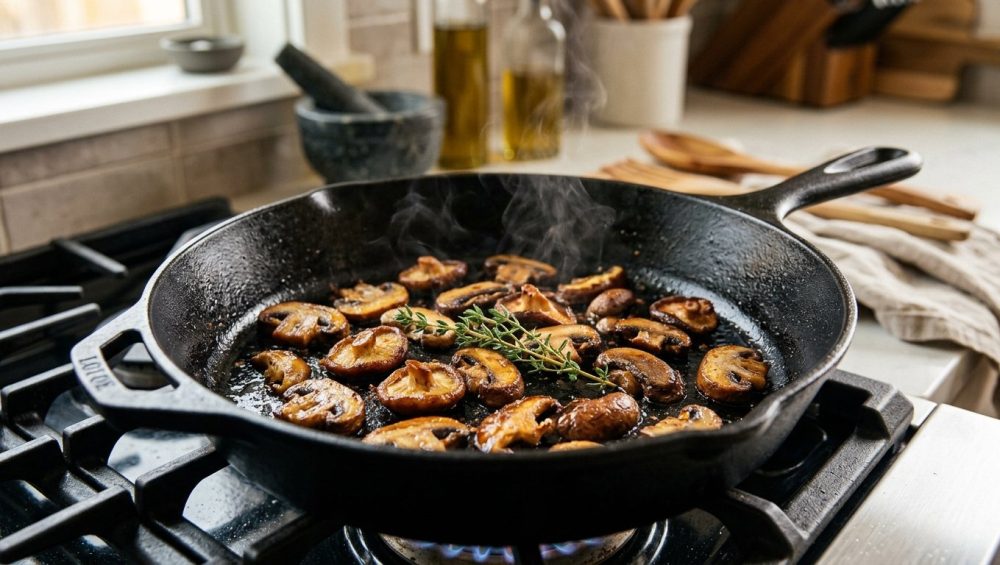
Cooking should not be an exercise in frustration. Listen, we’ve all been there. You bought a beautiful, earthy pint of cremini mushrooms with grand visions of a restaurant-quality steak dinner or a deeply savory weeknight pasta. You sliced them up, tossed them into a hot pan with a generous glug of expensive olive oil, and waited for the magic to happen.
But instead of turning into deeply browned, meaty little flavor bombs, they instantly sucked up every drop of fat in the pan. Within seconds, your skillet was bone-dry. Then, the mushrooms started weeping their internal moisture, boiling in their own sad gray puddle. By the time you plated them, they were shriveled, rubbery, and squeaked against your teeth like a cheap dog toy.
It is a culinary tragedy. But before you banish mushrooms from your weeknight rotation, take a deep breath. You are not a bad cook; you have just been lied to by generations of outdated kitchen dogma.
You’ve probably been treating mushrooms like normal vegetables. You’ve been trying to sear them exactly like you would a bell pepper or an onion. But mushrooms are not vegetables. They are fungi. And if you want to unlock their incredible, savory, umami-packed potential, you have to completely change your approach. You don’t need a culinary degree to pull this off—you just need a little bit of food science and a willingness to break the rules.
In this masterclass, we are going completely scorched-earth on the old ways of cooking mushrooms. I am going to explain exactly why your sautéed mushrooms are turning out like pencil erasers, and I’m going to teach you a counterintuitive, scientifically backed technique that will give you perfectly caramelized, meaty mushrooms every single time. And yes, it involves doing the exact opposite of what you’ve been told: we are going to cook them in water.
The Biology of the Mushroom: Why They Act Like Sponges
To understand why mushrooms fail in the skillet, we have to put on our lab coats for a minute. The reason your standard pan-searing technique ruins mushrooms is rooted in their unique biological makeup.
The Chitin Factor: Why They Don’t Turn to Mush
Unlike plants, which have cell walls made of cellulose and pectin, fungi have cell walls made of a polymer called chitin. If that word sounds familiar, it’s because chitin is the exact same tough, heat-stable carbohydrate that makes up the exoskeletons of crabs, lobsters, and insects.
When you cook a normal vegetable, like zucchini, the heat breaks down the pectin. Leave a zucchini in a pan for too long, and it disintegrates into a watery mush. But chitin is practically invincible in the kitchen. In a famous experiment conducted by the food scientists at America’s Test Kitchen, researchers steamed mushrooms, zucchini, and beef tenderloin for 40 minutes, testing their texture every five minutes. The zucchini turned to mush. The beef turned into unchewable leather. The mushrooms? They stayed perfectly tender. You literally cannot overcook a mushroom in the traditional sense because the chitin structure will not break down.
The Sponge Effect: Air and Water
So if you can’t overcook them, why do they turn rubbery and squeaky? It comes down to their internal architecture. A raw mushroom is essentially a biological sponge. It is composed of about 90% water, and the remaining space is filled with microscopic air pockets.
When you drop raw mushrooms into a hot pan with oil, those air pockets act like tiny vacuums. They instantly absorb all the fat in the pan. This leaves your skillet completely dry, which prevents any browning from happening. As the pan continues to heat up, the massive amount of water trapped inside the mushroom’s cells begins to boil and release. Now, your oil-logged mushrooms are steaming in their own juices.
Because the pan temperature drops drastically when all that water is released, the Maillard reaction (the chemical process responsible for browning and flavor development) comes to a screeching halt. The water eventually boils off, but by that point, the mushrooms have shrunk, the oil they absorbed is trapped inside their collapsed structure, and they have taken on that dreaded, squeaky, rubbery texture.
The Great Washing Debate: Debunking the Brush-Only Myth
Before we even get to the stove, we need to address the most pretentious, time-wasting myth in the culinary world: the idea that you should never wash mushrooms.
For decades, snooty chefs and outdated cookbooks have insisted that because mushrooms are like sponges, washing them under the tap will cause them to become waterlogged and ruin your dish. They tell you to painstakingly wipe each individual mushroom with a damp paper towel or a specialized “mushroom brush.”
Let me be brutally honest: I do not have the time or the patience to give a spa treatment to a pound of cremini mushrooms on a Tuesday night. And neither do you.
Thankfully, food science has officially debunked this nonsense. Culinary heavyweights like J. Kenji López-Alt have conducted rigorous testing on this exact issue. By weighing mushrooms before and after a quick rinse under cold water, scientists proved that mushrooms only absorb about 1% to 2% of their total weight in water. To put that into perspective, that is barely a teaspoon of extra water per pound of mushrooms. It translates to maybe 15 extra seconds of cooking time to evaporate that moisture.
So, please, for the love of your own sanity, wash your mushrooms. Toss them in a colander, run them under cold water to blast off the dirt (which is often sterilized peat moss, by the way), and give them a quick spin in a salad spinner or a pat down with a kitchen towel. It is fast, it is effective, and it absolutely will not ruin your dinner.
The Counterintuitive Fix: The Water-First Method
Now that your mushrooms are clean, it’s time to cook them. If adding oil first causes them to absorb the fat and turn rubbery, what is the solution?
The answer is water. Yes, you read that right. The secret to deeply browned, perfectly textured, restaurant-quality sautéed mushrooms is to boil them in a little bit of water before you ever introduce a drop of fat to the pan.
It sounds completely wrong. It violates every instinct you have as a home cook. But the science behind the “water-first” method is bulletproof.
When you add sliced mushrooms to a skillet with about a quarter cup of water and turn the heat to medium-high, several incredible things happen:
- The Air Pockets Collapse: As the water comes to a simmer, the heat causes the mushroom to release its own internal moisture. The microscopic air pockets that normally act as oil-vacuums collapse entirely.
- The Sponge is Destroyed: Because the air pockets are gone and the cells have contracted, the mushroom literally loses its ability to absorb liquid. It is no longer a sponge; it is a dense, meaty piece of fungi.
- Temperature Control: The water regulates the temperature of the pan, cooking the mushrooms evenly and thoroughly without scorching the outside.
As the mushrooms simmer, the water in the pan (both the water you added and the water released by the mushrooms) will begin to evaporate. Once the pan goes completely dry, you will hear a distinct change in the sound. The wet, bubbling simmer will transition into a sharp, aggressive sizzle.
This is the exact moment you add your oil or butter. Because the mushrooms’ internal structure has already collapsed, they cannot absorb the fat. Instead, the oil coats the outside of the mushrooms and the surface of the pan, allowing the temperature to skyrocket past the boiling point of water. The Maillard reaction kicks into high gear, and your mushrooms will develop a gorgeous, deep mahogany crust in a matter of minutes.
The Sassy Sous-Chef’s Step-by-Step Mushroom Masterclass
Understanding the science is great, but execution is everything. Let’s walk through the exact, step-by-step process of transforming a standard grocery store punnet of mushrooms into a culinary masterpiece.
Step 1: Prep and Sizing
Start by washing your mushrooms in a colander as we discussed. Once they are relatively dry, it’s time to slice. Uniformity is key here. If you have paper-thin slices mixed with massive chunks, they will cook unevenly. Aim for slices that are about a quarter-inch thick. If you are using small button mushrooms, you can simply quarter them.
A quick note on stems: for standard white button or cremini mushrooms, the stems are perfectly tender and should be eaten. Just trim the very bottom woody edge. If you are working with shiitakes, the stems are incredibly tough and fibrous; snap them off and save them in a freezer bag for your next batch of homemade vegetable or chicken stock.
Step 2: Choosing the Right Pan
Do not even think about reaching for a cheap, scratched-up Teflon pan. If you want a serious sear on your food, you need cookware that can hold onto heat. Thin, flimsy pans lose their temperature the second food hits them, leading to steaming rather than searing.
You need a pan with high thermal mass. A heavy cast iron skillet, a thick carbon steel pan, or a high-quality multi-clad stainless steel skillet are your best friends here. If you are using stainless steel, make sure you know how to properly manage your heat to prevent sticking. A great trick is preheating your stainless steel pan until a drop of water dances across the surface like a mercury bead. This ensures the pores of the metal have closed, creating a naturally non-stick surface.
And please, throw away the chemical spray cans. The aerosol cooking sprays cause buildup that polymerizes onto your cookware, leaving a sticky, impossible-to-remove residue that permanently ruins the finish of your pans. Stick to real butter, olive oil, or neutral high-heat oils like avocado or grapeseed.
Step 3: The Water Phase
Place your skillet over medium-high heat. Add your sliced mushrooms to the dry pan, and immediately pour in about 1/4 cup to 1/3 cup of water (for a standard 8 to 16 oz batch of mushrooms).
At this stage, you want to add a generous pinch of kosher salt. Conventional wisdom often says to salt mushrooms at the very end so they don’t release their moisture too early. But remember, releasing moisture is exactly what we want to happen right now! The salt will draw the water out of the mushrooms faster, speeding up the entire cooking process.
Let the mushrooms simmer. Stir them occasionally. You will see them shrink dramatically as their cell walls collapse and they expel their liquid into the pan.
Step 4: The Evaporation and Searing Phase
Keep your eyes and ears on the pan. After 5 to 10 minutes (depending on the water content of your specific mushrooms), the liquid will completely evaporate. The sound will change from a soft bubbling to a harsh sizzle.
Now, push the mushrooms to the sides of the pan and add your fat to the center. A combination of a high-heat oil (like avocado oil) and a knob of unsalted butter is perfection. The oil prevents the butter solids from burning too quickly, while the butter provides unmatched flavor and aids in browning.
Toss the mushrooms to coat them in the fat. Now—and this is crucial—stop touching them. Spread them out into a single layer and let them sit undisturbed for at least two to three minutes. If you constantly agitate the pan, the mushrooms will never develop a crust. Let the heat do its job. Once the bottoms are deeply caramelized and brown, give them a toss and let the other side sear.
Step 5: The Flavor Phase
Once the mushrooms are beautifully browned and slightly crispy on the edges, turn the heat down to medium-low. This is when you build your flavor profile.
If you add minced garlic too early, it will scorch and turn acrid. Add your aromatics now, during the last minute of cooking, to prevent garlic from burning while still releasing its pungent oils into the fat. Toss in a minced shallot or two cloves of smashed garlic.
Next, deglaze the pan. A splash of dry white wine, a dash of soy sauce, or a spoonful of balsamic vinegar will lift all those incredible browned bits (the fond) off the bottom of the skillet and coat the mushrooms.
Finally, take the pan off the heat entirely. You can mount the remaining sauce by whisking in cold butter to create a glossy, emulsified glaze. Toss in a handful of fresh chopped parsley or thyme. Be gentle with your herbs; aggressively chopping them with a dull blade will end up bruising your fresh delicate herbs, causing them to turn black and lose their vibrant flavor. Use a razor-sharp knife and slice through them cleanly.
And always, always finish with a little acid. A squeeze of fresh lemon juice right before serving will brighten the earthy, heavy umami notes of the mushrooms and bring the entire dish into perfect balance.
Common Rookie Mistakes and Troubleshooting
Even with the foolproof water-first method, there are a few pitfalls that can trip up a weekend hobbyist. Let’s troubleshoot the most common errors so you can navigate your kitchen like a seasoned pro.
Mistake 1: Crowding the Pan During the Sear
While the water-first method is much more forgiving of a crowded pan during the initial boiling phase, you still need surface area for the searing phase. If you have two pounds of mushrooms stacked three inches high in a tiny 8-inch skillet, the water will take an eternity to evaporate. Worse, once you add the oil, the mushrooms will just steam each other because there isn’t enough contact with the hot metal to create a crust.
If you are cooking a massive batch for a dinner party, use your largest 12-inch or 14-inch skillet, or cook them in two batches. Patience yields caramelization; impatience yields mush.
Mistake 2: Using the Wrong Fat
Extra virgin olive oil is a beautiful, delicate ingredient. It is perfect for drizzling over a finished dish or making a vinaigrette. It is not ideal for high-heat searing. Its smoke point is relatively low, and the intense heat required to brown mushrooms will destroy its nuanced flavors, leaving behind a bitter, smoky residue.
For the searing phase, use clarified butter (ghee), beef tallow, duck fat, or a neutral oil with a high smoke point. Save your fancy finishing oils for the very end, off the heat.
Mistake 3: Dulling Your Tools on the Prep
This isn’t strictly a cooking mistake, but it drives me absolutely crazy. Preparing mushrooms requires a lot of slicing. If you are using a cheap glass cutting board or a rigid bamboo board, you are destroying your knife’s edge with every single chop. The silica in bamboo is notoriously hard on steel. Do yourself a favor and ditch the bamboo cutting board in favor of a soft end-grain wood or a high-quality rubberized board.
Furthermore, once you’ve sliced your mountain of mushrooms, do not scrape the sharp edge of your knife across the board to gather them up! This rolls the microscopic edge of the blade. To keep your knives razor sharp, you should always flip the knife over and use the spine, or better yet, get in the habit of scooping ingredients off the board with a stainless steel bench scraper. It costs five dollars and will save you hours of sharpening.
The Sassy Sous-Chef’s Stance on Toxic Gear
I cannot write a masterclass on high-heat stovetop cooking without addressing the elephant in the room: your cookware.
If you look in your cabinets and see a graveyard of scratched, peeling, lightweight non-stick pans, we need to have an intervention. I have zero patience for toxic kitchen gear. When you heat cheap non-stick coatings (like traditional Teflon) past 500°F (260°C)—a temperature easily reached when searing mushrooms or a steak—the coating begins to break down and release toxic fumes. Furthermore, those little black flakes of mystery metal and synthetic polymers that peel off into your food are not a secret seasoning blend. They are garbage.
You do not need a non-stick pan to cook mushrooms. You need a pan that can take a beating, hold a massive amount of heat, and last a lifetime.
Invest in a heavy-duty carbon steel skillet. It requires a bit of seasoning, but once it builds a natural polymerized patina, it is as slick as any chemical coating, and it will outlive you. Alternatively, a classic cast iron pan is a workhorse that excels at searing. Yes, they require a tiny bit of maintenance, but scrubbing your cast iron skillet with a chainmail pad and hot water takes thirty seconds. Stop buying disposable cookware. Buy good, safe, heavy metal, and learn how to use it. Your food will taste exponentially better, and you won’t be ingesting peeling plastic.
Elevating the Humble Shroom: Flavor Pairings
Once you master the water-first searing technique, the humble mushroom becomes a blank canvas for extraordinary flavor profiles. Because they are so rich in glutamates (the amino acids responsible for umami), they pair beautifully with other umami-rich ingredients.
- The Classic French: Butter, shallots, garlic, fresh thyme, and a splash of cognac or dry sherry. Finish with heavy cream for a decadent pan sauce.
- The Asian-Inspired Umami Bomb: Sear in avocado oil. Deglaze with a mixture of soy sauce, a dash of toasted sesame oil, minced ginger, and a splash of rice vinegar. Garnish with toasted sesame seeds and thinly sliced scallions.
- The Earthy Italian: Sear in olive oil (a refined one for heat). Toss with minced rosemary, a pinch of red pepper flakes, and deglaze with a robust red wine. Finish with a heavy grating of aged Parmigiano-Reggiano.
Reclaim Your Kitchen
When your food fails, it is rarely a lack of talent; it is usually a lack of proper technique. The old-school method of throwing raw, spongy mushrooms into hot oil was always doomed to fail. It defied the basic biology of the ingredient.
By understanding the science of chitin and the sponge-like nature of fungi, you can take total control of your skillet. The water-first method might feel weird the first time you do it. You might stare at that simmering puddle of gray water and think, “The Sassy Sous-Chef has finally lost her mind.” But trust the process. Wait for that water to evaporate. Wait for that aggressive sizzle. Add your fat, leave them alone, and watch as they transform into the most deeply caramelized, intensely flavorful mushrooms you have ever eaten.
You don’t need a culinary degree to cook like a pro. You just need to know when to break the rules. Now, grab a skillet, turn on the stove, and go make something mind-blowing. You’ve got this.






