
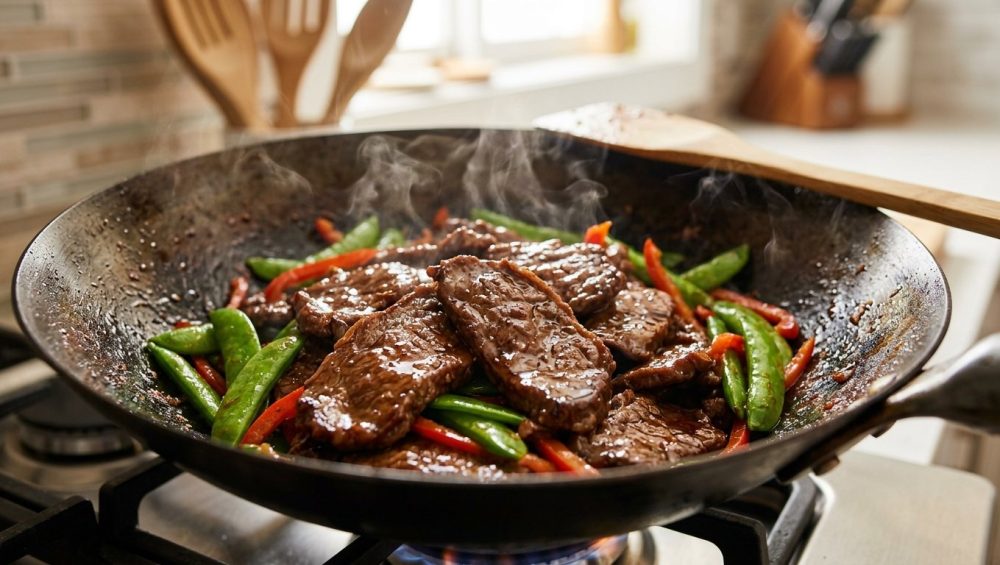
Listen, we’ve all been there. It is a random Tuesday night. You are exhausted from a long day of pretending to care about spreadsheets, but you have convinced yourself that ordering takeout for the third time this week is a personal failure. So, you dutifully pull a package of flank steak from the fridge, slice it up, toss it into a pan with some broccoli and a splash of soy sauce, and hope for the best. Fast forward twenty minutes, and you are aggressively chewing on a piece of grey, rubbery beef that possesses the structural integrity of a radial tire.
Why does the beef and broccoli from that tiny, unassuming takeout joint down the street melt in your mouth, while your homemade version requires a strong jaw and a whole lot of misplaced optimism?
It is not because the line cooks at your local restaurant possess a secret culinary degree, and it is certainly not because they are quietly buying premium Wagyu beef for a nine-dollar lunch special. It is because they know a fundamental, science-backed secret that transforms cheap, tough cuts of meat into tender, silky perfection. It is a technique called velveting, and today, we are going to master the easiest, most accessible version of it: the baking soda trick.
If you want to stop serving your family stir-fries that double as jaw-strengthening exercises, pull up a chair. Grab a glass of wine. We are going to dive deep into the food chemistry that will instantly elevate your cooking, because when discussing fast weeknight dinners, time is money, and we do not have time for bad food.
The Chewy Meat Epidemic: Why Your Stir-Fry Currently Sucks
Before we can fix the problem, we need to brutally diagnose it. Why does stir-fry meat turn out so aggressively bad in a home kitchen?
When raw meat hits a hot pan, a violent biological reaction occurs. Muscle fibers—specifically the proteins actin and myosin—react to the sudden introduction of high heat by rapidly contracting. Imagine wringing out a wet sponge; that is exactly what your steak is doing to its own internal moisture. As the protein fibers seize up and tighten, they violently squeeze out the water trapped inside them.
This is why, when you dump a pound of cold, sliced beef into a skillet, you almost immediately see a massive puddle of grey, murky liquid pooling at the bottom of the pan. Your meat is no longer searing; it is boiling in its own expelled juices. The result is a double tragedy: the meat becomes hopelessly dry because all the moisture has been forced out, and it becomes incredibly tough because the protein fibers are now tightly bound together in a dense, tangled matrix.
Furthermore, if you are hacking away at that meat with a dull knife, you are tearing and mangling the muscle fibers rather than slicing them cleanly, which only exacerbates the moisture loss and chewy texture.
Home cooks usually try to solve this by marinating the meat for hours in acidic concoctions of vinegar, citrus, or pineapple juice. While acid can break down proteins, it often turns the exterior of the meat into a powdery, mushy mess while leaving the interior completely tough. We do not want mushy meat. We want tender, silky, structurally sound meat that holds up to a blazing hot wok. That is where velveting comes in.
What Exactly is Velveting?
Velveting is not some viral internet “hack” invented by a teenager on social media. It is a foundational, centuries-old Chinese culinary process rooted in protein denaturation kinetics and controlled Maillard inhibition.
Historically, this technique was developed to make the most out of economical, highly active muscle cuts—think beef chuck, pork shoulder, or older poultry—which were notoriously tough. By treating the meat before it ever touched the heat, cooks could artificially manipulate the texture, creating a smooth, “velvety” mouthfeel that gave the technique its name.
In traditional restaurant settings, velveting often involves coating the meat in a mixture of egg whites, cornstarch, rice wine, and salt, allowing it to rest, and then briefly passing it through a bath of warm oil (or sometimes boiling water) to set the starch coating before the actual stir-frying begins. This creates a protective hydrocolloid gel barrier around the meat, shielding the delicate proteins from the harsh, direct radiant heat of the wok.
However, dealing with egg whites and vats of warm oil on a Tuesday night when you just want to get dinner on the table is a massive hassle. Luckily, there is a secondary velveting method that requires zero extra oil, no egg whites, and uses an ingredient you already have sitting in the back of your pantry: baking soda.
The Science of Sodium Bicarbonate
I promised you we wouldn’t use pretentious chef-speak, but we do need to put on our safety goggles for a minute and talk about food physics, because seeing exactly how baking soda transforms cheap beef is basically magic.
Baking soda, scientifically known as sodium bicarbonate (NaHCO₃), is an alkaline agent. Meat is naturally slightly acidic, typically resting at a pH level between 5.4 and 5.8. When you introduce baking soda to the surface of sliced meat, it rapidly aggressively raises the pH level, shooting it up to around 8.0 to 8.5 within a matter of minutes.
Why does this matter? Because proteins are highly sensitive to their pH environment. When the environment becomes highly alkaline, the actin and myosin filaments inside the meat gain an increased negative charge density. In simple terms: they become magnetically opposed to one another. Instead of clumping together and contracting tightly when exposed to heat, the proteins actively repel each other.
Because the proteins refuse to bind tightly, they physically cannot squeeze the water out of the muscle fibers. The meat retains its moisture. In fact, scientific testing has shown that this alkaline shift can actually increase the water-holding capacity of the meat by 12 to 18 percent.
Additionally, the alkalinity triggers a process called base-catalyzed hydrolysis. This gently breaks down the peptide bonds on the surface of the meat, physically softening the tough connective tissues without turning the meat into mush (provided you don’t leave it on too long).
The result? When you throw baking-soda-treated meat into a hot pan, it sears beautifully, the inside stays incredibly juicy, and the texture is so tender you could practically cut it with a spoon.
The Step-by-Step Baking Soda Masterclass
Knowing the science is great, but executing it flawlessly is what separates the weekend hobbyist from the home-kitchen hero. Velveting with baking soda is incredibly easy, but it requires precision. This is not a scenario where “eyeballing it” is going to work. If you mess up the ratios or skip a step, you will ruin your dinner. Follow these steps religiously.
Step 1: The Cut (Geometry Matters)
Baking soda velveting is a surface treatment. It only penetrates a few millimeters into the meat. Therefore, this trick will absolutely not work on a thick, two-inch ribeye steak or a massive pork roast. It is designed specifically for thin slices of meat.
First, identify the grain of the meat—the direction in which the muscle fibers are running. You must slice against the grain. Slicing against the grain physically shortens the muscle fibers, doing half the tenderizing work for you before the baking soda even touches the cutting board. Aim for slices that are no thicker than 1/4 inch.
Step 2: The Alkaline Soak (Ratios and Timing)
Place your thinly sliced meat into a bowl. Now, for the golden ratio: you need exactly 3/4 to 1 teaspoon of baking soda per one pound of meat.
Do not use a heaping teaspoon. Do not aggressively dump the box into the bowl. Measure it. If you use too much, the meat will chemically degrade into a disturbing, spongy paste.
Sprinkle the baking soda evenly over the meat. Add about one to two tablespoons of water to the bowl. The water acts as a carrier, helping to dissolve the baking soda and distribute it evenly across every surface of the meat. Massage the mixture into the meat with your hands for about thirty seconds, ensuring every single slice is coated.
Now, walk away. Let the meat sit at room temperature for 15 to 30 minutes. Do not exceed 45 minutes. If you leave it marinating in baking soda for hours, you will completely destroy the structural integrity of the protein, and it will turn into mush when you cook it.
Step 3: The Crucial Rinse (Skip This and Eat Soap)
This is the most critical step in the entire process, and shockingly, it is the one most people forget. One of the most common beginner cooking mistakes is leaving the baking soda on the meat and throwing it directly into the pan.
Baking soda tastes terrible. It is highly alkaline, which means it tastes aggressively metallic, soapy, and bitter. If you cook the meat with the baking soda still on it, your entire stir-fry will taste like a battery.
After the 15 to 30 minutes are up, transfer the meat to a colander and rinse it thoroughly under cold running water. Use your hands to toss the meat around under the stream of water, ensuring you wash away all the residual sodium bicarbonate. The chemical reaction has already happened; the proteins have already been altered. You no longer need the baking soda on the surface.
Step 4: The Pat Down (Dry Meat Browns, Wet Meat Steams)
After rinsing, your meat is soaking wet. If you throw wet meat into a hot pan with oil, the temperature of the pan will immediately plummet, the oil will splatter violently, and the meat will steam instead of searing. The Maillard reaction—the chemical process that causes beautiful, savory browning—can only occur at temperatures well above the boiling point of water. Moisture is the enemy of browning.
You must pat the meat completely dry with paper towels before it hits the heat. Lay out a few sheets, spread the meat out, and press down firmly to absorb as much surface moisture as humanly possible.
Once the meat is dry, you can proceed to marinate it in your soy sauce, garlic, ginger, and sesame oil, or you can throw it directly into the hot pan.
Baking Soda vs. Cornstarch and Egg Whites
You might be wondering why we are bothering with baking soda when traditional restaurants often use the egg white and cornstarch method. Let’s break down the difference.
The traditional “oil velveting” method (egg white, cornstarch, rice wine) works by creating a physical barrier. The egg white provides alkalinity (which slightly tenderizes), and the cornstarch hydrates to form a gelatinous, flexible film around the meat. When passed through hot oil, this film sets, locking the juices inside and shielding the meat from the intense heat of the wok. It is incredibly effective, but it requires separating eggs, dealing with messy starch batters, and using a significant amount of cooking oil just for the prep stage.
The “water velveting” method (the baking soda trick) works via chemical alteration rather than physical shielding. It directly changes the pH of the meat to prevent protein contraction. It is vastly superior for the home cook because it requires zero extra oil, creates virtually no mess, and relies on an ingredient that costs about a dollar a box. While egg white velveting might give you a slightly thicker, more sauce-clinging exterior, baking soda velveting guarantees tender, melt-in-your-mouth meat with a fraction of the effort.
Tailoring the Technique to Different Proteins
While the core science remains the same, different meats react slightly differently to the alkaline soak. Here is how to handle your proteins.
Beef (The Prime Candidate)
Beef is the undisputed king of the baking soda trick. Cheap cuts like chuck, flank, skirt, or topside steak are naturally loaded with tough muscle fibers. Slicing them thin and treating them with baking soda for 20 to 30 minutes will yield results so tender you will swear you are eating filet mignon. This is the exact secret behind the impossibly soft Mongolian Beef at your favorite takeout spot.
Chicken Breast (The Dryness Culprit)
Chicken breast is notoriously unforgiving. Because it is so lean, overcooking it by even two minutes results in a chalky, stringy disaster. Velveting chicken breast with baking soda gives you a massive buffer against overcooking. Because the proteins are prevented from contracting and squeezing out their moisture, the chicken stays plump and juicy even if you leave it in the pan a minute too long. For chicken, a shorter soak is better—aim for 15 to 20 minutes max.
Pork (The Unsung Hero)
Pork loin and pork shoulder chops can easily dry out in a high-heat stir-fry. Slicing pork into thin strips and hitting it with baking soda for 20 minutes transforms it into tender, bouncy bites that pair perfectly with sweet and sour sauces or spicy garlic noodles.
What NOT to Velvet
Do not use this trick on expensive, naturally tender cuts of meat. If you apply baking soda to a premium ribeye, a beef tenderloin, or a high-grade pork chop, you will ruin it. Those cuts already lack tough connective tissue, and the alkaline treatment will turn them to mush. Furthermore, do not use baking soda on delicate seafood like flaky white fish; the flesh is too fragile and will disintegrate. (Though, a tiny pinch of baking soda on shrimp can actually give them a wonderful, snappy, bouncy texture!).
The Gear Check: Ditch the Toxic Pans
I cannot write a masterclass on high-heat cooking without addressing the elephant in the kitchen. If you are going to execute a proper stir-fry, you have to throw away your cheap, scratched-up, peeling non-stick skillets.
I have zero tolerance for toxic kitchen gear in my house. Traditional non-stick coatings (like Teflon) are not designed for the blazing high heat required to sear velveted meat. When you heat cheap non-stick pans past 500°F (which happens very quickly on a gas stove), the chemical coating begins to break down, releasing invisible, toxic fumes that are literally lethal to pet birds and can cause flu-like symptoms in humans. Furthermore, when that coating inevitably flakes off into your food, you are eating mystery microplastics. We are better than that.
To get restaurant-quality results, fire up your carbon steel wok to get that perfect sear. Carbon steel is lightweight, heats up incredibly fast, and when properly seasoned with polymerized oil, becomes naturally non-stick without any toxic chemicals. It is the only tool professional wok chefs use.
If you do not have a wok, a heavy-bottomed stainless steel skillet is your next best friend. Stainless steel has fantastic thermal mass, meaning it won’t drop in temperature the second you add your meat. If you are using stainless steel pans instead of a wok, you just need to ensure the pan is properly preheated to prevent sticking.
How do you know when a stainless pan is ready? You can always rely on the water drop test to ensure the surface has reached the Leidenfrost point. Simply flick a few drops of water into the pan; if they instantly form into tight little beads of mercury and glide across the surface without evaporating, your pan is perfectly hot and ready for oil.
And please, put down the aerosol cooking spray. Those cans are filled with soy lecithin and propellants that burn at low temperatures, baking into a sticky, impossible-to-remove lacquer on your beautiful pans. Just use a bottle of high-smoke-point liquid oil, like avocado, peanut, or grapeseed oil.
Common Velveting Mistakes to Avoid
Even with a foolproof scientific method, things can go wrong if you stop paying attention. Here is a quick troubleshooting guide to ensure your meat turns out perfectly every single time.
1. The Mush Factor (Over-Tenderizing)
If your meat turns out feeling spongy, powdery, or unnaturally soft—almost like it has been pre-chewed—you overdid it. You either used way too much baking soda (stick to 1 teaspoon per pound), or you left the meat marinating for an hour while you got distracted watching television. Set a timer. 15 to 30 minutes is the sweet spot.
2. The Metallic Taste (Failing to Rinse)
We covered this, but it bears repeating because it is the number one complaint from people trying this technique for the first time. If your beef tastes like a mouthful of pennies or soap, you did not wash the baking soda off thoroughly enough. Rinse it under cold water for a full 30 seconds, tossing the meat vigorously.
3. The Steaming Disaster (Failing to Dry)
If you rinse the meat and immediately throw it into the wok, you are going to drop the temperature of the oil, create a massive plume of steam, and boil your beef. Wet meat cannot sear. Patting the meat dry is non-negotiable.
4. Overcrowding the Pan
Even if you velvet your meat perfectly, you can still ruin the stir-fry by dumping two pounds of cold beef into a standard 10-inch skillet all at once. The pan will lose its heat instantly. Cook the meat in batches. Spread it out in a single layer, let it sear undisturbed for a minute to develop a crust, then toss it. Remove the cooked meat to a plate, let the pan heat back up, and add the next batch.
5. Using Ground Meat Incorrectly
Can you use baking soda on ground beef? Yes, absolutely. It works wonders for keeping meatballs and burger patties tender and preventing them from shrinking into dense little hockey pucks. However, you cannot rinse ground beef. Therefore, the ratio changes drastically. If you are adding baking soda to ground meat, only use 1/4 teaspoon per pound of meat, dissolved in a tablespoon of water, and mix it gently into the beef. Because the amount is so small, you won’t taste it, and you won’t need to rinse it.
The Maillard Reaction: Bringing It All Together
Once you have velveted, rinsed, and dried your meat, the actual cooking process is a breeze. Because the proteins have been altered to retain moisture, you can push the heat higher than you normally would without fear of drying the meat out.
Get your carbon steel wok or stainless skillet smoking hot. Add a high-smoke-point oil. Drop your dry, velveted meat into the pan in a single layer. Leave it alone! Do not immediately start stirring. Let the meat sit in contact with the hot metal for 60 to 90 seconds. This allows the Maillard reaction to occur—the browning of amino acids and reducing sugars that creates deep, complex, savory flavors.
Once you have a great sear on one side, give it a quick toss, cook for another 30 seconds, and immediately remove the meat from the pan. Then, you can toss in your aromatics (garlic, ginger, scallions), stir-fry your vegetables, pour in your sauce, and finally, reintroduce the velveted meat at the very last second just to coat it in the glossy sauce.
Conclusion
Cooking restaurant-quality food at home does not require a massive budget, a professional kitchen, or a culinary degree. It requires an understanding of basic food science and the willingness to take an extra fifteen minutes to treat your ingredients with respect.
The baking soda velveting trick is the ultimate equalizer for the home cook. It takes cheap, stubborn cuts of meat and forces them into submission, yielding incredibly tender, juicy, and flavorful results that will make you question why you ever settled for mediocre takeout in the first place.
So, the next time you are staring down a tough piece of flank steak on a busy weeknight, don’t panic. Slice it thin, hit it with a little sodium bicarbonate, set a timer, and let science do the heavy lifting. Your jaw—and your dinner guests—will thank you. Now get off the internet, go prep your wok, and start cooking like you mean it.






