
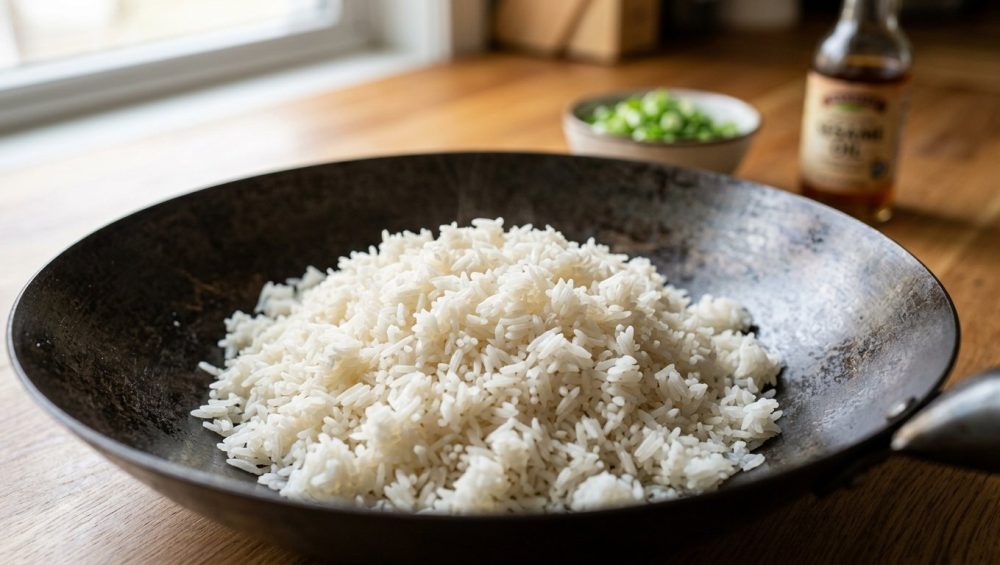
The Universal Weeknight Tragedy
We have all been there. It is a Tuesday night, you are exhausted from back-to-back meetings, and you are aggressively craving takeout. But instead of paying a delivery fee that somehow costs more than the meal itself, you decide to be a responsible, budget-conscious adult and whip up a quick batch of stir-fry at home. You steam some fresh jasmine grains, chop up whatever sad, wilting vegetables are lurking in the depths of your crisper drawer, and toss it all into a hot pan, expecting culinary magic.
Ten minutes later, you are not looking at a beautiful, restaurant-quality mound of perfectly separated, oil-kissed grains. You are staring at a gummy, clumpy, steaming pile of starch that looks more like a savory rice pudding than dinner. If you find yourself constantly wondering why your fried rice is always mushy, take a deep breath. You are not alone, and more importantly, it is not your fault. It is just basic chemistry.
I have absolutely zero patience for pretentious chef-speak, but if we want to fix this disaster once and for all, we need to put on our lab coats for a minute. The secret to achieving that distinct, chewy, individual-grain texture you get at your favorite local spot has very little to do with your spatula skills, and absolutely everything to do with how you handle your starches. Understanding exactly how day-old rice changes everything is the ultimate culinary cheat code. It is the dividing line between weekend hobbyists who make sticky messes and empowered home cooks who churn out mind-blowing food.
The Anatomy of a Grain: Amylose vs. Amylopectin
To understand why your dinner is turning into glue, we have to look at what a grain of rice actually is. At its core, rice is a powerhouse of complex carbohydrates, specifically starch. But not all starches behave the same way in the kitchen. Starch is primarily made up of two different types of molecules: amylose and amylopectin.
Amylose is a long, straight, linear molecule. Because of its neat, uniform shape, it does not tangle easily with other molecules. It packs tightly, cooks up firm, and helps grains maintain their distinct shape. Amylopectin, on the other hand, is a highly branched, bushy, chaotic molecule. Because of its sprawling structure, it tangles easily, traps massive amounts of water, and becomes incredibly sticky when heated.
This is why grain selection is your first major hurdle. Short-grain varieties, like Japanese sushi rice or Italian Arborio, are packed to the brim with amylopectin. That is fantastic if you are trying to roll a maki roll or slowly stir a creamy pot of risotto, but it is an absolute nightmare for a wok. If you try to stir-fry short-grain rice, your rice always turns out mushy, regardless of your technique. For the perfect wok-tossed meal, you need long-grain varieties like Jasmine or Basmati. These grains have a much higher amylose content (often hovering around 20-22%), meaning they naturally want to stay separate, fluffy, and dry.
The Water Problem: Why Fresh Rice is a Culinary Saboteur
Even if you buy the perfect bag of premium long-grain Jasmine, you can still ruin it if you do not respect the cooking process. When you boil or steam raw grains, you are initiating a process called starch gelatinization. The heat and the water break down the intermolecular bonds of the starch molecules. The granules absorb the water, swell up to three times their original size, and eventually burst, releasing a sticky gel.
Freshly cooked rice is, for all intents and purposes, a microscopic sponge fully saturated with boiling water. Now, imagine taking a handful of soaking wet sponges and throwing them into a pan of hot oil. What happens?
The surface moisture of those wet grains instantly hits the hot metal and violently evaporates, turning into a massive cloud of steam. Steam is the mortal enemy of frying. Instead of searing the exterior of the grain in oil, you are rapidly dropping the temperature of your pan and essentially boiling the grains a second time. The delicate structure of the swollen starch collapses under the heat and the mechanical action of your spatula, mashing together into a singular, unappetizing paste. You aren’t stir-frying; you are stir-steaming.
Starch Retrogradation: The Magic of the Refrigerator
This brings us to the most critical, non-negotiable step of the entire process: the overnight chill. When you take that freshly cooked, gelatinized rice and place it in the refrigerator (ideally at temperatures between 34–38°F), a fascinating molecular transformation occurs.
As the temperature drops, the starch molecules—specifically those long, straight amylose chains—begin to slow down, realign, and recrystallize into a rigid, ordered structure. In the food science world, this is known as starch retrogradation. We don’t need a PhD to understand it, but scientists utilizing X-ray diffraction (XRD) and scanning electron microscopy (SEM) have actually mapped this out, proving that overnight storage fundamentally increases the crystalline structure of the grain.
As these molecules pack tightly together to form crystals, they literally squeeze out the bound water trapped inside the grain. This forces the moisture to the surface, where the cold, dry air of your refrigerator evaporates it. According to hydration assays, this overnight chilling process can reduce the surface moisture of the rice by a staggering 22% to 27%.
The result? The grains become incredibly firm, slightly brittle, and bone-dry on the outside. When these chilled, retrograded grains hit a screaming-hot wok, there is no excess surface water to create steam. The oil coats the dry exterior of each individual grain, creating a barrier that prevents them from sticking together. The intense heat then rapidly rehydrates and softens the interior of the grain, giving you that perfect textural contrast: a slightly toasted, chewy exterior with a tender, fluffy center.
The Unexpected Health Bonus: Resistant Starch
As if achieving restaurant-quality texture wasn’t enough of a reward, starch retrogradation also comes with a massive nutritional perk. When those amylose molecules crystallize in the fridge, a portion of them transform into what is known as “resistant starch”.
Resistant starch gets its name because it literally resists digestion in your small intestine. Instead of being rapidly broken down into glucose and spiked into your bloodstream, it travels intact to your large intestine, where it acts like dietary fiber. It feeds your beneficial gut bacteria, producing short-chain fatty acids that support a healthy microbiome.
Studies have shown that cooling and gently reheating rice can lower its glycemic index by 10% to 15%, resulting in a significantly smaller post-meal blood sugar spike compared to eating freshly cooked rice. So, by simply having the patience to put your food in the fridge overnight, science is basically handing you a free pass to enjoy your favorite carbohydrates with less metabolic guilt. You’re welcome.
The Prep: Setting Yourself Up for Success
You cannot build a sturdy house on a crumbling foundation, and you cannot make perfect takeout at home if you botch the initial prep. Before you even think about turning on your stove, you have to wash your grains.
I know it sounds tedious, but skipping this step is a rookie mistake. When rice is milled and transported, the grains rub against each other, creating a fine dust of pure surface starch. If you do not wash this dust away, it will instantly gelatinize in your rice cooker, acting like a liquid cement that binds the grains together.
You absolutely need a Japanese wash bowl—or at the very least, a fine-mesh strainer—to properly agitate the grains under cold running water. Use your fingers to gently swirl the rice, pouring off the cloudy, milky water. Repeat this process three to four times until the water runs almost completely clear. The magic of a quick rinse is the cheapest, easiest insurance policy against a gummy dinner.
Once washed, cook the rice with slightly less water than you normally would. If a standard ratio is 1 cup of rice to 1.5 cups of water, drop the water down to 1.25 cups. You want the final product to be slightly al dente, as it will absorb soy sauce and oil later in the wok.
Weekday Shortcuts for the Impatient Home Cook
My core philosophy is that time is money, especially on a Wednesday night when you have exactly forty-five minutes to get dinner on the table before you collapse on the couch. I understand that meal-prepping 24 hours in advance isn’t always realistic.
If you forgot to make your rice yesterday, do not panic. You can still master simple weeknight dinners by artificially accelerating the evaporation process.
The Sheet Pan Fan Method:
If you have about an hour, take your freshly cooked, steaming hot rice and spread it out in a very thin, even layer on a large, bare aluminum baking sheet. Place the sheet pan directly in front of a desk fan or under a strong kitchen exhaust hood. The rapid airflow will aggressively evaporate the surface moisture as the rice cools. It won’t give you the full crystalline structure of retrograded starch, but it will dry the exterior enough to prevent a sticky disaster in the wok.
The Freezer Flash-Chill:
If you are incredibly pressed for time, spread the hot rice onto a sheet pan and place it uncovered in your freezer for exactly 15 to 20 minutes. The intense cold will rapidly chill the exterior of the grains and halt the steaming process. However, you must set a timer! If you leave it in too long and the rice actually freezes solid, you will ruin it. Freezing causes sharp intracellular ice crystals to form, which puncture the delicate cell walls of the starch granules. When you eventually thaw and cook frozen rice, those punctured walls leak soluble amylose, resulting in a tacky, uneven texture that browns prematurely and turns into mush. Flash-chill it, do not freeze it.
The “No-Go” Rule: Why Your Pan is Poisoning Your Food
Let’s have a brutally honest conversation about your cookware. If you are trying to execute high-heat wok techniques in a scratched, peeling, $15 non-stick Teflon pan you bought at a big-box store five years ago, you need to throw it in the garbage immediately. I am militant about this.
Proper stir-frying requires blistering, aggressive heat. We are talking surface temperatures well over 500°F. Modern synthetic non-stick coatings, primarily made of polytetrafluoroethylene (PTFE, commonly known as Teflon), are fundamentally incapable of safely handling this kind of thermal stress.
When a Teflon pan is heated above 500°F (260°C), the chemical coating begins to rapidly decompose. As it breaks down, it off-gasses a cocktail of toxic fluoride fumes and microscopic plastic particles directly into the air you are breathing. Inhaling these fumes causes a very real, documented medical condition called “polymer fume fever,” commonly referred to as the “Teflon Flu”. Symptoms include severe headaches, sudden fever, chills, chest tightness, and muscle aches that hit you 4 to 10 hours after cooking. Furthermore, these invisible toxic fumes are so potent that they are famously lethal to pet birds, whose sensitive respiratory systems shut down almost instantly upon exposure.
I am deeply passionate about banishing toxic kitchen gear from the homes of everyday cooks. You do not need a chemical coating to prevent sticking; you need a carbon steel wok.
Carbon steel is the undisputed king of the restaurant kitchen. It is a highly conductive, incredibly durable alloy (usually containing 98-99% iron and 1-2% carbon) that can effortlessly withstand temperatures exceeding 600°F without warping or releasing a single toxic fume. Better yet, when you heat oil in a carbon steel wok, the fat molecules undergo a process called polymerization, bonding with the metal to create a slick, black, naturally non-stick patina. It is 100% safe, lasts a lifetime, and only gets better the more you use it.
And while we are cleaning out your cabinets, throw away your aerosol cooking sprays. The chemical propellants and emulsifiers in those pressurized cans cannot withstand high heat. They degrade instantly and bake into the microscopic pores of your cookware, leaving behind a sticky, un-washable resin that destroys your natural seasoning. Aerosol cooking spray is the enemy of a well-maintained kitchen. Use a squeeze bottle of high-smoke-point liquid oil (like avocado, peanut, or rice bran oil) instead.
The Masterclass: Step-by-Step Wok Technique
You have your day-old, properly retrograded grains. You have a safe, heavy-duty carbon steel wok. Now, it is time to execute. Follow these steps precisely, and you will produce flawless results every single time.
Step 1: The Longyau Method
This is an ancient, fundamental technique used in professional kitchens to ensure food never sticks to the metal. Place your clean, dry carbon steel wok over the highest heat your stove can produce. Let it sit until the metal begins to lightly smoke. Turn off the heat entirely. Add a generous splash of cold, high-smoke-point oil and carefully swirl it around the entire surface of the wok. The cold oil rapidly fills the expanding microscopic pores of the hot steel, creating a temporary, flawless non-stick barrier. Pour out the excess oil, turn the heat back on to medium-high, and add two tablespoons of fresh cooking oil.
Step 2: The Aromatics
Flavor is built in layers. Toss in your minced aromatics—usually a combination of garlic, fresh ginger, and the white parts of scallions. Stir them rapidly for about 10 to 15 seconds. You want them to release their essential oils and perfume the cooking fat, but you absolutely do not want them to burn. Burnt garlic will turn the entire dish bitter.
Step 3: The Egg
Push your fragrant aromatics up the sloping side of the wok, where the metal is slightly cooler. Crack one or two thoroughly beaten eggs directly into the pool of hot oil at the bottom. The egg should bubble and puff up immediately. Use your spatula to aggressively scramble it, breaking it into small, uniform curds.
Step 4: The Rice
Turn your burner up to maximum heat. Add your chilled, day-old rice directly into the wok. Using the back of your metal spatula, firmly press down on the rice to break up any clumps that formed in the fridge. Do not use a chopping motion, as this will break the brittle grains in half; use a pressing and folding motion. Toss the rice constantly, ensuring every single grain gets coated in the aromatic oil and toasted against the blazing hot steel.
Step 5: The Maillard Reaction (Seasoning)
Here is where most home cooks fail. Do not pour your soy sauce directly onto the mound of rice. Instead, push the rice to the center of the wok and drizzle your soy sauce in a circle around the bare, screaming-hot upper edges of the metal.
As the soy sauce hits the hot steel, it instantly boils, reducing and caramelizing in a fraction of a second. This triggers the Maillard reaction, transforming the harsh, salty bite of raw soy sauce into a complex, smoky, deeply savory glaze before it even touches the food. Toss the rice through this caramelized ring to coat it evenly. Finish with a pinch of sugar (to balance the salt), a dash of white pepper powder, and a sprinkle of MSG. (Yes, MSG is safe, it is delicious, and it is the reason restaurant food tastes better than yours. Get over the stigma and use it.)
Fold in the green parts of your scallions, give it one final aggressive toss, and immediately remove it from the heat.
Troubleshooting: Fixing Your Wok Woes
Even with the best preparation, things can occasionally go sideways. If you find yourself ruining your dinners despite following the steps, you are likely committing one of these cardinal sins:
Mistake 1: Overcrowding the Pan
Your standard home stove produces a fraction of the BTUs (heat output) of a commercial restaurant burner. If you try to cook four cups of cold rice at once, the sheer thermal mass of the food will crash the temperature of your wok. The metal will cool down, the oil will stop sizzling, and the rice will begin to steam in its own juices. Cook in small batches—no more than two cups of rice at a time.
Mistake 2: Adding Wet Ingredients Too Early
If you want to add proteins (like chicken or shrimp) or vegetables (like mushrooms or bok choy), you must cook them separately first. Vegetables release massive amounts of water as their cell walls break down under heat. If you cook raw vegetables alongside your rice, that water will pool at the bottom of the wok and turn your perfectly retrograded grains back into mush. Sear your proteins and veggies first, remove them to a plate, fry your rice, and then fold the cooked ingredients back in at the very last second.
Mistake 3: Drowning it in Liquid
Fried rice should derive its color and flavor from the aggressive searing of the wok, not from drowning in a half-cup of soy sauce. If your rice looks pale, do not keep adding liquid sauces. You will ruin the texture. Rely on proper heat, a dash of dark soy sauce (which provides rich color with less moisture), and dry seasonings like salt, pepper, and MSG.
The Final Word
You do not need to attend a prestigious culinary academy to make phenomenal, mind-blowing food in your own kitchen. You just need to respect the chemistry of your ingredients, invest in safe, durable tools that can actually do the job, and cultivate a little bit of patience.
By understanding the science of starch retrogradation, utilizing the power of your refrigerator, and treating your wok with the respect it deserves, you can officially banish gummy, depressing weeknight dinners to the past. So, wash your grains, throw away that toxic Teflon pan, and let the fridge do the heavy lifting. Your takeout delivery driver might miss you, but your tastebuds certainly won’t.






