
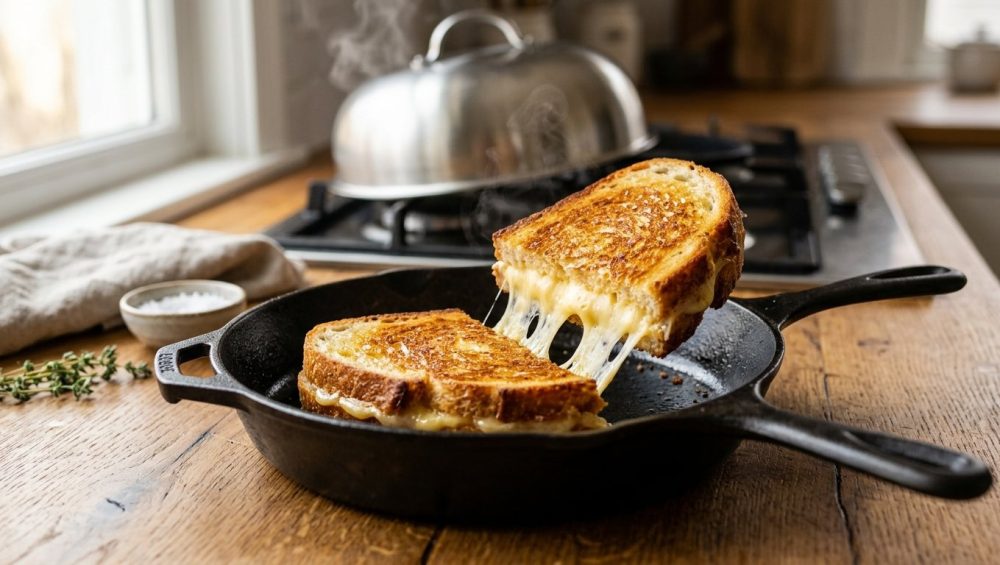
The Grilled Cheese Conundrum: Why You Keep Serving Charcoal
Let’s be brutally honest for a second. We have all been there. You invite a few friends over for a casual weekend get-together. You want to keep things relaxed, so you decide to make grilled cheese sandwiches. It sounds foolproof, right? It’s just bread, butter, and cheese. But then reality hits. You are standing over the stove, sweating through your favorite shirt, frantically flipping sandwiches while your guests politely sip wine in the other room. Half of the sandwiches are burnt to a crisp on the outside, yet the cheese in the middle is as cold and solid as a brick. You are stressed, your kitchen is a smoke-filled disaster zone, and you are left wondering how a meal meant for a five-year-old managed to defeat you.
Listen to me, darling: you do not need a culinary degree from Le Cordon Bleu to make a mind-blowing sandwich, and you certainly don’t need to spend your entire weekend stressing over the stove. The modern pressure to host a flawless dinner party has gotten completely out of hand. Recent industry data shows that a typical dinner party for a small group can easily spiral into a massive expense, costing anywhere from $60 for a budget affair to upwards of $940 if you go all out on expensive cuts of meat and fancy decor. We are putting a stop to that right now.
A DIY grilled cheese bar is the ultimate mindful, budget-friendly, and highly customizable party format. It allows your guests to get creative, and it allows you to actually enjoy the wine you bought. But to pull this off without batch-cooking failures, we need to talk about the science of what is actually happening in your skillet. We need to address the thermal bottleneck that is ruining your food.
The Thermodynamics of a Perfect Melt (No Culinary Degree Required)
I have zero patience for pretentious chef-speak, but if you want to stop burning your dinners, you need to understand basic kitchen physics. The fundamental problem with a grilled cheese sandwich is a massive conflict in temperature requirements. You are trying to accomplish two entirely different chemical reactions at the exact same time, and they operate on completely different thermal schedules.
The Maillard Reaction Explained
First, let’s talk about the bread. When you place a slice of bread into a hot skillet, you are triggering the Maillard reaction. This is the beautiful, complex chemical process where amino acids and reducing sugars collide under high heat to create hundreds of new flavor compounds and that gorgeous golden-brown crust. Here is the catch: the Maillard reaction does not even begin to kick into high gear until the surface temperature reaches between 280°F and 330°F.
If your pan is too cold, the bread just sits there, soaking up fat like a sad, greasy sponge. If your pan is too hot, the Maillard reaction rapidly accelerates past browning and goes straight into pyrolysis—which is the scientific term for “you just turned your sourdough into charcoal.”
The Science of Cheese Emulsification
Now, let’s look at the inside of the sandwich. Cheese is essentially a delicate emulsion of dairy fat, water, and casein proteins held together by calcium phosphate bonds. For standard melting cheeses like young cheddar or Gruyère, the proteins begin to relax and the fat begins to liquefy at a much lower temperature—usually right around 150°F.
Do you see the bottleneck? Your bread needs to hit 300°F to get crispy and delicious, but your cheese only needs 150°F to melt. Because bread is an incredible thermal insulator (it is literally filled with tiny pockets of air), the heat from the pan takes a painfully long time to travel through the bread and reach the cheese. If you blast the heat to speed things up, the bread burns before the cheese even gets warm. If you cook it low and slow to protect the bread, you are standing at the stove for fifteen minutes per sandwich, and if you push the internal temperature too high for too long, the emulsion breaks. The casein proteins seize up, squeezing out all the moisture, and suddenly your cheese turns greasy and clumpy instead of smooth and gooey.
We have to hack the heat transfer, and it starts with the fat you are using.
The Great Fat Debate: Why Butter is Sabotaging Your Sandwiches
If you learned to cook from your grandmother, you probably slather your bread with softened butter before it hits the pan. I am here to tell you that this is the primary reason your sandwiches are burning. It is time to break the habit.
The Problem with Whole Butter
Whole butter is delicious, but it is a deeply flawed cooking medium for this specific task. Butter is not pure fat; it is composed of about 80% butterfat, 16% water, and 4% milk proteins and solids. When you put buttered bread into a hot skillet, the water quickly evaporates, leaving the delicate milk solids behind. These milk solids have an incredibly low smoke point. They will start to scorch and burn at around 350°F.
Because the Maillard reaction requires temperatures right up against that 330°F threshold, you are playing a dangerous game of thermal chicken. You have a microscopic window of time between perfectly toasted bread and a kitchen filled with acrid black smoke. Furthermore, attempting to spread cold or even room-temperature butter on soft artisan bread usually results in tearing the crumb, destroying the structural integrity of your sandwich before you even start cooking.
The Mayonnaise Miracle
If you want professional-level results in a home kitchen, you need to rely on the secret power of mayonnaise.
Mayonnaise is a stable emulsion of oil, egg yolks (which contain the magical emulsifier lecithin), and an acid like lemon juice or vinegar. Because it is primarily oil-based, standard mayonnaise boasts a significantly higher smoke point than butter, safely reaching up to 450°F before it begins to burn. This gives you a massive thermal buffer. You can apply enough heat to rapidly toast the bread without constantly fearing the smoke detector.
Beyond the smoke point, mayonnaise spreads effortlessly straight out of the refrigerator. This allows you to achieve a perfectly even, edge-to-edge coating on the bread. This uniform coating acts as a flawless conductive layer between the uneven surface of the bread and the flat surface of the skillet, ensuring that every single millimeter of the bread toasts evenly. The egg yolks also contribute to a richer, deeply savory crust that butter simply cannot match. For a stress-free hosting experience, using mayonnaise on the outside of your sandwiches is an absolute, non-negotiable requirement.
Why Your Pan Choice Dictates Your Success
You can have the best artisanal sourdough and the most expensive cave-aged Gruyère in the world, but if you cook it in garbage equipment, you will get garbage results.
The “No-Go” Rule on Toxic Gear
Let’s get this out of the way: I absolutely despise cheap, peeling, scratched-up non-stick pans. If you are still cooking your family’s meals on a mystery-metal skillet where the Teflon coating is actively flaking off into your food, throw it in the trash today. I am entirely uncompromising when it comes to banishing toxic kitchen gear from the home.
Not only are these cheap non-stick coatings a chemical nightmare (many traditional coatings begin to degrade and off-gas toxic fumes when heated past 500°F), but they are also terrible at retaining heat. They are too thin, creating severe hot spots that will scorch the center of your bread while leaving the edges pale and soggy.
The Holy Trinity of Safe Cookware
For a grilled cheese bar, you need pans with substantial thermal mass and excellent heat distribution. You have three superior options:
- Cast Iron: The undeniable king of thermal retention. A heavy cast iron skillet takes a few minutes to preheat, but once it gets to temperature, it stays there. This is vital when you are dropping multiple cold sandwiches into the pan at once, which would normally crash the temperature of a thinner pan.
- Carbon Steel: If cast iron is too heavy for your wrists, a beautifully seasoned carbon steel skillet is your best friend. It offers the same naturally non-stick polymerization as cast iron, but it is lighter, highly responsive to temperature changes, and practically indestructible.
- Multi-Clad Stainless Steel: A heavy-bottomed, fully clad stainless steel pan (featuring an aluminum or copper core sandwiched between layers of steel) provides the most even heat distribution possible. While some home cooks fear sticking, preventing food from sticking is incredibly easy if you properly preheat the pan and rely on the mayonnaise barrier we discussed earlier.
The Steaming Dome Secret: Radiant Heat for the Win
We have solved the bread-burning issue with mayonnaise and proper cookware. Now we must solve the cold-cheese issue. How do we force the cheese to reach 150°F before the bread overcooks?
Breaking the Heat Transfer Bottleneck
Relying solely on conduction (heat transferring directly from the pan, through the bread, to the cheese) is a fool’s errand. Bread is too good of an insulator. We need to introduce convection and radiant heat to attack the cheese from all sides simultaneously.
The Splash of Water Technique
To do this, you must invest in a cheap stainless steel melting dome. (If you don’t have one, a deep metal mixing bowl or a tight-fitting pan lid works in a pinch).
Here is the professional technique that will change your life: Place your assembled sandwich into the preheated skillet. Let the bottom piece of bread toast for about 60 seconds to establish a crust. Then, using a small spoon, drop exactly one teaspoon of water directly onto the exposed surface of the hot skillet—not onto the bread. Immediately slam the melting dome over the sandwich.
Physics takes over instantly. The water hits the hot pan and flashes into steam, expanding in volume by roughly 1,600 times. This superheated steam is trapped by the dome, instantly wrapping the sandwich in a 212°F cloud of thermal energy. The steam rapidly penetrates the exposed edges of the sandwich, melting the cheese in a matter of seconds without making the toasted bread soggy (because the bread’s exterior is protected by the frying mayonnaise). After 15 seconds, remove the dome, flip the sandwich, and repeat. You will achieve a flawless, gooey melt every single time, cutting your total cooking time in half.
Building Your Mindful Grilled Cheese Bar
Now that you have mastered the thermal dynamics, it is time to set up the actual party. A mindful gathering is all about intentionality, organization, and giving your guests the tools to build their own culinary masterpieces.
Bread Selection: Structural Integrity Matters
Your bread is the foundation of the house; if it is weak, the whole thing collapses.
- Sourdough: The undisputed champion. Its sturdy crumb structure holds up to heavy fillings, and the natural tang of the fermentation cuts through the rich fat of the cheese perfectly.
- Shokupan (Japanese Milk Bread): If you want a softer, more nostalgic bite, this slightly sweet, incredibly pillowy bread toasts up like an absolute dream.
- What to Avoid: Stay away from ciabatta or heavily holed artisanal boules. Those giant air pockets might look rustic and beautiful, but they are structural hazards. Hot, molten cheese will leak right through the holes, burning onto the pan and cementing your sandwich to the skillet.
The Cheese Matrix: Mixing Melters and Flavor Bombs
Do not just put out a block of mild cheddar and call it a day. A world-class grilled cheese requires a “Cheese Matrix”—a strategic blend of a moisture-rich melting cheese and a dry, pungent flavor cheese.
- The Melters (The Glue): These cheeses have a high moisture content and a flexible protein structure. They provide the epic cheese pull. Stock your bar with young mild cheddar, Monterey Jack, Fontina, Havarti, or low-moisture mozzarella.
- The Flavor Bombs (The Kick): These are aged, drier cheeses that pack a massive umami punch but refuse to melt smoothly on their own. Think sharp aged cheddar, Parmigiano-Reggiano, Gruyère, sharp provolone, or crumbled blue cheese.
Instruct your guests to build their sandwiches with the “Melters” touching the bread on both sides, and the “Flavor Bombs” tucked safely in the middle.
The Pre-Shredded Trap
I am going to explicitly warn you about the biggest rookie mistake in the dairy aisle: never buy those pre-shredded cheese in bags.
Commercially shredded cheese is coated with anti-caking agents—usually potato starch, cellulose, or natamycin. These powders are designed specifically to absorb moisture and prevent the cheese strands from sticking together in the bag. Guess what happens when you try to melt them? Those exact same starches prevent the cheese proteins from binding together in the pan, resulting in a gritty, grainy, broken texture. Taking the extra five minutes for grating your own cheese from a fresh block is the single easiest way to elevate your food from amateur to expert.
Elevated Fillings and Flavor Pairings
A grilled cheese bar is not complete without an array of sophisticated additions. The key is to balance the heavy, rich dairy fat with acid, sweetness, and crunch.
Sweet, Savory, and Acidic Additions
Set up small, beautiful bowls with the following options:
- The Sweet: Fig jam, hot honey, caramelized onions (cooked low and slow until they are basically candy), or paper-thin slices of Granny Smith apple.
- The Acid: Pickled jalapeños, quick-pickled red onions, kimchi, or a sharp Dijon mustard. The acid cuts through the fat, preventing the sandwich from feeling too heavy on the palate.
- The Savory/Salty: Crispy bacon, thinly sliced prosciutto, or sun-dried tomatoes.
The Architecture of the Sandwich
When hosting, I like to put a small chalkboard on the table explaining the “Architecture of a Perfect Melt” so guests don’t build structurally unsound sandwiches. The rules are simple:
- Bread (mayo applied to the exterior).
- Base Melter Cheese (acts as the moisture barrier so the bread doesn’t get soggy from the fillings).
- Fillings (jam, bacon, pickles).
- Flavor Bomb Cheese.
- Base Melter Cheese (acts as the top glue).
- Bread (mayo applied to the exterior).
Execution Strategy: Hosting Without Losing Your Mind
The whole point of a mindful gathering is that the host actually gets to participate in the gathering. If you are chained to the stove in a panic, you have failed the assignment. Time is money, and efficiency is your best friend.
Station Setup and Flow
Do all of your prep work long before the first guest rings the doorbell. Grate all the cheeses into separate, labeled bowls. Slice the bread. Pre-cook the bacon and caramelize the onions. Arrange everything on a beautiful wooden grazing board or a long kitchen island. Place a small butter knife in a jar of mayonnaise at the start of the line.
Let the guests assemble their own raw sandwiches on small parchment squares. This turns the cooking process into a fun, interactive event rather than a chore you have to manage alone.
Temperature Control and Staging
When it is time to cook, fire up two large cast iron or carbon steel skillets on your stovetop. You can comfortably cook two to three sandwiches per pan.
Because guests will finish assembling at different times, you need a holding strategy so that everyone can sit down and eat together. Preheat your oven to 200°F and place a wire cooling rack inside a rimmed baking sheet. As each sandwich finishes its glorious, steam-domed journey in the skillet, immediately transfer it to the wire rack in the oven. The wire rack prevents the bottom of the bread from getting soggy, and the low 200°F heat keeps the cheese perfectly molten and the crust shatteringly crisp while you finish the rest of the batches.
The Final Verdict on Sandwich Artistry
You do not need to spend hundreds of dollars on a catered affair, and you certainly do not need to suffer through the anxiety of timing a complicated roast just to have a meaningful night with your friends. By respecting the thermal dynamics of the Maillard reaction, ditching the burning butter for the stability of mayonnaise, utilizing a steaming dome, and avoiding cheap toxic cookware, you can easily produce restaurant-quality food in your own kitchen.
Cooking is not magic; it is just applied physics and a little bit of preparation. So pour yourself a glass of wine, set up your ingredients, and let your guests build the sandwich of their dreams. You’ve got this.






