
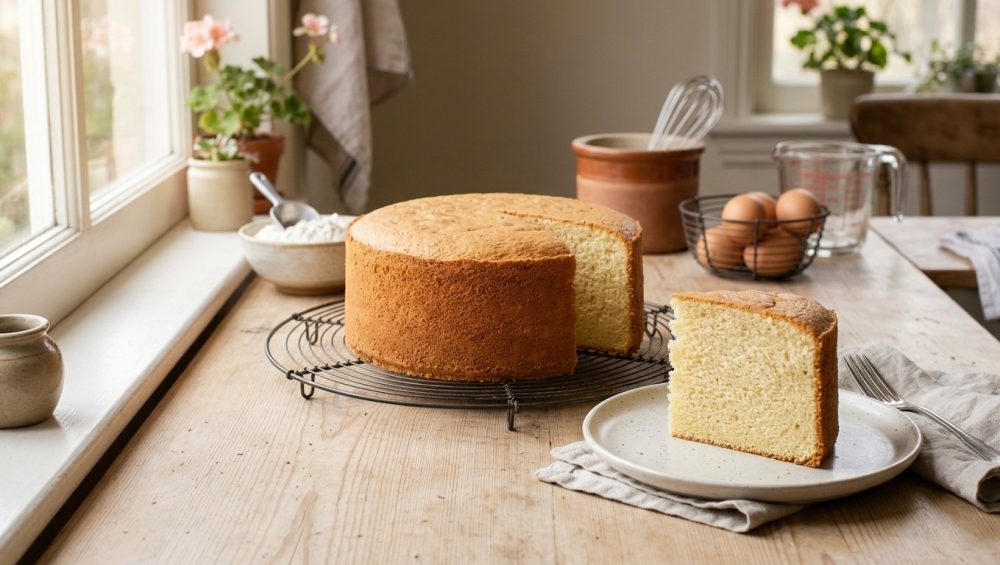
Few things in the culinary world are as profoundly heartbreaking as the “crater of despair.” You know exactly what I am talking about. You have spent your precious Saturday afternoon meticulously measuring flour, creaming butter and sugar until it resembles a fluffy cloud, and gently folding in eggs. You slide the cake pans into the oven, and for the first twenty minutes, everything is going perfectly. You peek through the smudged oven window and see a glorious, golden dome rising beautifully. You feel like a pastry genius. But the moment you pull that cake out of the oven, tragedy strikes. Right before your eyes, the center of the cake deflates, collapsing inward to form a dense, gummy, sad little sinkhole.
Before you throw your spatula across the kitchen and order a ridiculously overpriced cake from the local bakery, take a deep breath. Pour yourself a glass of wine. I have been exactly where you are, staring into the abyss of a sunken sponge, wondering where it all went wrong. The brutal truth is that baking is not like making a weeknight stir-fry. You cannot just toss a handful of ingredients into a bowl, eyeball the measurements, aggressively stir it all together, and hope for a masterpiece. Baking is an exact, unforgiving, and highly predictable edible chemistry experiment.
You do not need a degree from a fancy French culinary institute to bake a structurally sound, perfectly domed cake. You simply need to understand the basic food science of what is actually happening inside that pan, and you need to stop making a few incredibly common rookie mistakes. Today, we are going to strip away the pretentious chef-speak and dive deep into the microscopic architecture of your cake batter. We are going to explore exactly why your baked goods are collapsing, and I am going to give you the foolproof, no-nonsense fixes you need to ensure you never bake a crater again.
The Edible Architecture: Understanding the Science of the Sponge
To understand why a cake falls, you first have to understand why it rises and how it holds its shape. Think of your cake batter as a massive construction site. For the building to stand tall, you need a perfect balance between the materials that build the rigid scaffolding and the materials that make the building soft, tender, and pleasant to eat.
In the world of pastry chemistry, we divide our ingredients into two distinct categories: structure makers and structure weakeners.
Structure Makers: The Scaffolding
The primary structure makers in your cake are flour and eggs. Flour contains proteins called glutenin and gliadin. When these proteins are hydrated by liquid and agitated by mixing, they bond together to form an elastic network called gluten. This gluten network is the literal framework of your cake. Meanwhile, the proteins in the eggs act as the mortar. As the cake bakes, the heat causes these egg proteins to coagulate (firm up) and the starches in the flour to gelatinize, effectively locking the expanded scaffolding permanently into place.
Structure Weakeners: The Tenderizers
If you baked a cake using only flour and eggs, you would end up with a rubbery, inedible brick. To make the cake tender, moist, and delicious, we rely on structure weakeners. These include sugar, fats (like butter, oil, or shortening), and liquids (like milk or buttermilk). Fats coat the flour proteins, actively preventing them from forming too much tough gluten. Sugar absorbs moisture and delays the coagulation of the egg proteins, ensuring the cake stays soft.
The Leavening Process: Inflating the Balloon
Finally, we have the leavening agents—baking powder and baking soda. These chemical marvels react with moisture and heat to release carbon dioxide gas. This gas gets trapped inside the tiny air bubbles you created when you creamed your butter and sugar together. As the gas expands in the heat of the oven, it pushes against the gluten and egg scaffolding, causing the cake to rise.
When a cake sinks in the middle, it means this delicate architectural balance has failed. Either the gas bubbles expanded too quickly and popped, the scaffolding was too weak to hold the weight of the batter, or the proteins did not have enough time to permanently set before the temperature dropped. Let’s break down the exact culprits that cause this structural failure.
Culprit #1: The Impatient Peek and the Physics of Heat
I am going to say this as lovingly as possible: stop opening your oven door. I know the aroma of vanilla and butter is intoxicating. I know you want to check on your masterpiece. But opening that oven door prematurely is the absolute fastest way to murder your cake’s structural integrity.
The Danger of Thermal Shock
Baking relies on a continuous, steady application of heat to drive the chemical reactions forward. When your cake is in the oven, the carbon dioxide bubbles are expanding, pushing the batter upward. At the same time, the heat is slowly working its way from the outside of the pan toward the center, coagulating the egg proteins and gelatinizing the starches to set the structure. The center of the cake is always the very last part to fully bake and solidify.
If you open the oven door when the cake is only halfway done, you let a massive rush of cold kitchen air into the cooking chamber. The ambient temperature inside the oven can plummet by up to fifty degrees in a matter of seconds. When that blast of cold air hits your cake, the expanding gas bubbles inside the batter instantly contract. Because the proteins in the center of the cake have not yet set into their rigid structure, the heavy, wet batter simply collapses under its own weight. Once those bubbles deflate and the structure falls, no amount of additional baking time will ever make it rise again.
Ovens Are Notoriously Dishonest
Even if you keep the door firmly shut, your cake might still sink if your oven is running too cold. If you are relying solely on the digital beep of your oven to tell you it has reached 350 degrees Fahrenheit, you are playing a dangerous game of culinary roulette. Ovens lie. They lie constantly. You absolutely must invest in a simple oven thermometer to hang on the center rack. I have seen high-end home ovens run anywhere from twenty to forty degrees cooler than what the digital display claims. If the oven is not hot enough, the leavening agents will not react properly, the moisture will not turn to steam, and the proteins will not set fast enough to support the rise.
The Fix: Preheat your oven for a minimum of twenty minutes before you even think about putting the cake inside. Verify the temperature with an independent thermometer. And most importantly, do not open the oven door until you are in the final five minutes of the suggested baking time.
Culprit #2: Leavening Agent Overload (More is NOT Better)
There is a very common misconception among beginner bakers that if a teaspoon of baking powder makes a cake fluffy, then a tablespoon will make it extraordinarily light and airy. This is a fundamental misunderstanding of baking chemistry, and it is a guaranteed one-way ticket to the crater of despair.
The Anatomy of a Bubble
As we discussed, baking powder and baking soda release carbon dioxide gas that inflates the microscopic air pockets in your batter. The gluten network stretches to accommodate these expanding bubbles, much like blowing air into a rubber balloon.
When you dump a tablespoon of baking powder into a batter that only needed a teaspoon, those bubbles expand too rapidly. They become massive, thin-walled, and incredibly fragile. Eventually, they pop. The entire structure caves in on itself. It is the exact same chemical tragedy that occurs when your banana bread sinks right in the middle of the loaf pan. The gluten simply cannot stretch far enough to contain the excessive amount of gas you generated.
The Expiration Date Trap
On the flip side, using expired or dead leavening agents will also cause a sunken cake, though for a different reason. If your baking powder has been sitting in the back of your pantry since the last presidential election, it has lost its potency. It will not produce enough gas to lift the heavy batter, resulting in a dense, flat, heavy disc that sags in the middle because it never had the strength to rise in the first place.
The Fix: Always measure your leavening agents with absolute precision using proper measuring spoons, leveling off the top with the flat edge of a butter knife. Test your baking powder for freshness by dropping a half-teaspoon into a bowl of hot water; it should fizz vigorously and immediately. Test your baking soda by dropping a half-teaspoon into a splash of white vinegar; if it doesn’t erupt like a grade-school volcano, throw it in the trash.
Culprit #3: The Overmixing Trap and Gluten Gone Wild
I love a good stand mixer as much as the next home cook, but allowing it to run unsupervised is a recipe for structural disaster. The way you handle your batter once the wet and dry ingredients meet dictates the final texture of your cake.
The Science of Toughness
Remember those gluten proteins we talked about? Glutenin and gliadin? When they are dry, they are harmless. But the moment they come into contact with the moisture from your milk and eggs, they wake up. As you mix the batter, you mechanically encourage these proteins to link together into long, elastic chains.
If you are baking a chewy sourdough loaf, you want to develop massive amounts of gluten. But a cake is supposed to be tender. When you overmix cake batter, you develop a tight, highly elastic gluten network. When you put that overmixed batter into the oven, the leavening agents try to push the cake upward, but the tight elastic gluten acts like a giant rubber band, resisting the rise. Even worse, as the overmixed cake begins to cool on your counter, that tight gluten network shrinks, pulling the center of the cake aggressively downward and creating a dense, gummy, sunken core.
The Art of Folding
Instead of attacking your delicate cake batter with a high-speed electric mixer, switch to a gentle folding motion by hand once the dry ingredients are introduced. Using a Danish dough whisk is my absolute favorite trick for this, as its unique wire loops cut through the batter to incorporate flour without aggressively agitating the gluten proteins. You want to mix only until the very last streak of dry flour disappears into the batter. If there are a few tiny lumps remaining, leave them alone. They will hydrate and disappear during the baking process.
The Fix: Cream your butter and sugar on medium-high speed for as long as you want—this builds the foundational air bubbles and cannot be overmixed. But the second your flour hits the bowl, turn your mixer to the lowest possible speed, or better yet, finish the job by hand with a gentle folding motion.
Culprit #4: Ingredient Imbalance and the Measurement Catastrophe
Baking recipes are carefully formulated mathematical equations. The ratio of structure makers (flour, eggs) to structure weakeners (fat, sugar, liquid) must be exact. If you throw off this ratio, the cake will fail. And the number one way home bakers destroy this ratio is by measuring their ingredients by volume instead of by weight.
The Flaws of the Measuring Cup
Let’s talk about flour. When you plunge a measuring cup directly into a densely packed bag of all-purpose flour, you are compressing the ingredient. The habit of blindly scooping your flour can result in up to thirty percent more volume than the recipe actually intended. A standard cup of flour is supposed to weigh 120 grams. If you scoop aggressively, you might pack 160 grams into that cup.
If you accidentally add 30% too much flour to your cake, the ratio of structure makers to weakeners is completely ruined. The cake will be incredibly dry, heavy, and dense, and the leavening agents will struggle to lift the excess weight, resulting in a sunken, heavy center.
Conversely, if you under-measure your flour, or if you add too much liquid, butter, or sugar, you create a batter that is far too heavy on structure weakeners. The cake will taste incredibly moist and delicious, but it simply will not possess the structural scaffolding required to hold itself up. It will rise beautifully in the oven, and the moment it hits room temperature, it will collapse into a gooey, underbaked puddle.
The Non-Negotiable Kitchen Tool
The only way to guarantee perfectly consistent, fluffy, domed cakes every single time is to measure by weight, not volume. Buying a digital kitchen scale will fundamentally transform your baking from a stressful guessing game into an exact, predictable science. Weighing your ingredients ensures that your chemical ratios are flawless, eliminating the most common variable that causes baking failures.
The Fix: Ditch the measuring cups for your dry ingredients. Use a scale. If a recipe does not provide gram measurements, use a standard conversion (1 cup of all-purpose flour = 120g, 1 cup of granulated sugar = 200g). If you absolutely refuse to buy a scale, at least use the “spoon and level” method: use a spoon to lightly fluff the flour in the bag, gently spoon it into your measuring cup until it mounds over the top, and level it off with a straight edge. Never pack it down.
Culprit #5: The Absolute Garbage You Are Baking In (Let’s Talk Pans)
We need to have a serious conversation about the absolute garbage you are pouring your beautiful cake batter into. I am ruthlessly passionate about banishing toxic kitchen gear from my home, and you should be too. If you are still using a flimsy, scratched-up, peeling non-stick cake pan from a decade ago, throw it in the trash immediately. Not only are those mystery chemical coatings leaching into your food, but the pans themselves are actively sabotaging your baking.
The Dark Pan Disaster
Most cheap non-stick cake pans feature a dark grey or black finish. In the world of thermodynamics, dark colors absorb radiant heat far more aggressively than light colors. When you put a dark pan into a hot oven, the exterior edges of your cake batter heat up incredibly fast.
Because the edges are absorbing heat so rapidly, they bake, set, and grip the sides of the pan long before the center of the cake has even begun to warm up. As the baking time progresses, the center finally begins to rise, but the edges are already locked in place. This often results in a cake with a massive, cracked volcano dome in the center, or, if the center doesn’t bake through in time, a heavy, raw core that sinks the moment it is removed from the heat.
While we are on the subject of ruining your equipment, please step away from the pressurized cans of grease. Relying on aerosol cooking sprays will destroy your bakeware over time, leaving a sticky, polymerized residue of soy lecithin that is impossible to scrub off. This tacky residue causes your cakes to stick and tear when you try to invert them.
The Glass Pan Insulation Problem
You might be tempted to reach for a glass casserole dish to bake a cake. Do not do this. Glass is a thermal insulator, meaning it takes forever to heat up and forever to cool down. Beyond the fact that it will overbake the edges of your cake, there is also the very real danger that your glass bakeware shatters when exposed to sudden, extreme temperature changes. Cakes belong in metal pans. Period.
The Only Cake Pan You Should Ever Buy
If you want professional, bakery-level results at home, you need to use the exact same equipment the professionals use. Instead of cheap mystery metals, you want heavy-duty, light-colored anodized aluminum pans. They conduct heat beautifully and evenly, and unlike those thin, flimsy pans that sound like a gunshot when your baking sheets keep warping in a hot oven, quality anodized aluminum will hold its shape forever.
Anodized aluminum has a sealed, non-reactive surface that is completely non-toxic. Because it is light in color, it reflects heat rather than absorbing it aggressively, ensuring that the edges of your cake bake at the exact same rate as the center. This even heat distribution allows the entire cake to rise uniformly, preventing both the dreaded volcano dome and the sunken crater.
The Fix: Invest in two high-quality, 8-inch or 9-inch light-colored anodized aluminum cake pans. To prevent sticking without using toxic aerosol sprays, simply rub the inside of the pan with a little cold butter, dust it lightly with flour, and place a circle of parchment paper flat against the bottom. Your cakes will slide out flawlessly every single time.
The Sassy Sous-Chef’s Master Plan for Perfectly Domed Cakes
Now that we have covered the complex food science and eliminated the toxic gear, let’s put it all together into a foolproof, step-by-step master plan. If you follow these rules religiously, you will never bake a sunken cake again.
1. Master the Temperature of Your Ingredients
Temperature control doesn’t stop at the oven door; it starts with your raw ingredients. Just like how using butter that is too warm will make your cookies spread flat across the baking sheet, using cold eggs and warm butter in a cake batter will cause the emulsion to break, leading to a dense, uneven crumb.
Cake batters are emulsions—they require fat and water to suspend together harmoniously. Cold ingredients simply do not emulsify. Take your butter, eggs, milk, and sour cream out of the refrigerator at least an hour before you plan to bake. Your butter should yield slightly when pressed with a finger, but it should not look greasy or melted.
2. Cream the Butter and Sugar Like You Mean It
The creaming method is the foundation of your cake’s rise. When you beat room-temperature butter and sugar together, the sharp edges of the sugar crystals carve microscopic air pockets into the fat. You need to beat them on medium-high speed for a full three to five minutes until the mixture transforms from a dense yellow paste into a pale, fluffy, cloud-like consistency. Do not rush this step.
3. Add Eggs One at a Time
If you dump all your eggs into the bowl at once, you will flood the emulsion and break the batter. Add the room-temperature eggs one at a time, beating well after each addition and scraping down the sides of the bowl with a silicone spatula.
4. Alternate the Dry and Wet Ingredients
To prevent overworking the gluten, add your dry ingredients (flour, salt, leavening) and wet ingredients (milk, buttermilk) in alternating batches. Start with a third of the dry, then half the wet, then a third of the dry, the remaining wet, and finish with the final third of the dry. Mix on the lowest possible speed, and stop the moment the flour disappears.
5. Bake in the Center of the Oven
Always place your cake pans on the middle rack of the fully preheated oven. This ensures that the ambient heat circulates evenly around the top and bottom of the pans. Do not crowd the pans; they should not touch each other or the walls of the oven.
6. The Ultimate Doneness Tests
How do you actually know when the center is set so it won’t sink? First, look at the edges. The cake should be slightly pulling away from the sides of the pan. Second, use the bounce test: gently press the very center of the cake with your index finger. If the indentation remains, it needs more time. If the sponge springs back immediately, the structure is set. Finally, insert a wooden skewer or toothpick into the dead center. It should come out clean or with a few moist crumbs attached, but absolutely no wet batter.
7. The Crucial Cooling Protocol
A perfectly baked cake can still collapse if you cool it improperly. When you pull the pans from the oven, place them directly onto a wire cooling rack. Leave the cakes in the pans for exactly ten to fifteen minutes. This resting period allows the hot, fragile proteins to firm up slightly.
If you try to invert the cake immediately, the delicate crumb will tear and collapse. However, if you leave the cake in the pan until it is completely cold, the residual heat will generate steam. With nowhere to escape, the steam will condense on the sides and bottom of the pan, making your cake incredibly soggy, heavy, and prone to sinking. After ten minutes, run a thin butter knife around the edge, invert the cake onto the wire rack, peel off the parchment paper, and let it cool completely to room temperature before frosting.
How to Salvage the Crater: Don’t You Dare Throw It Away
Let’s say you are reading this article a little too late. You already baked the cake, you opened the oven door to check on it, and now you are staring at a sunken crater. Do you throw it in the trash? Absolutely not. Time is money, and ingredients are expensive. We do not waste food in this kitchen.
If the edges of the cake are perfectly baked and only the center is sunken and slightly dense, you can easily salvage the situation with a little culinary sleight of hand.
The Leveling Trick: Use a long, serrated bread knife to simply slice the raised edges off the cake, leveling the entire surface down to the height of the sunken center. You will end up with a slightly thinner cake layer, but once it is stacked and covered in a thick layer of buttercream frosting, literally no one will know the difference.
The Trifle Pivot: If the center is completely raw and gummy, use a round biscuit cutter to stamp out the center and throw the raw dough away. Take the perfectly baked outer rings of the cake, cube them up, and layer them in a beautiful glass bowl with fresh berries, whipped cream, and vanilla pudding. Congratulations, you didn’t fail at making a cake; you succeeded at making an elegant English trifle.
The Cake Pop Rescue: Crumble the baked portions of the cake into a large bowl. Add a few generous dollops of store-bought or homemade frosting, and mash it all together until it forms a pliable dough. Roll the mixture into tight little balls, chill them in the fridge, and dip them in melted chocolate. You just turned a baking disaster into gourmet cake truffles.
Final Thoughts from the Sassy Sous-Chef
Baking is not magic. It is not an innate talent bestowed upon a lucky few. It is a straightforward science of ratios, temperatures, and gentle handling. The next time you set out to bake a cake, leave the measuring cups in the drawer and pull out your digital scale. Throw away the peeling, toxic non-stick pans and invest in heavy aluminum. Check your expiration dates, leave the oven door shut, and treat your gluten with the respect it deserves.
You absolutely have the ability to produce a flawless, towering, bakery-quality sponge in your own home kitchen. Stop letting the fear of the crater keep you from creating something spectacular. Now go preheat that oven, weigh your flour, and let’s bake something incredible.






