
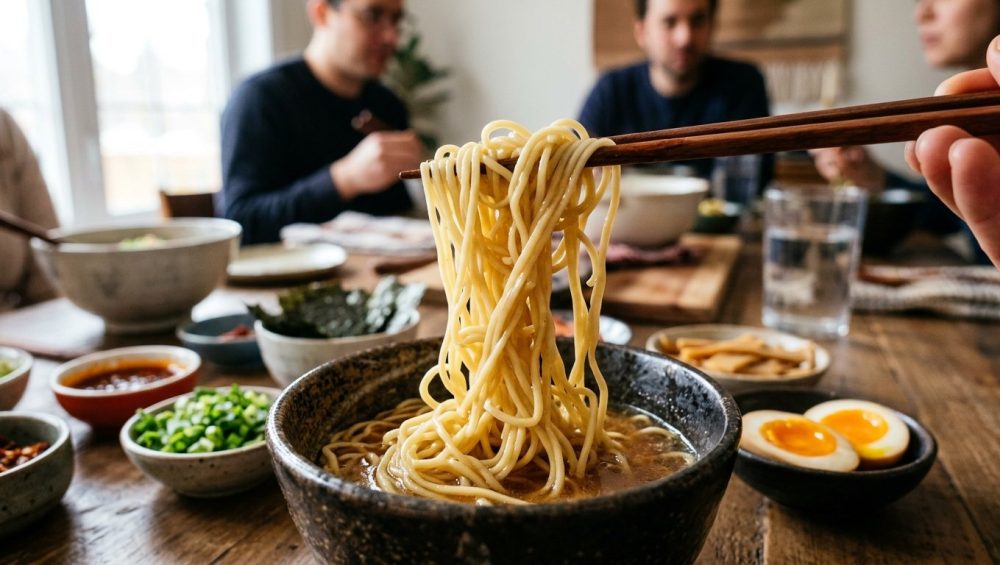
Picture this: It is Saturday night, and you have decided to be the ultimate host. You are throwing a DIY ramen bar dinner party. It is a brilliant concept in theory. You spend your weekend lovingly simmering a rich, complex broth, you prep a gorgeous array of toppings, and you plan to let your friends build their own customized bowls. It is supposed to be the pinnacle of stress-free, mindful gatherings. You cook the noodles, drain them, set them in a beautiful artisanal ceramic serving bowl, and turn your back to pour a well-deserved glass of wine.
Ten minutes later, your guests arrive, and you proudly go to serve the noodles. Except, they are not noodles anymore. They have fused together into a single, terrifying, gelatinous mega-noodle. You try to pull a single portion with your tongs, and the entire mass lifts out of the bowl like a heavy, starchy brain from a low-budget sci-fi movie.
I have been there. We have all been there. You end up hacking at this monolith with a pair of kitchen shears while your friends politely pretend not to notice you sweating into the tonkotsu broth.
Listen to me: hosting an interactive, restaurant-quality noodle night does not require a culinary degree, a brigade of screaming sous-chefs, or a commercial noodle boiler. You are an everyday home cook, and you absolutely can pull off a flawless dining experience. The secret to preventing sticky, tangled noodles does not lie in some mystical ancient restaurant secret; it lies in unapologetic, basic food science. Just like when your pasta clumps in the colander because you walked away to check your phone, ramen will punish your inattention with extreme prejudice. But once you understand the thermodynamics of boiling, rinsing, and holding, you will be in total control. Grab a drink, pull up a stool, and let’s get into it.
The Anatomy of a Noodle: Why Clumping Happens
To defeat the enemy, you must first understand the enemy. And in this case, the enemy is unmanaged starch.
When you buy a pack of premium ramen noodles (or if you are feeling incredibly ambitious and making them from scratch), you are essentially dealing with a highly engineered matrix of wheat flour, water, salt, and alkaline salts. Wheat flour is packed with two crucial components: gluten-forming proteins and starch granules.
Starch is a complex carbohydrate made up of two types of molecules: amylose, which is a linear chain, and amylopectin, which is highly branched. In their raw, dry state, these starches are tightly packed and completely harmless. But the second they hit hot water, everything changes.
Between 140°F and 160°F (60°C to 72°C), wheat starch undergoes a violent process called gelatinization. The microscopic starch granules absorb water, swell up like tiny water balloons, and eventually burst open. When they rupture, they spew their amylose and amylopectin payloads directly into the surrounding water. This creates a sticky, highly viscous gel.
If you leave hot, freshly cooked noodles sitting in a bowl together, that surface starch acts like a high-strength industrial adhesive. As the noodles cool down, the starch undergoes a phase called “retrogradation,” essentially setting into a firm, gluey state. The strands form hydrogen bonds with one another, physically entangling themselves at the molecular level. Within minutes, your individual noodles have permanently welded themselves together.
But wait, you might be thinking, “Do Italian pastas not have starch too?” Yes, they absolutely do. But ramen is a completely different beast, thanks to one magical, highly alkaline ingredient that changes the rules of the game.
The Alkaline Magic of Kansui
You cannot talk about ramen without talking about kansui. If your noodles do not contain this crucial ingredient, you are not making ramen; you are just making soup with spaghetti.
Kansui is an alkaline mineral water—typically a carefully calibrated ratio of sodium carbonate and potassium carbonate. Historically, it was drawn from highly alkaline lakes in Mongolia, but today, it is a refined powder or liquid added to the noodle dough. Potassium carbonate makes the noodles firmer, while sodium carbonate makes them softer.
Why does this matter for your dinner party? Because alkalinity fundamentally alters the behavior of both the gluten and the starch in the wheat flour.
First, the high pH (usually hovering around 9 to 11) tightens the gluten network, making it incredibly strong and resilient. This gives ramen its signature “springy” bite (known as koshi) and prevents the noodles from instantly turning into mush when submerged in scalding hot broth.
Second, the alkaline environment actually inhibits the excessive swelling and gelatinization of the starch. It keeps the starch tightly bound within the protein network. Furthermore, kansui reacts with the natural flavonoid pigments in the wheat flour, turning the noodles that beautiful, appetizing yellow color without the need for a single egg yolk.
However, even with kansui working its chemical magic to keep the internal structure intact, the surface of the noodle will still shed starch into the boiling water. And that surface starch is the exact culprit behind your clumping disaster. To manage it, we have to aggressively perfect the boiling phase.
The Boiling Battlefield: Hydration and Agitation
When it comes to boiling noodles for a crowd, time is money, and space is everything. The biggest rookie mistake I see home cooks make is trying to boil four portions of ramen in a tiny two-quart saucepan.
Here is the absolute truth: you need a massive pot and a terrifying amount of rapidly boiling water. I am talking at least a full gallon (16 cups) of water per pound of noodles.
Why? Two reasons: thermal mass and dilution.
When you drop a pound of room-temperature noodles into boiling water, the temperature of the water plummets. If you are using a small pot, the water will stop boiling entirely. Your noodles will sit in tepid water, slowly turning into a gummy, over-hydrated mess before the heat can finally recover. You need a large volume of water to maintain that rolling boil.
Secondly, dilution. Remember that surface starch we talked about? As it sloughs off the noodles, it thickens the cooking water. If you use a tiny pot, you are essentially boiling your noodles in a thick, starchy gravy. When you pull them out, they will be coated in a thick layer of glue. A large volume of water dilutes that starch, keeping the water relatively clear and the noodle surfaces clean.
The Agitation Imperative
The moment those noodles hit the water, you cannot just walk away. The first 60 to 90 seconds are critical. You must agitate them aggressively. Use a pair of long cooking chopsticks or tongs to stir, separate, and lift the noodles. This physical movement prevents the strands from touching each other while the surface starches are in their most sticky, gelatinizing phase.
If you look away, your water always boils over, making a huge, sticky mess on your stovetop and ruining your perfectly organized prep zone. Stay at the stove. Keep the heat high, keep the water moving, and pull the noodles exactly when they are done. For fresh ramen, this might literally be 60 to 90 seconds. Do not overcook them, because they are going to face another round of intense heat later.
The Shock and Awe: Rinsing vs. Not Rinsing
Okay, brace yourselves, because we are about to break one of the most sacred rules of the Western culinary world.
If you are cooking Italian pasta, every chef on television will scream at you to never, ever rinse your pasta. And they are right—for Italian food. While Italians rely on the power of starchy water to bind their rich tomato and butter sauces to the noodles, ramen operates in a completely different universe.
When you are hosting a ramen bar and staging noodles to sit out for your guests, you absolutely must rinse your noodles.
This is non-negotiable. Let’s look at the science of the cold shock.
When you pull the noodles from the boiling water, two things are happening. First, carryover cooking. The internal temperature of the noodle is still over 200°F (93°C). If you just dump them in a bowl, they will continue to cook themselves into absolute mush. Second, they are coated in a microscopic layer of that gelatinized starch we discussed earlier.
By immediately plunging the cooked noodles into a colander and blasting them with freezing cold water (or better yet, submerging them in a prepared ice bath), you instantly halt the cooking process. The sudden drop in temperature locks the gluten network, preserving that bouncy, chewy texture you worked so hard to achieve.
More importantly, the mechanical action of your hands and the running water physically washes away the excess surface starch. You are literally rinsing the glue down the drain. Without that starch, the primary mechanism for clumping is completely eliminated.
Coating and Holding: The Fat Barrier
So, you have boiled them perfectly, and you have shocked and rinsed them until they are cold and completely starch-free. If you leave them sitting in a colander for an hour, will they stick?
Eventually, yes. Water evaporates. As the noodles dry out, any residual proteins and starches will find a way to bond, driven by capillary action as the moisture disappears. To hold noodles for a crowd without them turning into a brick, we need to introduce a lipid barrier.
Fat and water do not mix. By coating your freshly rinsed, well-drained noodles in a very light layer of oil, you are lubricating the strands and creating a physical barrier that prevents hydrogen bonding.
But please, do not just reach for a bottle of cheap, flavorless vegetable oil. This is a culinary experience! Use this step to build incredible flavor. Toss the cold noodles with a splash of toasted sesame oil, or better yet, a homemade aroma oil. Scallion oil, black garlic oil, or rendered pork fat (if you are making a rich tonkotsu) are phenomenal choices.
You do not need much—just a tablespoon or two for a massive batch of noodles. Toss them gently with your hands until every single strand is glistening. At this point, these noodles are virtually indestructible. They can sit on a platter for an hour while your guests mingle, sip their drinks, and marvel at your effortless hosting skills.
Portioning and Staging: The “Nest” Technique
When you are hosting a dinner party, the last thing you want is a bottleneck at the buffet line. If you leave a giant mountain of oiled noodles in a single bowl, your guests will struggle to pull out a single portion. They will grab with the tongs, and half the bowl will come with it, trailing long strands across your table and ruining your beautiful aesthetic setup.
Efficiency is the name of the game here. We are going to portion the noodles into individual “nests” before the guests even arrive.
Once your noodles are rinsed, drained, and lightly oiled, take a carving fork or a pair of long chopsticks. Grab a single portion of noodles and twirl them around the fork, pressing them gently against the curve of a ladle to form a tight, neat little bundle.
Slide this nest onto a large, rimmed baking sheet lined with parchment paper. Repeat until all your noodles are portioned into beautiful, identical little mounds. You can cover this tray with a damp paper towel or plastic wrap and leave it at room temperature until serving time.
When your guests are ready to eat, they simply use a spatula or tongs to transfer one perfect nest into their bowl. It is elegant, it is fast, and it completely eliminates the awkward wrestling match at the food station.
To make the initial boiling and lifting process even smoother, invest in a stainless steel spider skimmer to easily lift multiple portions out of the boiling water at once. It drains the water instantly and gives you total control over your timing.
The Broth Bottleneck: Temperature Management
Now we face the final logistical hurdle. You have a platter of perfectly cooked, un-clumped, beautifully portioned noodles. But they are cold. Ramen is meant to be eaten piping hot. How do we bridge this gap without throwing the noodles back into a pot and ruining them?
The answer lies entirely in the thermodynamics of your broth.
Because your noodles are cold, your broth must be scalding, ferociously hot when it hits the bowl. The thermal mass of the boiling broth will instantly reheat the noodles, bringing the entire bowl to the perfect eating temperature in a matter of seconds.
Keep your broth in a large, heavy-bottomed pot on the stove at a rolling simmer. When a guest finishes assembling their bowl (noodles, toppings, aromatics), you ladle the boiling broth directly over the cold noodle nest. Within seconds, the oil barrier melts away into the broth (adding even more flavor!), the noodles loosen up, and the dish is ready to eat.
A Warning on Broth Boiling
A quick caveat: while you want the broth hot, you must manage it carefully depending on the style you are serving. If you are serving a delicate, clear chintan broth (like a shio or shoyu ramen), maintaining a rapid, violent boil for hours will emulsify the fats and proteins. Suddenly, your crystal-clear broth gets cloudy and murky.
For clear broths, keep it just below a rolling boil—around 205°F (96°C). For rich, opaque paitan broths (like tonkotsu or tori paitan), boil away; the cloudiness is the whole point!
The “No-Go” Rule: Banish Toxic Gear From Your Kitchen
Let’s take a brief intermission for a topic I absolutely refuse to compromise on. If you are spending your weekend lovingly crafting a 12-hour pork bone broth, sourcing premium alkaline noodles, and inviting people you care about into your home, do not ruin it by cooking in cheap, toxic garbage.
I have zero patience for flimsy aluminum pots with peeling non-stick coatings. When you boil liquids for hours, or aggressively sear pork belly, those mystery synthetic coatings degrade. They flake off into your food and release noxious fumes into your kitchen. Stop ruining your nonstick pans with high-heat searing and aggressive boiling. In fact, throw them in the trash where they belong.
For a ramen night, you need heavy, durable, safe equipment.
- For the Broth: A large enameled cast-iron Dutch oven or a heavy-gauge multi-clad stainless steel stockpot. These materials offer incredible heat retention and will never leach chemicals into your acidic or salty broths.
- For the Noodles: A wide stainless steel pot. Stainless steel is non-reactive, can take a beating, and won’t scratch when you are aggressively stirring your noodles with metal tongs.
- For the Sear: Carbon steel or bare cast iron for searing your chashu (braised pork belly) before serving.
Invest in tools that will outlive you. Your food will taste exponentially better, and you will not be feeding your friends microplastics.
Toppings and Timing: The Art of Stress-Free Hosting
The beauty of a ramen bar is the endless customization. But if you are trying to soft-boil eggs, sear pork, chop scallions, and fry garlic oil while your guests are standing in your kitchen waiting to eat, you have failed as a host. Time is money, and your sanity is priceless. Everything must be prepped before the doorbell rings.
The Perfect Ajitama (Ramen Egg)
Ramen eggs should have a firm, deeply marinated white and a jammy, custard-like yolk. Boil them for exactly 6 minutes and 30 seconds, then immediately plunge them into an ice bath. The ice bath shrinks the egg slightly inside the shell, making peeling a breeze. If you skip the ice bath, your eggs refuse to peel cleanly, leaving you with mangled, ugly whites that look like they were chewed on by a dog. Marinate them in a mixture of soy sauce, mirin, and water for at least 4 hours, or up to 2 days in advance.
Aroma Oils and Garlic
Aroma oils (like mayu or black garlic oil) are the secret weapon of high-end ramen shops. They float on top of the broth and coat the noodles as you pull them out of the bowl. But making them requires patience. When frying minced garlic for oil, start it in cold oil and bring the heat up slowly. If you drop raw garlic into screaming hot oil, your garlic always burns, turning acrid, bitter, and completely inedible. Low and slow extracts the flavor perfectly. Do this days in advance and keep it in a glass jar.
The Mushroom Situation
Whether you are using fresh shiitakes, enoki, or wood ear mushrooms, prepare them properly. Sauté them over high heat to drive off their internal moisture and concentrate their earthy flavor. Nobody wants spongy mushrooms in their premium ramen bowl. Get a good sear on them, season them well, and set them aside in a serving dish.
By staging all your toppings in beautiful little bowls—your mise en place, darling—your only job during the party is pouring hot broth and accepting compliments.
Cleanup and Leftovers: Protecting Your Hard Work
At the end of the night, you will likely have leftover noodles, broth, and toppings. Because you followed my advice and kept the noodles separate from the broth, your leftovers are actually salvageable! If you had dumped all the noodles into the main soup pot, they would have absorbed all the liquid overnight, swelling into massive, mushy worms.
Store the oiled noodle nests in an airtight container in the fridge. They will keep for about three days. When you want a quick lunch, just drop a nest into a bowl of hot broth, and they will revive instantly.
Store the broth separately. A quick tip for dealing with rich, fatty broths like tonkotsu: when you refrigerate it, the fat will solidify on top. This is great for preservation, but a nightmare for your plastic storage ware. If your containers stay greasy no matter how much dish soap you use, it is because plastic is lipophilic (fat-loving). Do yourself a favor and store your rich broths in glass mason jars or stainless steel containers. It makes reheating and washing up infinitely easier.
You Are Now the Ultimate Ramen Master
Let’s recap the masterclass. The secret to preventing your ramen noodles from turning into a clumpy, gelatinous disaster is a strategic combination of chemistry and workflow.
First, understand the starch: gelatinization is the enemy of a buffet line. Second, rely on Kansui: alkaline salts give the noodles their strength and prevent blowout. Third, boil aggressively: use a massive pot of water and agitate constantly. Fourth, shock and rinse: halt carryover cooking and wash away the gluey surface starch. Fifth, coat with fat: use an aroma oil to create a physical barrier against sticking. Sixth, nest and stage: portion the noodles for seamless, elegant serving. And finally, reheat with scalding broth: let the thermodynamics of the soup do the final work.
You do not need a culinary degree to pull this off. You just need to respect the ingredients, understand the basic physics of cooking, and refuse to cut corners with cheap equipment.
Hosting a dinner party should be a joyful, mindful experience, not a chaotic scramble that leaves you sweating over a stove while your friends have all the fun in the other room. By managing your noodles like a pro, you buy yourself the luxury of time. You get to pour that glass of wine, sit down at the table, and genuinely enjoy the incredible food you have created.
So go ahead. Send out those invites, start simmering those bones, and prepare to blow your friends’ minds. You have got this, and your noodles are going to be absolutely perfect.






