
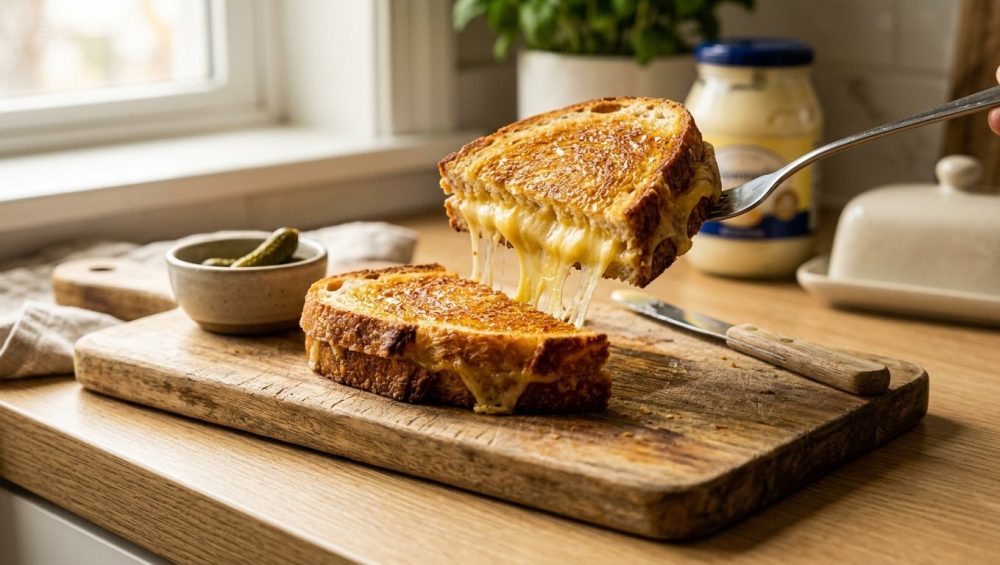
Listen up, weekend culinary hobbyists and weeknight survivalists. We need to have a serious, brutally honest conversation about what you are doing to your bread on a Tuesday night.
Picture this: You have just wrapped up an exhausting workday. You are tired, you are hungry, and you want nothing more than the nostalgic, gooey embrace of a classic comfort meal. You reach into the fridge, grab a block of cheddar, two slices of bread, and a rock-hard stick of butter. Because you are starving and operating on the “time is money” principle of weeknight cooking, you don’t have forty-five minutes to let that butter soften at room temperature. So, you take a knife, hack off a cold slab of butter, and attempt to drag it across your soft, innocent bread.
Rip.
You just tore a massive hole right through the center of your slice. Frustrated, you throw the mangled, unevenly buttered bread into a hot skillet anyway. Two minutes later, your kitchen smells like a campfire, the smoke detector is screaming, and you are left staring at a sandwich that is charred black on the edges, pale in the center, and somehow still housing unmelted, cold cheese inside.
If this sounds familiar, you are not alone. According to a massive 2025 consumer survey, a staggering 84% of Americans admit that biting into a perfectly crispy, gooey grilled cheese is one of their favorite feelings in the world. In fact, 62% of the country proudly identify as “grilled cheese enthusiasts”. Yet, despite this national obsession, that same survey revealed a shocking culinary tragedy: 71% of people are still stubbornly using butter to coat the outside of their bread, while a mere 12% have seen the light and switched to mayonnaise.
Those 12% are absolute geniuses, and the rest of you are needlessly making your lives harder. If you want to know what exactly makes the ultimate grilled cheese, you need to step away from the butter dish and open your mind to the science of emulsions. Today, we are going to dissect the secret power of mayonnaise, explore the thermodynamics of the perfect crust, and permanently upgrade your sandwich game without requiring a culinary degree.
The Butter Betrayal: Why Your Sandwich is Smoking and Tearing
Before you come for me with your pitchforks, let me clarify something: I love butter. I bake with it, I baste steaks with it, and I slather it on fresh biscuits. But when it comes to pan-frying the exterior of a delicate carbohydrate, butter is a treacherous, unreliable friend.
To understand why butter fails us in this specific application, we have to look at its chemical composition. Standard American butter is roughly 80% butterfat, 16% water, and 4% milk proteins and milk solids. When you drop butter into a hot skillet, that 16% water content immediately begins to evaporate and steam. Steaming is the absolute enemy of a crispy crust. Once the water cooks off, you are left with butterfat and milk solids.
Here is the fatal flaw: those milk solids have an abysmally low smoke point. Butter begins to smoke, scorch, and burn at temperatures between 302°F and 350°F (150°C to 175°C). By the time your skillet is hot enough to thoroughly melt the thick layer of cheese inside your sandwich, the milk solids on the exterior of your bread are already turning into bitter, blackened carbon.
Furthermore, unless you are the kind of meticulously organized home cook who remembers to leave butter out on the counter all day, you are dealing with cold butter. Dragging cold, stiff butter across soft bread destroys the structural integrity of the crumb. You end up with thick clumps of fat in some areas and completely bare spots in others. When you are standing at the sink aggressively scrubbing scorched, burnt milk solids off your stainless steel pans, you have no one to blame but the butter.
The Secret Power of Mayonnaise: Emulsion Science for the Home Cook
Enter the hero of our story: mayonnaise. Forget whatever preconceived notions you have about mayo being just a sandwich condiment for cold cuts. In the culinary world, mayonnaise is a highly stable, scientifically perfect frying medium.
The Magic of the Emulsion
At its core, mayonnaise is an emulsion. In chemistry, an emulsion is a mixture of two liquids that normally refuse to combine—in this case, oil and water (usually in the form of vinegar or lemon juice). If you just whisk oil and vinegar together, they will separate the second you turn your back. To force them to hold hands and play nicely, you need an emulsifier.
In mayonnaise, that emulsifier is egg yolk, which contains a miraculous phospholipid called lecithin. Lecithin has a hydrophilic (water-loving) head and a lipophilic (oil-loving) tail. It acts as a microscopic mediator, binding the oil droplets and the acidic water together into a thick, luxurious, creamy matrix.
The Heat Resistance
Because standard mayonnaise is composed of anywhere from 70% to 80% oil (typically soybean, canola, or sunflower oil), it inherits the thermal properties of that oil. While butter taps out and burns at 302°F, the refined oils used in mayonnaise boast smoke points well over 400°F (200°C). This massive buffer in temperature means you can leave your sandwich in the pan long enough to completely melt the cheese without ever worrying about the bread turning into a charcoal briquette.
The “Time is Money” Spreading Factor
From a purely practical standpoint, mayonnaise is a weeknight lifesaver. Because of its emulsified state, it remains perfectly soft and spreadable straight out of the refrigerator. You can glide a thin, even layer of mayo across the softest, most delicate brioche without a single tear. It ensures edge-to-edge fat coverage, which is the secret to an even, golden crust. Whether you are using a standard skillet or working on seasoning cast iron to perfection, a uniform layer of fat is the only way to ensure uniform browning.
The Maillard Reaction: Why Mayo Wins the Crust Game
Now that we have established that mayo won’t burn and won’t rip your bread, let’s talk about the flavor and the crunch. Some skeptics argue that butter tastes better. But when you fry bread in mayonnaise, you aren’t actually tasting raw mayo; you are tasting the glorious results of the Maillard reaction.
The Maillard reaction is a complex chemical process that occurs when amino acids (proteins) and reducing sugars are subjected to heat, typically in the range of 285°F to 330°F (140°C to 165°C). This reaction is responsible for the deep, savory, roasted flavor profiles we universally crave. It is what makes a seared steak taste infinitely better than a boiled one, and it is what transforms pale dough into a golden-brown crust.
Mayonnaise is essentially a Maillard reaction cheat code. The egg yolks in the mayo are packed with proteins (amino acids), and the bread provides the carbohydrates (sugars). The high smoke point of the oil allows the surface of the bread to sit right in that optimal 285°F–330°F sweet spot for an extended period without burning.
Because the mayo spreads so evenly, the thermal energy from the pan is distributed uniformly across the entire surface of the bread. There are no dry spots and no thick clumps of fat. Achieving that flawless, stick-free searing requires a consistent medium of heat transfer, and an emulsified layer of oil and egg protein delivers exactly that. The vinegar in the mayo evaporates almost immediately upon hitting the hot pan, leaving behind a perfectly crisp, savory, golden-brown exterior that shatters beautifully when you bite into it.
The “No-Go” Rule on Toxic Gear: Stop Poisoning Your Comfort Food
As a culinary blogger who respects the home cook, I have zero patience for pretentious chef-speak. But I also have absolutely zero tolerance for cheap, toxic kitchenware that poisons your food. We need to pause this recipe lesson to address the elephant in your kitchen cabinets: that scratched, peeling, $15 non-stick Teflon pan you bought at a big-box store five years ago.
The Teflon Tragedy
I do not care how convenient you think your non-stick pan is; if the coating is flaking off into your food, you are eating a chemical cocktail. Traditional non-stick coatings are made from PTFE (polytetrafluoroethylene), which belongs to a massive class of over 10,000 synthetic chemicals known as PFAS (per- and polyfluoroalkyl substances).
These are widely referred to by scientists as “forever chemicals” because they simply do not break down in the environment or in the human body. When you heat a cheap PTFE pan above 500°F (260°C)—which is incredibly easy to do if you preheat an empty pan on a gas stove—the coating begins to thermally degrade, releasing toxic fumes into your kitchen air. Furthermore, if you use metal utensils and scratch that coating, you are actively releasing microplastics and toxic chemical compounds directly into the fat you are using to fry your sandwich.
The Impending Global Crackdown
This isn’t just me being a paranoid perfectionist. The regulatory landscape is shifting rapidly because the health data is undeniable. The European Union is currently pushing forward with a universal restriction on PFAS—covering over 10,000 chemical compounds, including those used in non-stick cookware coatings—with a major European Commission decision expected in 2027. States like California and Washington are already cracking down on the use of these forever chemicals in consumer goods.
It is officially time to start banishing toxic kitchen gear from your home. You deserve better than mystery metals and peeling polymers.
Safe, High-Quality Alternatives
You do not need a chemical coating to prevent your grilled cheese from sticking. You just need proper heat control and high-quality, durable equipment. I strongly advocate for investing in professional-grade carbon steel pans, heavy-bottomed tri-ply stainless steel, or a well-seasoned cast-iron skillet.
Yes, cast iron and carbon steel require a bit of maintenance to build up their natural, polymerized seasoning layer. But once you do, they offer a naturally slick surface that will literally outlive you. They retain heat beautifully, they provide an unmatched sear, and most importantly, they won’t slowly leach forever chemicals into your beautiful, crisp, mayo-slathered sourdough.
The Definitive Masterclass: Building the Perfect Sandwich
Alright, we have covered the chemistry, the thermodynamics, and the heavy metal health warnings. Now it is time to put the theory into practice. Making a mind-blowing grilled cheese doesn’t require a culinary degree, but it does require rigorous attention to detail. Here is your step-by-step masterclass for the ultimate weekend (or weeknight) grilled cheese.
Phase 1: The Bread Architecture
Do not use heavily crusty, artisanal sourdough boules with massive air pockets. I love a good rustic loaf, but large air holes are structural liabilities. When the cheese melts, it will leak through those holes, hit the hot pan, and burn. You want a bread with a tight, even crumb. A high-quality white bread, a sturdy brioche, or a mild, dense sourdough is perfect. Slice it about half an inch thick—any thicker, and the heat won’t penetrate to the cheese; any thinner, and the bread will disintegrate.
Phase 2: The Cheese Matrix
This is non-negotiable: You must grate your own cheese from a block. Do not, under any circumstances, reach for those convenient pre-shredded bags at the grocery store.
Commercially shredded cheese is tossed in anti-caking agents like potato starch, cornstarch, or powdered cellulose to keep the shreds from clumping together in transit. These starches inhibit the proteins in the cheese from melting together smoothly. If you have ever tried to make macaroni and wondered why your cheese sauce gets grainy and refuses to emulsify, it is because of those anti-caking agents.
For the ultimate melt, you need a blend of flavor and texture. Sharp cheddar provides the robust, tangy flavor (in fact, 44% of Americans prefer cheddar in their sandwiches), while a younger, high-moisture cheese like American, Fontina, or Monterey Jack provides the gooey, stretchy texture. Grate them fresh, and mix them together.
Phase 3: The Spread Application
Take your room-temperature bread and a jar of high-quality, full-fat mayonnaise (Duke’s or Hellmann’s/Best Foods are the gold standards here). Do not use low-fat or fat-free mayo—they are pumped full of extra water and sugar to make up for the lack of oil, which will cause your bread to steam and burn.
Using a butter knife, spread a thin, edge-to-edge layer of mayo on one side of each slice of bread. Do not glob it on. A heavy hand will result in a greasy, soggy sandwich. You just need enough to act as a conductive fat layer.
Phase 4: Temperature and Heat Control
Place your heavy-bottomed, non-toxic skillet on the stove and turn the heat to medium-low. Patience is your greatest virtue here. If the pan is too hot, the bread will brown before the cheese melts. If it is too cold, the bread will absorb the oil and become greasy.
Place one slice of bread, mayo-side down, into the pan. Immediately pile your freshly grated cheese matrix evenly across the bread. Top with the second slice of bread, mayo-side up.
Phase 5: The Flip
Let the sandwich cook undisturbed for about 3 to 4 minutes. You are looking for a deep, even, golden-brown crust. When it is time to flip, do not use a thick, clunky plastic spatula that is going to melt against the rim of your pan. Invest in a high-quality, heat-resistant odor-free silicone turner, or better yet, a thin, flexible stainless steel fish spatula. Slide it swiftly under the bread, place a finger lightly on the top slice to hold it together, and flip with confidence.
Cook for another 3 to 4 minutes on the second side until the cheese is oozing out the sides and the crust is audibly crunchy when you scrape your spatula across it. Remove from the pan, let it rest for exactly one minute so the cheese doesn’t instantly run out onto your cutting board, and slice it diagonally. (Triangles taste better; this is a scientifically unprovable but universally acknowledged culinary fact).
Frequently Asked Questions (And My Brutally Honest Answers)
Whenever I preach the gospel of the mayonnaise grilled cheese, I get hit with the same wave of skepticism. Let’s clear the air.
“Will my sandwich taste like a giant glob of warm mayonnaise?”
Absolutely not. This is the number one fear people have, and it is entirely unfounded. When the mayonnaise hits the hot pan, the small amount of vinegar evaporates, and the egg proteins undergo the Maillard reaction. By the time the sandwich hits your plate, the distinct “mayo flavor” is completely gone. What remains is a rich, savory, deeply roasted flavor profile that complements the cheese perfectly.
“Is this trick healthier than using butter?”
Let’s be real for a second: you are eating a pile of melted cheese aggressively sandwiched between two carbohydrates. We are not making a kale salad here; we are making comfort food. Calorically speaking, a tablespoon of mayonnaise and a tablespoon of butter are very similar. The goal here isn’t to shave off calories; the goal is to achieve culinary perfection and prevent the bitter taste of burnt milk solids.
“Can I use vegan mayonnaise?”
Yes, you absolutely can. Most high-quality vegan mayonnaises use an emulsion of oil and aquafaba (chickpea water) or soy protein. Because the primary ingredient is still oil, you still get the massive benefit of the higher smoke point, and the plant-based proteins will still facilitate a beautiful browning reaction.
“What if I genuinely miss the flavor of butter?”
I hear you. Butter has a distinct, sweet, creamy flavor profile that oil simply cannot replicate. If you are a butter purist but still want the structural and thermal benefits of the mayonnaise crust, there is a brilliant compromise. Use the mayo on the outside of the bread for the perfect, unburnt sear. Then, take a small pat of high-quality, grass-fed butter and tuck it inside the sandwich, right in the middle of your grated cheese. As the sandwich cooks, the butter will melt into the cheese matrix, infusing the entire interior with that rich, buttery flavor, while the exterior remains impeccably crisp.
Your Weekend Culinary Hobbyist Assignment
Cooking does not have to be a stressful, smoke-filled chore. It is a series of small, easily mastered techniques that stack together to create something beautiful. By swapping out your cold, tearing, low-smoke-point butter for a thin, scientifically superior layer of emulsified mayonnaise, you are taking control of the thermodynamics in your skillet. You are working smarter, not harder.
So, this weekend, I want you to ditch the toxic, peeling Teflon pans. I want you to buy a block of real, high-quality cheddar and grate it yourself. I want you to spread that mayo edge-to-edge, control your heat, and experience the unparalleled joy of a perfectly golden, deeply savory, edge-to-edge crunchy grilled cheese.
And the best part? Because you didn’t scorch any milk solids to the bottom of your skillet, cleanup is going to be a breeze. You’ll barely even need a bench scraper to clear your cutting board before you sit down to enjoy the fruits of your labor.
Now get out of here, go heat up a heavy skillet, and stop ruining your dinners. You’ve got this.






