
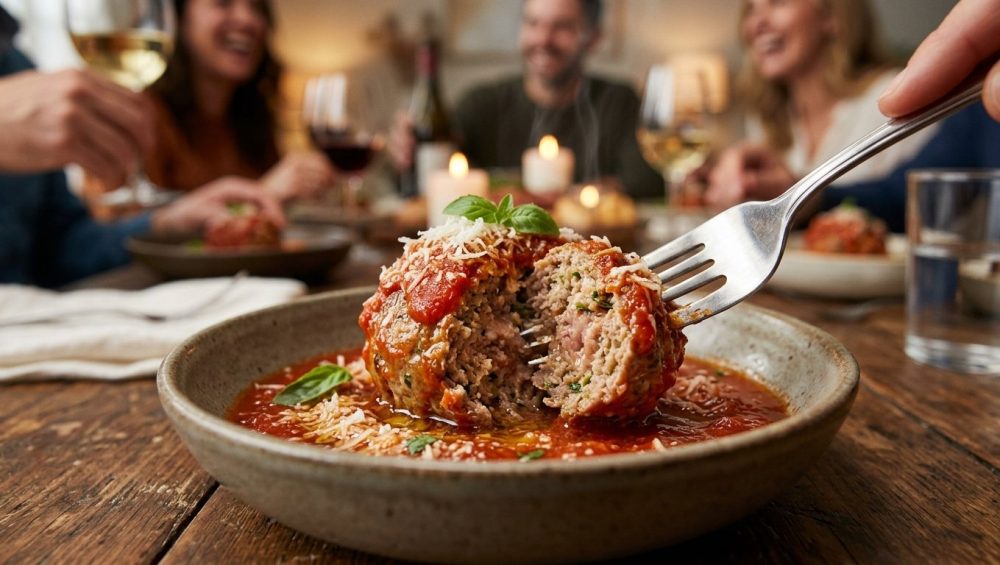
We need to have a serious conversation about the tragedy occurring in kitchens across the globe every single Sunday. You know exactly what I am talking about. You spend your precious weekend hours meticulously blending ground meats, grating fresh Parmigiano-Reggiano, and simmering a San Marzano tomato sauce until your kitchen smells like a rustic trattoria in Naples. You proudly serve your masterpiece to your guests, they take a bite, and suddenly… silence.
They are chewing. And chewing. And chewing.
Congratulations, you have successfully manufactured a batch of savory golf balls.
Look, I get it. We have all been there. I learned to cook through trial, error, and setting off the smoke detector enough times that my neighbors thought it was a scheduled alarm test. Early in my culinary journey, I produced meatballs so dense they could have been used as structural masonry. But here is the brutal truth: professional-level, melt-in-your-mouth meatballs do not require a culinary degree. They require a basic understanding of meat chemistry, a refusal to compromise on technique, and a zero-tolerance policy for rushing the process.
Today, we are going to tear down everything you thought you knew about ground meat. We are going to explore the microscopic protein structures that are ruining your dinners, the absolute necessity of a proper panade, and the foolproof methods for shaping and cooking. Once you have mastered the science, we are going to translate that knowledge into the ultimate 2026 entertaining flex: the Mindful Meatball Bar. Because if there is one thing I love more than a perfectly tender meatball, it is a low-stress, highly interactive dinner party where the guests practically feed themselves.
Grab your mixing bowls, ditch the pretentious chef-speak, and let’s get to work.
The Anatomy of a Culinary Disaster: Why Your Meatballs Bounce
If you want to stop making rubbery hockey pucks, you have to understand the enemy. And in the world of ground meat, the enemy has a name: myosin.
The Myosin Matrix (The Science of Rubber)
Meat is primarily composed of muscle fibers, and those fibers contain two highly reactive proteins called actin and myosin. In a living animal, these proteins act like the hook-and-loop sides of Velcro, sliding past each other to contract and relax the muscles. When you grind meat, you physically tear these muscle fibers apart, exposing the actin and myosin to the outside world.
Here is where things go horribly wrong in the home kitchen. Myosin is a highly sticky, water-soluble protein. When you aggressively knead, squish, and squeeze your ground meat mixture with your bare hands, you are essentially extracting that myosin and forcing it to cross-link with the other proteins. The more you mix, the tighter that protein matrix becomes.
Think of it like gluten in bread dough. When you knead bread, you want a tight, elastic network to give the loaf a chewy structure. But a meatball is not a baguette. You want a delicate, loosely bound structure that yields to the gentle pressure of a fork. If you overwork the meat, the myosin binds everything into an impenetrable web, trapping the fat and moisture in a vice grip that only tightens as it cooks.
The Salt Paradox: When Seasoning Becomes Curing
Mechanical agitation (overmixing) is only half the problem. The other culprit is chemical agitation, specifically from salt.
Salt is a magical ingredient, but it is also a powerful solvent for myosin. When you add salt to ground meat, it rapidly dissolves the myosin proteins, turning them into a sticky, sausage-like glue. This is fantastic if you are making bratwurst or salami, where a bouncy, snappy texture is the ultimate goal. It is an absolute disaster for a tender meatball.
Just like the fatal error of salting ground beef too early, timing is everything. If you salt your meatball mixture and then aggressively mix it, or worse, let it sit in the fridge for several hours before cooking, you are effectively curing the meat. The proteins will lock together, and no amount of simmering in tomato sauce will save them.
The Lean Meat Fallacy
The final nail in the coffin of a tender meatball is a lack of fat. Fat is flavor, yes, but more importantly, fat is lubrication. As the meatball cooks, the muscle fibers inevitably contract and squeeze out moisture. If there is enough fat distributed throughout the mixture, it melts into those microscopic gaps, keeping the meatball juicy and tender.
If you try to make meatballs out of 99% lean ground turkey or 95% lean ground beef because you are trying to be “healthy,” you are setting yourself up for failure. Lean proteins contract violently under heat, and without fat to buffer that contraction, you are left with a dry, chalky mess. We will discuss proper ratios shortly, but for now, write this on your forehead: fat is a structural requirement, not an optional indulgence.
The Secret Weapon: Mastering the Panade
If myosin and salt are the villains of our story, the panade is the undisputed hero. If you take absolutely nothing else away from this masterclass, remember this: a panade is non-negotiable.
What the Heck is a Panade? (And the Chemistry Behind It)
A panade (pronounced pah-NAHD) is a paste made from a starch and a liquid, typically bread and milk. Many amateur cooks mistakenly believe that adding breadcrumbs to a meatball is a cheap way to stretch the meat or act as a “filler.” This is a fundamental misunderstanding of culinary science.
When you soak bread in milk, the starches in the bread hydrate and swell into a thick, slippery gel. When you gently fold this gel into your ground meat, it coats the exposed muscle fibers. This starch barrier physically interrupts the actin-myosin cross-linking we talked about earlier. The proteins literally cannot bind tightly together because the panade is standing in the way.
Furthermore, as the meatball cooks and the proteins inevitably contract, the panade acts like a microscopic sponge, holding onto the liquid and preventing it from weeping out into your pan. This is exactly why you need soggy bread to act as a buffer against the harsh realities of thermal contraction.
Bread Selection: The Good, The Bad, and The Sourdough
Not all starches are created equal, and your choice of bread will drastically impact your final texture.
The Ideal Choice: High-Quality White Bread. Standard, soft white sandwich bread (crusts removed) is the gold standard for a panade. It dissolves easily into a smooth, homogenous paste that incorporates flawlessly into the meat without leaving weird, gummy chunks.
The Acceptable Alternative: Panko. If you do not have fresh bread, unseasoned panko breadcrumbs are your next best bet. Panko is airy and absorbs liquid beautifully. However, you must give it ample time (at least 10 minutes) to fully hydrate and turn into a paste before adding it to the meat. Dry breadcrumbs will simply act like tiny sponges, sucking the natural moisture out of the meat as it cooks.
The Absolute No-Go: Artisanal Sourdough or Stale Baguettes. I know you want to be fancy, but keep your crusty artisan loaves away from your meatballs. The tough crusts and highly developed gluten networks in rustic breads do not break down easily. If you use them, you will end up with hard, unpleasant lumps of dough studded throughout your meatballs.
Liquid Assets: Milk vs. Broth vs. Water
While milk is the traditional liquid for a panade, it is not the only option.
- Whole Milk: The classic choice. The fat and lactic acid in the milk add a subtle richness and help tenderize the meat.
- Buttermilk or Yogurt: If you want a slight tang and even more tenderizing power (thanks to the higher acidity), a splash of buttermilk works wonders.
- Beef or Chicken Stock: An excellent dairy-free alternative that aggressively boosts the savory, umami profile of the meatball.
- Ricotta Cheese: While not a traditional liquid, folding a generous dollop of full-fat ricotta into your panade mixture adds incredible moisture and a luxurious, cloud-like texture.
Understanding the secret power of soaked bread will change your culinary life. It is the single most important technique separating amateur home cooks from seasoned professionals.
The Holy Trinity of Meat: Ratios and Blends
You can have the perfect panade and the gentlest mixing technique in the world, but if you start with the wrong meat, you are fighting a losing battle.
Beef, Pork, and Veal: The Classic Breakdown
The traditional Italian-American meatball relies on a specific trio of meats, often sold pre-packaged at butcher counters as a “meatloaf mix.” There is a highly scientific reason this specific blend works so flawlessly:
- Beef (The Foundation): Beef provides the robust, savory, beefy flavor that we expect from a classic meatball. However, beef (especially standard 80/20 ground chuck) can be slightly dense on its own.
- Pork (The Lubricant): Ground pork is naturally sweeter and inherently fattier than beef. It lightens the texture of the meatball and provides the necessary internal lubrication to keep things juicy.
- Veal (The Secret Weapon): Veal does not bring much aggressive flavor to the party, but it is packed with natural gelatin. As the meatball cooks, this gelatin melts, creating a lip-smacking, silky texture that coats the palate.
If you cannot find ground veal (or prefer not to eat it), do not panic. You can mimic its textural benefits by replacing it with an equal amount of ground pork, and adding a packet of unflavored powdered gelatin bloomed in a few tablespoons of cold chicken stock to your panade.
The Golden Ratio: Aim for 50% beef, 25% pork, and 25% veal (or 50% beef and 50% pork). Under no circumstances should the overall fat content of your meat blend drop below 20%.
Poultry Pitfalls: Saving Chicken and Turkey Meatballs
I hear the wellness crowd in the back clamoring for turkey meatballs. Listen, you can make phenomenal poultry meatballs, but you have to respect the biology of the bird.
Ground chicken and turkey are notoriously lean and lack the natural myoglobin and fat structure of red meat. If you treat ground turkey exactly like ground beef, you will end up with a dry, chalky disaster.
To save poultry meatballs, you must artificially introduce fat and moisture.
- Use Dark Meat: Never buy 99% lean ground breast meat. Always opt for 93/7 or, ideally, a dark meat blend.
- Double the Panade: Poultry needs more structural buffering than beef.
- Add Umami Boosters: Because poultry lacks the deep savory notes of beef, you need to compensate. Finely minced, sautéed mushrooms, a splash of soy sauce, or a heavy hand of grated Parmesan cheese will inject the umami that the bird naturally lacks.
Technique is Everything: Mixing and Shaping
Alright, you have your perfectly hydrated panade, your beautifully balanced meat blend, your aromatics, and your seasonings. Now comes the moment of truth. This is where 90% of home cooks ruin their meatballs.
The “Claw” Method: Gentle Mixing for Tender Results
Do not mash the meat. Do not squeeze the meat through your fingers like playdough. Do not throw it in a stand mixer unless you are intentionally trying to make a meatloaf.
Instead, use the “Claw” method. Spread your ground meat out in an even layer in a wide, shallow bowl. Distribute your panade, herbs, cheese, and seasonings evenly over the top. Now, spread your fingers wide like a claw. Gently lift the meat from the bottom of the bowl and fold it over itself, keeping your fingers separated. You are tossing the mixture, not compressing it.
Stop mixing the absolute second the ingredients are evenly distributed. You should still be able to see distinct, individual specks of fat and meat. If the mixture turns into a homogenous, smeary, uniform paste, you have gone too far. The myosin has been activated, and your meatballs are destined to be tough.
Hydrated Hands: The Secret to Seamless Rolling
When it comes time to shape the meatballs, friction is your enemy. If your hands are warm and dry, the meat will stick to your palms, forcing you to roll the balls aggressively to get them smooth. This aggressive rolling compresses the center of the meatball, creating a dense core.
To prevent this, set up a small bowl of cold water (or olive oil) next to your workstation. Lightly coat your hands before rolling. The moisture creates a barrier, allowing the meat to glide smoothly in your palms.
Use a spring-loaded cookie scoop to portion the meat. This ensures every meatball is exactly the same size, which is critical for even cooking. Gently toss the portioned meat back and forth between your cupped, hydrated hands just until it forms a cohesive sphere. Do not pack it tight like a snowball.
The Maillard Reaction: Cooking Methods Decoded
You have treated your meat with the utmost respect. Now, how do we apply heat without ruining all our hard work? You generally have three options, each with its own pros and cons.
The Stovetop Sear (Flavor vs. Mess)
Searing meatballs in a skillet is the traditional method for a reason. When protein and amino acids hit a hot pan, they undergo the Maillard reaction—a complex chemical process that creates hundreds of new, wildly delicious flavor compounds. That golden-brown crust is pure culinary gold.
However, searing requires patience and the right equipment. If you use a cheap, thin pan, the temperature will plummet the second you add the cold meat, causing the meatballs to steam in their own juices rather than sear. You need a heavy-bottomed skillet with high thermal mass. Furthermore, if you are frustrated when half your dinner sticks to your stainless steel skillet, it means you are not properly utilizing temperature control. You must let the pan preheat adequately so the meat sears and releases naturally.
The downside? Searing is messy. Your stovetop will be covered in grease splatters, and you have to babysit the pan, carefully turning the fragile meatballs so they do not fall apart.
The Oven Bake (Efficiency for the Weekend Host)
If you are cooking for a crowd, the stovetop sear is an inefficient nightmare. This is where the oven bake shines.
Preheat your oven to a blistering 425°F (220°C). Line a heavy-duty rimmed baking sheet with parchment paper. Space the meatballs out evenly—if they are touching, they will steam. Baking at a high temperature allows you to achieve a respectable level of browning on the exterior while keeping the interior tender, all without a single drop of grease hitting your stovetop.
The Braise (The Slow Simmer to Perfection)
The most foolproof way to guarantee a tender meatball is to skip the browning entirely and drop the raw, gently shaped meatballs directly into a pot of gently simmering tomato sauce.
This is the classic “Nonna” method. As the meatballs poach in the liquid, they absorb the flavors of the sauce, and the sauce absorbs the rich, savory juices of the meat. Because the temperature of the simmering sauce never exceeds 212°F (100°C), it is nearly impossible to violently overcook the proteins. The result is a meatball so tender it practically dissolves on your tongue. The only trade-off is that you sacrifice the complex, roasted flavors of the Maillard reaction.
Welcome to 2026: The Era of the Mindful Meatball Bar
Now that you possess the technical knowledge to produce flawless meatballs, it is time to put that knowledge to work. We are going to completely rethink how you entertain.
Casual is the New Formal: The Data Behind the Dinner Party Revival
Let’s look at the facts. According to the 2026 OpenTable Dining Trends Report, group dining is surging, with parties of six or more up 12% year-over-year. But alongside this restaurant boom, there is a massive, parallel shift happening in our homes. The 2026 International Housewares Association (IHA) Occasions Survey revealed that 57% of consumers hosted a casual at-home gathering in the past year, a significant 10-point jump from 2025. Furthermore, the HelloFresh 2025-2026 State of Home Cooking report notes that a staggering 93% of Americans expect to cook as much or more in the coming year.
What does this data tell us? People are desperate for connection, but they are entirely over the stiff, pretentious, multi-course formal dinner party. Formality is dead; intentional, relaxed hospitality is thriving.
When you decide to host a relaxed dinner party this weekend, you need a menu that scales easily, accommodates various dietary preferences, and—most importantly—does not require you to be chained to the stove while your guests are drinking wine in the living room.
Enter the Mindful Meatball Bar.
Setting Up Your Meatball Stations
A meatball bar is the ultimate interactive dining experience. It empowers your guests to customize their plates while removing the plating burden from your shoulders. If you want to master the art of effortless hosting, preparation is key. You do all the work in the morning, and when the doorbell rings, your only job is to pour the drinks.
Here is how you structure the ultimate spread:
1. The Base Station (The Carb Foundation):
Provide three distinct vessels for the meatballs to rest upon.
- Classic: Al dente spaghetti or bucatini tossed in a tiny bit of olive oil to prevent sticking.
- Comfort: Creamy, parmesan-whipped polenta or a massive bowl of buttery mashed potatoes.
- Vessel: High-quality, toasted sub rolls brushed with garlic butter for those who want to build a sandwich.
2. The Meatball Trio:
Offer variety to keep things interesting.
- The Purist: The classic Beef/Pork/Veal blend we perfected above.
- The Lighter Side: A bright, herbaceous chicken meatball packed with lemon zest, ricotta, and parsley.
- The Plant-Based: A hearty eggplant and lentil “meatball” bound with walnuts and a flax-egg panade for your vegan friends.
3. The Sauce Symphony:
This is where the magic happens. Do not just serve one sauce. Building depth of flavor by browning your tomato paste first in the pan will yield a rich, dark Marinara. Alongside that, offer a rich, creamy Swedish-style mushroom gravy (perfect over the mashed potatoes), and a vibrant, acidic basil pesto to cut through the richness of the meat.
4. The Garnish Gallery:
Let people play with texture. Set out bowls of freshly torn basil, grated Pecorino Romano, toasted pine nuts, red pepper flakes, and perhaps some deeply caramelized onions.
Thermodynamics and Food Safety: Keeping It Hot (and Safe)
We need to take a brief detour into the unsexy world of food safety, because giving your friends food poisoning is generally considered a dinner party faux pas.
First, the cooking phase. Ground meat is inherently riskier than whole cuts of meat because the surface bacteria have been mixed throughout the entire batch. You cannot serve a “medium-rare” meatball. According to strict food safety standards, ground beef and pork must be cooked to a minimum internal temperature of 160°F (71°C), and ground poultry must reach 165°F (74°C). Do not guess. Always verify doneness with a digital instant-read meat thermometer to guarantee safety without overcooking.
Second, the holding phase. The beauty of a meatball bar is that it sits out for hours while people graze. However, bacteria thrive in the “Temperature Danger Zone” between 41°F and 135°F (5°C and 57°C). In commercial catering, safety regulations mandate that hot food must be held at 135°F or above (in the UK, the standard is 63°C / 145°F).
You cannot just leave a bowl of meatballs on the counter for three hours. You must utilize thermal mass. Serve your meatballs in pre-heated, heavy enameled cast-iron Dutch ovens, which retain heat beautifully. Alternatively, embrace the retro charm of a slow cooker set to the “Warm” function, or use chafing dishes with gel fuel burners. Check the temperature periodically to ensure the sauce and meatballs remain safely above that 135°F threshold.
Ditching the Toxic Gear: Safe Cookware for Your Meatball Masterpiece
As the “Sassy Sous-Chef,” I have a strict, zero-tolerance policy for cheap, toxic kitchenware. If you are going to put the time, effort, and money into sourcing high-quality meats and mastering the science of the panade, do not insult your ingredients by cooking them in garbage pans.
The Non-Stick Nightmare (Why Teflon Ruins the Sear)
I will say it until I am blue in the face: Teflon flakes are not a recognized food group. If you are trying to sear meatballs in a scratched, peeling, $15 non-stick skillet you bought at a big-box store five years ago, you are making a grave mistake.
First, traditional non-stick coatings (PTFE) degrade rapidly under high heat. If you get the pan hot enough to properly sear a meatball, you are likely releasing toxic fumes. Second, non-stick pans inherently inhibit the Maillard reaction. You will never get that deep, crusty, caramelized exterior on a slippery surface.
Furthermore, if you are using aerosol sprays on these pans, you are accelerating their demise. Please remember that aerosolized cooking spray is the enemy of high-quality cookware; the chemical propellants bake into an impossible-to-remove sticky residue that destroys the non-stick properties anyway.
Embracing Stainless Steel and Enameled Cast Iron
For the ultimate meatball preparation, you need cookware with high thermal mass and safe, unreactive surfaces.
Fully Clad Stainless Steel: A heavy, 3-ply or 5-ply stainless steel skillet is your best friend for stovetop searing. It holds heat brilliantly, won’t drop in temperature when you add the cold meat, and creates the ultimate fond (those browned bits stuck to the bottom of the pan). You can deglaze that fond with a splash of wine to start your sauce, ensuring zero flavor is lost. And when you are done prepping your ingredients on your cutting board, you can easily clean your board using a stainless steel bench scraper before moving on to the next task.
Enameled Cast Iron: For the braising method, or for hot-holding your meatballs on the buffet line, nothing beats an enameled cast-iron Dutch oven (think Le Creuset or Staub). The cast iron provides unparalleled heat retention, keeping your food safely out of the temperature danger zone, while the glass-enamel coating is completely non-toxic, non-reactive to acidic tomato sauces, and stunningly beautiful on a serving table.
Invest in good gear. It will outlast you, it will not poison your family, and it will genuinely make you a better cook.
The Final Bite: Bringing It All Together
Cooking is not magic; it is applied science wrapped in hospitality. When you understand how myosin reacts to salt and mechanical force, you stop making mistakes. When you understand how a panade physically blocks protein binding, you unlock the secret to melt-in-your-mouth tenderness. And when you understand the shifting trends of 2026 home entertaining, you stop stressing over formal table settings and start creating environments where genuine connection can happen.
The Mindful Meatball Bar is more than just a dinner party format. It is a philosophy. It is an acknowledgment that the best food is comforting, the best gatherings are relaxed, and the best hosts are the ones who actually get to sit down and enjoy a glass of wine with their guests.
So this weekend, skip the crowded restaurant reservations. Call up your favorite people, buy some high-quality ground meat, soak some bread in milk, and treat your ingredients with the gentle respect they deserve. You now possess the definitive blueprint for meatball perfection. Go forth, mix gently, and reclaim your kitchen.






