
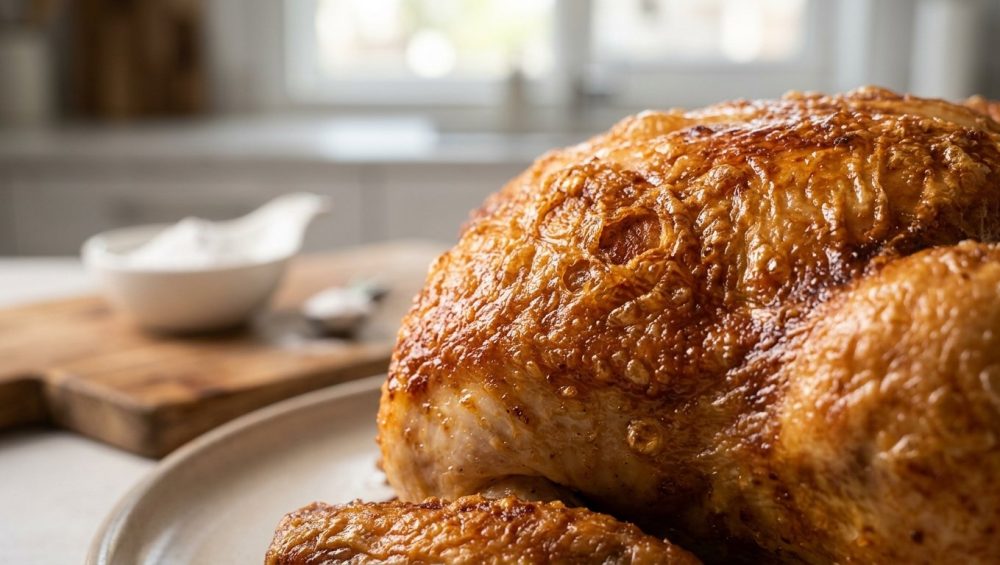
Pour yourself a glass of wine, grab a seat, and let’s have a brutally honest conversation about your oven-roasted chicken. You know the scenario. You’ve spent your precious evening carefully seasoning a beautiful batch of chicken wings or a whole spatchcocked bird. You slide it into the oven, dreaming of that shatteringly crisp, golden-brown skin you get at your favorite bistro. But when the timer goes off, what do you pull out? A pale, flabby, rubbery disappointment. The meat might be perfectly juicy, but biting into that skin feels like chewing on a seasoned wet raincoat.
It’s tragic, it’s frustrating, and it’s entirely preventable.
Listen to me: you do not need a culinary degree, a commercial deep fryer, or a vat of dangerous, splattering peanut oil to achieve rotisserie-level crispiness in your standard home kitchen. You just need a basic understanding of food science and a cheap pantry staple you probably only use for making pancakes. Today, we are leaving the dark ages of soft poultry behind. We are going to harness the magic of baking powder.
The Anatomy of Poultry Skin: Why It Defies You
To defeat your enemy, you must first understand it. Chicken skin is not just a thin wrapper holding the meat together; it is a complex biological matrix composed primarily of three things: water, fat, and a tough network of collagen proteins.
When you subject chicken skin to heat, several things need to happen simultaneously for it to become crispy. First, the water must evaporate. Moisture is the eternal enemy of crunch. As long as there is water present in or on the skin, the temperature of that skin cannot rise above 212°F (100°C)—the boiling point of water. Instead of roasting, your chicken is essentially steaming itself in its own juices.
Once the water is finally driven off, the fat needs to render. Rendering is just a fancy culinary term for melting the solid fat into a liquid so it can drain away, leaving behind the protein structure. If the fat doesn’t render completely, it acts as a soft, greasy cushion, preventing the skin from crisping.
Finally, those tough collagen proteins need to unravel, cross-link, and undergo the Maillard reaction—the complex chemical process of browning that creates hundreds of new flavor compounds and that beautiful mahogany color.
The problem? In a standard home oven, these three processes are in a constant race against the meat underneath. By the time the water evaporates and the fat renders enough to crisp the skin, the delicate breast meat has usually turned to sawdust. You are left with a lose-lose situation: juicy meat with rubbery skin, or crispy skin with meat so dry it requires a gallon of gravy to swallow.
The Flawed Methods You Need to Abandon
Before we get to the solution, we need to address the terrible advice floating around the internet. If you are committing any of these rookie kitchen mistakes, stop immediately.
The High-Heat Fallacy
Many home cooks think the solution to pale skin is just cranking the oven up to 450°F and hoping for the best. While high heat is eventually necessary, blasting wet chicken skin with intense heat right out of the gate is a recipe for disaster. The rapid heat sears the exterior proteins before the fat underneath has a chance to slowly render out. You end up with skin that is burnt and blistered on the very outside, but thick, chewy, and loaded with unrendered fat underneath.
The Wet Brine Trap
Wet brining—submerging your chicken in a bath of saltwater and aromatics—is fantastic for injecting moisture into lean meat. But what did we just establish? Moisture is the enemy of crispy skin. When you wet brine a chicken, the skin acts like a sponge, soaking up excess water. You can pat it down with paper towels all you want, but that skin is fundamentally waterlogged. It will take twice as long to evaporate that moisture in the oven, completely sabotaging your chances of a crispy finish.
The Butter and Oil Smear
“Just rub the skin with butter or olive oil!” they say. Let’s think about this logically. Chicken skin is already composed of a massive amount of fat. Adding more fat on top of it doesn’t help it render; it just adds to the greasy puddle at the bottom of your roasting pan. Furthermore, butter contains about 15% to 18% water. When you rub butter on chicken skin, you are literally painting it with moisture. While the milk solids in butter might brown quickly, giving the illusion of crispy skin, the texture will remain soft and greasy.
Enter the Magic Powder: The Science of Alkalinity
So, how do we solve the moisture and fat problem without overcooking the meat? We hack the chemistry of the chicken skin using baking powder.
Yes, baking powder. The white powder sitting in the back of your baking cabinet. When applied as a dry rub to poultry skin, it triggers a cascade of chemical reactions that practically guarantee a shattering crunch. This isn’t just a quirky internet hack; it is a proven, science-backed technique popularized by serious food scientists and adopted by professional chefs everywhere.
Here is exactly what happens when you dust your chicken with baking powder:
1. Breaking the Peptide Bonds
Baking powder is slightly alkaline. When it dissolves into the natural moisture on the surface of the chicken, it raises the pH level of the skin. This alkaline environment actively breaks down the tough peptide bonds holding the skin’s proteins together. By weakening this protein matrix, the skin is able to render its fat and dry out significantly faster than it would in its natural, slightly acidic state.
2. Accelerating the Browning Process
That same elevated pH level acts as a catalyst for browning. The Maillard reaction occurs much more rapidly and efficiently in an alkaline environment. This means your chicken skin will achieve that gorgeous, deep golden-brown color much earlier in the cooking process, long before the meat underneath has a chance to dry out.
3. The Carbon Dioxide Micro-Blisters
This is where the true magic happens. Baking powder is a leavening agent; it is formulated to release carbon dioxide gas when it encounters moisture and heat. When you roast baking-powder-coated chicken, the powder reacts with the meat juices and the heat of the oven to create thousands of microscopic bubbles of carbon dioxide gas on the surface of the skin.
As these tiny bubbles expand and harden in the heat, they dramatically increase the surface area of the skin. Instead of a flat, smooth surface, you get a highly textured, micro-blistered crust that mimics the exact texture of something that has been plunged into a deep fryer. It creates a delicate, airy crunch that shatters when you bite into it.
Baking Powder vs. Baking Soda: A Crucial Distinction
Pay very close attention to this section, because mixing up your white pantry powders will completely ruin your dinner.
You must use baking powder, absolutely NEVER baking soda.
Baking soda is pure sodium bicarbonate. It is intensely alkaline. If you coat your chicken in baking soda, it will certainly raise the pH and brown the skin, but it will also leave behind a harsh, metallic, soapy taste that is completely inedible.
Baking powder, on the other hand, is a mixture of sodium bicarbonate (the base) and a weak powdered acid (like cream of tartar or sodium aluminum sulfate), along with a starch buffer (like cornstarch) to keep them from reacting in the can. When baking powder hits the moisture of the chicken, the acid and base neutralize each other, leaving behind zero metallic taste while still providing enough alkalinity to break down the proteins and create those glorious carbon dioxide bubbles.
The Aluminum-Free Mandate
There is one caveat: you must ensure your baking powder is labeled “aluminum-free.” Many commercial baking powders use sodium aluminum sulfate as their acid because it is cheap and heat-activated. However, when used in the quantities required for a dry rub, that aluminum compound can sometimes leave a faint, tinny aftertaste on the chicken. Look for brands like Rumford or Bob’s Red Mill that use calcium acid pyrophosphate or cream of tartar instead.
The Master Technique: Dry Brining Like a Pro
Now that we understand the science, we need to talk about the application. You cannot simply dust a chicken wing with baking powder and throw it straight into the oven. The baking powder needs time to work its chemical magic, and the skin needs time to dry out.
This brings us to the magic of dry brining.
Dry brining is the process of salting meat and letting it rest, uncovered, in the refrigerator for an extended period before cooking. It is the single most important technique you can master for cooking any type of meat, and it is the perfect vehicle for our baking powder hack.
When you apply a mixture of salt and baking powder to chicken skin, the salt immediately begins drawing liquid out of the meat through osmosis. At first, the chicken will look wet and glossy. But if you leave it in the fridge, the salt and baking powder will dissolve into that liquid, forming a concentrated brine that the meat then reabsorbs.
This process deeply seasons the meat all the way to the bone, while simultaneously allowing the surface skin to dry out completely in the cold, circulating air of the refrigerator. By the time you are ready to roast, the skin will look tight, translucent, and leathery—exactly what you want for maximum crispiness.
The Golden Ratio
For the perfect dry brine, you need a precise ratio. If you want to be incredibly accurate, break out your digital kitchen scale, but standard measuring spoons work fine here.
For every 1 pound of chicken wings (or bone-in, skin-on thighs/drumsticks), you will need:
- 1 teaspoon of kosher salt (Diamond Crystal preferred; if using Morton or table salt, cut this in half!)
- 1 teaspoon of aluminum-free baking powder
- A few grinds of black pepper (optional)
Mix this together in a small bowl. Do not add garlic powder, paprika, or brown sugar at this stage. Those spices have a tendency to burn during the high-heat roasting process, and sugar will attract moisture. Keep it simple: salt and baking powder.
The “No-Go” Gear Warning: Stop Poisoning Your Poultry
Before we get to the step-by-step instructions, I need to have a very serious word with you about your cookware. As your sassy sous-chef, I cannot in good conscience let you put perfectly prepped chicken onto toxic garbage.
If you are still roasting meat on a scratched, peeling, lightweight non-stick baking sheet that you bought for five dollars at a discount store, throw it in the trash right now. I am dead serious. Successfully banishing toxic kitchen gear is the first step to cooking like an adult. Those cheap non-stick coatings degrade at high temperatures. When you blast them in a 425°F oven, they can release toxic fumes and flake off directly into your food.
Furthermore, thin, cheap pans cannot handle the thermal shock of high-heat roasting. This is exactly why your baking sheets keep warping and loudly popping in the oven, causing your chicken juices to pool in one corner and steam the skin you worked so hard to dry out.
You need two basic, indestructible tools for this process:
- A Heavy-Duty Baking Sheet: Look for uncoated, heavy-gauge aluminum or stainless steel half-sheet pans. They conduct heat evenly, they will never warp, and they will outlast you.
- A Stainless Steel Wire Rack: This is non-negotiable. If you place chicken directly on a flat pan, the underside will sit in its own rendered fat and juices, resulting in a soggy, flabby bottom. Elevating the chicken on a wire rack allows the hot oven air to circulate 360 degrees around the meat, ensuring crispiness on all sides. Make sure the rack is 100% stainless steel, not chrome-plated, so it doesn’t rust or peel.
Step-by-Step Execution for Rotisserie-Level Crunch
Alright, you have the science, you have the ratios, and you have the proper gear. Let’s walk through the exact, foolproof process for making the crispiest oven-roasted chicken of your life.
Step 1: The Great Drying
Remove your chicken from its packaging and pat it dry with paper towels. I do not mean a gentle dab. I mean you need to aggressively squeeze every ounce of surface moisture off that bird. Get into the crevices. If the chicken is wet when you apply the rub, the baking powder will clump up and form a weird paste instead of an even coating.
Step 2: The Toss
Place your bone-dry chicken into a large mixing bowl. Sprinkle your salt and baking powder mixture evenly over the top. Use your hands to toss the chicken vigorously, massaging the powder into the skin until every square inch is coated. It should look like a very light, even dusting, not a thick batter.
Step 3: The Rack Setup
Line your heavy-duty baking sheet with aluminum foil (for easy cleanup) and place your stainless steel wire rack on top. Arrange the chicken pieces on the rack.
Crucial Rule: Leave space between each piece! If the chicken pieces are touching, they will create steam pockets between them, completely ruining the crisping process. Social distancing for poultry is mandatory.
Step 4: The Fridge Rest
Place the entire tray into the refrigerator, completely uncovered. Do not wrap it in plastic wrap, or you will trap the moisture. Let it rest for a minimum of 12 hours, but ideally 24 hours. If you are in an absolute rush, you can get away with 4 hours, but the results will not be as mind-blowing. The cold, dry air of the fridge is doing half the work for you.
Step 5: The Roast
When you are ready to cook, preheat your oven to 425°F (220°C). If you have a convection setting, use it, but drop the temperature to 400°F (200°C). Convection fans are amazing for whisking away moisture and accelerating crispiness.
Place the cold tray of chicken directly from the fridge into the hot oven. The thermal shock of the cold fat hitting the high heat will help jumpstart the rendering process.
Roast for 20 minutes, then pull the tray out and use tongs to flip each piece of chicken. This ensures even browning and fat rendering. Return to the oven for another 20 to 30 minutes.
Step 6: The Temperature Check
Do not pull the chicken out just because the skin looks brown. You need to ensure the fat has fully rendered and the connective tissues have broken down. For dark meat (wings, thighs, drumsticks), you actually want to overcook it slightly compared to breast meat.
While breast meat dries out at 165°F, dark meat is loaded with collagen that only begins to melt into gelatin at 170°F. For the best texture, aim for an internal temperature of 175°F to 185°F.
Insert a high-quality instant-read thermometer into the thickest part of the meat, avoiding the bone. If you touch the bone, you will get a false reading, which is exactly why your meat thermometer is lying to you half the time.
Troubleshooting: Why Your Skin Still Isn’t Crisping
If you followed the steps above and still ended up with sub-par skin, you likely committed one of these common errors. Let’s troubleshoot.
1. You Crowded the Pan
I said it once, and I will say it again: steam is the enemy. If you cram 20 chicken wings onto a single small rack, the moisture evaporating from the meat will create a localized sauna in your oven. The skin will stay soft and rubbery. Use two pans if you have to, and leave at least an inch of space between every piece.
2. Your Baking Powder is Dead
Baking powder loses its potency over time. If that can has been sitting in your pantry since the Obama administration, it is no longer going to produce those crucial carbon dioxide micro-blisters. Test your baking powder by dropping a spoonful into a cup of hot water. If it fizzes violently, it’s good. If it just sits there looking cloudy, throw it away and buy a fresh can.
3. You Used a Glass Baking Dish
Glass is a terrible conductor of heat and retains moisture. If you try to roast crispy chicken in a high-sided glass casserole dish, the high sides will trap the steam, and the bottom will boil in its own juices. Stick to flat, heavy metal baking sheets.
4. You Didn’t Wait Long Enough
Patience is a virtue, especially in the kitchen. If you only let the chicken rest in the fridge for 30 minutes, the salt hasn’t had time to draw out the moisture, and the baking powder hasn’t had time to break down the peptide bonds. Plan ahead. Weekday meals are for efficiency; weekend cooking projects require respect for the process.
Flavoring Your Crispy Masterpiece
Notice that our master technique only uses salt, pepper, and baking powder. So, how do you get those amazing garlic-parmesan, lemon-pepper, or spicy buffalo flavor profiles without ruining the crunch?
You apply the flavor after the cook.
If you coat your raw chicken in garlic powder, paprika, and dried herbs before a 45-minute stint in a 425°F oven, those spices will scorch and turn acrid. Spices burn quickly.
Instead, create a flavor station while the chicken is roasting. If you want a dry rub, mix your favorite spices together. When the chicken comes out of the oven, hot and bubbling, transfer it to a large clean bowl and immediately toss it with your dry spices. The residual heat and rendered fat on the surface of the chicken will instantly toast the spices, waking up their essential oils without burning them.
If you want a wet sauce (like Buffalo or Teriyaki), heat the sauce gently in a saucepan first. Tossing hot, crispy chicken in cold sauce directly from the fridge will immediately shock the skin and turn it soggy. Warm your sauce, and toss the chicken right before you serve it.
For an advanced culinary move, try taking your raw spices (like cumin, smoked paprika, or chili flakes) and gently blooming them in oil or melted butter in a small skillet over low heat for two minutes. This extracts fat-soluble flavor compounds that simply don’t exist in raw spices. Pour this infused oil over your crispy wings for a massive flavor upgrade.
You don’t need to understand pretentious recipe jargon like “gastrique” or “emulsion” to make an incredible wing sauce. Just combine a fat (butter or oil), an acid (vinegar or hot sauce), and your bloomed spices. Toss, serve, and accept the applause.
The Final Bite
Cooking shouldn’t be a source of stress, and you shouldn’t have to settle for mediocre food just because you are cooking at home. The difference between a frustrated amateur and a confident home cook is simply knowing how to manipulate the environment of your food.
By understanding the anatomy of poultry skin, ditching the toxic gear, and utilizing the alkaline magic of baking powder, you have completely removed the guesswork from roasting chicken. You are no longer hoping for crispy skin; you are chemically engineering it.
So, go buy a fresh can of aluminum-free baking powder, salt your poultry with authority, and let your refrigerator do the hard work overnight. The next time you pull a tray of perfectly blistered, golden-brown chicken out of your oven, you’ll wonder why you ever bothered ordering takeout in the first place.
Now, if you’ll excuse me, I have a batch of dry-brined wings calling my name, and my wine glass isn’t going to refill itself. Stay sassy, and keep cooking smart.






