
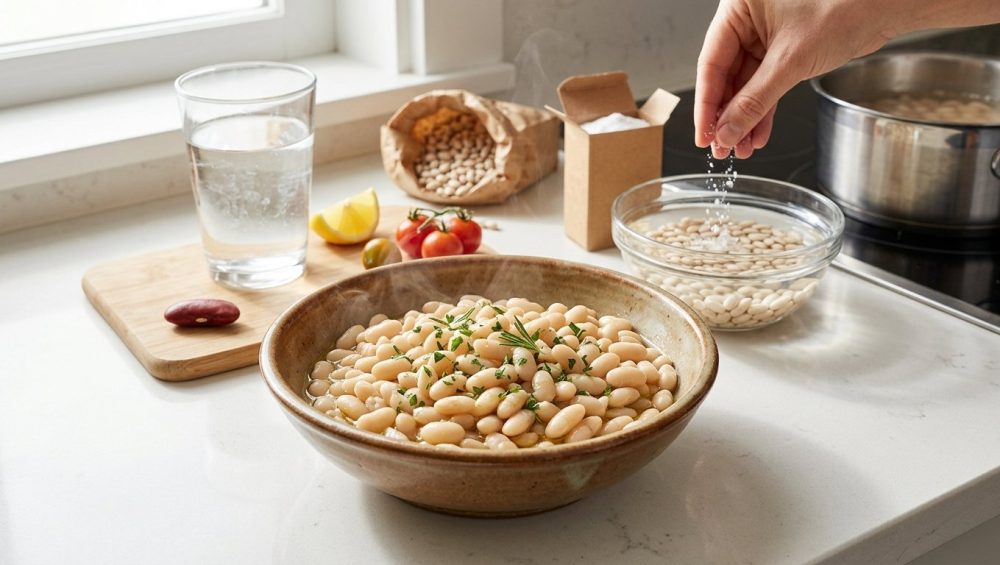
Listen, we need to have a serious talk about your legumes. There is nothing quite as soul-crushing as spending your entire Sunday soaking, chopping, sautéing, and simmering a beautiful pot of dried beans, only to sit down for dinner and bite into what feels like a handful of gravel. You followed the recipe. You simmered them for three hours. You hovered over the stove like a medieval alchemist. And yet, your beans are still stubbornly, aggressively, tooth-breakingly hard.
If you are currently staring at a pot of crunchy chickpeas or bullet-proof pintos and questioning your abilities as a home cook, take a deep breath. Put down the wooden spoon. You are not a failure. It is one of the most common rookie kitchen mistakes to assume that boiling water and time are the only two ingredients required to soften a dried bean. The truth is, cooking dried legumes is a masterclass in food chemistry, and there are invisible forces at play in your kitchen that are actively sabotaging your dinner.
As a home cook who survived the trenches of culinary trial and error to bring you the unvarnished truth, I am here to tell you that perfectly creamy, melt-in-your-mouth beans are entirely achievable on a weekday schedule. You do not need a culinary degree, and you certainly do not need to settle for the metallic, mushy texture of canned beans forever. We are going to break down the exact molecular reasons why your beans are refusing to soften, how to outsmart them, and how to guarantee absolute bean supremacy every single time you turn on the stove.
The Great Bean Betrayal: The Science of Why They Refuse to Soften
To understand why your beans are acting like tiny pebbles, you have to understand what a dried bean actually is. A bean is a dormant seed. Its entire biological purpose is to survive harsh winters, droughts, and predators so that it can eventually sprout in the spring. Nature designed that outer seed coat to be practically impenetrable.
At the microscopic level, the cells of a bean are held together by a complex carbohydrate called pectin. Think of pectin as the structural mortar holding the cellular bricks of the bean together. When you cook beans, your primary goal is to dissolve that pectin mortar. As the water heats up, it permeates the seed coat, swells the starch granules inside the cells, and eventually causes the pectin to break down, resulting in that luxurious, creamy texture we all crave.
However, pectin is highly reactive to its environment. Depending on what else is in the pot—or what is in your tap water—that pectin can either dissolve gracefully or turn into a hardened fortress. When your beans stay hard no matter how long you boil them, it means the pectin has been chemically locked into place.
The Usual Suspects: What’s Sabotaging Your Simmer?
If you have been simmering your beans for hours and they still have the texture of a roasted peanut, one of three hidden culprits is to blame. Let’s interrogate the suspects.
Culprit #1: The Geriatric Bean (Age Matters)
Dried beans are pantry staples, but they are not immortal. While they will never technically “spoil” or grow mold in a dry environment, they do undergo a chemical change as they age known as the “hard-to-cook” (HTC) defect.
When beans sit in a warehouse for a year, and then sit on a grocery store shelf for six months, and then sit in the back of your pantry for another two years, their cellular structure begins to cross-link. The cotyledon cells inside the bean become highly resistant to water absorption. You could boil a five-year-old kidney bean until the end of time, and it will never achieve a creamy interior.
If you bought your beans from a dusty bulk bin at a low-turnover grocery store, you were set up to fail before you even turned on the stove. Always buy your beans from stores with high inventory turnover, or better yet, order them directly from reputable heirloom bean purveyors. A fresh dried bean (harvested within the last year) will cook in half the time of a geriatric supermarket bean and will yield a significantly creamier broth.
Culprit #2: Hard Water Havoc (The Calcium and Magnesium Trap)
This is the most common, yet least understood, reason why home cooks fail at beans. If you live in an area with hard tap water, you are fighting an uphill battle against chemistry.
Hard water is packed with dissolved minerals, specifically calcium and magnesium ions. Remember our friend pectin, the mortar holding the bean cells together? Pectin absolutely loves calcium. When you simmer beans in hard water, the calcium ions bind to the pectin molecules in the bean skins, cross-linking them and reinforcing them like steel rebar in concrete.
This chemical reaction strengthens the cell walls to the point where they become entirely waterproof. The water cannot penetrate the reinforced skin, the starches inside cannot swell, and the bean remains hard. If your drinking water leaves white mineral scale on your faucets, it is actively ruining your legumes.
Culprit #3: The Acid Attack (Tomatoes, Vinegar, and Molasses)
If you have ever tried to make baked beans or chili from scratch and found that your beans stayed crunchy even after four hours in the oven, acid is your culprit.
Pectin breakdown is highly dependent on the pH level of the cooking liquid. In an alkaline (higher pH) environment, pectin dissolves rapidly. In an acidic (lower pH) environment, pectin firms up and refuses to break down.
The hidden trap of adding tomatoes too early is that their natural acidity drops the pH of the entire pot, instantly locking the bean skins into their hardened state. The same goes for wine, vinegar, citrus juice, and molasses. Molasses is actually a triple threat to your baked beans: it is acidic, it contains sugar (which also slows water absorption), and it is packed with naturally occurring calcium.
You must absolutely wait until the beans are completely, 100% tender before introducing any acidic ingredients to the pot. Once the beans are soft, the acid can no longer reverse the process, and you can simmer your chili or baked beans safely.
The Great Salt Debate: When to Season Your Beans
For decades, culinary conventional wisdom—passed down through generations of grandmothers and printed in countless old-school cookbooks—dictated that you must never, ever salt your beans until the very end of cooking. The myth claimed that salt toughens bean skins and prevents them from softening.
I am here to tell you, with the full backing of modern food science, that this is absolute nonsense.
Extensive testing by America’s Test Kitchen and Serious Eats has definitively proven that salting your bean-cooking water—and your soaking water—actually helps the beans cook faster and more evenly.
Here is the chemistry behind why the old wives’ tale is wrong: When you soak or cook beans in salted water, the sodium ions in the salt swap places with the calcium and magnesium ions naturally present in the bean skins. Because sodium ions are much weaker at cross-linking pectin than calcium ions, this ion exchange actually weakens the pectin structure, allowing the skins to soften beautifully without blowing out or exploding.
If you wait until the very end of cooking to add salt, the salt will only coat the exterior of the bean. The interior will remain bland and starchy. Salting early and often is the only way to deeply season a legume from the inside out.
The Masterclass: How to Actually Fix Hard Beans (and Prevent Them)
Now that we have identified the enemies—age, hard water, acid, and bad advice—it is time to arm you with the practical, time-saving techniques that will guarantee perfect results. Weeknight cooking is about efficiency, and weekend cooking is about perfection. These methods deliver both.
The Brining Technique (The Ultimate Game Changer)
If you take only one piece of advice from this entire masterclass, let it be this: stop soaking your beans in plain water, and start brining them.
Brining is the process of soaking your dried beans in a heavily salted water solution for 8 to 24 hours before cooking. This does two things: it hydrates the beans, cutting the cooking time in half, and it initiates that beautiful sodium-for-calcium ion exchange we just talked about, ensuring the skins will be tender but intact.
The Formula: Dissolve 3 tablespoons of kosher salt into 1 gallon of cold water. Add 1 pound of dried beans. Let them sit on the counter overnight. When you are ready to cook, drain the brining liquid, rinse the beans thoroughly, and place them in your pot with fresh water. You will still need to lightly salt your cooking water, but the beans will already have a head start on flavor and texture.
The Baking Soda Miracle (Alkalinity is Your Friend)
If you know you have hard water, or if you suspect your beans have been sitting in the pantry since the last presidential election, brining alone might not be enough. You need to manipulate the pH of the water.
Much like the secret power of baking soda in other recipes, salt alters the chemistry, but baking soda takes it to the next level. Baking soda (sodium bicarbonate) is highly alkaline. Adding a tiny amount to your soaking or cooking water raises the pH, neutralizing the effects of hard water minerals and aggressively weakening the pectin in the bean skins.
The Formula: Add exactly 1/4 teaspoon of baking soda to your soaking water, or directly to your cooking pot if you are skipping the soak.
A massive warning here: do not get heavy-handed with the baking soda. If you add too much, two disastrous things will happen. First, the alkaline environment will completely obliterate the cellular structure of the bean, turning your pot into a sludgy, mushy mess. Second, excessive baking soda leaves a distinct, bitter, soapy chemical taste that will ruin your entire dish. A quarter teaspoon is the magic number. It is enough to soften the beans without destroying their integrity or flavor.
The Quick Soak vs. The Overnight Soak vs. The No-Soak
Let’s talk about time management, because your time is valuable.
The Overnight Soak (The Gold Standard): 8 to 12 hours in a salt brine. Yields the most even cooking, the creamiest texture, and the fewest blown-out skins.
The Quick Soak (The Weekday Savior): You forgot to soak the beans last night, but you want chili tonight. Put your dried beans in a pot, cover them with two inches of water, and bring to a rolling boil for two minutes. Turn off the heat, cover the pot, and let them sit for one hour. Drain, rinse, and proceed with your recipe. This forces hot water into the beans rapidly, mimicking an overnight soak in a fraction of the time.
The No-Soak (The Lazy Sunday Method): You can absolutely cook beans from a rock-hard, unsoaked state. It will just take significantly longer (sometimes up to three hours), and the resulting broth will be much darker and starchier. This method only works reliably if your beans are fresh and your water is relatively soft.
Cooking Methods: Efficiency Meets Perfection
The vessel you use to cook your beans is just as important as the chemistry happening inside it. This brings me to one of my strictest rules in the kitchen: we do not tolerate toxic, cheap, or reactive cookware.
The Stovetop Simmer (And Why Your Pot Matters)
The traditional stovetop simmer is a beautiful, romantic way to cook beans on a lazy Sunday afternoon, but you must use the right pot.
Do not cook beans in a cheap, scratched, peeling non-stick pot. You do not want forever-chemicals flaking off into your beautiful legumes. Furthermore, do not use thin, unlined aluminum or cheap cast iron if you plan on adding acidic ingredients later. If your cheap cast iron leaves black specks in your food, or if it strips its seasoning into your broth, it will ruin the flavor profile. Just like how tomato sauce tastes metallic when cooked in reactive cookware, a long-simmered bean broth will take on a harsh, tinny flavor if exposed to bare aluminum.
Instead, use a heavy-bottomed, enameled cast-iron Dutch oven or a high-quality, fully clad stainless steel pot. These materials distribute heat evenly, preventing the beans at the bottom of the pot from scorching while the ones at the top remain undercooked. A gentle, rolling simmer—not a violent, rolling boil—is the key to preventing the beans from violently smashing against each other and turning to mush.
The Pressure Cooker / Instant Pot (The Weekday Savior)
If you are a busy professional trying to get dinner on the table on a Tuesday night, the electric pressure cooker is your best friend. Pressure cookers raise the boiling point of water to around 250°F, forcing moisture and heat into the beans at lightning speed.
You can take a batch of unsoaked black beans from dry pebbles to creamy perfection in about 35 minutes. If you brined them overnight first? They will cook in 15 to 18 minutes. The pressure cooker eliminates the need to babysit a simmering pot, making from-scratch beans a viable weeknight reality.
The Slow Cooker Warning: The Danger of Kidney Beans
I need you to pay very close attention to this section, because this is not just about culinary perfection—this is about food safety.
If you are making chili in a slow cooker and you toss in a handful of raw or merely soaked red kidney beans to cook on the “Low” setting all day, you are actively creating a toxic biohazard in your kitchen.
Red kidney beans (and to a lesser extent, white cannellini beans and broad beans) contain exceptionally high levels of a naturally occurring protein called phytohaemagglutinin, or PHA. PHA is a lectin that is highly toxic to humans. Consuming as few as four or five undercooked kidney beans can cause severe, violent food poisoning, including extreme nausea, vomiting, and abdominal cramping within just a few hours.
To measure this toxicity, scientists use “hemagglutinating units” (hau). Raw red kidney beans contain a staggering 20,000 to 70,000 hau. To make the beans safe to eat, that number needs to drop below 400 hau.
Here is the terrifying part: PHA is only destroyed by aggressive, high-heat boiling. The beans must reach a rolling boil of 212°F (100°C) for a minimum of 10 minutes to neutralize the toxin.
Most slow cookers, especially on the “Low” setting, max out at around 170°F to 180°F. Not only is this temperature too low to destroy the PHA, but food science has proven that heating kidney beans to 175°F actually increases their toxicity up to fivefold. You are essentially incubating the poison. Sometimes your meat thermometer is lying to you about internal temps, but a rolling boil is unmistakable—and absolutely mandatory here.
If you want to use your slow cooker for a recipe containing dried kidney beans, you MUST boil the soaked beans vigorously in a pot of fresh water on the stovetop for at least 15 minutes before transferring them to the slow cooker. Do not skip this step. If you are using canned kidney beans, they have already been pressure-cooked at the factory and are perfectly safe to toss straight into the slow cooker.
Troubleshooting: Can You Save Beans That Are Already Cooking and Still Hard?
We have all been there. You are two hours into a recipe, your dinner guests are arriving in forty-five minutes, and the beans in your Dutch oven are still crunchy. Panic sets in. Consider this your essential kitchen survival guide for rescuing a ruined dinner. Can they be saved?
It depends on why they are hard, but here is your emergency triage protocol:
Step 1: The Baking Soda Hail Mary. If you suspect hard water or old beans are the issue, immediately stir 1/4 teaspoon of baking soda into the simmering pot. The sudden spike in alkalinity will rapidly attack the pectin. Give it 20 minutes and test a bean. Use a stainless steel spider skimmer to fish out a test bean and blow on it; if the skin peels back beautifully, you are making progress.
Step 2: The Heat Blast. If you have been simmering them too gently, crank the heat. Bring the pot to a vigorous, rolling boil for 15 minutes. The aggressive mechanical agitation and high heat will force moisture into the stubborn cell walls. You may sacrifice a few blown-out skins, but a slightly ugly soft bean is vastly superior to a beautiful crunchy one.
Step 3: The Acid Assessment. Evaluate your liquid. Did you already add tomatoes, wine, or vinegar? If the pH of your pot is highly acidic, you are in a very tough spot. The pectin is locked. Your only hope is to add enough baking soda to neutralize the acid (which will cause the pot to foam up as the alkaline powder reacts with the acid), but this risks altering the flavor of your dish entirely. In the future, hold the acid until the very end.
If all else fails, and you are three hours in with no progress, you have encountered the dreaded “hard-to-cook” defect of ancient beans. Cut your losses, order takeout, and throw the rest of that bag of beans in the trash. You fought a valiant battle against chemistry, but the beans won.
Bean Storage 101: Preventing the Problem Before It Starts
If you want to avoid the headache of geriatric, un-cookable beans, you need to rethink how you store them. Leaving them in their flimsy, half-torn plastic bags shoved in the back of a humid pantry is a recipe for disaster.
Beans are highly sensitive to temperature and humidity fluctuations. When exposed to heat and moisture, the cross-linking of their cellular structure accelerates, bringing on the hard-to-cook defect much faster.
As soon as you bring dried beans home from the store, transfer them to airtight glass mason jars or high-quality, BPA-free airtight containers. Transferring them to glass jars is one of those aesthetic kitchen upgrades that also serves a functional purpose, allowing you to instantly see your inventory while protecting the legumes from humidity.
Store these jars in a cool, dark place. Do not store them in the cabinet directly above your stove or oven, where heat and steam constantly rise. Just as a wooden cutting board keeps cracking if left in dry, harsh conditions, beans will degrade if subjected to constant temperature swings. If you buy a massive bulk bag of specialty heirloom beans and know you won’t use them within six months, you can actually store dried beans in the freezer. The sub-zero temperatures halt the chemical aging process entirely, preserving their fresh-from-the-harvest cooking times indefinitely.
The Final Verdict: Your Blueprint for Bean Supremacy
Cooking dried beans from scratch is one of the most rewarding, budget-friendly, and deeply satisfying culinary skills a home cook can master. It transforms a humble, rock-hard agricultural product into a luxurious, creamy, nutrient-dense foundation for countless meals.
You don’t need a culinary degree to pull this off. You just need to respect the science. Let’s review the non-negotiable rules for absolute bean supremacy:
- Check Your Source: Buy fresh beans from high-turnover stores. If they look shriveled and dusty, walk away.
- Embrace the Brine: Soak your beans overnight in heavily salted water. It hydrates the center and softens the skins through ion exchange.
- Neutralize Hard Water: If your tap water leaves mineral scale, add exactly 1/4 teaspoon of baking soda to your soaking or cooking water to break down the pectin.
- Hold the Acid: Never, under any circumstances, add tomatoes, vinegar, or molasses to the pot until the beans are 100% tender.
- Respect the Toxin: Never slow-cook raw kidney beans. Always subject them to a vigorous 10-minute stovetop boil to destroy the PHA lectin.
- Ditch the Toxic Gear: Simmer your legumes in high-quality, heavy-bottomed enameled cast iron or stainless steel. Leave the cheap, peeling non-stick pans in the past where they belong.
Armed with this knowledge, you are no longer at the mercy of stubborn legumes. You have outsmarted the pectin, conquered the calcium ions, and banished the old wives’ tales. Now get into the kitchen, start brining, and show those beans exactly who is boss. We’ve got a family to feed, and life is simply too short to eat bad food.






