
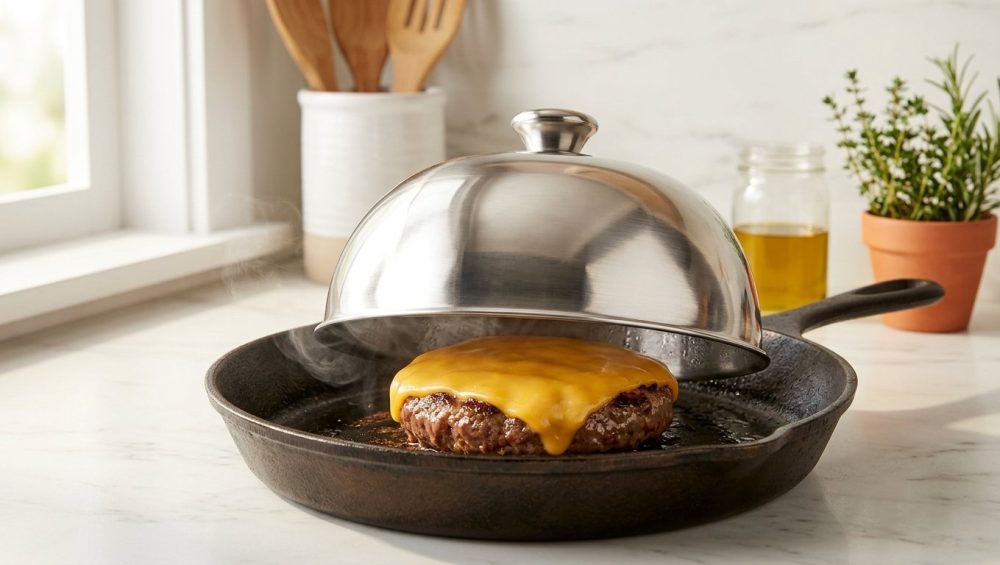
Let’s have a brutally honest conversation about the culinary crimes happening in your kitchen right now. You’ve gone out of your way to buy a beautiful, well-marbled chuck roast blend from the butcher. You’ve painstakingly formed your patties, being incredibly careful not to overwork the meat so you don’t end up wondering why your burgers always shrink into dense, unappetizing hockey pucks. You’ve preheated your skillet, achieved a gorgeous, crusty Maillard reaction on the first side, and executed the perfect, confident flip.
Then, tragedy strikes. You place a cold, stiff square of cheddar on top of the meat. And you wait.
The Culinary Tragedy of the Sad, Sweaty Burger
You stand there, tongs in hand, watching the cheese sweat. It’s not melting; it’s just lightly perspiring under the kitchen lights. Meanwhile, the bottom of your perfectly seared burger is still in direct contact with a 450-degree cooking surface. Every single second you wait for ambient convection heat to soften that cheddar, the bottom of your patty is inching closer to carbonized ruin. By the time the cheese finally drapes over the edges in a somewhat acceptable manner, the meat is overcooked, dry, and entirely devoid of joy.
You are ruining your dinner because you are relying on the open air to do a job it was never designed to do. The atmosphere in your kitchen is cold, drafty, and wildly inefficient at transferring heat downward. If you want to fix your food and stop serving your family dry, overcooked meat, you need a restaurant secret that costs less than a decent bottle of wine: the stainless steel melting dome.
What Exactly is a Melting Dome? (And Why You Need One Yesterday)
Walk into any high-volume diner, premium burger joint, or professional kitchen, and you will see a battered, well-loved metal dome sitting on the flat top griddle. Also known as a basting cover, a steam cloche, or a cheese melting dome, this unassuming piece of metal is the unsung hero of the culinary world. It is the definitive difference between a home-cooked amateur burger and a professional, melt-in-your-mouth masterpiece.
But what exactly is it doing? It’s not just a lid. It is a handheld thermodynamic manipulation chamber.
The Thermodynamics of Trapped Steam (No Physics Degree Required)
When you place a dome over a burger patty in a hot pan, you are instantly trapping the radiant heat that was previously escaping into your kitchen. Instead of floating up to your ceiling fan, that intense thermal energy reflects off the interior walls of the dome and is forced back down onto the top of the food.
But the real magic happens when you introduce water. As any seasoned line cook will tell you, the technique requires a splash of liquid—usually water, sometimes broth or a splash of beer—poured directly onto the hot cooking surface immediately before slamming the dome down.
Water expands roughly 1,700 times its volume when it converts to steam. By trapping that explosive volumetric conversion inside a confined space, you create a hyper-pressurized microclimate of superheated vapor. Steam is exponentially more efficient at transferring heat than dry air. That stiff square of cheddar doesn’t stand a chance; it will melt into a glossy, cascading blanket of dairy perfection in roughly fifteen seconds. Fifteen seconds! That saves the bottom of your burger from turning to ash and ensures your meat stays perfectly medium-rare.
The Leidenfrost Effect and Steam Basting
When water hits a skillet that is significantly hotter than its boiling point (typically around 380°F to 400°F or higher), it triggers the Leidenfrost effect. The liquid instantly vaporizes upon contact, creating an insulating layer of steam. While you might already know this phenomenon as the frustrating reason why sticks to your stainless steel skillet when the pan isn’t properly preheated, in the context of a melting dome, it becomes your greatest asset.
The rapid vaporization creates a billowing cloud of steam that envelops the food from all 360 degrees. This is known as steam basting. You are essentially flash-steaming the top of the ingredient while aggressively searing the bottom. It is a high-wire act of temperature control that the dome makes entirely foolproof.
The Weekend Perfectionist vs. The Weekday Hustler: Why Time is Money
As a home cook, you likely have split personalities. On a Tuesday night, you are the exhausted weekday hustler. You just want to master simple weeknight dinners without spending two hours cleaning up. You don’t have the patience to hover over a stove waiting for cheese to melt or for thick cuts of meat to cook through. The melting dome accelerates the cooking process, trapping heat so efficiently that it cuts your finishing time in half. Time is money, and the dome buys you your evening back.
On a Saturday, however, you are the weekend perfectionist. You have the time to grind your own brisket, bake your own brioche buns, and obsess over the lacy, caramelized edges of a smashburger. Here, the dome isn’t just about speed; it’s about absolute precision. It allows you to melt the cheese flawlessly without leaving the patty on the heat long enough to dry out that beautiful, fatty crust you just worked so hard to build. It’s the ultimate tool for both weeknight efficiency and weekend artistry.
Ditching the Toxic Garbage: Why Material Matters (The “No-Go” Rule)
Let me be very clear: I have absolutely zero patience for cheap, toxic kitchenware. If you are currently trying to melt cheese by covering your skillet with a warped plastic plate, a piece of aluminum foil that you’ve reused three times, or an old, peeling non-stick pan held upside down, we need to have an intervention.
The Dangers of Cheap Aluminum and Peeling Non-Stick
The market is flooded with cheap, flimsy aluminum basting covers. Do not buy them. Aluminum is highly reactive. When exposed to acidic liquids—like a splash of white wine, a squirt of lemon juice, or the residual tomato sauce from your skillet meal—aluminum can pit, warp, and leach a metallic taste directly into your food.
Worse yet are the home cooks who use an inverted non-stick skillet as a makeshift dome. If that Teflon coating is scratched, peeling, or heated beyond its safe temperature threshold, it can release toxic PFAS chemicals right into the steam cloud you are using to baste your food. We are strictly banishing toxic kitchen gear from this process. You need a dedicated, food-safe tool that can withstand a beating without poisoning your family.
The Holy Grail: 300-Series Stainless Steel
When purchasing a melting dome, you must look for high-quality, food-grade stainless steel. But not all stainless steel is created equal. The two most common grades you will encounter in kitchenware are 430 and 304.
Grade 430 stainless steel is a ferritic alloy. It contains essentially no nickel (less than 0.75%), making it magnetic, cheaper to produce, and unfortunately, far more susceptible to rust and corrosion when exposed to harsh environments or acidic foods. If you use a 430-grade dome to steam-baste a dish involving tomatoes, citrus, or vinegar, it will eventually degrade and rust.
Grade 304 stainless steel is the undisputed holy grail for this application. It is an austenitic alloy, meaning it contains between 8% and 10.5% nickel. This high nickel content makes it non-magnetic and incredibly resistant to rust and corrosion, even under heavy daily use with highly acidic ingredients. A 304 stainless steel melting dome will outlive you. It is practically indestructible, easy to clean, and perfectly safe for high-heat steam basting.
The Anatomy of a Perfect Melting Dome: It’s Not Just a Metal Bowl
You might be tempted to just grab a stainless steel mixing bowl out of your cabinet and call it a day. Do not do this. A mixing bowl is not engineered for steam basting. A true melting dome has specific anatomical features designed for safety and efficiency.
The Handle: Heat-Resistant Silicone vs. Bare Metal
When a dome is trapping 400-degree steam, the exterior metal gets dangerously hot. If you are using a cheap dome with a bare metal handle, you are going to burn your hand the moment you try to lift it. Professional domes feature a heat-resistant, silicone-wrapped handle or a riveted, hollow-cast steel handle designed to dissipate heat. This allows you to lift the dome bare-handed in the fast-paced environment of a hot kitchen without reaching for a clumsy oven mitt.
The Rim: Rolled Edges vs. Straight Cuts
Look closely at the bottom rim of the dome. A high-quality tool will have a rolled or reinforced lip. This serves two critical purposes. First, it prevents the dome from warping when exposed to sudden, violent temperature changes (like dropping it onto a scorching griddle). Second, a rolled edge creates a slightly softer, more forgiving seal against the surface of your pan, preventing the harsh metal-on-metal scratching that can ruin your expensive skillets.
Sizing It Up: How to Choose the Perfect Melting Dome Dimensions
Size matters immensely when it comes to trapping steam. If the dome is too small, it will crowd the food and touch the melting cheese, creating a horrific, sticky mess. If it is too large, the steam will dissipate too thinly, and you won’t generate enough vapor pressure to flash-melt the cheese.
The Solo Act: 6 to 8-Inch Domes
A 6 to 8-inch diameter dome is the perfect size for a single large burger patty, a pair of smashburgers, or two fried eggs. Because the internal volume is small, the steam concentration is incredibly high. A single teaspoon of water under a 6-inch dome creates a violent, highly effective steam cloud that sets egg whites in a matter of seconds. This is the exact size you reach for when cooking a quick solo breakfast.
The Crowd Pleaser: 9 to 12-Inch Domes
If you are cooking for a family, a 9 to 12-inch dome is mandatory. This size can comfortably cover three to four burger patties simultaneously. It is also the ideal size for covering an entire 10-inch cast iron skillet when you are trying to melt a thick layer of mozzarella over a weeknight pasta bake. Just be aware that larger domes require slightly more water to generate adequate steam pressure.
Shape Matters: Round vs. Rectangular
While the classic round cloche is iconic, rectangular melting domes are gaining popularity for good reason. If you cook primarily on a large outdoor griddle or a rectangular stovetop plancha, a rectangular dome aligns perfectly with the cooking surface, allowing you to cover an entire row of burgers or a massive pile of cheesesteak meat and peppers at once. For standard round skillets, however, stick to the traditional round dome to ensure a tight seal against the pan’s curved edges.
Beyond the Burger: The Melting Dome’s Masterclass Repertoire
If you think this tool is only for backyard barbecues, you are severely underestimating its utility. The melting dome is a versatile workhorse that will transform your daily meals across the board, from breakfast to midnight snacks.
Sunny-Side-Up Eggs That Don’t Look Like Alien Artifacts
Cooking the perfect over-easy or sunny-side-up egg is a notoriously frustrating endeavor. The bottom gets rubbery and brown long before the gelatinous, snotty layer of raw egg white over the yolk finally sets. Attempting to flip a delicate egg often results in a broken yolk, leading to a sad, weeping mess that makes you wonder why your scrambled eggs leak water when you furiously try to salvage them in the pan.
Enter the steam basting technique, championed by culinary experts and diner cooks alike. According to Nelson Serrano-Bahri, chef and director of innovation at the American Egg Board, steam basting eliminates the need for flipping entirely. You simply cook the egg in butter or oil until the edges just begin to set. Then, add 1 to 2 teaspoons of water to an empty spot in the pan (never directly on the yolk) and immediately cover it with your stainless steel dome.
Leave it covered for 20 to 60 seconds depending on your preferred doneness. The trapped steam gently and evenly cooks the top of the egg whites without applying aggressive direct heat to the yolk. The result? A perfectly translucent, fully set white encasing a glorious, liquid gold yolk. No flipping, no breaking, no anxiety.
Rescuing Leftovers Without the Microwave Rubber Effect
The microwave is the enemy of texture. It turns leftover pizza crust into chewy cardboard and transforms yesterday’s roasted chicken into a dry, stringy disaster. The melting dome offers a vastly superior reheating method.
Place your leftover slice of pizza in a dry, medium-hot skillet to crisp up the bottom crust. Once the bottom is revitalized, add a few drops of water to the side of the pan and drop the dome over the pizza. The steam will rehydrate the stale toppings and melt the coagulated cheese perfectly, while the dry heat of the pan keeps the crust crispy. It tastes like it just came out of a wood-fired oven.
The same applies to rice and pasta. Microwaved rice turns into hard, crunchy pebbles. Microwaved pasta turns into a gummy, coagulated lump. Add your leftover fried rice or pasta to a skillet with a tiny drizzle of oil. Let it toast for a moment to awaken the flavors. Then, add two tablespoons of water and drop the dome. The steam rehydrates the starches instantly, softening the rice grains and loosening the pasta sauce without turning the meal to mush.
Steaming Vegetables in Seconds
Want perfectly crisp-tender asparagus or broccoli florets without boiling a giant pot of water? Toss your vegetables into a hot skillet with a little olive oil to get a quick, flavorful sear. Once they have a bit of color, pour in a splash of water or chicken broth, and cover them with the dome. The intense steam will flash-cook the vegetables in under two minutes, locking in their vibrant green color and snappy texture.
The Science of the Perfect Sear Before the Melt
Before you even think about dropping that dome, you need to understand what you are covering up. The dome is a finishing tool, not a cooking crutch. If you apply the dome too early, you will steam the raw meat, resulting in a sad, gray, boiled patty that belongs in a cafeteria, not your kitchen.
You must first achieve a flawless Maillard reaction. This is the chemical reaction between amino acids and reducing sugars that gives browned food its distinctive flavor. It requires high heat and a dry environment. You must let the meat sear uninterrupted. Press it down once if you are making a smashburger, and then leave it alone. Do not poke it. Do not prod it.
Only after you have achieved that deeply caramelized, crispy crust on the bottom do you flip the patty. The moment the raw side hits the hot pan, the clock starts. This is when you add your cheese, your splash of water, and your dome. The bottom sears while the top steams. It is a symphony of simultaneous cooking methods.
Step-by-Step: How to Master the Melting Dome Like a Line Cook
To truly eliminate kitchen chaos, you need to execute the dome technique with the fluid confidence of a seasoned line cook. Here is the exact, foolproof workflow for the perfect cheeseburger:
- The Sear: Place your seasoned patty in a ripping hot skillet. Do not touch it until a deep, crusty Maillard reaction forms on the bottom.
- The Flip: Slide a sturdy metal spatula under the patty and flip it confidently.
- The Cheese: Immediately place your cheese of choice onto the hot, freshly seared side of the meat. Do not wait.
- The Splash: Using a squeeze bottle or a small cup, pour exactly one tablespoon of water onto the exposed hot surface of the pan, right next to the burger. Do not pour water on the meat or the cheese.
- The Slam: The second the water hits the pan and erupts into steam, slam the stainless steel dome over the burger to trap the vapor.
- The Count: Wait 15 to 20 seconds. Do not peek. Peeking releases the pressurized steam and ruins the thermodynamic magic.
- The Reveal: Lift the dome (watch out for the escaping steam billow) to reveal a perfectly draped, flawlessly melted blanket of cheese. Remove the burger immediately.
Troubleshooting: Why Your Steam Basting is Failing
Even with the right tool, beginners can still make mistakes. If you’ve bought the dome but are still struggling with your execution, you are likely committing one of these common steam-basting sins.
The Soggy Bun Syndrome
If your burger buns are turning into wet sponges, you are using entirely too much water. You are not trying to boil the burger; you are trying to flash-steam the cheese. One tablespoon of water is the absolute maximum you need for a standard 8-inch dome. Any more than that, and the residual water will pool in the pan, soaking into the bottom bun when you try to assemble the burger.
The Evaporating Puddle
If you pour the water into the pan and it just sits there bubbling weakly, your pan is not hot enough. Steam basting requires the Leidenfrost effect to work properly. The pan must be scorching hot so that the water vaporizes instantly upon contact. If your pan is too cold, the water will simply lower the overall temperature of the cooking surface, ruining your sear and turning your meat gray.
The Thermal Shock Disaster
Never, under any circumstances, pour ice-cold water onto a smoking hot cast iron or carbon steel skillet. The violent temperature differential can cause thermal shock, which can literally crack your pan. Always use room temperature or warm water for your steam splash.
Maintenance and Care for Your Stainless Steel Lifesaver
A high-quality 304 stainless steel dome is rugged, but it still requires proper care to maintain its mirror finish and structural integrity. Fortunately, unlike the delicate seasoning process required to avoid ruining your cast iron skillets, stainless steel is delightfully low-maintenance.
Wash your dome with hot, soapy water after every use to remove vaporized grease and dairy splatter. If you notice a dull, cloudy film or rainbow-colored heat tinting on the metal, do not panic. This is a harmless oxidation layer. Simply make a paste of Bar Keepers Friend and water, gently rub it along the grain of the stainless steel, and rinse. It will look brand new.
Never use coarse steel wool or highly abrasive scouring pads, as they will permanently scratch the surface. If you encounter stubborn, baked-on grease, treat the dome just as you would when cleaning your cutting boards to avoid dulling your knives: use the right tool for the job. A non-scratch nylon scrubber or a specialized stainless steel sponge is all you need.
The Final Verdict: Stop Overcooking Your Food
Cooking shouldn’t be a stressful race against the clock where you are constantly forced to choose between melted cheese and a juicy burger. The frustration of overcooked bottoms and undercooked tops is entirely preventable.
By understanding the simple, undeniable power of thermodynamics and investing in a high-quality, 304 stainless steel melting dome, you are taking a massive step away from amateur hour and stepping into the realm of professional kitchen mastery. It is a deceptively simple tool that completely redefines how you manage heat, moisture, and time in your skillet.
Throw away the warped plastic lids. Stop using dangerous, peeling non-stick pans as makeshift covers. Buy a dedicated stainless steel melting dome, learn to harness the explosive power of steam basting, and stop overcooking your food. Your burgers, your eggs, and your dinner guests will thank you.






