If I read one more food blog claiming I can achieve “deep, jammy caramelized onions in just five minutes while the pasta boils,” I am going to throw my favorite heavy-bottomed skillet directly through a window.
You know exactly what I am talking about. You come home from a long day at work, exhausted but determined to make a gourmet weeknight dinner. You find a recipe for a beautiful French onion tart or a decadent patty melt. The recipe author—who clearly sits on a throne of lies—breezily instructs you to “caramelize the onions until dark mahogany, about 5 to 7 minutes.”
Five minutes? Five minutes?
In five minutes, an onion has barely realized it is no longer in the refrigerator. In five minutes, you have slightly warm, aggressively crunchy, raw-tasting onions that will absolutely ruin your dinner. It is the most pervasive, infuriating myth in modern cooking. It is exactly the kind of pretentious recipe jargon that makes everyday home cooks feel like utter failures when their food doesn’t look like the magazine photos.
But here is the good news: You are not crazy, your stove is not broken, and you do not lack culinary talent. You are simply fighting against the unbending laws of thermodynamics and chemistry.
As your resident Sassy Sous-Chef, I am here to tell you that you absolutely can achieve mind-blowing, restaurant-quality caramelized onions in a fraction of the traditional time. You just need to stop trusting the liars and start trusting science. We are going to dive deep into the chemistry of the Maillard reaction, debunk the five-minute myth, and look at three scientifically proven shortcuts that will drastically cut down your cooking time without sacrificing a single ounce of flavor.
Grab a glass of wine, pull up a stool, and let’s fix your food.
The Great Five-Minute Caramelization Myth
Why do recipe writers lie to us? The answer is simple: fear and editorial constraints. Food media executives are terrified that if they print “Step 1: Stand over the stove and stir onions for 55 minutes,” you will immediately close the tab and order takeout. They want to sell you on the fantasy of effortless, lightning-fast weeknight gourmet meals.
So, they shave the time down. They call slightly translucent, sweated onions “caramelized.” They are gaslighting you.
Real caramelized onions—the kind that are deeply sweet, jammy, complex, and dark brown—require a fundamental structural transformation of the vegetable. This is not a quick sauté. This is a deliberate, controlled breakdown of cell walls and the pyrolysis of complex sugars. You cannot cheat the basic principles of physics, but you can intelligently manipulate them.
The Actual Science of Browning Onions
To understand how to speed up the process, we first have to understand what is actually happening inside your skillet. Cooking is just edible chemistry, and onions are a fascinating science experiment.
Maillard Reaction vs. Sugar Pyrolysis
The term “caramelizing onions” is actually a bit of a culinary misnomer. When you subject an onion to heat, there are two distinct, non-enzymatic browning reactions happening simultaneously: sugar pyrolysis (true caramelization) and the Maillard reaction.
Let’s break that down. When you cut into an apple and leave it on the counter, it turns brown due to enzymatic browning—the enzymes in the fruit are reacting with oxygen in the air. Onions do not do this. An onion will stay perfectly white on your cutting board until you apply heat. This is non-enzymatic browning.
Sugar Pyrolysis: A raw onion is roughly 89% water. But hiding inside that water are natural sugars—specifically, about 4.7 grams of sugar per medium onion. The plant stores its energy in chains of fructose, glucose, and sucrose. When the temperature of the onion exceeds 212°F (100°C)—the boiling point of water—the water evaporates, allowing the internal temperature of the onion tissues to rise. Once the temperature hits around 320°F (160°C), true pyrolysis begins. The large, complex sugar molecules violently break apart into hundreds of smaller, simpler compounds. This is what transforms the sharp, pungent bite of a raw allium into the mellow, candy-like sweetness we crave.
The Maillard Reaction: While the sugars are breaking down, another miracle is occurring. The Maillard reaction is a chemical dance between amino acids (proteins) and reducing sugars under high heat. This reaction occurs in five distinct scientific steps: condensation, rearrangement, fragmentation, Strecker degradation, and polymerization. This sequence creates complex flavor molecules called melanoidins, which give the onions their deep, savory, nutty, and almost meaty umami profile.
Why Time and Temperature Are Dictators
Here is the crux of the problem: Water is the enemy of browning. Because onions are nearly 90% water, putting them in a hot pan immediately causes them to “sweat”. As long as there is liquid water in the pan, the temperature of the cooking surface cannot exceed 212°F (100°C).
Both the Maillard reaction and sugar pyrolysis require temperatures significantly higher than 212°F to occur at a rapid pace. Therefore, the onions cannot begin to truly caramelize until almost all of their internal moisture has evaporated. If you try to rush this by cranking the stove to maximum heat, the water evaporates quickly, but the dry sugars left behind will instantly burn, leaving you with acrid, bitter, scorched onions.
The traditional method—cooking them low and slow for 45 to 60 minutes—is a safe, foolproof way to gently evaporate the water and slowly coax out the sugars without burning them. But time is money, and we have weekday dinners to conquer.
The Right Gear for the Job (And What to Throw Away)
Before we get to the time-saving hacks, we need to have a serious conversation about your equipment. I have a strict “no-go” rule when it comes to toxic, cheap kitchenware. You cannot execute high-level culinary techniques with garbage tools.
First, throw away that scratched-up, cheap non-stick skillet. I absolutely despise mystery metals and peeling chemical coatings. Not only do they leach forever chemicals into your food, but they are completely incapable of developing the “fond” (the sticky, browned bits of flavor on the bottom of the pan) that is essential for this process. If you are wondering why your pans are losing their slip after just a few months of use, it is because non-stick coatings degrade rapidly under the sustained heat required for caramelization.
Instead, you need a heavy-bottomed, multi-clad stainless steel skillet, an enameled cast iron pan, or well-seasoned carbon steel pans. These materials offer superior thermal mass and heat retention, ensuring that the temperature doesn’t plummet the second you add a mountain of cold, wet onions to the skillet.
Next, look at your prep tools. If you are hacking away at your vegetables with a dull blade, you are crushing the cell walls rather than slicing them. This violent crushing releases a massive amount of lachrymatory factor synthase—the chemical compound that makes you cry. Yes, the real reason you cry chopping onions is because your blade is dull. A razor-sharp chef’s knife will glide through the cellular structure cleanly.
Furthermore, pay attention to your cutting surface. If you are using a rock-hard bamboo board, you are ruining your knives with every single chop. Switch to an edge-grain walnut, maple, or high-quality rubber board. And when it is time to move your massive pile of sliced onions from the board to the stove, do not scrape the delicate edge of your expensive knife across the wood. You need a bench scraper to scoop them up efficiently and safely.
Finally, ensure you are stirring with the right utensils. Use a flat-edged wooden spoon or a high-quality, odor-free silicone spatula that won’t melt or leach strange flavors into your food when exposed to high heat.
Hack #1: The Water-Deglazing Method (The Pan Temperature Regulator)
The traditional method tells you to cook onions on medium-low heat for an hour so they don’t burn. But if we actively regulate the temperature of the pan ourselves, we can crank the heat up to medium-high and slash the cooking time in half.
This is the water-deglazing method.
When you cook onions over medium-high heat, the water evaporates rapidly, and the sugars begin to brown very quickly. However, they will inevitably start to stick to the bottom of the pan, forming a dark, sticky layer of concentrated flavor known as the “fond”. If left unattended for even thirty seconds, this fond will turn from mahogany to pitch black, ruining the entire batch.
To prevent this, keep a small glass of water (or dry vermouth, or broth) right next to the stove. The second the onions threaten to scorch and the fond builds up, pour two tablespoons of water directly into the hot skillet.
The water does three brilliant things instantly:
- Temperature Drop: It rapidly cools the surface of the pan, halting the burning process in its tracks.
- Deglazing: The liquid dissolves the deeply caramelized fond from the metal, acting as a solvent.
- Flavor Redistribution: As you scrape the bottom of the pan, the dissolved fond coats the rest of the pale onions, distributing that rich, complex color and flavor evenly.
By repeatedly riding the line between browning and burning, and pulling back from the edge with a splash of water, you can achieve deeply caramelized onions in about 20 to 25 minutes. It is an aggressive, high-risk maneuver that requires your undivided attention, but it yields spectacular, restaurant-quality results.
Hack #2: Micro-Dosing Baking Soda (The pH Alteration Trick)
If you really want to play mad scientist in your kitchen, we can manipulate the chemical environment of the skillet by altering the pH level.
The Maillard reaction is highly dependent on pH. It proceeds incredibly slowly in acidic environments, but it accelerates rapidly in alkaline (basic) environments. Onions are naturally slightly acidic. By adding a tiny pinch of baking soda (sodium bicarbonate) to the pan, we artificially raise the pH, creating an alkaline environment that dramatically speeds up the browning process.
Baking soda also weakens the pectin in the cell walls of the vegetable, causing the onions to soften and break down much faster than they would from heat alone.
The Crucial Warning: With great power comes great responsibility. If you use too much baking soda, you will completely destroy the structural integrity of the onions, turning them into a grey, mushy, chemical-tasting paste.
The golden rule of micro-dosing baking soda is to use no more than 1/4 teaspoon per pound of raw onions. Add it about five minutes into the cooking process, right after the onions have released their initial wave of water. You will visibly see the onions turn yellow and then brown at an astonishing rate. This trick is an absolute lifesaver when you are making a pureed soup or a dip where the final texture of the onion doesn’t need to hold its shape perfectly.
Hack #3: The Microwave Pre-Cook (The Water Extraction Shortcut)
Remember how we established that the 89% water content of the onion is the primary bottleneck preventing caramelization? What if we forcefully evicted that water before the onions ever touched a hot skillet?
Sometimes, the microwave is your best friend. I know many home cooks view the microwave as a glorified leftover-reheater, but it is actually a highly efficient tool for exciting water molecules and generating internal steam.
Here is how the extraction shortcut works:
Place your sliced onions in a large, microwave-safe glass bowl. Cover the bowl tightly with a microwave-safe lid or a plate. Microwave the onions on high for 10 to 15 minutes, stopping halfway to give them a quick stir.
The intense, penetrating heat of the microwaves will cause the water inside the onion cells to boil, rupturing the cell walls and forcing the vegetable to release a massive pool of liquid. When you carefully remove the lid (watch out for the scalding steam), you will find that the onions have shrunk to half their original volume and are swimming in onion juice.
Drain this liquid completely. (Pro tip: Do not pour it down the sink! Save it in a jar in the fridge to add incredible depth to your next batch of rice or chicken broth).
Now, take those limp, pre-cooked, dehydrated onions and toss them into a hot skillet with some butter and oil. Because you have already bypassed the tedious 20-minute “sweating” phase, the sugars will begin to caramelize almost immediately upon hitting the hot metal. This hack cuts out all the boring waiting time and gets you straight to the fun part.
The Sassy Sous-Chef’s 15-Minute Accelerated Masterclass
Now that we understand the science and the shortcuts, it is time to put it all together. This is my definitive, battle-tested method for achieving deeply sweet, jammy onions on a busy weeknight. We are going to combine proper knife skills, the microwave extraction hack, and the water-deglazing technique into one seamless workflow.
Step 1: The Pole-to-Pole Slice
Do not slice your onions across the equator (orbitally). This severs the vascular bundles, causing the onions to turn into mushy worms when subjected to high heat. Instead, slice them “pole-to-pole”—from the root end to the stem end. This preserves their structural integrity so they hold their shape even as they soften.
Step 2: The Microwave Sweat
Place two pounds of sliced yellow onions (yellow onions have the best balance of complex sweetness and slight bitterness) into a glass bowl. Cover and microwave on high for 10 minutes. Carefully drain the excess liquid.
Step 3: The High-Heat Sear
Place your heavy-bottomed stainless steel or carbon steel skillet over medium-high heat. Add one tablespoon of neutral oil (like avocado oil, which has a high smoke point) and one tablespoon of unsalted butter (for flavor and milk solids that aid in browning).
Step 4: The Sizzle and Salt
Add your drained, microwaved onions to the hot fat. Spread them out into an even layer and leave them alone for 2 to 3 minutes. Do not touch them. Let the bottom layer make aggressive contact with the hot metal to kickstart the Maillard reaction. Sprinkle generously with kosher salt. Salt draws out any remaining moisture through osmosis, further accelerating the process.
Step 5: The Aggressive Deglaze
Once the bottom layer is deeply browned and a sticky fond has formed on the skillet, use a sturdy spatula to scrape it up. Stir the onions vigorously. When the pan looks dry and the onions threaten to burn, splash in two tablespoons of water (or dry vermouth). Scrape up the dissolved fond and let the water evaporate.
Step 6: The Finish
Repeat the deglazing process every 2 to 3 minutes. Within 10 to 15 minutes in the skillet, your onions will be a glorious, dark mahogany color. Turn off the heat. If you want to elevate them to absolute perfection, stir in a splash of balsamic vinegar or a tiny pinch of fresh thyme to balance the intense sweetness with some bright acidity.
Storage and Batch Prep (Because Time is Money)
If you are going to go through the effort of caramelizing onions, you should never, ever just make enough for one meal. Time is our most valuable asset in the kitchen. When I caramelize onions, I buy a five-pound bag and spend a Sunday afternoon doing a massive batch.
Caramelized onions freeze beautifully. Once they have cooled to room temperature, pack them into silicone ice cube trays and freeze them solid. Pop the frozen flavor-bombs out of the tray and store them in a heavy-duty freezer bag. The next time you are making a quick pan sauce, a grilled cheese sandwich, or a weeknight soup, you can just toss a frozen cube directly into the pan. It is the ultimate culinary cheat code.
When it comes to storing leftovers in the fridge, be mindful of your containers. The rich oils and butter used in the caramelization process can cling stubbornly to cheap plastic. If you find that your plastic containers stay greasy no matter how much dish soap you use, it is time to upgrade to tempered glass storage containers. Glass won’t absorb the pungent allium odors, and it washes perfectly clean every single time.
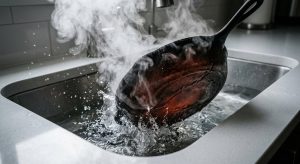
And please, respect your cookware during cleanup. If you used a stainless steel pan and have some stubborn fond left behind, do not attack it with steel wool. Simply add an inch of water to the pan, put it back on the stove, and let it simmer for five minutes. The hot water will release the stuck-on bits effortlessly. Never use or soak a cheap pan that has lost its non-stick integrity, as the exposed metal underneath will immediately begin to rust, degrade, and ruin your hard work.
Final Thoughts: Stop Babysitting Your Skillet
Cooking should be a joy, not a stressful chore where you feel chained to your stove, endlessly pushing translucent onions around a pan while praying for them to turn brown.
You do not need a culinary degree to cook like an expert. You just need to arm yourself with a basic understanding of how heat, water, and chemistry interact in your kitchen. By utilizing the microwave to bypass the sweating phase, using water to aggressively regulate your pan temperature, and maybe employing a tiny pinch of baking soda when you’re in a real rush, you can conquer the caramelized onion in record time.
The next time a recipe promises you a five-minute caramelization miracle, you can confidently roll your eyes, decode the nonsense, and tackle the recipe on your own terms. You are the master of your kitchen domain. Now go forth, chop some alliums, and make something absolutely mind-blowing for dinner tonight. You’ve got this!