The Great Risotto Lie That Keeps You Chained to the Stove
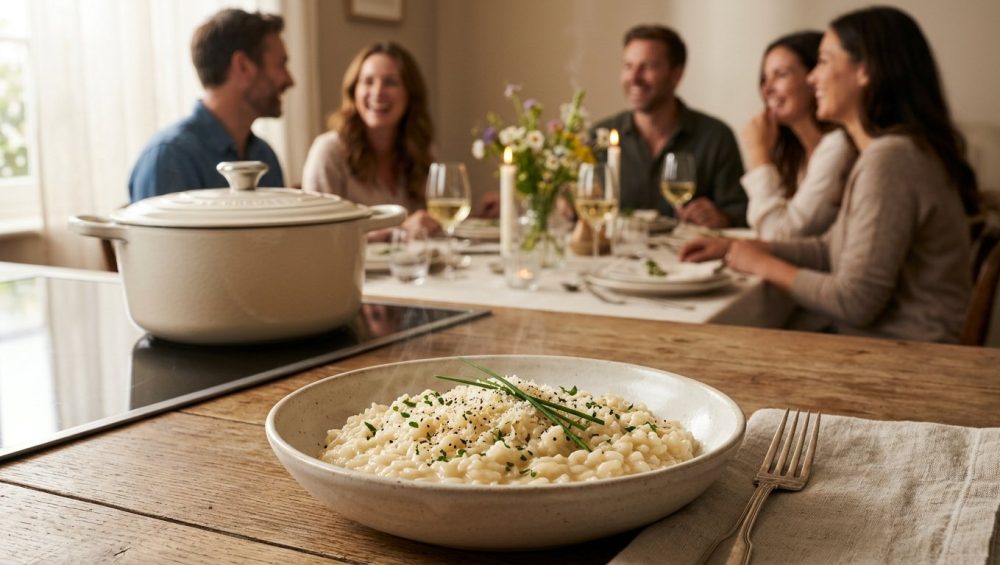
Start by setting the scene. It is Saturday night. You invited six friends over for what was supposed to be an elegant, cozy dinner party. You wanted to be the effortlessly chic host, gliding through the kitchen with a glass of wine in hand. Instead, you are sweating profusely over a bubbling vat of starch, your dominant arm cramping from 35 minutes of relentless stirring, while your guests are in the living room drinking all your good wine without you.
This is the risotto trap. We have been culturally brainwashed by pretentious restaurant chefs and outdated culinary school textbooks into believing that risotto requires a blood sacrifice of your time and physical labor. The old-school mantra dictates that you must stand at the stove, slowly ladling in hot broth a half-cup at a time, stirring constantly until your shoulder gives out, all in the name of “coaxing out the starches.”
I am here to tell you, with zero patience for chef-speak and a deep love for food science, that this is absolute nonsense. You do not need to be a martyr to make a creamy, luxurious, restaurant-quality risotto. In fact, mastering the art of effortless hosting means actively rejecting these high-maintenance, outdated methods.
Today, we are going to debunk the myth of constant stirring. We are going to look at the actual starch chemistry of Arborio rice, leverage the thermodynamic miracle of a heavy-bottomed Dutch oven, and give you a foolproof, scientifically backed method that frees you from the stove. Because at the end of the day, a dinner party is about connecting with your guests, not performing a culinary endurance test.
Deconstructing the Grain: The Chemistry of Arborio Rice
To understand why we do not need to stir, we first need to understand what we are actually cooking. Not all rice is created equal, and if you try to make risotto with standard long-grain white rice, you will end up with a sad, watery pilaf.
The magic of risotto lies in the specific botanical anatomy of short-grain Italian rice varieties, most notably Arborio and Carnaroli. These grains are essentially brilliant, complex little starch capsules.
Amylose vs. Amylopectin: The Starch Sisters
Rice contains two primary types of carbohydrate starch: amylose and amylopectin. Think of them as two sisters with very different personalities.
Amylose is the rigid, structured sister. It is a straight-chain molecule that likes to keep to itself. Grains with high amylose content, like Basmati or Jasmine, cook up fluffy, separate, and firm. They do not want to mingle.
Amylopectin, on the other hand, is the chaotic, clingy, highly branched sister. When heated in the presence of water, amylopectin molecules aggressively absorb liquid, swell, break apart, and dissolve into the surrounding environment, creating a thick, viscous, creamy suspension.
Arborio rice is a culinary superstar because it contains an incredibly high concentration of amylopectin—specifically around 18% to 22%. However, it also retains a dense, firm core of amylose. This dual nature is the holy grail of risotto: the exterior dissolves to create the luxurious, velvety sauce, while the interior remains perfectly al dente, offering that signature toothsome bite.
The Gelatinization Window: What Actually Makes It Creamy
When you add liquid to Arborio rice and apply heat, you are initiating a process called starch gelatinization. This is not just a fancy culinary buzzword; it is a specific, measurable endothermic chemical reaction.
For Arborio rice, this gelatinization window occurs precisely between 65°C and 95°C (149°F to 203°F). As the temperature of the liquid rises into this zone, the starch granules absorb water, swell to several times their original size, and eventually rupture, leaching their glorious amylopectin into the broth.
Here is the critical revelation that will change your life: this chemical reaction is triggered by heat and hydration, not by mechanical agitation. The starch will release and thicken the liquid regardless of whether you are standing there stirring it with a wooden spoon or sitting in the other room sipping a Negroni. Understanding this fundamental truth is the first step in mastering the kitchen arts.
The Real Reason Chefs Tell You to Stir (Hint: It’s Not About the Starch)
If the chemistry proves that heat and liquid do the heavy lifting, why has every Italian grandmother and Michelin-starred chef insisted on the constant stirring method for centuries?
Are they lying to us? Not exactly. They are just compensating for bad thermodynamics.
Thermal Gradients and Stovetop Hotspots
When you cook risotto on a traditional stovetop, the heat source is entirely concentrated at the bottom of the pan. Even on a high-quality residential range, burner hotspots can easily exceed 400°F (204°C) at the direct point of contact.
If you leave a dense, heavy pot of starchy rice sitting over a direct flame without moving it, the bottom layer of rice will rapidly exceed the gelatinization window, dehydrate, denature its proteins, and scorch onto the metal. Meanwhile, the top layer of rice, exposed to the cooler ambient air of your kitchen, remains under-hydrated and crunchy.
Chefs stir constantly to physically rotate the grains, moving the scorching bottom layer to the top and the cooler top layer to the bottom. They are manually managing a flawed thermal gradient. They are acting as human convection currents.
The Agitation Myth: Ruptured Granules and Gluey Sludge
The traditionalists will argue that stirring causes the grains to rub against each other, physically scraping off the starch to create the creaminess. While mechanical shearing does release starch, it is actually a dangerous double-edged sword.
When you aggressively agitate Arborio rice during the peak gelatinization phase, you do not just gently coax out the starch; you violently rupture the swollen granules. This releases an excess of free starch into the liquid, which can quickly cross the line from “luxuriously creamy” to “thick, gummy, homogenous sludge”.
If you have ever made a risotto that seized up into a stiff, gluey cement block on the plate, over-stirring and structural granule damage were likely the culprits. Believing that more stirring equals better texture is one of those classic rookie kitchen mistakes that we need to unlearn immediately.
The “No-Go” Rule: Banishing Toxic Kitchenware from Your Risotto
Before we get into the stress-free solution, we need to have a serious talk about your equipment. I am notoriously strict about this, and I make absolutely no apologies for it. If you attempt this low-maintenance method in a cheap, flimsy, peeling non-stick pot, you are going to ruin your dinner and potentially your health.
The Hidden Dangers of Cheap Non-Stick Coatings
I absolutely despise cheap kitchenware. I have a strict “no-go” rule when it comes to toxic gear, and nothing boils my blood quite like a scratched, lightweight aluminum pot coated in mystery non-stick chemicals.
When you use a cheap non-stick pan for a dish that requires high-heat searing (like toasting the rice) followed by a long simmer, you are asking for trouble. Those toxic coatings degrade rapidly over time, especially when exposed to acidic ingredients like the white wine we use to deglaze. You do not want microscopic flakes of Teflon integrating into your beautiful, starchy emulsion. It is time to start banishing toxic kitchen gear from your life forever.
Why Heavy-Gauge Cookware is Non-Negotiable
For the hands-off risotto method to work, you need cookware that acts as a thermal battery. Lightweight aluminum or thin stainless steel pans have atrocious heat retention and conduct heat too aggressively, leading to immediate scorching.
Similarly, you must avoid glass or ceramic baking dishes for this specific application. While they are fine for casseroles, they retain heat too aggressively for rice, pushing the final internal temperature above 78°C (172°F) and triggering excessive amylose leaching, which ruins the texture.
You need heavy-gauge, multi-clad stainless steel (like a high-quality tri-ply) or, optimally, a heavy enameled cast-iron Dutch oven. A solid, weighty Dutch oven is one of the foundational essential tools every beginner needs. It is safe, completely non-toxic, and possesses the exact metallurgical properties required to manipulate heat to our advantage.
The Dutch Oven Miracle: Optimizing Thermal Mass
So, how do we cook the rice evenly, release the starch perfectly, and avoid scorching the bottom—all without stirring? We take the pot off the stovetop and put it in the oven.
This is the secret weapon of the stress-free host. By moving the heavy-bottomed Dutch oven into a preheated oven, we fundamentally change the physics of how the food cooks.
Radiant Heat vs. Direct Conduction
On the stove, heat is transferred via direct conduction from the burner to the bottom of the pan. In the oven, we are utilizing radiant and convective heat.
A heavy enameled cast-iron Dutch oven absorbs the ambient heat of the oven and radiates it evenly across the entire surface area of the cooking vessel—the bottom, the sides, and the heavy lid. By simply closing the oven door, we are optimizing thermal mass to create a perfectly uniform, 360-degree cooking environment.
The 360-Degree Oven Environment
When you bake the risotto at a precise 350°F (177°C) in a tightly sealed Dutch oven, you eliminate the thermal gradients that cause stovetop scorching. The air-and-dish interface stabilizes the internal temperature of the rice at a perfect, gentle 73°C to 76°C (163°F to 169°F).
This temperature sits squarely in the middle of the ideal gelatinization window. The grains swell evenly. The amylopectin releases gently into the broth without the violent shearing of a wooden spoon. The heavy lid traps the steam, ensuring the top layer of rice hydrates at the exact same rate as the bottom layer.
The oven does the stirring for you, using thermodynamics instead of elbow grease.
The Golden Mathematics of Hydration: Ratios That Actually Work
Because we are not standing over the pot constantly adjusting the liquid levels, we cannot rely on intuition or the traditional “ladle until it looks right” method. The oven-baked method requires scientific precision.
Why “Ladle by Ladle” is a Waste of Time
The traditional method of adding a half-cup of broth at a time is designed to control the temperature of the stovetop pan and force the cook to monitor the starch release. It is tedious, highly subjective, and completely unnecessary when using a sealed, temperature-controlled oven environment.
If you dump all the liquid in at once on the stovetop, the bottom burns before the top cooks. But in the oven, bulk hydration works flawlessly.
The 1.75:1 Rule: Precision Over Guesswork
The number one cause of failure in hands-off risotto is an incorrect liquid ratio. Too little liquid (a 1.5:1 ratio or lower) yields undercooked, gritty, chalky centers. Too much liquid (a 2:1 ratio or higher) triggers over-gelatinization, resulting in a soggy, soupy mess.
Through exhaustive culinary testing and starch viscosity profiling, the optimal liquid-to-rice ratio has been definitively calculated: exactly 1.75 to 1 by volume for broth. (If you prefer to weigh your ingredients—which I highly recommend for absolute consistency—the ratio is 1 part rice to 3.25 parts liquid by weight).
If you use exactly 1 cup of Arborio rice, you need exactly 1.75 cups of broth. If you use 2 cups of rice, you need 3.5 cups of broth. Do not eyeball this. Measure it like you are baking a cake. If you want to host a relaxed dinner party, you need a formula you can trust blindly.
Temperature Matters: The Hot Stock Mandate
There is one traditional rule that we absolutely must keep: the stock must be hot when it hits the rice.
If you pour cold broth from the fridge into your hot Dutch oven, you immediately crash the temperature of the cooking vessel. The internal temperature drops well below the 65°C gelatinization threshold, delaying the onset of starch swelling and extending the total bake time by up to 11 minutes. This prolonged exposure to lower heat increases the risk of the outer layers of the grain turning to mush before the core is cooked.
Your stock must be steaming hot—ideally between 92°C and 95°C (198°F to 203°F)—when you pour it over the rice.
The Step-by-Step Masterclass for Stress-Free, No-Stir Risotto
We have covered the chemistry, the equipment, and the math. Now, let’s put it all together into a flawless, repeatable workflow that will allow you to reclaim your weekend.
Step 1: The Great Rinse Debate (Settled by Science)
There is a massive debate in the culinary world about whether to rinse Arborio rice. Traditionalists scream that rinsing washes away the precious surface starch needed for creaminess.
Science tells a more nuanced story. Arborio rice is milled with a fine, powdery starch dust on its surface. If left entirely intact, this superficial dust can actually create a sticky, gluey film rather than a smooth emulsion. However, over-rinsing strips away beneficial surface lipids that aid in grain separation.
The scientifically optimal compromise: place your measured dry rice in a fine-mesh strainer and rinse it under cold tap water for exactly 12 seconds, gently swirling it. Drain it completely and let it sit on a clean towel for 60 seconds to remove surface moisture. This brief rinse removes the problematic dust while preserving the essential amylopectin and lipids.
Step 2: Toasting the Grains (The Sofrito and the Sear)
Place your heavy Dutch oven on the stove over medium heat. Add a generous knob of butter and a splash of high-quality olive oil. Sauté your finely diced aromatics—usually yellow onion or shallots—until they are translucent and sweet.
Next, add your rinsed, dried rice. You must toast the grains in the fat for about 2 to 3 minutes. This step, known as the tostatura, is critical. The heat and fat gently fry the exterior of the grain, slightly hardening the outer shell. This prevents the rice from disintegrating into mush during the long bake. Just like you need to stop eating mushy veggies, you must demand structural integrity from your rice.
Step 3: The Wine Deglaze
Once the edges of the rice grains turn slightly translucent with a pearly white dot remaining in the center, it is time to deglaze. Pour in a half-cup of dry, crisp white wine (like Pinot Grigio or Sauvignon Blanc).
The sharp hiss of the wine hitting the hot pan is one of the best sounds in the kitchen. Stir constantly for about 60 seconds until the harsh alcohol smell burns off and the liquid is almost entirely absorbed by the thirsty grains.
Step 4: The Dump, Cover, and Bake
This is where we diverge from tradition and embrace the magic.
Pour in your precisely measured, steaming hot broth (the 1.75:1 ratio). Add a hefty pinch of kosher salt. Give the mixture exactly one gentle stir to ensure no grains are stuck to the bottom corners of the pot.
Place the heavy lid on the Dutch oven. For absolute perfection and to prevent any steam from escaping, you can place a layer of aluminum foil over the pot before pressing the lid down tightly.
Transfer the entire vessel to the center rack of your preheated 350°F (177°C) oven. Close the door. Walk away.
Set a timer for 25 to 30 minutes. Go pour yourself a glass of wine. Mingle with your guests. Laugh at a joke. You are officially off the clock.
(A brief note on altitude: If you live at high elevations above 3,000 feet, the boiling point of water drops. You will need to increase your liquid volume by 2% to 4% and extend the bake time by 3 to 5 minutes to achieve proper starch gelatinization.)
Step 5: The Vigorous Finish (The Only Stirring You Actually Need)
When the timer goes off, pull the Dutch oven out and remove the lid. The rice will look mostly cooked, but there will still be a layer of watery, unabsorbed liquid bubbling at the top. Do not panic. This is exactly what it is supposed to look like.
Now comes the mantecatura—the final, crucial step where we manually force the emulsion.
Add two more tablespoons of cold, cubed butter and a generous handful of freshly grated Parmigiano-Reggiano. Grab a sturdy wooden spoon or a silicone spatula and stir the risotto vigorously, almost aggressively, for about 60 to 90 seconds.
This intense, short burst of mechanical agitation acts as a catalyst. It knocks the softened starch from the surface of the perfectly cooked grains, rapidly binding the residual liquid, the melted butter, and the cheese into a glossy, velvety, spectacularly creamy sauce.
You did not stir for 45 minutes. You stirred for two. And the result is flawless.
Elevating the Dish: Flavor Architecture and Mix-Ins
A masterclass in risotto is not just about texture; it is about flavor. A plain Parmesan risotto is a beautiful blank canvas, but to truly impress your guests, you need to understand flavor architecture.
Acid is Your Best Friend
Risotto is inherently heavy. It is a mountain of starch, butter, and cheese. If you serve a massive bowl of it without any counterbalancing elements, palate fatigue will set in by the third bite.
To cut through the richness and elevate the dish, your dinner actually needs acid. A squeeze of fresh lemon juice stirred in during the final mantecatura phase works absolute miracles. It brightens the heavy dairy notes and makes the savory flavors pop. A splash of high-quality white balsamic vinegar or a garnish of lemon zest can also provide that necessary high-note contrast.
Cheese and Fat Emulsions
When adding cheese, quality is paramount. Never, under any circumstances, use pre-shredded cheese from a plastic bag. Those shreds are coated in anti-caking agents like cellulose, which will actively prevent the cheese from melting smoothly and will turn your luxurious sauce into a grainy, broken mess.
Buy a wedge of real, aged Parmigiano-Reggiano or Pecorino Romano and grate it yourself on a microplane. The fine, airy shreds will melt instantly into the hot emulsion.
Timing Your Proteins and Vegetables
If you want to add delicate ingredients like fresh peas, asparagus tips, or seared shrimp, do not cook them in the risotto from the beginning. The long oven bake will obliterate them into gray mush.
Instead, cook your proteins and green vegetables separately. Blanch your peas, sear your scallops, or roast your mushrooms in a separate pan, and fold them gently into the risotto during the final 60 seconds of stirring. This preserves their vibrant color, distinct texture, and individual flavor profiles.
Reclaiming Your Evening: The Art of the Effortless Gathering
The ultimate goal of this technique is not just to make good food; it is to change the way you host.
When planning your menu, the chemistry of flavor pacing is crucial. Because this risotto requires zero babysitting for 25 minutes, you can easily serve a thoughtful, acidic first course—like a bright, bitter radicchio salad with a citrus vinaigrette—while the main course practically cooks itself in the oven.
Staging and Holding Temperatures
One of the most stressful aspects of traditional risotto is that it waits for no one. The second it reaches the perfect creamy consistency on the stove, it must be plated and eaten immediately, or it will rapidly cool, retrograde, and turn into a stiff block of spackle.
The oven-baked method offers a slight buffer. Because the Dutch oven has such immense thermal mass, it retains heat beautifully. If your guests are lingering over their appetizers, you can leave the risotto in the covered pot (off the heat, before the final butter and cheese stir) for an extra 5 to 10 minutes. The residual steam will keep it warm without significantly overcooking the grains.
Plating Like a Pro
When you are finally ready to serve, remember the golden rule of risotto consistency: it should flow, not clump. If you scoop a ladle of risotto onto a warm, shallow plate, it should slowly spread out and settle into a flat, even layer. If it stands up in a rigid mound like a scoop of mashed potatoes, it is too thick.
If your risotto has tightened up in the minute it took to carry the pot to the counter, simply splash in another tablespoon of hot water or broth and give it one final, vigorous stir to loosen the emulsion before plating.
Garnish with a final dusting of microplaned cheese, a crack of fresh black pepper, and perhaps a drizzle of the finest finishing olive oil you own.
You did it. You served a masterpiece of Italian comfort food. You did not ruin your favorite pan. You did not pull a muscle in your shoulder. And most importantly, you actually got to sit down, drink wine, and enjoy the company of your friends. Welcome to the new era of stress-free, deeply scientific, and unapologetically savvy home cooking. Now go preheat your oven and show that rice who is boss.


