Welcome to the tragedy of the “adult juice box.” We’ve all been there. You’re hosting a lovely, mindful gathering. You’ve spent the better part of your weekend meticulously curating a menu, and then someone asks for a non-alcoholic option. In a panic, you splash some cranberry juice over a handful of cloudy refrigerator ice, top it with flat sparkling water, and hand them a drink that tastes like a melted popsicle. It’s sad, it’s watery, and frankly, it’s beneath you.
I firmly believe that anyone can cook—and mix drinks—like an absolute expert without a fancy culinary degree or a pretentious mixology certificate. But if you want to master the art of effortless hosting, you need a strategy. Weeknights are about survival and clever hacks, but the weekend? The weekend is when we get to be perfectionists. And when it comes to zero-proof drinks, perfection means understanding the science of flavor, the physics of dilution, and the absolute necessity of prepping ahead so you aren’t playing bartender all night.
The mocktail has suffered a terrible reputation for decades. Historically relegated to the kids’ table, the “virgin” drink was usually just a sugary afterthought—a Shirley Temple or a hastily assembled mix of whatever fruit juices were lingering in the fridge. But the modern culinary hobbyist demands more. We want complexity. We want aromatics. We want a drink that evolves as it sits in the glass, offering a sophisticated sensory experience that doesn’t leave us with a sugar crash or a headache.
To achieve this, we have to stop treating zero-proof drinks as an omission of alcohol, and start treating them as a distinct culinary discipline. This requires a deep dive into the mechanics of temperature control, the chemistry of mouthfeel, and the precise balancing of acids and tannins. Grab a notebook, and perhaps a perfectly chilled glass of sparkling water, because we are about to elevate your home bar game to a level you didn’t think was possible.
The Physics of the Chill: Why Your Drinks Turn to Puddles
Let’s talk about thermodynamics. (Stay with me, I promise there won’t be a quiz, but this will change your life). The number one reason your mocktails taste like faintly flavored tap water is improper chilling and uncontrolled dilution.
When you add ice to a room-temperature liquid, the liquid doesn’t just magically get cold because it’s sitting next to something cold. It gets cold because the ice is actively melting. This is a scientific principle known as the enthalpy of fusion [11]. It takes a massive amount of energy (heat) to break the molecular bonds of solid ice and turn it into liquid water—specifically, about 80 calories of heat per gram of ice [11]. The heat is pulled directly from your drink, which lowers the drink’s temperature. Therefore, a cardinal rule of mixology is born: there is no chilling without dilution [19].
But here is where home cooks ruin everything: surface area. If you use small, cloudy ice cubes from a plastic tray, or worse, crushed ice from your refrigerator door, you are introducing a massive amount of surface area to the liquid. The ice melts rapidly, aggressively diluting the drink before it even reaches the proper serving temperature [9]. For a slow-sipping zero-proof drink, you need large-format ice. A single, massive two-inch cube has a much lower surface-area-to-volume ratio. It chills the drink efficiently but melts at a glacial pace, preserving the integrity of your carefully balanced flavors over a thirty-minute sipping window.
The Clear Ice Mandate and Directional Freezing
If you want to take your ice game from amateur to artisan, you need to understand why clear ice is superior to cloudy ice. Those white, opaque centers in standard ice cubes are trapped air bubbles and impurities. Cloudy ice is structurally weak; it cracks and shatters when liquid is poured over it, instantly increasing the surface area and flooding your drink with unwanted water.
To get crystal-clear ice at home, you don’t need a thousand-dollar machine. You just need to employ directional freezing. Water freezes from the outside in. In a standard ice tray, it freezes from the top, bottom, and sides all at once, pushing the air bubbles into the center. By placing your ice molds inside a small, insulated hard cooler (with the lid off) and placing the whole cooler in your freezer, you force the water to freeze from the top down. The pure water freezes first, pushing the air and impurities to the very bottom. You can then chip away the cloudy bottom layer, leaving you with a dense, perfectly clear block of ice that will cool your drink with minimal dilution.
The Toxic Gear Rant: Banish the Cheap Plastic
And this brings me to my absolute favorite topic: toxic kitchen gear. I have zero patience for those flimsy, neon-colored silicone ice trays you bought in the checkout aisle for three dollars. You know the ones—they smell vaguely of freezer burn and cheap plastic, and they leach who-knows-what into your beverages. Using degrading, mystery-material molds is one of the seven rookie kitchen mistakes I see constantly.
Do not ruin a beautiful, handcrafted botanical syrup by freezing water in a toxic plastic tray that makes your ice taste like last week’s frozen peas. Silicone is often cured using cheap peroxides, which break down over time and leave a soapy residue on your ice. You must invest in high-quality, food-grade, platinum-cured silicone molds, or better yet, stainless steel ice trays. They are durable, they don’t absorb freezer odors, and they won’t slowly poison your guests.
Anatomy of a Grown-Up Drink: Building Complexity Without Booze
Alcohol is a crutch. It’s a very delicious, very effective crutch, but a crutch nonetheless. Ethanol does three heavy-lifting jobs in a cocktail: it delivers volatile aroma compounds to your olfactory sensors, it provides a textural, astringent weight on the palate, and it gives a signature “bite” or burn that forces you to sip slowly [4]. When you remove the booze, you remove the structure. If you just mix fruit juices together, you end up with a cloying, one-dimensional sugar bomb.
To build a zero-proof drink that commands respect, we have to engineer that missing structure using three pillars: Acid, Tannins, and the Phantom Bite.
Pillar 1: The Acid Trip
If you’ve ever relied on my smart fixes to save a ruined pan sauce, you know that acidity is everything. It brightens, it balances, and it cuts through sugar. But in the mocktail world, relying solely on fresh lemon and lime juice gets boring fast.
Enter the magic of acid adjusting. Different fruits have different natural acid profiles. Lemon juice sits at about 6% titratable acidity, primarily from citric acid [16]. Limes are also around 6%, but their profile is a mix of roughly 4% citric acid and 2% malic acid [16]. Malic acid is what gives green apples their tart, lingering pucker [13].
Now, consider grapefruit or pineapple juice. They have incredible flavor, but their natural acidity hovers around a measly 1% to 3% [13, 16]. If you try to make a sour-style drink using just pineapple juice, it will be flat and overly sweet. But, if we add powdered citric and malic acid to the pineapple juice, we can “acid-adjust” it to behave exactly like a lime [14, 16]. To make pineapple juice mimic the acidity of lime juice, you simply add 3.2 grams of citric acid and 2 grams of malic acid per 100 milliliters of juice [16]. Suddenly, you have a tart, punchy, brilliantly acidic pineapple juice that balances perfectly with sweet syrups, without watering down the drink with additional citrus.
You can buy food-grade citric, malic, and tartaric acid powders online for pennies per serving. Tartaric acid, naturally found in grapes, is incredible for mimicking the acidity of wine [13, 14]. By mastering these powders, you unlock the ability to turn any liquid—from fresh watermelon juice to steeped chamomile tea—into a bright, punchy base that can carry a drink.
Pillar 2: Tannins and Astringency
Alcohol dries out your mouth. It’s an astringent quality that gives a drink a sophisticated, grown-up mouthfeel [6]. Without it, mocktails often feel thin, slippery, and distinctly juice-like. To fix this, we need tannins.
Tannins are naturally occurring polyphenols found in grape skins, oak bark, and tea leaves. They bind to the proteins in your saliva, creating that delightful, dry friction on your tongue [3]. If you want your zero-proof drink to have the weight and gravitas of a Manhattan or a Negroni, you need to brew a heavily concentrated, over-steeped black tea or use tart cherry juice as your base [2, 8].
Another brilliant trick for mouthfeel is vegetable glycerin. A quarter ounce of food-grade vegetable glycerin added to your shaker will drastically increase the viscosity of the liquid, mimicking the heavy, syrupy legs of a high-proof spirit [2]. It’s a cheap, natural, odorless ingredient that completely transforms the texture of the final pour.
Pillar 3: The Phantom Bite
The most difficult thing to replicate in a zero-proof drink is the burn [4]. That warming sensation in the back of your throat is a biological warning sign that you are consuming ethanol. To trick the brain into feeling that same satisfaction, we turn to capsaicin and gingerol [1, 4].
Capsaicin is the active compound in chili peppers, and gingerol is the fiery compound found in fresh ginger [1, 12]. These compounds don’t just taste spicy; they actively trigger the TRPV1 heat receptors in your mouth and throat, mimicking the exact physiological response of taking a shot of liquor [10].
A few dashes of a potent habanero tincture, or a heavy pour of cold-pressed ginger juice, will provide that lingering warmth [4]. It forces the drinker to slow down and sip the beverage, rather than gulping it down like a glass of iced tea. It’s the ultimate secret weapon for making a mocktail feel like a serious, contemplative cocktail.
The DIY Zero-Proof Station: How to Not Play Bartender All Night
I am a massive advocate for the home cook, but let me be brutally honest: if you invite people over for a relaxed evening and spend the entire night shaking individual drinks in the kitchen, you are doing it wrong. To truly eliminate kitchen chaos before your guests arrive, you must embrace the prep-ahead philosophy.
A permanently organized kitchen makes batching these syrups a breeze. Instead of making drinks à la minute, you are going to create “Base Concentrates.” A base concentrate is a pre-mixed, heavily flavored, perfectly acid-adjusted syrup that contains all the complexity of your drink.
The Art of the Batch
Batching is simply doing the math ahead of time. If a single drink requires two ounces of tea, one ounce of acid-adjusted juice, and half an ounce of syrup, you simply multiply that by ten and store it in a large glass bottle in the fridge.
But here is the pro-tip that separates the amateurs from the experts: pre-dilution. Remember how we discussed that shaking or stirring with ice adds necessary water to the drink? If you want to serve a drink straight from the fridge without shaking it over ice, you must account for that missing water. A standard cocktail gains about 20% to 25% of its volume in water during the chilling process. By adding 20% filtered water directly to your batched bottle, you can keep the bottle ice-cold in the fridge and pour it directly into a glass, perfectly diluted and ready to drink.
Clarification for Shelf Stability
If you really want to show off, you can employ clarification techniques. Fresh juices are full of cellular debris that will oxidize and turn brown after a day or two. By using agar-agar (a seaweed-derived gelatin substitute) or the traditional milk-washing technique, you can strip the solids out of your base concentrate.
Milk washing involves adding your acidic base concentrate to whole milk. The acid curdles the milk proteins, which act like a microscopic net, trapping all the harsh tannins, impurities, and color compounds. When you strain the mixture through a coffee filter, you are left with a crystal-clear, shelf-stable liquid that has a luxurious, silky mouthfeel thanks to the leftover whey. It is a stunning visual trick that elevates your zero-proof station to Michelin-star levels.
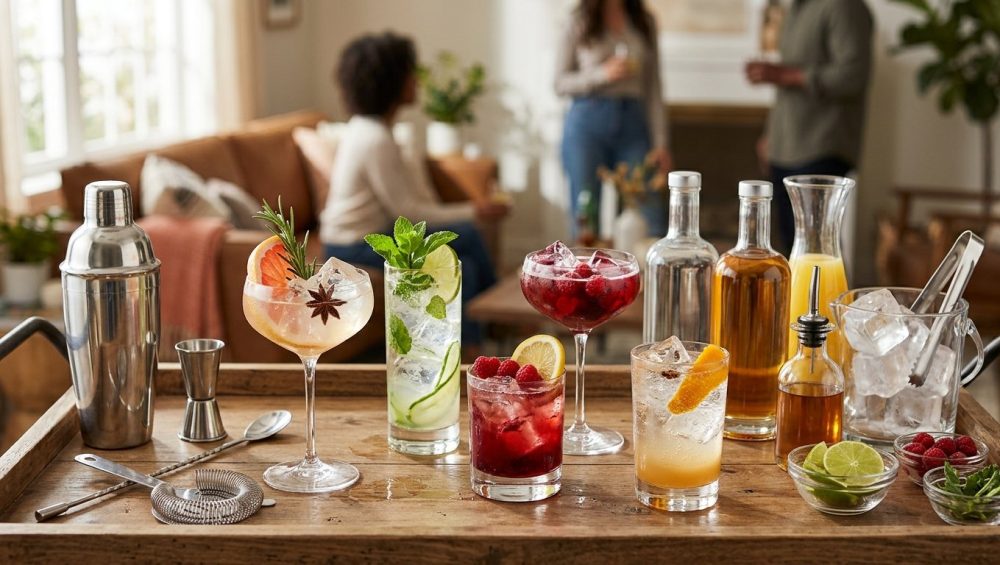
Set up a beautiful staging area on your kitchen island or bar cart. Place your clarified base concentrates in elegant glass bottles with pour spouts. Next to them, set out an ice bucket filled with your large-format, non-toxic ice cubes, and a variety of premium carbonated mixers—sparkling water, dry tonic, and ginger beer.
When guests want a drink, they simply pour two ounces of the base concentrate over a large ice cube and top it with four ounces of bubbly water. It takes ten seconds, it requires zero shaking, and it empowers your guests to customize their own experience. Pair these drinks with simple meals for mindful moments, and you actually get to sit down, sip your own perfectly balanced creation, and enjoy the party.
Essential Non-Toxic Gear for the Mindful Mixologist
Just as you have beginner cooking essentials for meal prep, you need a few reliable tools for your drink station. But remember my golden rule: absolutely no cheap, toxic garbage.
When stocking up on must-have tools, skip the flimsy plastic jiggers and the mystery-metal cocktail shakers that flake synthetic coatings into your drink. Acidic ingredients like lemon juice and our newly mastered malic acid powders will react aggressively with cheap, unlined metals, leaching a terrible metallic taste—and potentially harmful compounds—into your pristine mocktails.
You want a heavy-bottomed seamless glass mixing pitcher. You want a solid, 18/8 stainless steel Japanese-style jigger with internal measurement lines for absolute precision. You want a hawthorne strainer with a tightly coiled spring that won’t rust after three washes.
If you are going to shake drinks (which you should only do for drinks containing citrus or opaque juices, never for clear, spirit-forward style drinks), use a two-piece stainless steel Boston shaker. Avoid cobbler shakers with built-in strainers; they inevitably freeze shut due to the rapid temperature drop, leaving you wrestling with a cold piece of metal while your guests watch in polite horror.
Three Bulletproof Make-Ahead Mocktail Templates
Consider this masterclass your essential kitchen survival guide for navigating the world of zero-proof mixology. Here are three foolproof templates to get you started. Follow these simple steps to culinary artistry and your guests will be blown away.
The Faux-Groni (Bitter, Herbaceous, and Stirred)
The Negroni is a masterpiece of bitter balance. To replicate it without gin, Campari, or sweet vermouth, we lean heavily on tannins and bitter roots.
- The Concentrate: Brew an aggressively strong batch of Earl Grey tea (double the tea bags, steep for ten minutes to extract maximum tannins). Mix 2 cups of the tea with 1/2 cup of a high-quality non-alcoholic bitter aperitivo syrup, 1/4 cup of tart cherry juice for dark fruit notes [2], and 1 tablespoon of vegetable glycerin for viscosity [2].
- The Serve: Pour 3 ounces of the concentrate over one massive, clear ice cube in a rocks glass. Stir for exactly 15 seconds to achieve the perfect enthalpy-driven chill. Express the oil of an orange peel over the top and drop it in.
The Spicy Faux-Rita (Tart, Fiery, and Shaken)
This is where acid adjusting and capsaicin shine. We want the punch of a margarita without the tequila.
- The Concentrate: Take 2 cups of fresh pineapple juice. Acid-adjust it to lime strength by whisking in 6.4 grams of citric acid and 4 grams of malic acid [16]. Add 1/2 cup of agave nectar and 10 drops of a potent habanero hot sauce or capsaicin tincture [4].
- The Serve: Pour 2.5 ounces of this fiery, tart concentrate into a shaker with standard ice. Shake vigorously to aerate and dilute. Strain into a salt-rimmed glass over fresh ice. The capsaicin will provide a lingering warmth that perfectly mimics the bite of a high-proof blanco tequila [4].
The Botanical Sparkler (Floral, Dry, and Built in the Glass)
This is your Champagne or French 75 alternative. It is dry, highly carbonated, and elegant.
- The Concentrate: Create an oleo-saccharum by peeling three lemons and muddling the peels with 1/2 cup of white sugar. Let it sit for two hours to extract the citrus oils. Add 1/2 cup of fresh lemon juice, 1/4 cup of water, and 1 teaspoon of culinary lavender. Simmer until the sugar dissolves, then strain.
- The Serve: Pour 1.5 ounces of the lavender-lemon cordial into a chilled flute. Top with 4 ounces of bone-dry, premium tonic water. The quinine in the tonic provides a sophisticated bitterness, while the highly concentrated citrus oils give the drink a luxurious, aromatic lift.
The Final Pour
You do not have to settle for watery, uninspired drinks just because you are skipping the alcohol. By understanding the thermodynamic physics of ice, utilizing the brilliant science of acid adjusting, and strategically deploying tannins and capsaicin, you can build zero-proof beverages that rival the best cocktail bars in the world.
Set up your DIY station, banish the toxic plastic ice trays to the garbage bin where they belong, and prep your concentrates ahead of time. Your guests will feel incredibly cared for, your drinks will remain perfectly balanced from the first sip to the last, and best of all? You will actually get to enjoy your own party. Now go freeze some proper ice, and let’s get mixing. Cheers to a flawless, headache-free morning.


