Welcome to the intervention. You’ve invited friends over, bought the expensive artisanal pita, arranged a very aesthetically pleasing platter of Kalamata olives, and poured a crisp Assyrtiko. But sitting in the middle of your beautiful table is a bowl of homemade hummus that looks—and tastes—like wet, beige sand. It’s gritty, it’s heavy, and it has that raw, aggressive garlic bite that guarantees nobody is making eye contact on the drive home.
Let me guess: you opened a can of chickpeas, dumped them into a blender with a glob of tahini, squeezed in a lemon, and hit the power button. Congratulations, you’ve just made chickpea spackle.
I have zero patience for the pretentious chef-speak that gatekeeps good food, but I also have zero tolerance for settling for mediocre, gritty dips when professional-level results are entirely achievable in your standard home kitchen. You do not need a culinary degree to make mind-blowing food. What you need is a basic understanding of kitchen chemistry, a little bit of patience, and the willingness to throw out the terrible advice you’ve been given by mommy bloggers who prioritize a five-minute prep time over actual edible results.
Today, we are diving deep into the exhaustive, science-backed methodology of achieving ultra-smooth, cloud-like hummus. We are talking about pH adjustments, temperature-controlled emulsification, and the molecular breakdown of legumes. By the time we are done, you will understand exactly why your past attempts have failed, and you will be armed with the knowledge to host an intentional, slow-paced Mediterranean gathering with a centerpiece that will ruin store-bought hummus for you forever.
The Anatomy of a Hummus Tragedy: Why Yours Tastes Like Wet Sand
If you want to fix a problem, you have to understand the mechanics of the failure. Hummus is not just a puree; it is a complex physical structure—a delicate suspension of starches, proteins, and oils. When it fails, it fails on a structural level.
The Pectin Problem: Chickpeas Are Stubborn Little Stones
The primary culprit behind your gritty hummus is the anatomy of the chickpea itself (Cicer arietinum, if we’re being formal). A chickpea consists of the inner cotyledon (the starchy, fleshy part) and the outer seed coat (the skin). That translucent little skin is an absolute nightmare for your blender.
The seed coat is incredibly rich in insoluble fiber, specifically cellulose, hemicellulose, and pectin. Pectin is a structural carbohydrate that acts like the biological glue holding the plant cell walls together. It is rigid, stubborn, and highly resistant to mechanical breakdown. When you throw standard, un-treated chickpeas into a food processor, the spinning blades easily mash the starchy interior, but they merely tear the pectin-rich skins into thousands of microscopic, jagged shards.
No matter how long you run that motor, those shards will not dissolve. They will suspend themselves in your dip, leaving you with a texture that feels like you’re eating a mouthful of savory micro-plastics. This is one of those seven rookie kitchen mistakes that completely ruins the mouthfeel of an otherwise perfectly seasoned dish. You cannot blend your way out of a pectin problem; you have to solve it chemically.
The Tahini Trap: Oil, Water, and Emulsion Betrayal
The second reason your hummus is dense and heavy lies in your handling of the tahini. Tahini is a paste made from toasted, ground sesame seeds. From a physics standpoint, it is a colloidal dispersion of solid sesame particles suspended in liquid sesame oil.
When you introduce a small amount of water (or water-based ingredients like lemon juice and chickpea liquid) to tahini, something infuriating happens: it seizes. The carbohydrates and proteins in the ground sesame seeds rapidly absorb the water and swell, causing the loose paste to instantly clump up and turn into a stiff, concrete-like mass. This phenomenon is known as phase inversion.
If you just dump all your ingredients into the bowl at once, the tahini seizes, the chickpea starches clump around it, and the oil begins to separate. You are left with a dense, greasy, broken emulsion. To fix this, you must control the hydration and the temperature of the tahini before it ever meets a chickpea. Understanding this order of operations is the key to managing your time and will cure cooking anxiety when you’re prepping for guests.
The Science of Silk: Baking Soda and the pH Miracle
Now that we know the enemies—pectin and seized emulsions—we can deploy our scientific countermeasures. The most powerful tool in your pantry for achieving silky hummus doesn’t have a plug; it’s a humble box of sodium bicarbonate.
How Alkalinity Breaks Down Chickpea Pectin
Baking soda is alkaline, meaning it has a high pH (around 8.5 to 9 when dissolved in water). This is the absolute antithesis of an acidic environment. When you boil chickpeas in an alkaline solution, a glorious chemical reaction occurs known as the alkaline hydrolysis of pectin, specifically through a process called beta-elimination.
In plain English? The high pH chemically attacks the pectin molecules holding the chickpea skins together. It breaks the bonds in the hemicellulose matrix, causing the skins to weaken, detach, and essentially disintegrate.
This technique, heavily popularized by culinary giants like Yotam Ottolenghi and J. Kenji López-Alt, is non-negotiable for the home cook. If you are starting with dried chickpeas, you soak them overnight with a teaspoon of baking soda, and then boil them with another teaspoon. But because my weekday philosophy dictates that time is money, I am going to give you the shortcut: you can do this with canned chickpeas.
Drain and rinse two cans of high-quality chickpeas. Toss them into a saucepan with half a teaspoon of baking soda and cover them with water by about two inches. Bring them to a vigorous simmer and let them boil for 15 to 20 minutes. You will physically see the skins melting away and floating to the surface like a foam.
The Great Skin Debate: To Peel or Not to Peel? (Spoiler: Don’t Waste Your Time)
There is a highly pervasive, deeply irritating myth in the food blogging world that the only way to achieve smooth hummus is to sit at your kitchen counter and individually pinch the skin off of every single chickpea by hand.
I want to be very clear: I would rather eat glass.
Nobody who is balancing a career, a life, and hosting a weekend gathering has 45 minutes to manually undress three hundred tiny legumes. It is an absurd waste of human potential. If you utilize the baking soda boiling method I just described, the alkalinity does 95% of the work for you. Once you drain those boiled chickpeas, run them under cold water in a large bowl. Agitate them aggressively with your hands. The weakened skins will float to the top of the water, and you can simply skim them off with a slotted spoon and pour them down the drain. Whatever microscopic fragments of skin remain are so structurally compromised by the baking soda that your food processor will effortlessly obliterate them.
Boiling Beyond Belief: When Are They Actually Done?
When you are boiling your chickpeas (canned or dried) with baking soda, you must abandon all concepts of al dente. If your chickpea holds a perfect, beautiful, round shape when you pull it out of the water, it is undercooked for hummus.
You want them falling apart. You want them looking like they have given up on life. When you press a chickpea between your thumb and index finger, it should offer absolutely zero resistance; it should instantly smear into a smooth paste. Mushy is the mission here. If they are even slightly firm in the center, that firmness will translate directly to a chalky texture in the final dip. Boil them until they are practically disintegrating.
The Ice Water Emulsion: Taming the Tahini
With our chickpeas chemically tenderized, we must address the tahini. A silky mezze night requires a dip that is light, airy, and stable. We achieve this through temperature-controlled emulsification.
Why Tahini Seizes (And How to Prevent It)
When you run a food processor or a high-speed blender for several minutes, the mechanical friction of the spinning blades generates a massive amount of heat. In a thick paste like hummus, the temperature inside the blender bowl can easily exceed 110°F (43°C) in just a few minutes.
Heat is the absolute enemy of a stable emulsion. As the temperature rises, the sesame oil inside the tahini becomes less viscous and begins to separate from the solid particles. The proteins denature, the starches clump, and your hummus becomes a greasy, split mess with puddles of oil pooling on the surface.
To counteract this thermodynamic nightmare, we use ice water. Not cold tap water. Literally, water with ice cubes in it. The ice dramatically drops the ambient temperature of the mixture, counteracting the friction of the blades and keeping the emulsion tight, stable, and glossy.
The Aeration Phase: Whipping Your Sesame Paste into Submission
The secret to a cloud-like texture is the order of operations. You do not put the chickpeas in first.
Start by adding your high-quality tahini and your freshly squeezed lemon juice to the food processor. Turn it on. The mixture will immediately seize and look like thick, clumpy peanut butter. Don’t panic; this is the phase inversion we talked about. With the motor running, slowly stream in your ice water, or literally drop in two or three whole ice cubes.
The physical chunks of ice do double duty here. Not only do they chill the mixture, but as the blades shatter the ice, the hard fragments act as mechanical aerators, whipping microscopic air bubbles into the heavy tahini paste before they melt. Run the machine for a full two minutes. When you take the lid off, the tahini will have transformed from a dark, heavy paste into a pale, ivory, incredibly fluffy sauce that looks like whipped cream. Now you are ready to add your mushy chickpeas.
Flavor Architecture: Acid, Garlic, and the Order of Operations
Texture is only half the battle. A truly masterful hummus must have a balanced, resonant flavor profile that doesn’t assault your palate.
Mellowing the Garlic: The Lemon Juice Soak Trick
We need to talk about raw garlic. When you chop, crush, or blend raw garlic, you rupture its cell walls. This allows an enzyme called alliinase to mix with an amino acid called alliin, producing a compound called allicin. Allicin is what gives raw garlic that harsh, aggressive, burning flavor that lingers on your breath for two business days.
If you just toss raw garlic cloves into the blender with your hummus, the allicin will completely overpower the delicate nuttiness of the sesame and the earthiness of the chickpeas. This is a classic mistake, and it is exactly why your garlic always burns the back of your throat long after the meal is over.
Fortunately, chemistry offers a brilliant workaround. The enzyme alliinase is highly sensitive to pH. It cannot function in an acidic environment. So, before you do anything else, mince your raw garlic and submerge it in your freshly squeezed lemon juice. Let it steep for 10 to 15 minutes. The high acidity of the lemon juice (which has a pH of around 2.5) completely denatures the alliinase enzyme, halting the production of allicin in its tracks.
When you strain the garlic out (or leave it in, if you want a mild kick), you are left with a bright, aromatic, sweet garlic flavor without the aggressive, pungent burn. This simple acid trick elevates the entire dish, proving that sometimes you need to stop reaching for the salt and start utilizing acidity to balance your food.
Salt, Cumin, and Building a Balanced Profile
Speaking of seasoning, the aromatics you choose dictate whether your hummus tastes authentic or like a confused grocery store generic brand. You need salt, obviously. Kosher salt, not iodized table salt, which tastes metallic and harsh.
Then comes the cumin. Do not dump raw, dusty cumin powder straight from a jar that has been sitting in your pantry since 2019 into your beautiful, silky hummus. Raw ground spices contain volatile oils that are locked up and taste like sawdust until they are heated. You must stop using raw spices if you want professional depth of flavor. Take your ground cumin, toss it in a dry skillet over medium heat for 30 seconds until it becomes incredibly fragrant, and then add it to your food processor. The heat volatilizes the essential oils (specifically cuminaldehyde), transforming the flavor from flat and dusty to warm, earthy, and complex.
The Essential Gear: Blenders, Food Processors, and Avoiding Toxic Plastics
We cannot have a masterclass on purees without addressing the elephant in the room: your equipment. I have a very strict, non-negotiable rule when it comes to kitchen gear. I absolutely despise cheap, toxic kitchenware.
Why Your Cheap Blender is Ruining the Texture (and Leaching Chemicals)
If you are using a $20 discount-store blender with a cloudy, scratched polycarbonate plastic pitcher, you are actively sabotaging your food and your health. Those micro-scratches on the inside of cheap plastic pitchers are breeding grounds for bacteria, and more importantly, they degrade over time, leaching microplastics and endocrine-disrupting chemicals (like BPA and its equally toxic cousins, BPS and BPF) directly into your food.
This chemical leaching is highly accelerated by heat (which the blender motor generates) and acidity (hello, lemon juice). If you’ve ever wondered why your plastic containers stay greasy and hold onto old food smells, it is because cheap plastics are highly porous and lipophilic (fat-loving). They absorb the oils from your tahini and refuse to let them go.
Throw the toxic plastic away. You are feeding yourself and your loved ones; act like it.
The Food Processor vs. High-Speed Blender Showdown
For hummus, you need power, and you need safe materials. You have two acceptable options: a high-quality food processor with a heavy-duty stainless steel blade and a BPA-free Tritan or glass work bowl, or a professional-grade high-speed blender (like a Vitamix) with a tamper.
A food processor is generally easier for hummus because the wide base allows the thick paste to circulate without getting stuck in a narrow vortex. It excels at the tahini-whipping phase. A high-speed blender, on the other hand, will give you an even silkier, molecularly smooth texture, but it requires active plunging with the tamper to keep the thick mixture moving through the blades.
Whichever you choose, ensure the motor is powerful enough to run for five continuous minutes without burning out. Good equipment is an investment in your health and your sanity, and it is one of the essential tools every beginner needs to stop fighting their kitchen and start actually cooking. And while we are on the subject of toxic gear, if you are boiling your chickpeas in a cheap, lightweight aluminum pot with a peeling Teflon non-stick coating, throw that in the garbage, too. Use stainless steel or enameled cast iron. We do not serve forever-chemicals at mezze night.
Staging Your Mezze Night: Stress-Free Hosting
You have successfully executed the chemistry. You have a food processor full of ethereal, cloud-like, perfectly emulsified hummus. Now, we must discuss the logistics of hosting, because making the food is only half the battle; presenting it without having a nervous breakdown is the other.
Make-Ahead Strategies: Why Hummus Needs to Rest
Here is the absolute best thing about hummus: it is fundamentally a make-ahead dish. In fact, it is better on day two.
When you first blend hummus, the flavors are disjointed. The garlic is sitting on top, the cumin is fighting for attention, and the starches are still highly agitated from the mechanical shearing. When you transfer that hummus to an airtight glass container and let it rest in the refrigerator for 24 hours, magic happens. The starches undergo a slight retrogradation, which thickens the dip and gives it a luxurious, velvety body. More importantly, the fat-soluble flavor compounds from the garlic and the cumin fully dissolve and disperse into the lipid phase (the olive oil and sesame oil), rounding out the flavor profile into one cohesive, harmonious masterpiece.
Making your centerpiece the day before is the ultimate secret to learning how to host a relaxed dinner party. You should be pouring wine and laughing with your guests, not standing over a screaming blender in a kitchen covered in chickpea skins.
Temperature Matters: Never Serve Hummus Cold
This is a critical directive: never, under any circumstances, serve hummus straight out of the refrigerator.
Cold temperatures cause the saturated fats present in the tahini and the olive oil to solidify. If you serve it cold, the texture will be dense, stiff, and spackle-like, completely undoing all the aeration work you did with the ice water. Furthermore, cold temperatures physically suppress the volatility of aromatic compounds, meaning your guests won’t be able to taste the nuances of the lemon, garlic, or toasted cumin.
Pull your hummus out of the fridge at least 45 minutes to an hour before your guests arrive. Let it come to ambient room temperature. The fats will relax, the texture will loosen back into a silky cloud, and the flavors will wake up.
The Art of the Swirl: Plating and Garnishing Like a Pro
We eat with our eyes first. Do not just dump your beautiful creation into a bowl and leave it looking like a beige mound of spackle. Plating is a crucial part of the essential kitchen survival guide for anyone who wants their food to look as good as it tastes.
Spread the room-temperature hummus into a wide, shallow bowl or a rimmed plate. Take the back of a large metal spoon, press it gently into the center of the dip, and slowly rotate the bowl with your other hand, spiraling outward to create deep, swooping craters and ridges.
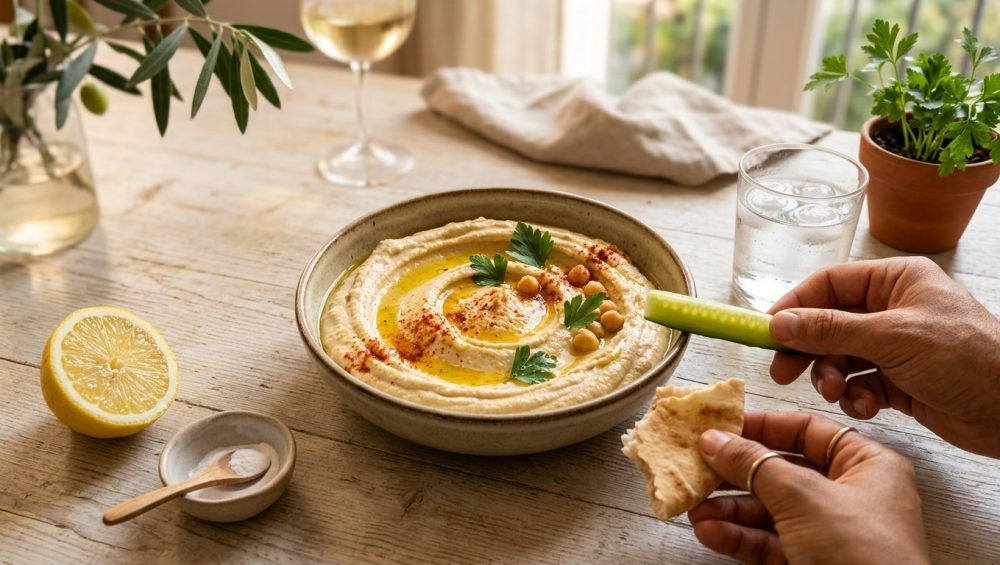
These ridges are not just for aesthetics; they are structural moats designed to hold your garnishes. Pour a generous glug of the highest-quality, grassy, peppery extra virgin olive oil you can afford right into those craters. (Do not use the cheap, blended, rancid supermarket olive oil for finishing—save that for cooking). Sprinkle the top with vibrant, citrusy sumac, a pinch of flaky sea salt, some toasted pine nuts, and a handful of roughly chopped fresh flat-leaf parsley. Serve it alongside warm, pillowy pita bread, crisp radishes, and Persian cucumbers.
Conclusion: Claiming Your Title as the Hummus Whisperer
You have survived the chemistry lesson, banished the toxic plastics, and mastered the thermodynamics of tahini. You now understand that a truly silky mezze night doesn’t require a culinary degree, a professional kitchen, or the soul-crushing tedium of peeling individual chickpeas by hand.
It requires respect for the ingredients. It requires baking soda to break down the stubborn pectin cell walls. It requires the sharp shock of ice water to stabilize an emulsion under the intense friction of a blender blade. And it requires the acidic grace of lemon juice to tame the aggressive bite of raw garlic.
Cooking is not magic; it is applied science mixed with a healthy dose of sass and intuition. When you stop blindly following bad internet advice and start understanding the why behind the techniques, you unlock an entirely new level of culinary freedom. You step out of the realm of anxious recipe-following and fully embrace the art of the kitchen.
So go ahead. Send out the invites, chill the wine, and prepare to ruin grocery store hummus for your friends forever. You are officially the hummus whisperer, and your mezze nights will never be the same. Now, go clean your food processor before that tahini dries like cement. You’re welcome.


